
The Dexcom G7, a state-of-the-art continuous glucose monitoring (CGM) system, offers unparalleled convenience for managing diabetes in 2026. However, its compact design, while revolutionary, often leaves users searching for practical, aesthetically pleasing ways to store and protect it. This is where the artistry of woodworking truly shines. Far beyond simple utility, “The Woodworker’s Guide to Dexcom G7: Building Custom Holders and Storage Solutions for Medical Devices” explores how woodworking enthusiasts can transform functional necessities into beautiful, integrated pieces that enhance daily life. Imagine not just a holder, but a piece of bespoke furniture that discreetly houses your essential medical device, keeping it safe, charged, and always at hand. This guide delves into innovative designs and practical construction techniques for creating personalized Dexcom G7 accessories that blend seamlessly with your home or lifestyle.
Key Takeaways
- Custom woodworking provides elegant, functional storage solutions for the Dexcom G7, moving beyond generic plastic accessories.
- Designing holders and cases requires careful consideration of the device’s dimensions, charging needs, and user accessibility.
- A range of projects, from simple desk stands to integrated charging stations and discreet travel cases, can be tackled by woodworkers of varying skill levels.
- Material selection, joinery techniques, and finishing options are crucial for durability, aesthetics, and hygiene.
- These projects not only offer practical benefits but also provide a creative outlet and a sense of empowerment for Dexcom G7 users or their loved ones.
Understanding the Dexcom G7 and Design Considerations for Custom Holders
The Dexcom G7 receiver is a sophisticated yet delicate piece of technology crucial for glucose management. Its sleek, modern design, roughly the size of a small smartphone, demands careful consideration when conceptualizing custom wooden holders. Before cutting any wood, it is essential to understand the device’s specific needs to ensure your custom creation is both functional and protective.
First, precise dimensions are paramount. The Dexcom G7 receiver measures approximately 3.46 inches (87.9 mm) long, 2.01 inches (51.1 mm) wide, and 0.33 inches (8.4 mm) thick (Dexcom, Inc., 2024). Any holder or case must be accurately sized to secure the device without undue pressure or excessive movement. Allowing a slight tolerance, perhaps 0.5-1mm, can make insertion and removal easier while still maintaining a snug fit.
Second, charging access is a critical design element. The Dexcom G7 charges via a USB-C port, usually located on one end. Your holder must incorporate an unobstructed pathway for the charging cable. This could involve a simple cutout, a recessed channel for cable management, or even an integrated charging dock design. Consider how the cable will be routed to avoid kinks or strain. For ideas on managing cables effectively in furniture, see our guide on building a modular home office desk system.
Third, user interaction must be intuitive. The holder should allow easy insertion and removal of the device. If it’s a desk stand, the screen should be visible at a comfortable angle. If it’s a bedside organizer, it should be within easy reach. For portable cases, quick access is key, but security is equally important to prevent accidental opening.
Fourth, protection and hygiene are essential. Wood provides excellent shock absorption, but the internal surfaces should be smooth to prevent scratches. Consider adding felt or cork lining to contact points for extra cushioning. For hygiene, especially in medical device storage, select finishes that are easy to clean and resist moisture, such as polyurethane or lacquer.
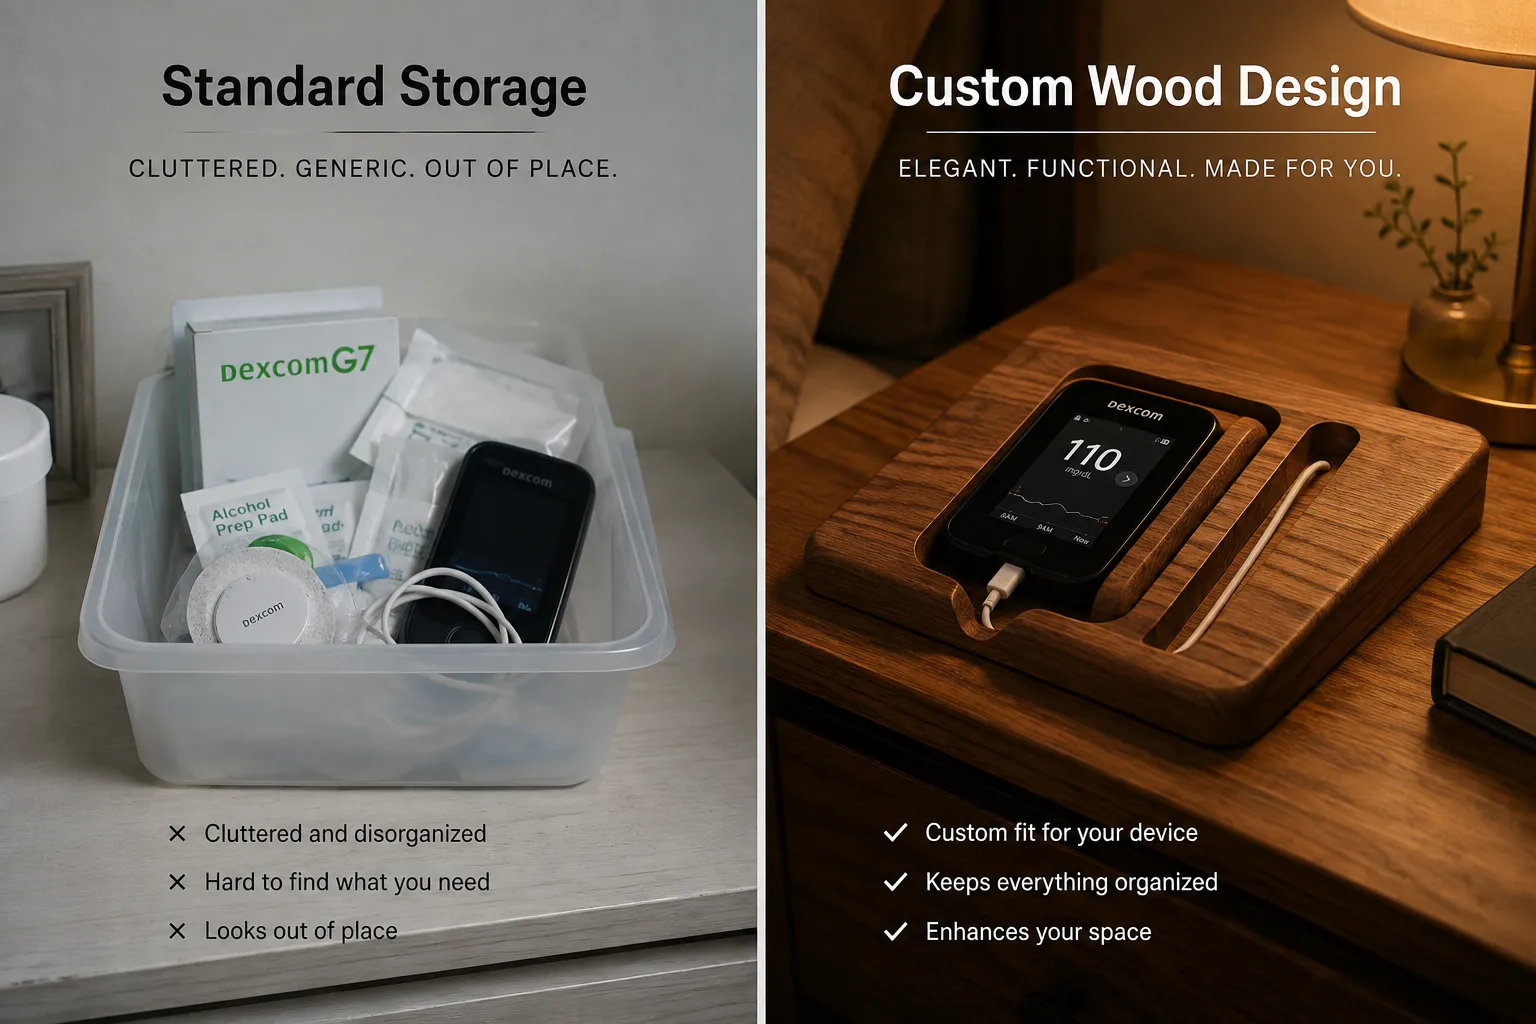
Finally, aesthetic integration allows these functional pieces to enhance your living space. Instead of a utilitarian plastic accessory, a custom wooden holder can match your existing furniture, reflect your personal style, or even serve as a decorative element. This approach transforms a medical necessity into an object of beauty.
Materials and Tools for Crafting Dexcom G7 Solutions
Choosing the right materials and having the appropriate tools are fundamental to the success of your Dexcom G7 holder projects. Wood offers a vast array of options, each with its own characteristics, while a well-equipped workshop ensures precision and quality.
Wood Selection
The type of wood you choose impacts the project’s durability, appearance, and ease of workability.
Hardwoods:
- Walnut: Known for its rich, dark color and fine grain, walnut is excellent for elegant, premium-looking holders. It’s durable and takes finishes beautifully.
- Maple: A light-colored, dense wood that is very strong and provides a clean, modern aesthetic. It’s stable and carves well.
- Cherry: Offers a warm, reddish-brown hue that deepens with age. Cherry is relatively easy to work with and sands to a smooth finish.
- Oak: A durable and strong wood with a distinctive open grain. While robust, its grain can be more challenging to achieve a silky-smooth finish.
Softwoods:
- Pine: An economical and widely available option, easy to work with for beginners. It’s lighter in weight and color but can be prone to dents. Often, a good stain or paint can elevate its appearance.
- Poplar: A moderately soft hardwood, poplar is inexpensive and takes paint very well, making it a good choice if you plan to paint your holder.
Plywood/MDF:
- Baltic Birch Plywood: High-quality plywood with many thin layers, offering excellent stability and strength. It’s great for projects requiring precise cuts and structural integrity.
- MDF (Medium-Density Fiberboard): Ideal for painting due to its smooth, uniform surface. It lacks natural grain and isn’t as strong as solid wood but is very stable and affordable.
When selecting wood, consider its weight, grain pattern, and how it will complement the device and your home decor. For inspiration on selecting the right wood for various projects, check out our article on premium wood selection for 2026 projects.
Essential Woodworking Tools
Your toolset will depend on the complexity of your chosen project. However, some basic tools are invaluable for building custom Dexcom G7 holders and storage solutions.
- Measuring and Marking Tools:
- Ruler, measuring tape, calipers (for precise device dimensions)
- Pencils, marking knife, squares (combination, try, speed)
- Cutting Tools:
- Hand Saws: Coping saw, dovetail saw for intricate cuts.
- Power Saws: Jigsaw (for curves), miter saw (for accurate crosscuts), table saw (for ripping and joinery, explore Craftsman Table Saw Riving Knife).
- Router: Essential for creating dados, rabbets, round-overs, and flush trimming.
- Shaping and Smoothing Tools:
- Chisels and mallets (for fine detail work, mortises)
- Sanders (orbital, block, detail sander for smooth finishes)
- Files and rasps (for refining curves and openings)
- Clamping and Assembly:
- Bar clamps, F-clamps, spring clamps (essential for gluing)
- Wood glue (PVA glue is versatile)
- Drill and drill bits (for pilot holes, counterbores)
- Finishing Supplies:
- Various grits of sandpaper
- Wood stains, oils (e.g., Danish oil, tung oil), varnishes, polyurethanes
- Clean cloths, brushes, or foam applicators
For those looking to optimize their workshop, consider DIY smart workshop storage solutions to keep your tools organized and accessible.
Project Ideas and Plans: Building Custom Holders and Storage Solutions for Dexcom G7
Now, let’s explore specific project ideas for creating custom Dexcom G7 holders and storage solutions, ranging from simple to more advanced. Each project focuses on balancing functionality with aesthetic appeal, keeping “The Woodworker’s Guide to Dexcom G7: Building Custom Holders and Storage Solutions for Medical Devices” at its core.
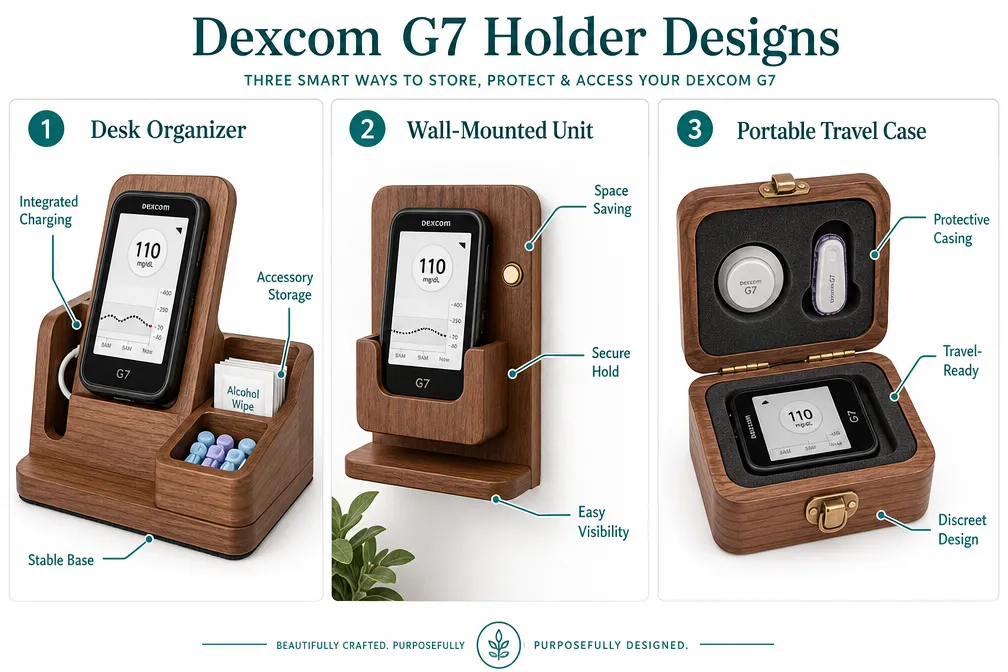
1. Simple Desktop Dexcom G7 Stand
This is an excellent beginner project, perfect for getting acquainted with precise measurements and basic joinery.
Design Concept: A minimalist wooden block with a precisely routed channel or pocket for the Dexcom G7 receiver to sit upright or at a slight angle, allowing for easy screen visibility and charging access.
Materials: A small block of hardwood (e.g., maple, cherry) or stable softwood (e.g., pine). Felt or cork for lining.
Tools: Measuring tools, marking knife, router with a straight bit and a round-over bit, clamps, wood glue, sander, finishing supplies.
Steps:
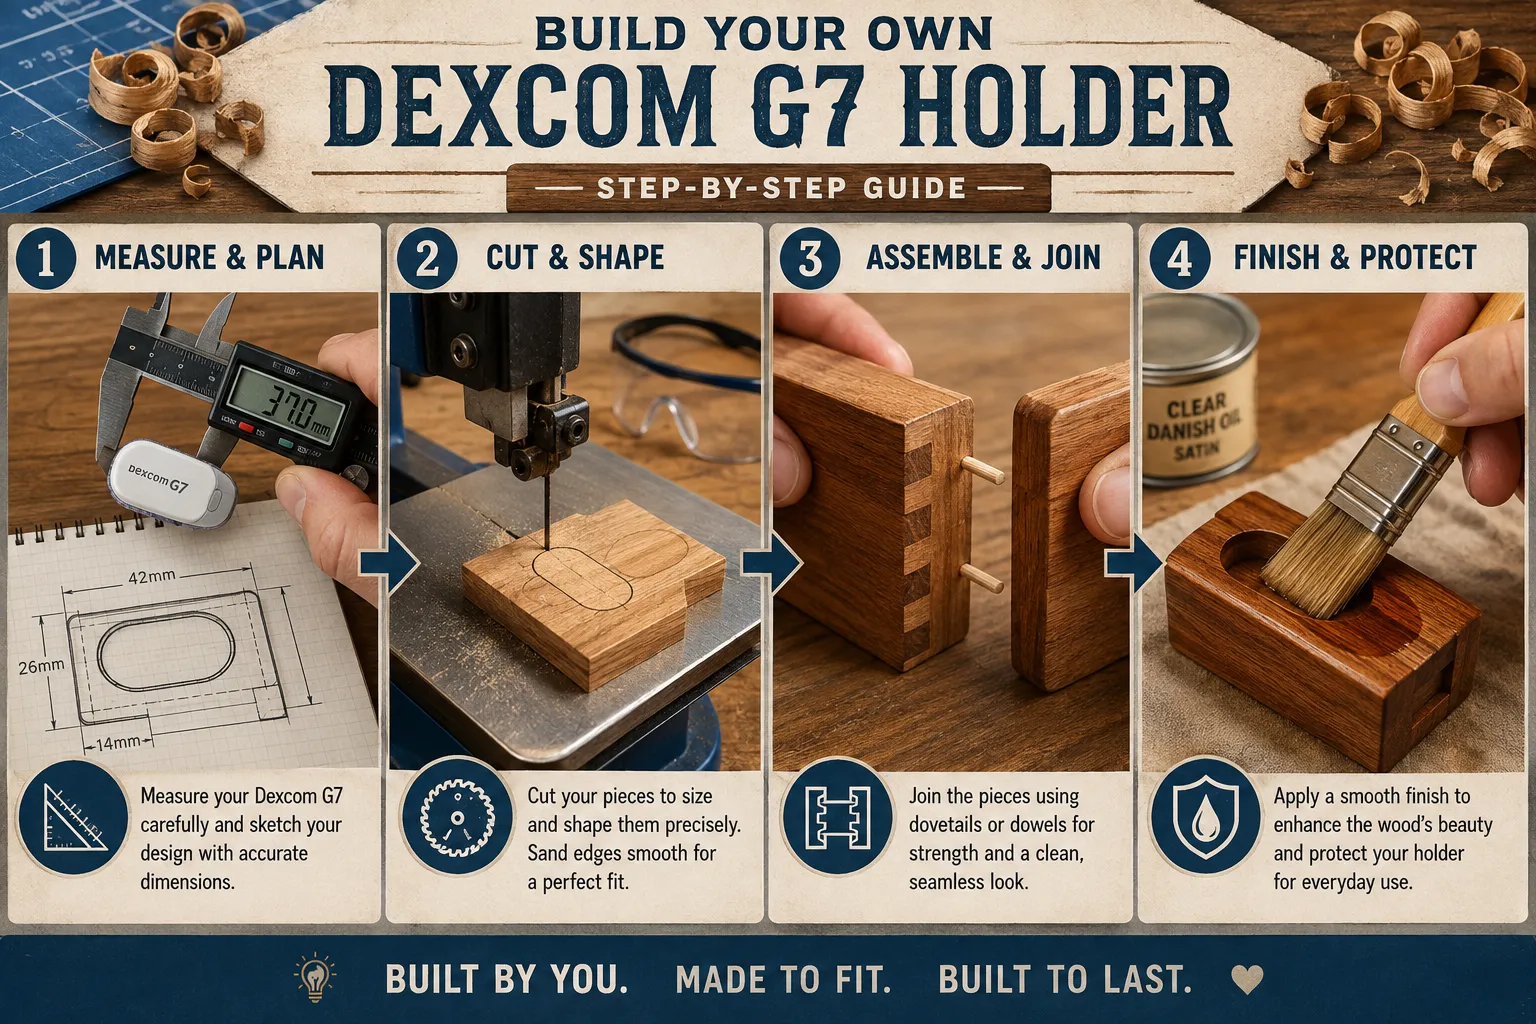
- Measure: Accurately measure the Dexcom G7 receiver’s length, width, and thickness.
- Cut Base: Cut your chosen wood block to the desired base dimensions (e.g., 4″ L x 3″ W x 1″ H).
- Route Pocket/Channel: Using a router, carefully rout a pocket or channel that perfectly fits the Dexcom G7. Start with shallow passes and test fit frequently. Ensure a cutout for the USB-C port is included.
- Angle (Optional): If you want a display angle, you can either cut the base at an angle or rout the pocket at an angle.
- Smooth Edges: Use a round-over bit on the router or sandpaper to soften all edges.
- Sand & Finish: Sand thoroughly through various grits (120, 180, 220). Apply your chosen finish (oil, poly, lacquer).
- Add Lining: Once dry, glue thin felt or cork strips into the routed pocket to protect the device.
This project is quick, satisfying, and immediately functional.
2. Integrated Bedside Charging Station
A more advanced project that combines storage and charging with furniture integration, perfect for keeping the Dexcom G7 accessible at night.
Design Concept: A small, self-contained wooden box or drawer insert designed to hold the Dexcom G7 receiver, charger, and perhaps a few essential supplies like alcohol wipes or extra sensors. It can sit on a bedside table or be recessed into a larger piece of furniture.
Materials: Hardwood planks (e.g., walnut, oak), thin plywood for drawer bottoms (if applicable), felt lining, small hinges, magnetic catches (optional).
Tools: All basic woodworking tools, potentially a table saw for precise joinery, chisels for mortises (if using hinges), drill, clamps. For joinery techniques, review guides on doweling jigs or mastering the woodworking box lid.
Steps:
- Design Layout: Sketch a detailed plan, including compartments for the Dexcom G7, its charger, and any accessories. Plan cable routing from the charging port to an external power source.
- Cut Panels: Cut all wooden panels (sides, top, bottom, dividers) to size.
- Create Joinery: Use preferred joinery (e.g., dovetails, box joints, rabbets, or simple butt joints with screws/dowels) to assemble the main box structure. Precision is key.
- Internal Compartments: Construct and fit internal dividers. Rout specific pockets for the Dexcom G7 receiver and its charging cable.
- Cable Management: Drill holes or rout channels for the charging cable to pass through neatly.
- Lid/Door (Optional): If building a box with a lid, cut and fit the lid, attaching it with hinges or designing a simple lift-off top. Consider a magnetic catch for secure closure.
- Sanding & Finishing: Sand thoroughly, apply a durable, easy-to-clean finish. Line the Dexcom G7 compartment with felt.
This project can be customized to match existing bedroom furniture, making it a truly bespoke item.
3. Wall-Mounted Dexcom G7 Organizer
Ideal for small spaces or for keeping the device visible and accessible in a specific area like a kitchen or home office.
Design Concept: A compact, wall-mounted wooden shelf or panel with a custom-fitted cradle or clip for the Dexcom G7, possibly with a small shelf for other medical essentials.
Materials: A sturdy piece of hardwood or good quality plywood, mounting hardware (keyhole hangers, French cleat).
Tools: Measuring tools, jigsaw or band saw (for curves), router, drill, sander, finishing supplies.
Steps:
- Design Mount: Decide on the overall shape and size of the wall-mounted unit. Consider a simple rectangular panel or a more elaborate design with curved edges.
- Create Dexcom G7 Cradle: Precisely cut and rout a section that securely holds the Dexcom G7. This could be a recessed pocket or a “hook” design that the device slides into. Ensure charging access.
- Add Storage (Optional): Integrate a small, shallow shelf below the Dexcom G7 cradle for alcohol wipes, test strips, or other small items.
- Mounting System: Install keyhole hangers on the back for a flush mount, or build a simple French cleat system for easy installation and removal.
- Sanding & Finishing: Sand all surfaces smooth, paying attention to edges. Apply a durable finish that protects against moisture and is easy to wipe clean.
This solution helps declutter surfaces and keeps the device safely off the counter.
4. Discreet Portable Travel Case
For users who travel frequently, a custom wooden travel case provides robust protection and a touch of elegance.
Design Concept: A compact, hinged wooden box with custom-fit foam inserts to securely hold the Dexcom G7 receiver, a few sensors, and possibly a charging cable. The exterior can be styled to look like a small jewelry box or a decorative keepsake box.
Materials: Thin hardwood stock (e.g., poplar, cherry), small brass hinges, clasp, dense foam (e.g., craft foam, Kaizen foam), wood glue.
Tools: Hand saw or band saw, router or chisels, drill, clamps, sander, finishing supplies.
Steps:
- Box Construction: Build a small, sturdy box. Dovetail or box joints add strength and beauty, but simple miter or butt joints can also work.
- Lid & Hinges: Cut and fit the lid. Install small brass hinges and a matching clasp for secure closure.
- Custom Foam Insert: Trace the outline of the Dexcom G7 receiver and sensors onto the foam. Carefully cut out the shapes to create snug pockets within the foam.
- Lining: Glue the foam insert into the bottom of the box. You might also line the inside of the lid with thin felt or leather.
- Sanding & Finishing: Smooth all exterior and interior wooden surfaces. Apply a protective finish. Consider adding a small engraved initial or design for a personal touch.
This project elevates the protection of a crucial medical device, making it a stylish travel companion.
Finishing Touches and Practical Considerations
Once your custom Dexcom G7 holder or storage solution is constructed, the finishing touches are what elevate it from a functional item to a piece of craftsmanship. Proper finishing enhances durability, improves aesthetics, and ensures the piece is hygienic and pleasant to use.
Selecting the Right Finish
The choice of finish depends on the wood type, desired appearance, and the environment where the holder will be used.
- Oils (e.g., Danish Oil, Tung Oil): These penetrate the wood, enhancing its natural grain and providing a subtle, matte finish. They are easy to apply and repair but offer less protection against moisture and scratches than film-forming finishes. They provide a very natural feel.
- Waxes: Often used over oil finishes or for a very natural, low-sheen look. Waxes offer minimal protection but are easy to apply and reapply.
- Polyurethane (Oil-Based or Water-Based): A durable, film-forming finish that offers excellent protection against moisture, scratches, and chemicals. Available in various sheens (matte, satin, semi-gloss, gloss). Water-based polyurethanes dry faster and have lower VOCs. This is an excellent choice for medical device holders due to its protective qualities and ease of cleaning.
- Lacquer: Dries very quickly and provides a hard, durable finish. It builds quickly but requires careful application.
- Shellac: A natural, non-toxic finish that is easy to apply and repair. It offers good protection but can be sensitive to alcohol and heat.
- Paint: If using a less expensive wood like poplar or MDF, painting can provide a pop of color and a smooth, uniform surface. Ensure you use a primer for best results.
For optimal results, always prepare the wood by sanding thoroughly through progressively finer grits (e.g., 120, 180, 220, 320). Clean off all dust before applying any finish. Apply multiple thin coats, sanding lightly between coats if recommended by the product instructions.
Enhancing Functionality and Aesthetics
Beyond the basic structure and finish, consider these details to perfect your custom Dexcom G7 holder:
- Non-Slip Feet: Add small rubber or felt feet to the bottom of desktop stands or cases to prevent sliding and protect surfaces.
- Cable Management Channels: For charging stations, ensure all cables are routed neatly. You can rout channels on the underside or back of the holder to keep cords out of sight. This contributes to a tidy appearance and prevents cable damage.
- Lining: As mentioned, lining the interior with felt, cork, or even thin leather protects the Dexcom G7 from scratches and provides a softer landing. Ensure the lining material does not impede device function or charging.
- Personalization: Engrave initials, a significant date, or a subtle design using a wood burner or a CNC router. This adds a unique, personal touch.
- Ventilation: While the Dexcom G7 does not generate significant heat, ensure that the design allows for adequate airflow, especially if the device will be charging for extended periods in an enclosed space. Small, discreet vent holes can be incorporated.
- Modular Design: Consider creating components that can be reconfigured. For instance, a desk stand that can also be wall-mounted, or a modular system that can expand to hold other medical supplies. This aligns with the principles of DIY compact entryway organizers which prioritize adaptable storage.
Maintenance and Care
Wooden holders, like any fine wood furniture, benefit from proper care.
- Cleaning: Dust regularly with a soft cloth. For spills or sticky residue, use a slightly damp cloth with mild soap, then wipe dry immediately. Avoid harsh chemical cleaners, as they can damage the finish.
- Protection: Keep wooden holders out of direct sunlight to prevent fading or warping. Avoid extreme temperature fluctuations and high humidity.
- Re-finishing: Over time, the finish might show wear. Depending on the type of finish, you can often reapply a fresh coat of oil or wax, or lightly sand and re-apply a film-forming finish to restore its appearance and protection.
By paying attention to these finishing touches and maintenance practices, your custom wooden Dexcom G7 holder will not only serve its purpose admirably but also remain a beautiful and lasting testament to your woodworking skill in 2026.
Conclusion
The journey through “The Woodworker’s Guide to Dexcom G7: Building Custom Holders and Storage Solutions for Medical Devices” reveals a unique intersection of craftsmanship and personal wellness. What begins as a practical need for medical device storage transforms into an opportunity for creative expression and functional elegance. By applying fundamental woodworking principles, from precise measurement and thoughtful design to careful material selection and meticulous finishing, woodworkers can create bespoke solutions that not only protect the Dexcom G7 but also enhance daily living.
Whether you’re crafting a simple desktop stand for easy access, an integrated bedside charging station for discreet nighttime use, a space-saving wall organizer, or a robust travel case, each project offers a chance to refine your skills and make a meaningful impact. These custom wooden holders go beyond mere utility; they become personalized items that reflect care, attention to detail, and a commitment to seamless integration of health management into a stylish environment. In 2026, as medical devices become more compact and essential, the demand for such thoughtful, handcrafted solutions will only grow.
Next Steps:
- Assess Your Needs: Determine which type of Dexcom G7 holder best suits your lifestyle. Do you need a permanent home station, a travel companion, or both?
- Gather Measurements: Carefully measure your Dexcom G7 receiver to ensure precise fit.
- Sketch a Design: Draw out your chosen project, incorporating features like charging access and material thickness.
- Select Materials: Choose a wood type that aligns with your skill level, aesthetic preferences, and the project’s requirements.
- Start Building: Begin with a simpler project to hone your skills, then progress to more complex designs as confidence grows.
- Focus on Finish: Don’t underestimate the importance of a good finish for durability, hygiene, and appearance.
Embrace the challenge, enjoy the creative process, and craft a solution that is as unique and valuable as the device it holds.
References
Dexcom, Inc. (2024). Dexcom G7 User Guide. Retrieved from [Official Dexcom Website – User Guides Section] (Specific URL may vary by region and year, but represents the most current general user guide).
SEO Meta Title: Build Custom Dexcom G7 Holders: Woodworking Guide 2026 SEO Meta Description: Craft elegant, custom wooden holders & storage for your Dexcom G7. This 2026 guide offers plans, materials, and steps for DIY medical device solutions.