
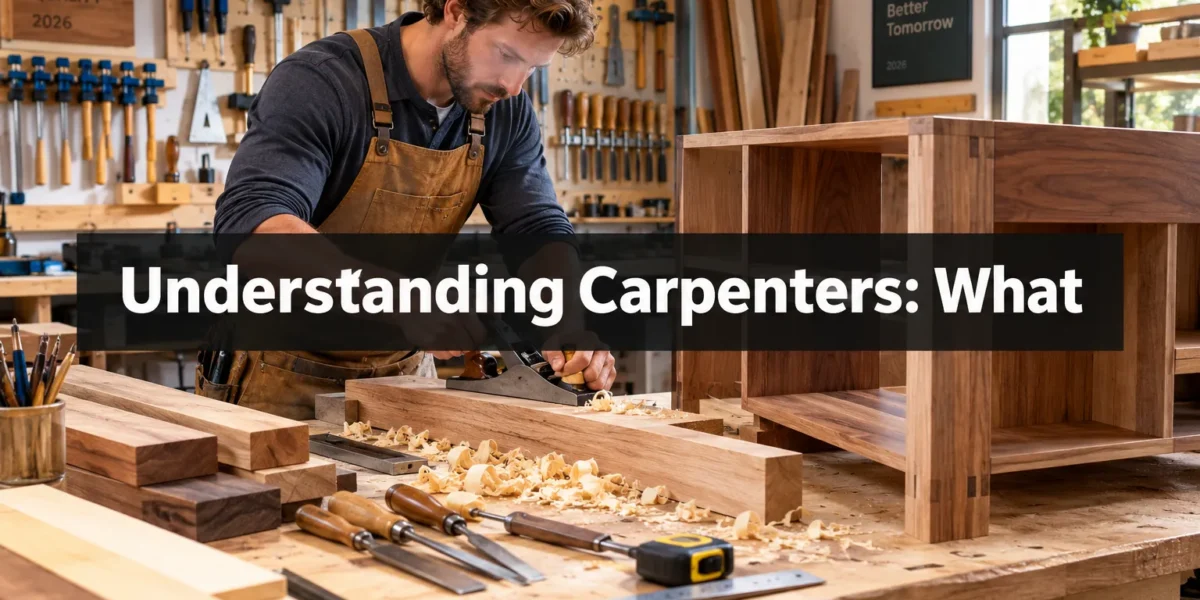
The average piece of mass-produced furniture in a typical home often hides a secret: its planned obsolescence. While seemingly affordable, many items are designed with cost-cutting measures that sacrifice durability for initial price. This contrasts sharply with the timeless quality found in professionally crafted pieces. Understanding Carpenters: What Professional Carpentry Can Teach DIY Woodworkers About Better Furniture delves into the foundational principles that elevate simple wood construction into lasting works of art, offering invaluable lessons for anyone looking to improve their DIY projects in 2026.
Professional carpentry isn’t merely about cutting and joining wood; it’s a discipline rooted in precision, structural integrity, and an intimate understanding of materials. By examining the methods, tools, and mindset of experienced carpenters, DIY woodworkers can significantly enhance the strength, longevity, and aesthetic appeal of their own furniture builds. This article will bridge that gap, translating professional best practices into actionable advice for the home workshop.
Key Takeaways
- Professional carpentry emphasizes meticulous planning and precise layout, crucial for strong, stable furniture.
- Understanding wood movement and selecting appropriate joinery techniques are fundamental to durability.
- The proper application and concealment of fasteners are key to both structural integrity and aesthetic finish.
- High-quality surface preparation and finishing techniques dramatically improve furniture appearance and lifespan.
- Adopting a professional mindset of patience, continuous learning, and attention to detail elevates DIY woodworking.
Understanding Carpenters: The Foundation of Precision and Planning
Professional carpenters operate under a rigorous set of standards that often go unnoticed by the casual observer but are fundamental to the quality of their work. From the initial concept to the final assembly, every step is executed with an unwavering commitment to precision. For DIY woodworkers, adopting this mindset of meticulous planning and accurate layout is perhaps the most critical lesson to learn for building better furniture.
A professional carpenter begins every project with a detailed plan, often sketching designs, creating cut lists, and envisioning the assembly process long before the first piece of wood is cut. This preemptive approach minimizes errors, reduces material waste, and ensures a smoother workflow. They consider not just the final appearance but also the structural requirements, the stresses the furniture will endure, and how different wood species will respond over time.
The Importance of Accurate Layout
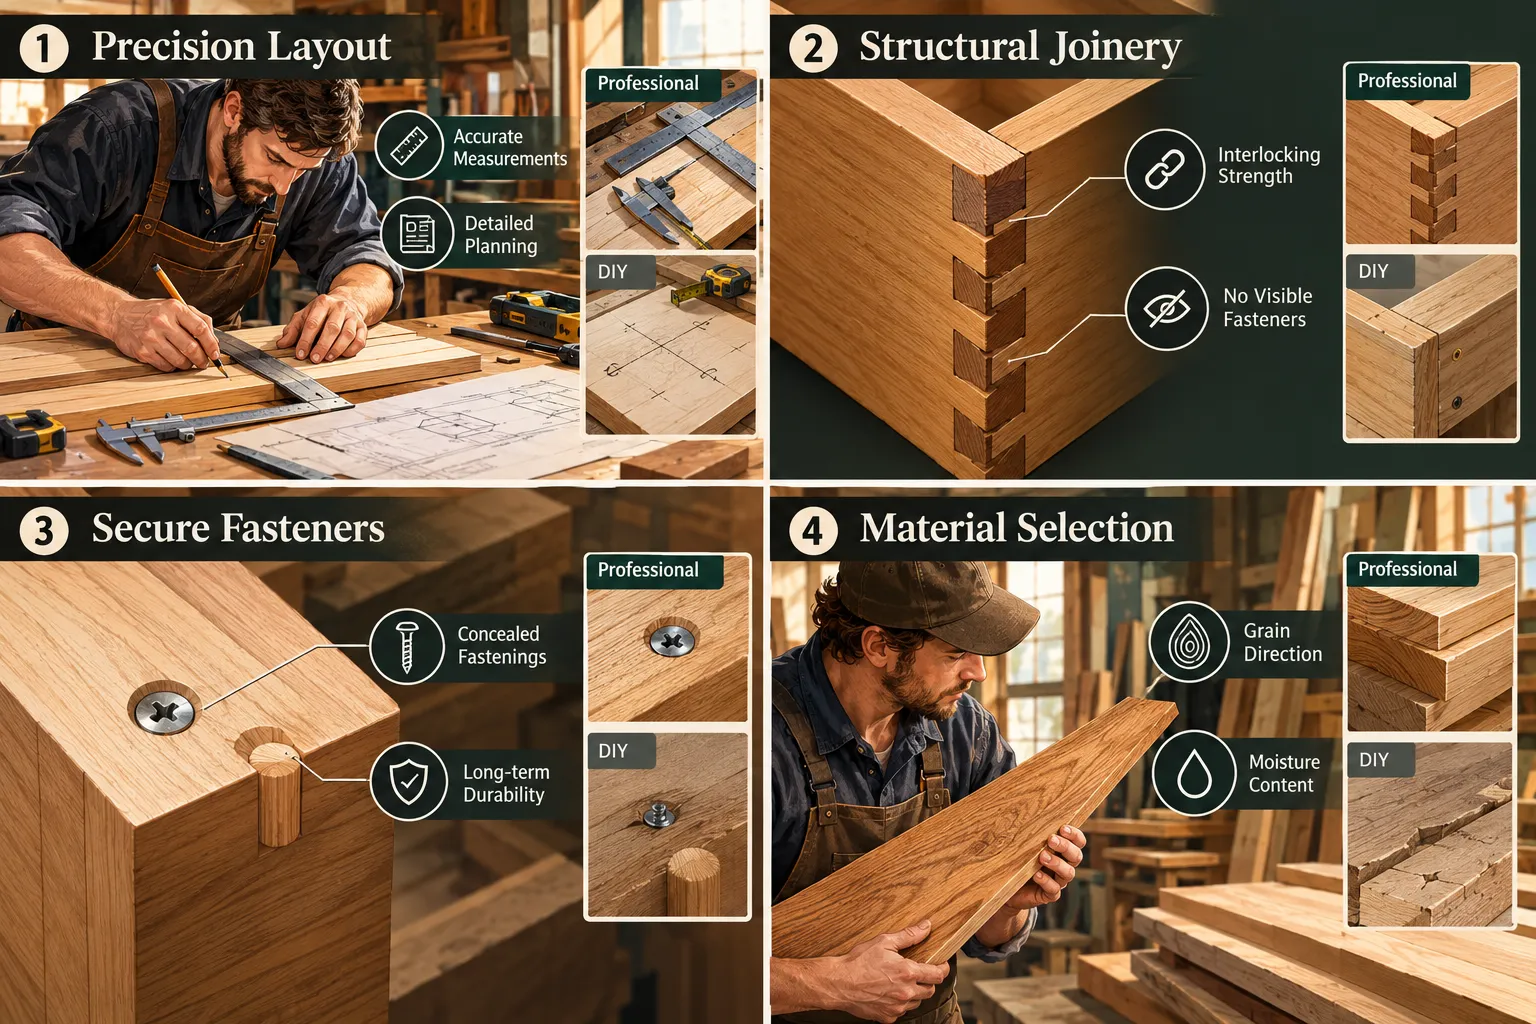
One of the cornerstones of professional carpentry is the concept of “measure twice, cut once.” This isn’t just a catchy phrase; it’s a foundational principle that underscores the importance of accurate layout. Professional carpenters use high-quality measuring tools, precision squares, calipers, and marking gauges, to ensure every line, every angle, and every dimension is exact.
- Precision Measuring Tools: While tape measures are common, professional shops frequently utilize combination squares, marking knives, and digital calipers for unparalleled accuracy. These tools allow for consistent, repeatable marks that are essential for tight-fitting joints and straight cuts.
- Reference Faces and Edges: Carpenters establish clear reference faces and edges on their stock. This ensures that all subsequent measurements and cuts are made from a consistent, square starting point, preventing cumulative errors that can throw an entire project out of alignment.
- Test Cuts and Mock-ups: For complex joinery or critical dimensions, professionals often make test cuts on scrap material. This allows them to fine-tune their saw settings or router depths, ensuring the final pieces fit perfectly. This practice, though seemingly time-consuming, saves significant time and material in the long run.
By embracing detailed planning and meticulous layout, DIY woodworkers can avoid common pitfalls like misaligned parts, gaps in joinery, and skewed assemblies. It transforms the act of woodworking from a series of hurried cuts into a thoughtful, controlled process that lays the groundwork for truly superior furniture.
Structural Joinery and Fasteners: Building for Durability
The strength and longevity of any piece of furniture largely depend on how its components are joined together. While DIY woodworkers might rely heavily on screws and basic butt joints, professional carpenters understand that superior structural integrity comes from well-designed joinery and the strategic use of fasteners. This section focuses on Understanding Carpenters: What Professional Carpentry Can Teach DIY Woodworkers About Better Furniture when it comes to the hidden strength within.
The Art of Strong Joinery
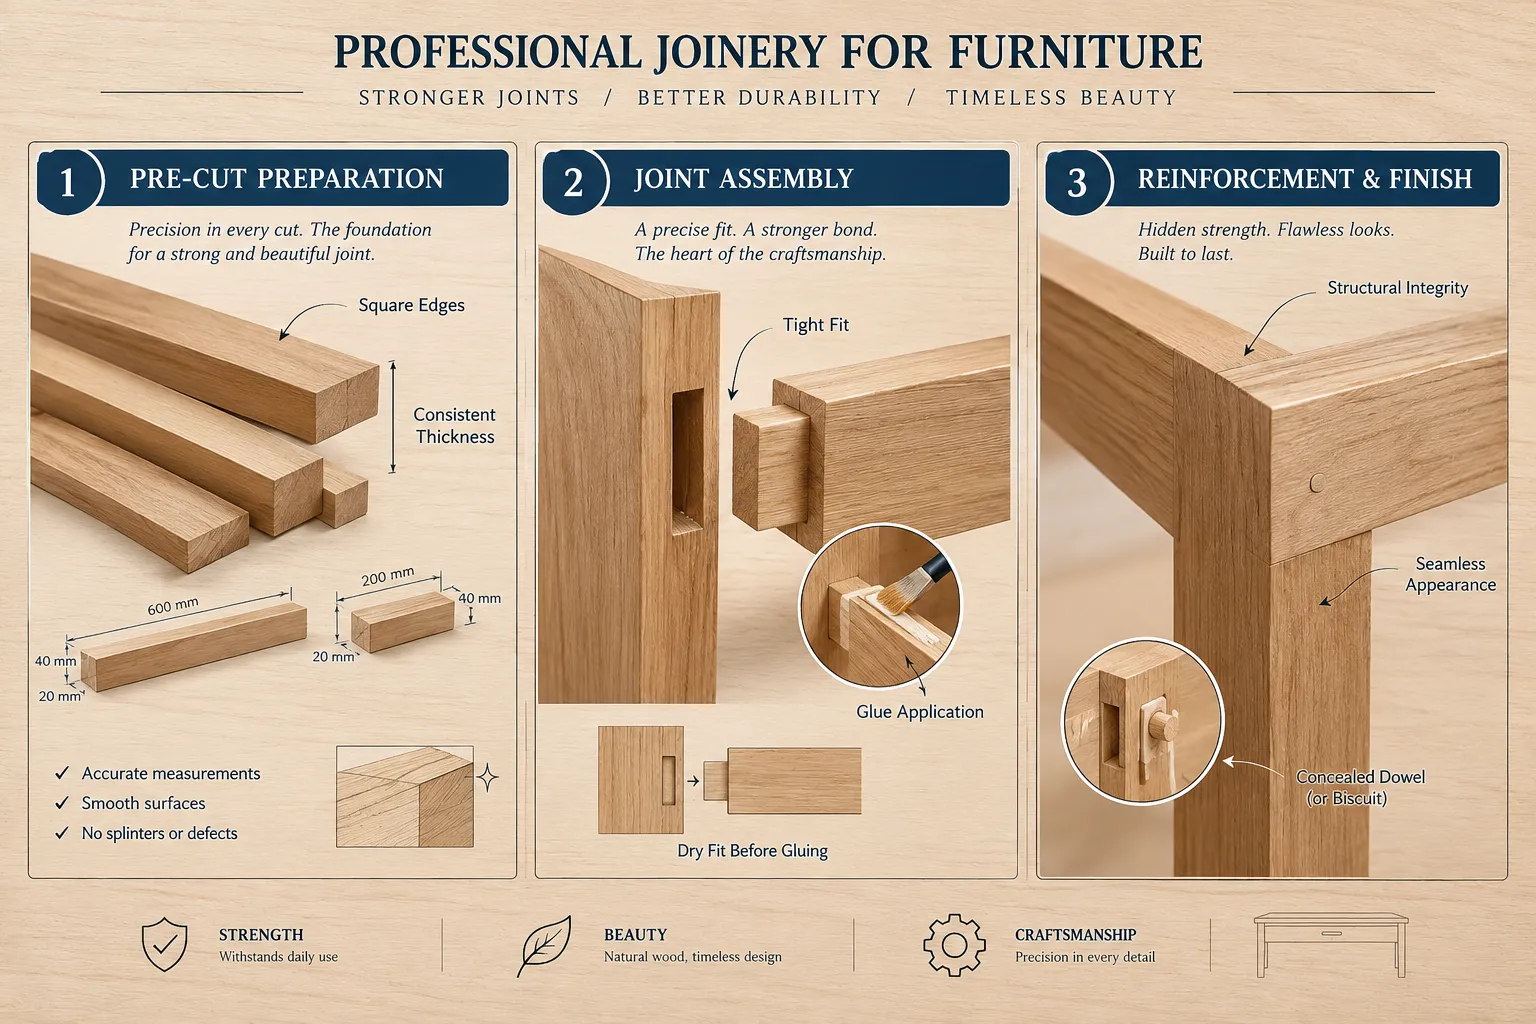
Professional carpentry prioritizes joinery that creates strong, interlocking mechanical connections between wood pieces. These joints distribute stress effectively, resist racking, and minimize reliance on fasteners or glue alone.
Common Professional Joinery Techniques:
| Joint Type | Description | Best Use Case | DIY Application |
|---|---|---|---|
| Mortise and Tenon | A projecting tenon fits snugly into a rectangular mortise hole. Extremely strong, resists pulling apart, and provides excellent shear strength. | Table and chair frames, cabinet doors, bed frames. | Can be done with a router, mortising chisel, or drill press. Requires precise layout. |
| Dovetail Joint | Interlocking “pins” and “tails” create a strong, beautiful joint resistant to pulling apart. Iconic for its aesthetic appeal. | Drawer boxes, casework, blanket chests. | Best achieved with a jig, but can be cut by hand with practice. |
| Dado and Rabbet | A dado is a groove cut across the grain, a rabbet is a groove cut along or across the edge. Provides substantial surface area for glue, preventing movement. | Shelving, cabinet backs, drawer bottoms. | Easily cut with a table saw or router. |
| Domino/Biscuit | Uses specialized tools to cut slots for flat wooden biscuits (biscuits) or elongated dowels (Dominos). Provides alignment and increased glue surface. | Panel glue-ups, carcase construction, frame and panel. | Biscuit joiners are accessible, Domino joiners are a significant investment but highly efficient. |
The strength of these joints is further enhanced by the proper use of wood glue. A quality wood glue, correctly applied, creates a bond stronger than the wood itself. Understanding the different types of wood glue and how to achieve optimal clamping pressure is crucial.
Strategic Fastener Usage
While joinery provides the primary structural strength, fasteners play a critical role in assembly and reinforcement. Professional carpenters use fasteners strategically, often preferring to conceal them for a cleaner aesthetic and to avoid splitting wood or creating weak points.
- Pilot Holes and Countersinking: Always drill pilot holes to prevent wood splitting, especially near edges or in hardwoods. Countersinking or counterboring fasteners allows the screw head to sit flush with or below the surface, which can then be plugged for concealment.
- Screws vs. Nails: Screws provide much greater holding power and are often preferred for critical structural connections, especially in furniture that will bear weight or experience movement. Nails are quicker for assembly but offer less resistance to pull-out.
- Concealed Fasteners: For high-quality furniture, visible fasteners are often avoided. Techniques include:
- Pocket Hole Joinery: While less traditional than mortise and tenon, pocket holes offer strong, concealed joints for face frames, cabinets, and tables.
- Dowels and Biscuits: As mentioned, these add strength and alignment, often being entirely hidden within the joint.
- Plugging Screw Holes: After countersinking, a matching wood plug can be glued into the hole, sanded flush, and finished, making the fastener virtually invisible.
By focusing on robust joinery and thoughtful fastener application, DIY woodworkers can build furniture that not only looks professional but also stands the test of time.
Finishing Touches: Elevating Furniture Through Surface Preparation and Aesthetics
The final appearance and long-term protection of a piece of furniture are determined by its finishing process. Many DIY woodworkers underestimate the impact of proper surface preparation and the nuances of various finishing techniques. Professional carpenters, however, view finishing as an integral part of the craftsmanship, understanding that a superior finish enhances both the beauty and durability of their work. This is a critical aspect of Understanding Carpenters: What Professional Carpentry Can Teach DIY Woodworkers About Better Furniture.
Meticulous Surface Preparation
Before any finish is applied, the wood must be impeccably prepared. This phase is non-negotiable for professionals and can dramatically distinguish a high-quality piece from a rushed DIY project.
- Sanding Schedules: Professionals follow a progressive sanding schedule, starting with a coarser grit (e.g., 80-100 grit) to remove machining marks and significant imperfections, and gradually moving to finer grits (e.g., 180-220 grit, sometimes up to 320 or 400 for specific finishes). The key is to ensure all scratch marks from the previous grit are removed before moving to the next.
- Dust Removal: Every speck of dust must be removed before applying finish. Professionals use compressed air, tack cloths, or vacuum systems. Dust left on the surface will be trapped by the finish, creating an uneven, bumpy texture.
- Grain Raising: For water-based finishes, professionals often “raise the grain” by wiping the wood with a damp cloth, letting it dry, and then performing a final light sanding with a fine grit (e.g., 220-320). This prevents the finish from raising the grain later, leading to a rough feel.
- Defect Correction: Prior to finishing, any minor dents, glue squeeze-out, or small gaps are addressed. Dents can often be steamed out, glue is meticulously scraped and sanded away, and small gaps might be filled with wood putty or a mixture of sawdust and glue.
Choosing and Applying Finishes Professionally
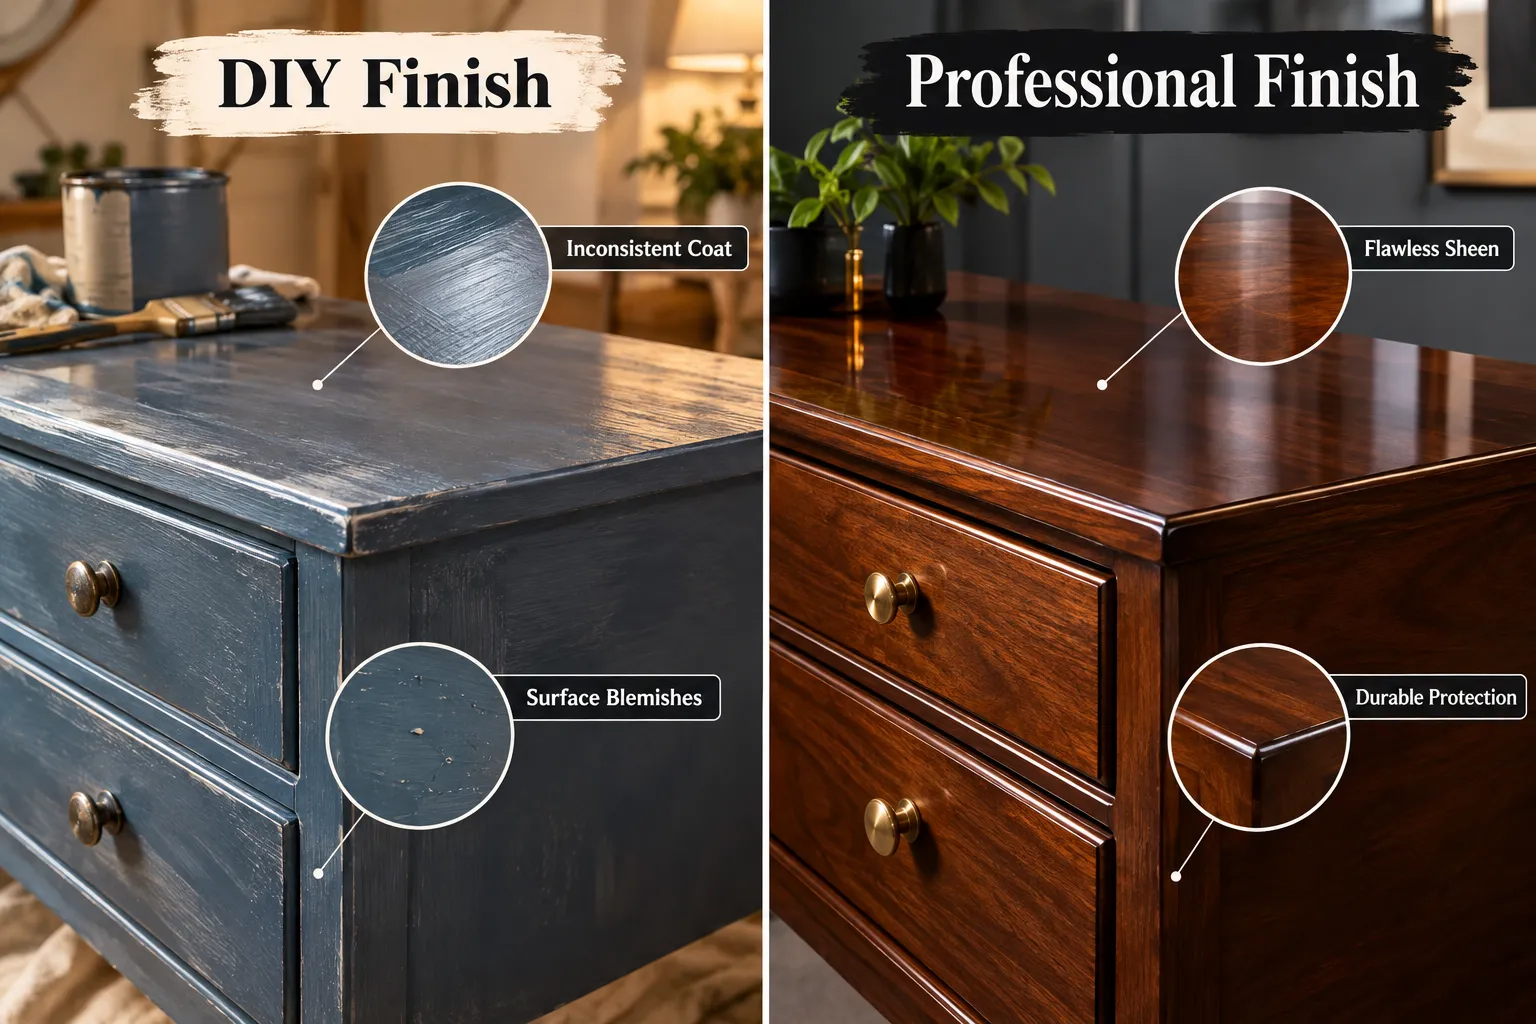
The choice of finish depends on the desired aesthetic, durability requirements, and the wood species. Professionals understand the characteristics of different finishes and apply them with precision. For example, high gloss wood finishing techniques require an exceptionally smooth surface and multiple thin coats, while weathered wood finishing techniques involve different preparation and application methods.
Common Professional Finishing Approaches:
- Oil Finishes (e.g., Tung Oil, Linseed Oil):
- Characteristics: Penetrate the wood, enhance natural grain, provide a warm, satin luster. Easy to repair.
- Application: Applied in thin coats, wiped on and off, allowing ample drying time between coats. Multiple coats build protection.
- Varnish/Polyurethane/Lacquer:
- Characteristics: Form a hard, protective film on the wood surface. Offer excellent durability against scratches, moisture, and chemicals. Available in various sheens (matte to high gloss).
- Application: Applied in multiple thin, even coats, often with light sanding between coats to ensure adhesion and smoothness. Requires a dust-free environment for best results. Spraying often yields the smoothest finish.
- Stains and Dyes:
- Characteristics: Change or enhance the color of the wood. Dyes penetrate more deeply and offer more vibrant colors; stains sit on the surface and highlight grain.
- Application: Applied evenly, often with a rag or brush, then wiped off to control color intensity. Pre-conditioners might be used on blotch-prone woods (like pine or maple) to ensure even absorption.
- For specific woods, like oak wood finishing techniques might involve grain filling to achieve a super smooth surface before applying a topcoat.
- Specialty Finishes (e.g., Milk Paint, Casein):
- Characteristics: Offer unique aesthetic properties, such as a distressed or antique look. Mastering milk paint and casein finishes involves specific techniques for achieving desired effects.
- Application: Varies greatly by product but generally involves layering, distressing, and sealing.
The Professional Edge in Finishing:
- Thin, Even Coats: Professionals understand that multiple thin coats are always superior to a few thick coats. Thin coats dry harder, are less prone to runs or sags, and build a more durable film.
- Intercoat Sanding: Lightly sanding with very fine sandpaper (e.g., 320-400 grit) between coats creates a microscopic “tooth” for the next coat to adhere to, ensuring a smooth, durable finish.
- Curing Time: Allowing adequate time for finishes to fully cure, not just dry to the touch, is crucial for maximum hardness and durability. Rushing this step can lead to a soft, easily damaged finish.
By dedicating time to meticulous surface preparation and understanding the intricacies of various finishing techniques, DIY woodworkers can achieve professional-grade results that transform their handmade furniture into exquisite, long-lasting pieces.
Conclusion
The journey of Understanding Carpenters: What Professional Carpentry Can Teach DIY Woodworkers About Better Furniture reveals that the distinctions between amateur and professional work lie not just in skill, but in a profound approach to the craft. Professional carpenters prioritize meticulous planning, employ robust structural joinery, strategically use fasteners, and execute flawless finishing techniques. These are not merely advanced skills but fundamental principles that, when adopted by DIY woodworkers, can dramatically elevate the quality, durability, and aesthetic appeal of their handmade furniture.
In 2026, as interest in custom and handmade items continues to grow, the lessons from professional carpentry offer a clear path to building better. By embracing patience, investing in precision tools, learning the nuances of wood and joinery, and dedicating time to proper surface preparation and finishing, DIY enthusiasts can transcend the common limitations of casual woodworking. The ultimate goal is not just to build furniture, but to craft lasting pieces that embody true skill and artistry, reflecting a commitment to quality that rivals the pros.
To further refine your woodworking journey, consider exploring specialized techniques like unique wood finishing techniques or delving into specific material applications to expand your repertoire and master the craft.
SEO Meta Title: Learn Pro Carpentry: Better DIY Furniture & Woodwork (60 Characters) SEO Meta Description: Elevate your DIY furniture! Discover what professional carpentry teaches about precision, joinery, fasteners, and finishing for stronger, more beautiful builds in 2026. (159 Characters)