
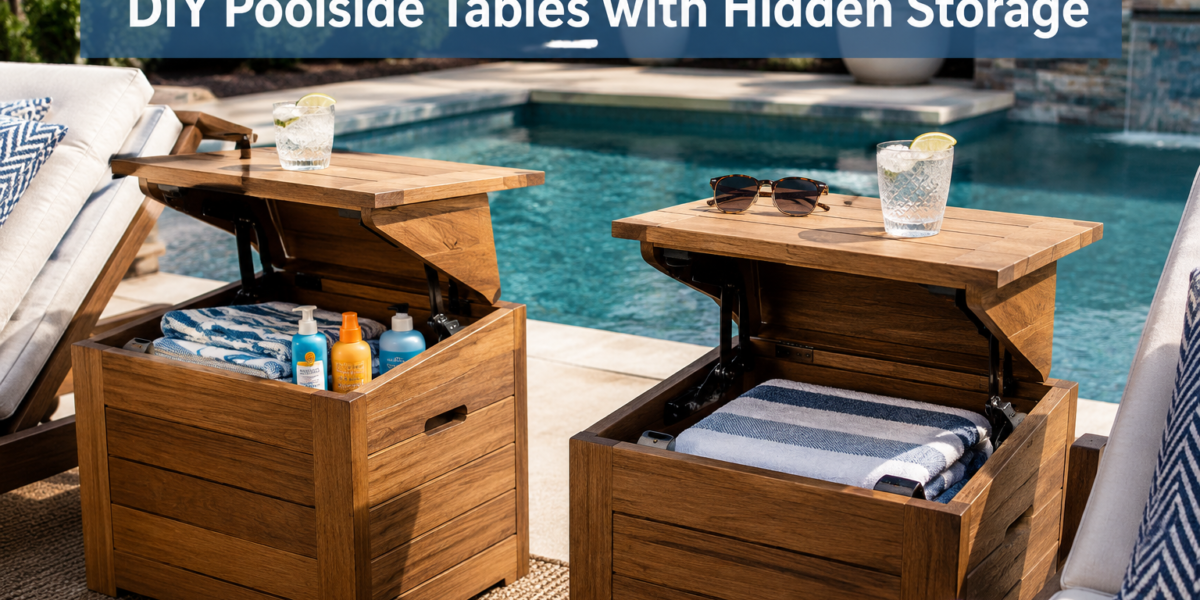
Over 60% of homeowners with pools cite maintaining a tidy and functional poolside area as a significant challenge, often struggling with misplaced towels, scattered sunscreen bottles, and general clutter. This persistent issue detracts from the relaxing ambiance a pool area is meant to provide. Addressing this common frustration, crafting DIY Poolside Side Tables with Hidden Storage for Towels and Sunscreen offers a practical, elegant, and durable solution, seamlessly blending utility with outdoor aesthetics. These custom-built pieces enhance convenience by keeping essentials within easy reach while maintaining a clean, organized environment, specifically designed to withstand the unique challenges of a humid, chlorinated setting.
Key Takeaways
- Custom Storage Solutions: Building your own poolside tables allows for tailored storage compartments, perfectly sized for towels, sunscreen, goggles, and other pool essentials, reducing clutter.
- Durable Materials & Finishes: Selecting the right weather-resistant woods and marine-grade finishes is crucial for longevity in humid, chlorinated environments.
- Enhanced Functionality: Integrating hidden storage, whether via lift-up tops, pull-out drawers, or side compartments, maximizes convenience and keeps the poolside organized.
- Design Personalization: DIY projects offer the flexibility to match your existing outdoor decor, creating cohesive and aesthetically pleasing spaces.
- Cost-Effective & Rewarding: Crafting these tables yourself can be more economical than purchasing pre-made outdoor furniture and provides a fulfilling woodworking experience.
Designing Your DIY Poolside Side Tables with Hidden Storage for Towels and Sunscreen
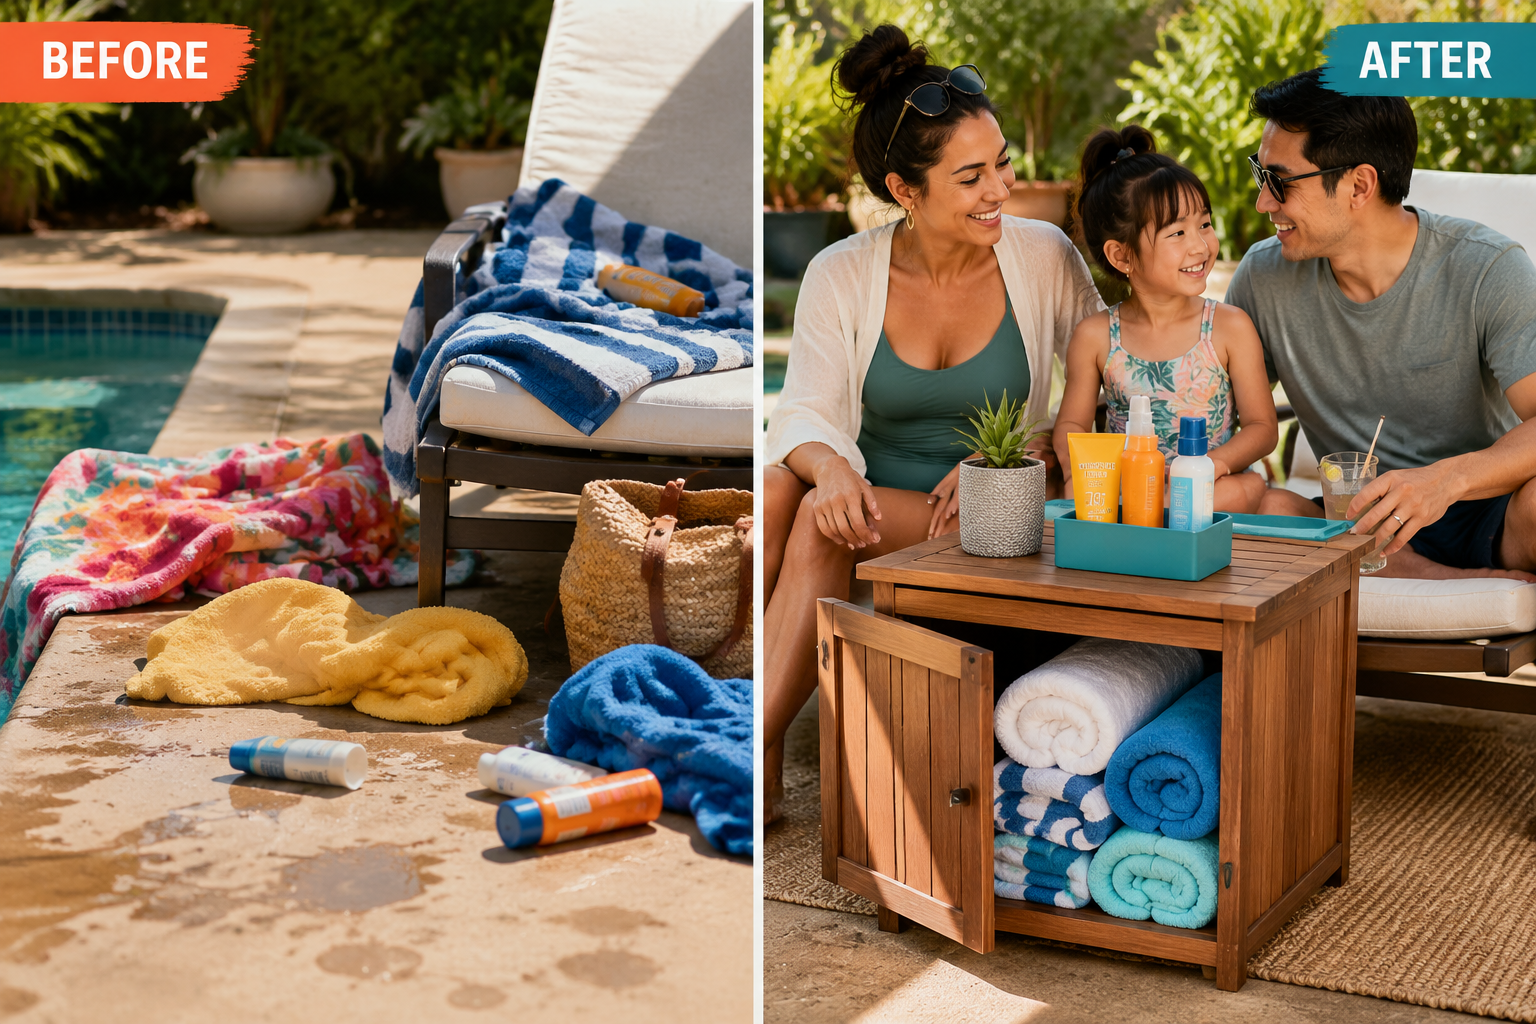
The foundation of any successful woodworking project lies in meticulous planning and design. For DIY Poolside Side Tables with Hidden Storage for Towels and Sunscreen, this means considering not only the aesthetic but also the functionality and durability required for an outdoor, often wet, environment. Thoughtful design ensures your tables are not just attractive additions but also highly practical storage solutions.
Essential Design Considerations
Before cutting any wood, establish the table’s dimensions, style, and storage mechanism.
- Size and Placement: Consider where the tables will be placed (next to loungers, by a seating area) and what height is most comfortable. Standard side table heights range from 18 to 24 inches. Width and depth should accommodate the items you plan to store without being bulky.
- Storage Mechanism:
- Lift-up tops: A common and effective choice, providing a large, accessible compartment. Hinges must be weather-resistant, ideally stainless steel.
- Side compartments: Accessible from the side, possibly with a hinged door or a sliding panel. These can be ideal for smaller items like sunscreen bottles or reading materials.
- Pull-out drawers: While more complex to build for outdoor use due to the need for weather-resistant slides, they offer excellent organization. If opting for drawers, ensure they are well-sealed and drain properly to prevent moisture buildup.
- Aesthetics: Will the table be rustic, modern, or classic? The design should complement your existing outdoor decor. Consider incorporating elements like slatted sides for drainage or solid panels for a cleaner look.
Selecting Materials for Longevity
The poolside environment is harsh, with exposure to sun, rain, and chlorinated water. Material selection is paramount.
- Wood Species:
- Cedar: Naturally resistant to rot, decay, and insect infestation. It’s lightweight and takes finishes well.
- Redwood: Similar to cedar in durability and resistance, but often more expensive and harder to source.
- Teak: The gold standard for outdoor furniture due to its extreme durability, natural oils, and resistance to water and rot. However, it is a premium, costly option.
- Treated Pine: A more economical choice, chemically treated to resist rot and insects. Ensure it is rated for ground contact if any part of the table will touch the soil.
- Cypress: Another excellent choice for outdoor use, offering good rot and insect resistance.
- Hardware: All fasteners, hinges, and drawer slides must be made from marine-grade stainless steel (316 grade) to prevent rust and corrosion. Galvanized or coated screws may suffice for some applications but will not offer the same longevity as stainless steel.
- Adhesives: Use a waterproof wood glue (e.g., Titebond III) for all joinery. This glue is designed for outdoor applications and offers superior water resistance. For more insights on choosing the right adhesive, consult “The Ultimate Guide to Wood Glue: Choosing the Right Adhesive for Every Project, Joint, and Environmental Condition” – https://woodcraftwiz.com/the-ultimate-guide-to-wood-glue-choosing-the-right-adhesive-for-every-project-joint-and-environmental-condition/.
- Finishes: A high-quality exterior-grade finish is critical.
- Marine-grade spar varnish or polyurethane: Offers excellent UV protection and water resistance, creating a hard, protective barrier.
- Deck stains/sealers: Penetrate the wood to protect against moisture and UV damage, often allowing the wood’s natural grain to show through.
- Oil finishes (e.g., tung oil, linseed oil): Penetrate and nourish the wood, offering good water resistance and a natural look, but require more frequent reapplication.
Step-by-Step Construction Guide for Your Poolside Side Table
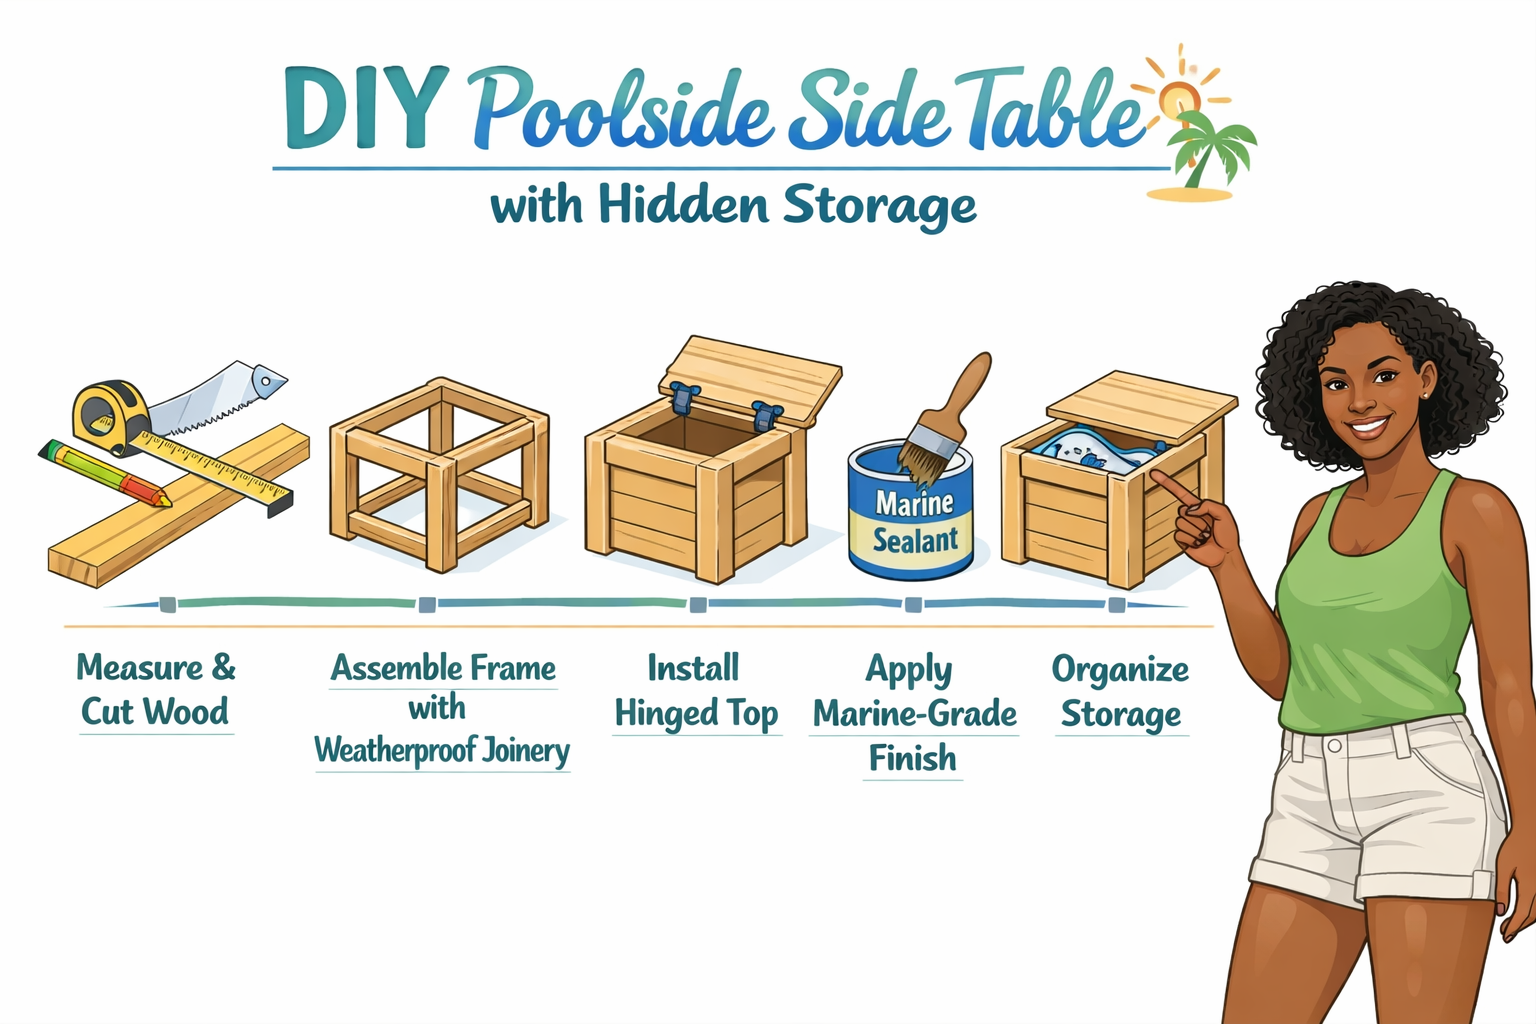
Building DIY Poolside Side Tables with Hidden Storage for Towels and Sunscreen is a rewarding project that combines practical skills with creative design. This section outlines the general steps for constructing a robust and functional table, assuming a basic rectangular design with a hinged lift-up top.
Tools and Materials Checklist
Ensure you have the following before you begin:
- Safety Gear: Safety glasses, ear protection, gloves.
- Measuring & Marking: Tape measure, carpenter’s square, pencil.
- Cutting Tools: Miter saw, circular saw, or table saw. For precision and safety, a table saw is highly recommended, and understanding “Table Base Width for Stability: Maximizing Support and Stability” can be beneficial for your workshop setup.
- Drilling: Drill/driver, various drill bits, countersink bit.
- Joining: Clamps, waterproof wood glue, marine-grade stainless steel screws. For advanced joinery like dovetails, refer to “Mastering Dovetail Joints with Hand Tools: A Step-by-Step Guide for”.
- Sanding: Orbital sander, various grits of sandpaper (80, 120, 220).
- Finishing: Brushes or rollers, chosen outdoor finish, rags.
- Wood: Selected weather-resistant lumber (e.g., cedar, treated pine).
- Hardware: Marine-grade stainless steel hinges.
Construction Phases
- Cut the Components:
- Carefully measure and cut all pieces according to your design plans. This typically includes:
- Four legs
- Horizontal rails for the top and bottom frames (front, back, and sides)
- Panels for the side walls (if not using slats)
- Top piece (which will be hinged)
- Bottom panel for the storage compartment
- Precision in cutting is crucial for strong joints and a clean final appearance.
- Carefully measure and cut all pieces according to your design plans. This typically includes:
- Assemble the Frame:
- Begin by assembling the two side frames. Attach the top and bottom side rails to two legs using waterproof wood glue and stainless steel screws. Pre-drill and countersink all screw holes to prevent splitting and allow for a flush finish.
- Once the side frames are stable, connect them with the front and back rails to form the main table carcass. Ensure the frame is square and level using a carpenter’s square before the glue sets.
- Construct the Storage Compartment:
- Install the side panels or slats into the frame. For slatted designs, ensure even spacing and secure attachment.
- Cut and fit the bottom panel of the storage compartment. This can rest on ledges routed into the lower rails or be secured with cleats. Ensure proper drainage if water accumulation is a concern (e.g., by drilling small holes in the corners of the bottom panel). For general tips on maximizing storage, consider our article on “Building Modular Wood Storage Systems for Small Workshops: Maximizing”.
- Prepare and Attach the Lid:
- Sand the top piece thoroughly, rounding any sharp edges for comfort and safety.
- Position the marine-grade stainless steel hinges on the back edge of the table frame and the corresponding edge of the lid. Mark and pre-drill all screw holes before attaching the hinges securely. Test the lid’s movement to ensure it opens and closes smoothly. Consider adding a lid stay to prevent the top from slamming shut. For deeper insights into crafting hinged lids, review “Mastering the Woodworking Box Lid: A Comprehensive Guide for 2026”.
- Sanding and Finishing:
- Thoroughly sand the entire table, starting with 80-grit sandpaper to remove any major imperfections, then progressing to 120-grit, and finally 220-grit for a smooth finish. Dust removal is critical between sanding steps.
- Apply your chosen outdoor finish according to the manufacturer’s instructions. This typically involves multiple coats, with light sanding between coats for spar varnish or polyurethane, or reapplication as needed for oil finishes. Pay special attention to end grain, which absorbs more finish.
Maintaining and Personalizing Your Poolside Storage Tables
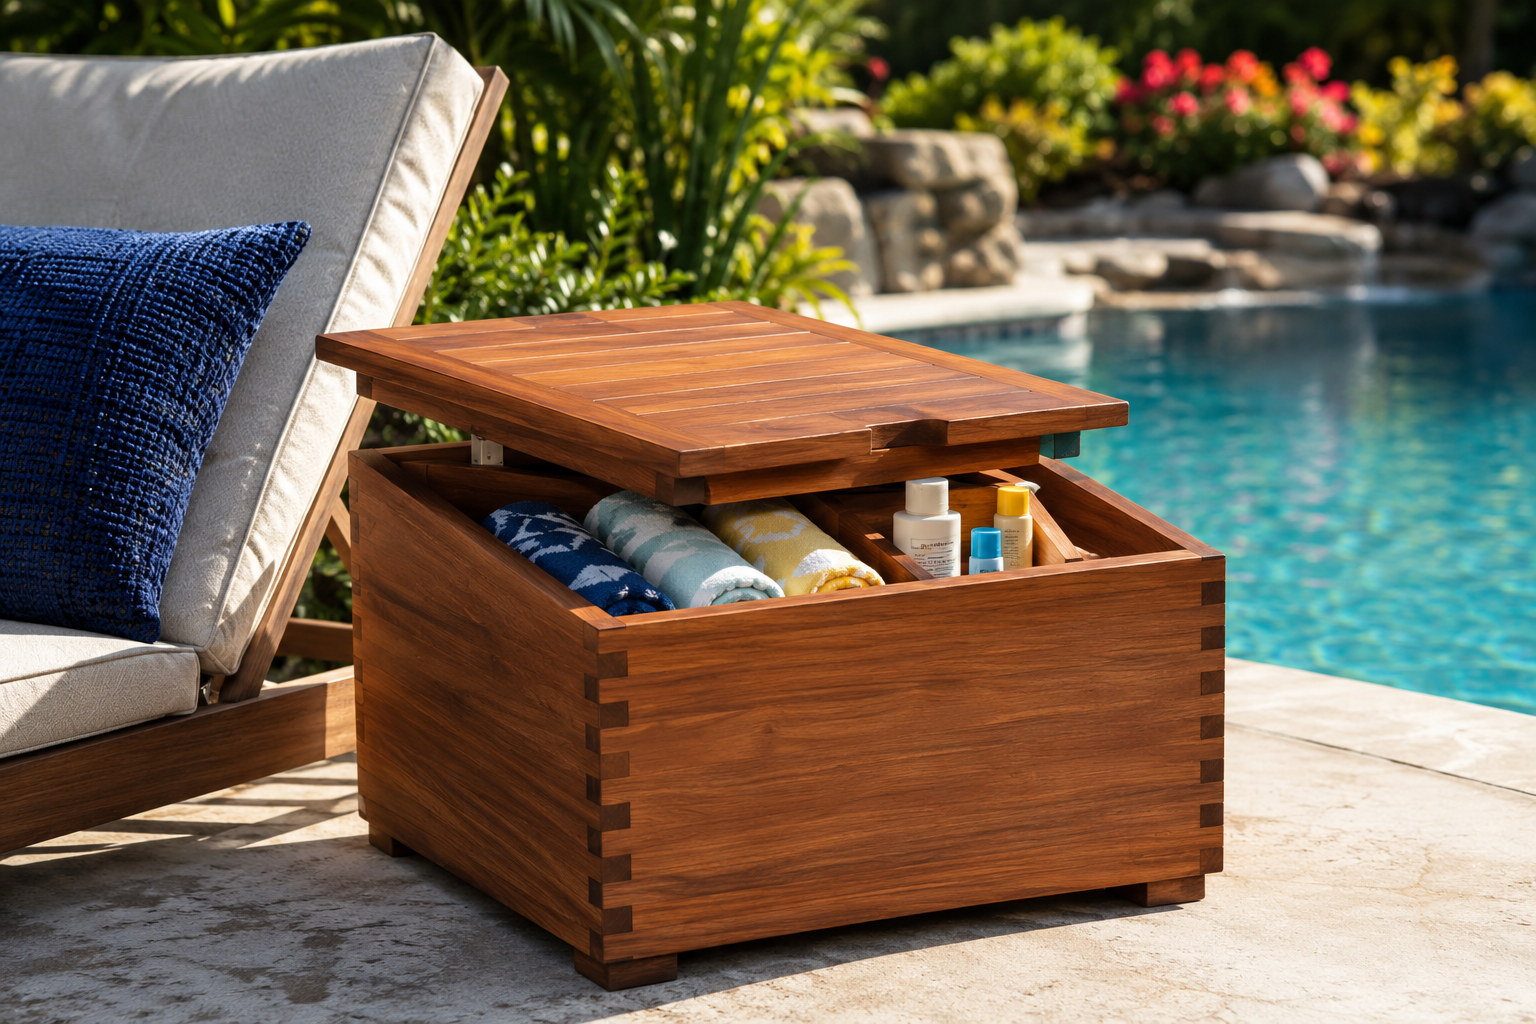
Once your DIY Poolside Side Tables with Hidden Storage for Towels and Sunscreen are built, proper maintenance and thoughtful personalization will ensure they remain functional and attractive for years to come.
Maintenance for Longevity
The outdoor environment, especially by a pool, is demanding. Regular maintenance extends the life and beauty of your tables.
- Routine Cleaning: Wipe down the tables regularly with a damp cloth to remove dust, pollen, and chlorine residue. For stubborn grime, use a mild soap solution and rinse thoroughly. Avoid harsh chemical cleaners, which can damage the finish.
- Inspecting Hardware: Periodically check all screws and hinges for tightness and signs of rust. Replace any corroded stainless steel hardware immediately. Loose screws should be tightened.
- Reapplying Finish: Depending on the type of finish and exposure, you will need to reapply it every 1-3 years.
- Spar Varnish/Polyurethane: Look for signs of peeling, cracking, or dullness. Lightly sand the affected areas and reapply coats as needed.
- Oil Finishes: Reapply when the wood starts to look dry or faded. This can be as frequent as every 6-12 months.
- Stains/Sealants: Follow the manufacturer’s recommendations for reapplication, typically when water no longer beads on the surface.
- Winter Storage: If you live in an area with harsh winters, consider covering your tables with waterproof furniture covers or storing them indoors during the off-season to protect them from extreme cold, snow, and ice.
Personalizing Your Tables
Beyond the basic build, there are numerous ways to add unique touches to your poolside tables.
- Color and Stain: Experiment with different wood stains to achieve a desired color, from natural cedar tones to darker, richer hues. Exterior paints can also add a vibrant pop of color to match your outdoor cushions or accessories.
- Decorative Hardware: While functionality is key, decorative marine-grade stainless steel handles or pulls can enhance the table’s appearance.
- Inlays or Carvings: For the more adventurous woodworker, adding a simple inlay pattern or a carved motif can create a truly custom piece. This often requires specialized tools and techniques, but can elevate the aesthetic significantly.
- Integrated Features:
- Cup Holders: Install recessed cup holders into the top surface to keep drinks stable and prevent spills.
- Phone/Tablet Slots: Create a narrow, routed slot on the surface for safely propping up a phone or small tablet.
- Towel Hooks: Attach small, weather-resistant hooks to the exterior sides of the table for hanging towels to dry.
- Built-in Planters: For a truly unique touch, integrate a small, waterproof planter box into one side of the table for succulents or small herbs. For inspiration, refer to “Crafting Custom Wooden Planters: Indoor and Outdoor Designs with Drainage Solutions and Weatherproofing” – https://woodcraftwiz.com/crafting-custom-wooden-planters-indoor-and-outdoor-designs-with-drainage-solutions-and-weatherproofing/.
By combining robust construction with mindful maintenance and personalized touches, your DIY poolside side tables with hidden storage will not only serve their practical purpose but also become cherished elements of your outdoor living space in 2026 and beyond.
Conclusion
Building DIY Poolside Side Tables with Hidden Storage for Towels and Sunscreen is a highly rewarding project that offers a tangible solution to common poolside clutter. By carefully selecting weather-resistant materials, employing durable joinery and finishes, and incorporating smart storage designs, these tables become indispensable additions to any outdoor oasis. From the initial design phase to the final coat of protective finish, each step contributes to a piece of furniture that is not only functional and enduring but also uniquely tailored to your style and needs.
The effort invested in crafting these tables translates into a cleaner, more organized, and ultimately more enjoyable poolside experience. No more searching for lost sunscreen or dealing with damp towels scattered across your patio. Instead, you’ll have elegant, custom-built storage right where you need it, ready to enhance your relaxation and convenience throughout the swimming season. Take the plunge and transform your poolside into a testament to practical design and quality craftsmanship.
References
- Forest Products Laboratory. (2010). Wood Handbook: Wood as an Engineering Material. General Technical Report FPL-GTR-190. U.S. Department of Agriculture, Forest Service, Forest Products Laboratory.
- Hoadley, R. B. (2000). Understanding Wood: A Craftsman’s Guide to Wood Technology. Taunton Press.
- McIntyre, A. (2012). The Workbench Book. Taunton Press. (While focused on workbenches, principles of durable construction apply to outdoor furniture).
SEO Meta Title: DIY Poolside Side Tables: Hidden Storage for Towels & Sunscreen
SEO Meta Description: Build DIY poolside side tables with hidden storage for towels & sunscreen. Learn designs, weather-resistant materials & step-by-step construction for your 2026 pool area.