

The average household in 2026 possesses no fewer than 10-15 smart devices requiring daily charging, leading to a ubiquitous tangle of cables that often detracts from carefully curated interior aesthetics. Rather than resigning living spaces to this inevitable electronic sprawl, consider a woodworking project that harmonizes modern technology with timeless design. This article provides a comprehensive guide to constructing a DIY Wood Console Table with Hidden Charging Station: Blending Modern Tech with Classic Craftsmanship. This piece of furniture not only serves as a stylish accent in your entryway or living room but also ingeniously conceals the charging clutter that plagues contemporary homes.
Key Takeaways
- A DIY wood console table offers a sophisticated solution for decluttering device charging.
- Integrating a hidden charging station requires careful planning for power access and cable management.
- Choosing the right wood and joinery techniques elevates the project’s aesthetic and durability.
- Successful execution blends traditional woodworking skills with modern technological requirements.
- This project enhances home functionality and design, making it a valuable addition to any space.
The Vision: Integrating Functionality and Form in a DIY Wood Console Table with Hidden Charging Station
The concept of a console table has evolved significantly. Once purely decorative, modern console tables are expected to provide utility beyond holding keys and mail. By incorporating a hidden charging station, a DIY Wood Console Table with Hidden Charging Station: Blending Modern Tech with Classic Craftsmanship transforms a simple piece of furniture into a smart home essential. This project goes beyond merely drilling holes for cables; it involves thoughtful design to ensure the charging components are seamlessly integrated and easily accessible without compromising the table’s structural integrity or visual appeal.
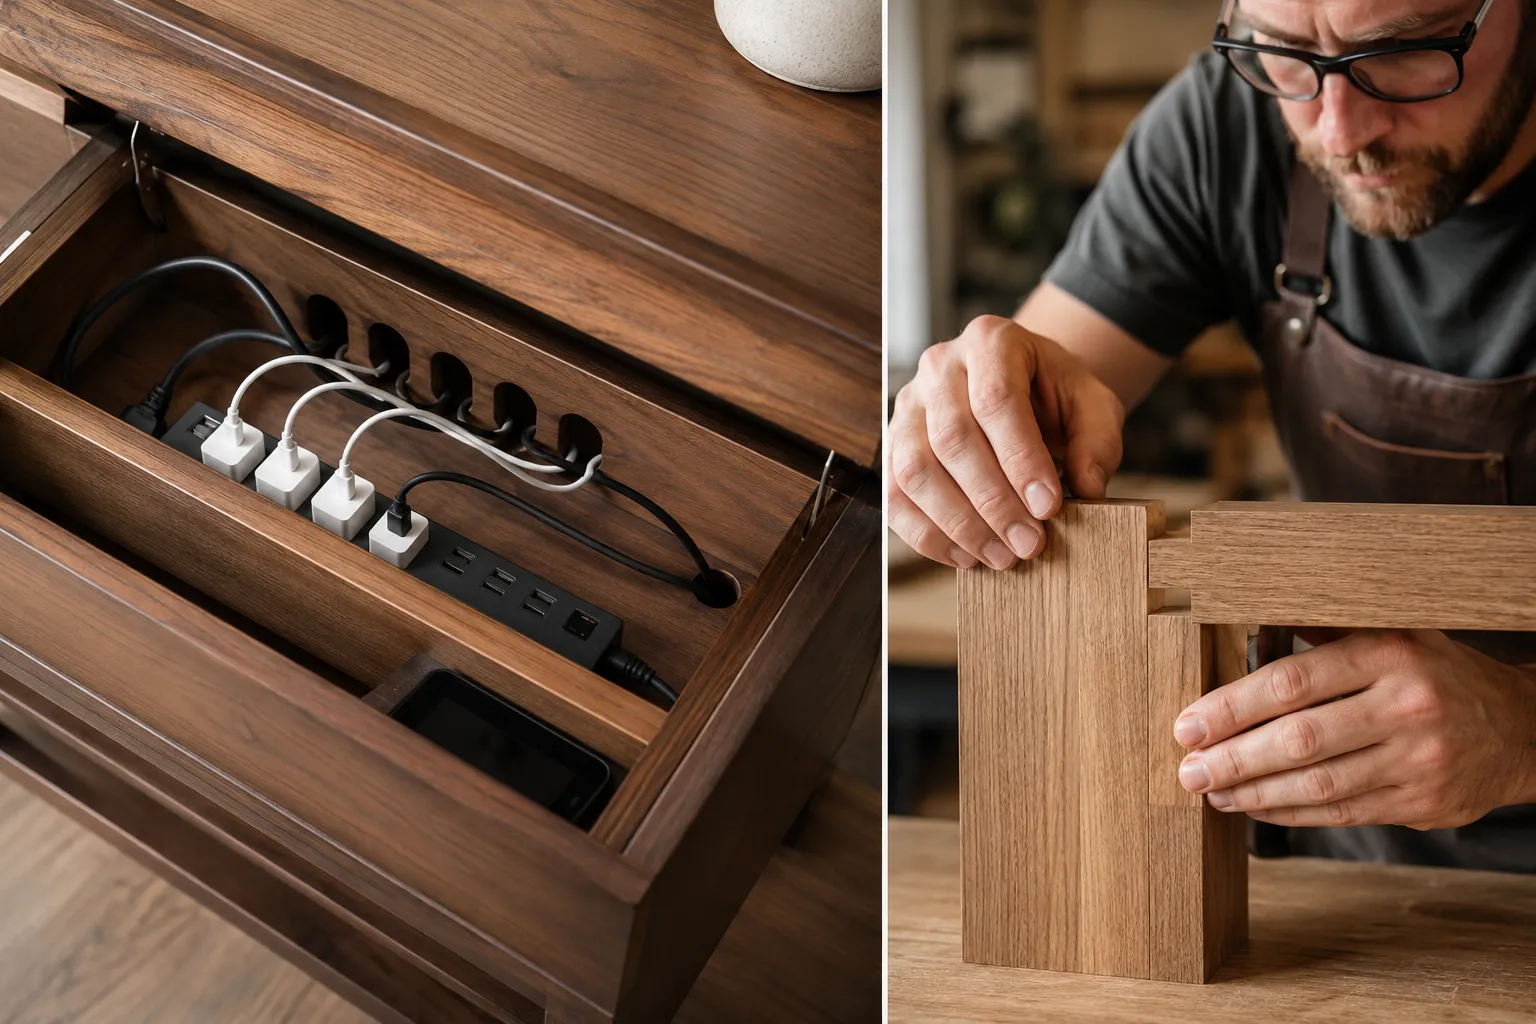
The true beauty of this project lies in its ability to marry two seemingly disparate worlds: the rustic appeal of handcrafted wood and the sleek efficiency of modern electronics. Imagine a beautifully finished console table, perhaps in a rich walnut or a light maple, that at first glance appears to be a classic piece of furniture. A subtle touch, however, reveals a hidden compartment, a sliding top, a pivot-out drawer, or a drop-down panel, that houses a multi-port USB charger, wireless charging pads, and neatly coiled cables. This discreet integration ensures that devices can be charged out of sight, maintaining a clean and elegant environment.
Design Considerations for Your Hidden Charging Station
Before cutting any wood, thorough planning is essential. Consider the following:
- Placement and Size: Where will your console table reside? Entryways typically benefit from narrower designs, while living room applications might allow for a deeper surface. Measure the space accurately to determine optimal dimensions.
- Power Source: The hidden charging station will require electricity. Plan for an outlet to be conveniently located, or factor in a longer power cord and cable management along the wall.
- Charging Requirements: What devices will primarily use this station? Consider the number of USB-A, USB-C, and traditional outlets needed. Integrating wireless charging pads adds a touch of modern convenience, as explored in projects like DIY Modern Nightstands with Integrated Wireless Charging: A.
- Accessibility: How will the charging station be accessed? A smooth-sliding drawer, a hinged lid, or a discreet panel that can be pushed to open are popular options. Ensure the mechanism is robust and blends flawlessly with the table’s design.
- Ventilation: Charging devices generate heat. Design the compartment with adequate ventilation holes or gaps to prevent overheating, especially if housing multiple devices simultaneously.
- Cable Management: This is crucial. Plan for internal cable routing to keep wires tidy and prevent tangles. Cable ties, adhesive clips, and grommets will be your allies.
Crafting the Console: Tools, Materials, and Techniques for Your DIY Wood Console Table with Hidden Charging Station
Embarking on a woodworking project of this nature requires a good understanding of tools, materials, and fundamental techniques. The choice of wood significantly impacts both the aesthetics and durability of your console table. Hardwoods like oak, maple, walnut, or cherry are excellent choices for their resilience and attractive grain patterns. For a more rustic or reclaimed look, pine or poplar can be used, though they are softer and may show wear more easily.
Essential Tools and Materials
A well-equipped workshop is vital for success. Here’s a list of commonly used tools and materials for building a console table:
Tools:
- Measuring & Marking: Tape measure, ruler, square, pencil.
- Cutting:
- Circular saw or Pro Tech Table Saw A Comprehensive Guide For Effective Usage for precise cuts.
- Miter saw for accurate crosscuts and angles.
- Jigsaw for curved cuts or cutouts for power modules.
- Shaping & Smoothing:
- Router with various bits for dados, rabbets, and decorative edges.
- Orbital sander and sanding blocks with a range of grits (e.g., Beyond Basic Sanding Achieving A Flawless Finish With Progressive Grits And Finishing Techniques).
- Hand planes for fine-tuning surfaces.
- Joining:
- Drill/driver for pilot holes and screws.
- Clamps (bar clamps, pipe clamps) for securing joints while glue dries.
- Wood glue (The Ultimate Guide To Wood Glue Choosing The Right Adhesive For Every Project Joint And Environmental Condition).
- Optional: Dovetail jig, biscuit joiner, or pocket hole jig for advanced joinery.
- Safety Gear: Safety glasses, hearing protection, dust mask.
Materials:
- Lumber: Selected hardwood or softwood based on design.
- Plywood/MDF: For hidden compartments or drawer bottoms.
- Charging Components: Multi-port USB charger, wireless charging pad(s), extension cord, grommets, surge protector.
- Hardware: Drawer slides, hinges, magnetic catches, power outlet module.
- Finish: Stain, varnish, polyurethane, or natural oil finish.

Fundamental Woodworking Techniques
Even for a DIY Wood Console Table with Hidden Charging Station, mastering a few core woodworking techniques will ensure a professional result:
- Accurate Measuring and Cutting: Precision is paramount. Measure twice, cut once. Use a sharp blade to avoid tear-out.
- Joinery:
- Butt Joints: Simple, but rely heavily on screws and glue for strength. Reinforce with pocket screws or dowels.
- Dadoes and Rabbets: Excellent for shelving and back panels, offering good strength and alignment.
- Mortise and Tenon: A strong, traditional joint ideal for leg-to-apron connections, providing classic craftsmanship.
- Dovetails: A highly aesthetic and incredibly strong joint, often used for drawers, showcasing advanced skill. Refer to guides on Power Tool Mastery For Building Console Tables Modern Entryway Furniture For Small Spaces for more on structural integrity.
- Assembly: Dry fit all components before applying glue. Use clamps to hold pieces securely while glue sets. Ensure all angles are square.
- Sanding: Progressive sanding with increasingly fine grits is essential for a smooth, professional finish. Start coarse (e.g., 80 or 100 grit) and move to fine (e.g., 180 or 220 grit).
- Finishing: The finishing process protects the wood and enhances its beauty. Choose a finish that complements your wood choice and home décor. Apply multiple thin coats, sanding lightly between coats. Learn more about different finishes from resources like Sustainable Wood Finishing Eco Friendly Oils Waxes And Natural Stains For Healthier Projects.
The Integration: Concealing Technology with Style in Your DIY Wood Console Table with Hidden Charging Station
The real innovation of this project lies in the seamless integration of the charging station without detracting from the table’s overall design. This requires careful planning and execution of the hidden compartments and power routing.
Strategies for Hiding the Charging Station
Several effective methods can be employed to conceal your charging station:
- Sliding Top Panel: A section of the tabletop can slide open on concealed tracks, revealing the charging area beneath. This is sleek and effective.
- Hinged Lid: A hinged section of the tabletop or a hinged panel on the side can lift up or swing open. Use high-quality, concealed hinges for a clean look.
- Pull-Out Drawer: Design a shallow drawer dedicated to charging. Devices can sit inside, with cables managed through the back of the drawer into the main power source. This method works well with Ultimate Diy End Tables Versatile Designs From Nightstands To Side Tables With Dovetail Drawers.
- Drop-Down Panel: A panel on the back or side of the table can drop down or swing inwards to expose the charging area. This is particularly useful for console tables placed against a wall.
Wiring and Safety Considerations
When working with electricity, safety is paramount.
- Component Selection: Use certified, high-quality charging components (USB hubs, power strips, wireless chargers). Ensure they meet safety standards.
- Power Inlets: Integrate a discreet power inlet into the back or underside of the table, allowing a single cord to connect the entire charging station to a wall outlet.
- Cable Routing: Create channels or use cable clips within the table’s structure to route wires neatly and prevent them from being pinched or damaged.
- Ventilation: As mentioned, design your hidden compartment with adequate airflow. Small ventilation holes, strategically placed and perhaps lined with mesh, can help dissipate heat. Consider a small, quiet fan for heavily used stations.
- Surge Protection: Always incorporate a surge protector within your hidden charging station to protect valuable devices from power fluctuations.
- Accessibility for Maintenance: Design the compartment so that charging components can be easily accessed for upgrades or replacement if needed.

By carefully planning the integration of these modern technological elements into your classic woodworking project, you can achieve a truly sophisticated and functional piece of furniture. A DIY Wood Console Table with Hidden Charging Station: Blending Modern Tech with Classic Craftsmanship stands as a testament to thoughtful design and skilled execution in 2026. This approach extends to other areas of home integration, as seen in Diy Smart Home Integration With Custom Woodwork Hiding Tech With Style.
Conclusion
Creating a DIY Wood Console Table with Hidden Charging Station: Blending Modern Tech with Classic Craftsmanship is a rewarding project that elevates your home’s functionality and aesthetic. It challenges you to combine traditional woodworking artistry with contemporary technological demands, resulting in a piece of furniture that is both beautiful and incredibly practical. By carefully planning your design, selecting appropriate materials and tools, and applying sound woodworking techniques, you can craft a console table that seamlessly integrates device charging, eliminates cable clutter, and stands as a testament to your craftsmanship.
As you embark on this journey, remember that patience and attention to detail are your greatest assets. The satisfaction of building a custom piece that perfectly suits your needs and enhances your living space is immense. Begin by sketching out your ideal design, gather your tools and materials, and enjoy the process of bringing your vision to life. For further inspiration on building entryway furniture or other pieces, explore resources like Building Statement Furniture Pieces Designing And Constructing Coffee Tables Benches And Console Tables That Sell For 500 In 2026.