
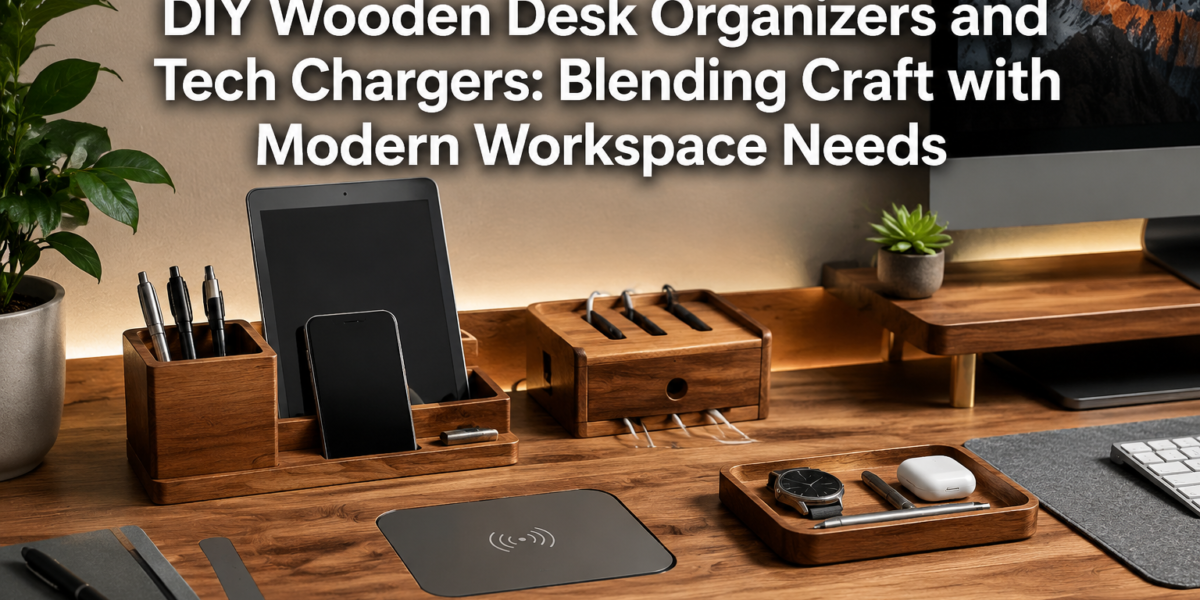

For many professionals in 2026, the ideal workspace is no longer merely functional; it is a meticulously crafted environment that fosters productivity while reflecting personal style. The challenge often lies in harmonizing the organic warmth of traditional materials with the cold efficiency of modern technology. This article delves into the burgeoning trend of DIY Wooden Desk Organizers and Tech Chargers: Blending Craft with Modern Workspace Needs, offering practical insights into creating custom solutions that declutter, empower, and beautify your work area. Imagine a desk where every gadget has its place, cables vanish discreetly, and your devices charge wirelessly, all encased in the timeless elegance of handcrafted wood. This fusion of artisanal woodworking and smart technology is not just an aesthetic choice; it is a strategic approach to optimizing the contemporary professional’s daily routine.
Key Takeaways
- Customization is Key: Tailor desk organizers to your specific tools, devices, and workflow for maximum efficiency.
- Seamless Tech Integration: Incorporate wireless charging pads and advanced cable management directly into wooden designs.
- Material Choice Matters: Selecting the right wood enhances both durability and aesthetic appeal, complementing your office decor.
- Sustainability & Craft: Embrace sustainable wood sourcing and traditional woodworking techniques for unique, long-lasting pieces.
- Enhanced Productivity: A well-organized, aesthetically pleasing workspace significantly reduces distractions and boosts focus.
Designing Your Perfect DIY Wooden Desk Organizers and Tech Chargers
The journey to a perfectly organized desk begins with thoughtful design. Before cutting any wood, consider the exact items you need to organize and how you interact with them daily. Do you have multiple smartphones, a tablet, noise-canceling headphones, or specific writing tools? Sketching out your ideas, even roughly, can help visualize the layout and dimensions required for each compartment. This initial planning phase is crucial for ensuring your DIY Wooden Desk Organizers and Tech Chargers: Blending Craft with Modern Workspace Needs truly meet your individual requirements.

Essential Design Elements for a Modern Organizer
Device-Specific Compartments:
- Phone/Tablet Stands: Design angled slots or holders that allow devices to stand upright for easy viewing. Consider varying widths for different tablet models.
- Pen/Pencil Trays: Shallow, elongated slots keep writing instruments neatly separated.
- Accessory Dishes: Small, open sections for keys, paperclips, USB drives, or watches.
- Notebook/Document Holders: Vertical slots for slim notebooks or important papers.
Integrated Wireless Charging:
- Flush-Mount Pads: The most elegant solution involves routing out a recess in the wood to perfectly fit a standard Qi wireless charging pad. This creates a seamless surface.
- Concealed Wiring: Design channels or drill holes within the organizer’s structure to hide the charging pad’s USB cable, leading it discreetly to a power source.
- Ventilation: While most wireless chargers don’t generate excessive heat, ensure adequate airflow if embedding a high-power charger, especially in an enclosed space.
Smart Cable Management:
- Routing Channels: Create grooves or hidden pathways on the underside or within the organizer to guide charging cables for wired devices (laptops, monitors) away from sight.
- Cable Clips/Ties: Integrate small wooden posts or attachable clips within compartments to secure excess cable length.
- Power Hub Integration: If multiple devices require wired charging, consider a slightly larger organizer designed to conceal a small power strip or USB hub within a dedicated, accessible compartment.
A popular approach is to think modularly. You might create separate, interlocking wooden blocks for different functions: one for charging, one for pens, another for a tablet stand. This allows for flexibility and rearrangement. For those interested in expanding their woodworking skills, exploring “DIY Modular Desk Organizers: Custom Solutions for a Clutter-Free Woodworking Workspace” can provide further inspiration for adaptable systems.
Remember, the goal is not just organization, but also aesthetic harmony. The wood species you choose, the finish you apply, and the precision of your joinery will all contribute to the final look and feel of your custom piece.
Selecting Materials and Crafting Your Organizer with Integrated Tech
The beauty of a DIY project lies in the ability to select materials that resonate with your personal style and sustainability values. For your DIY Wooden Desk Organizers and Tech Chargers: Blending Craft with Modern Workspace Needs, the choice of wood is paramount, influencing both durability and appearance.
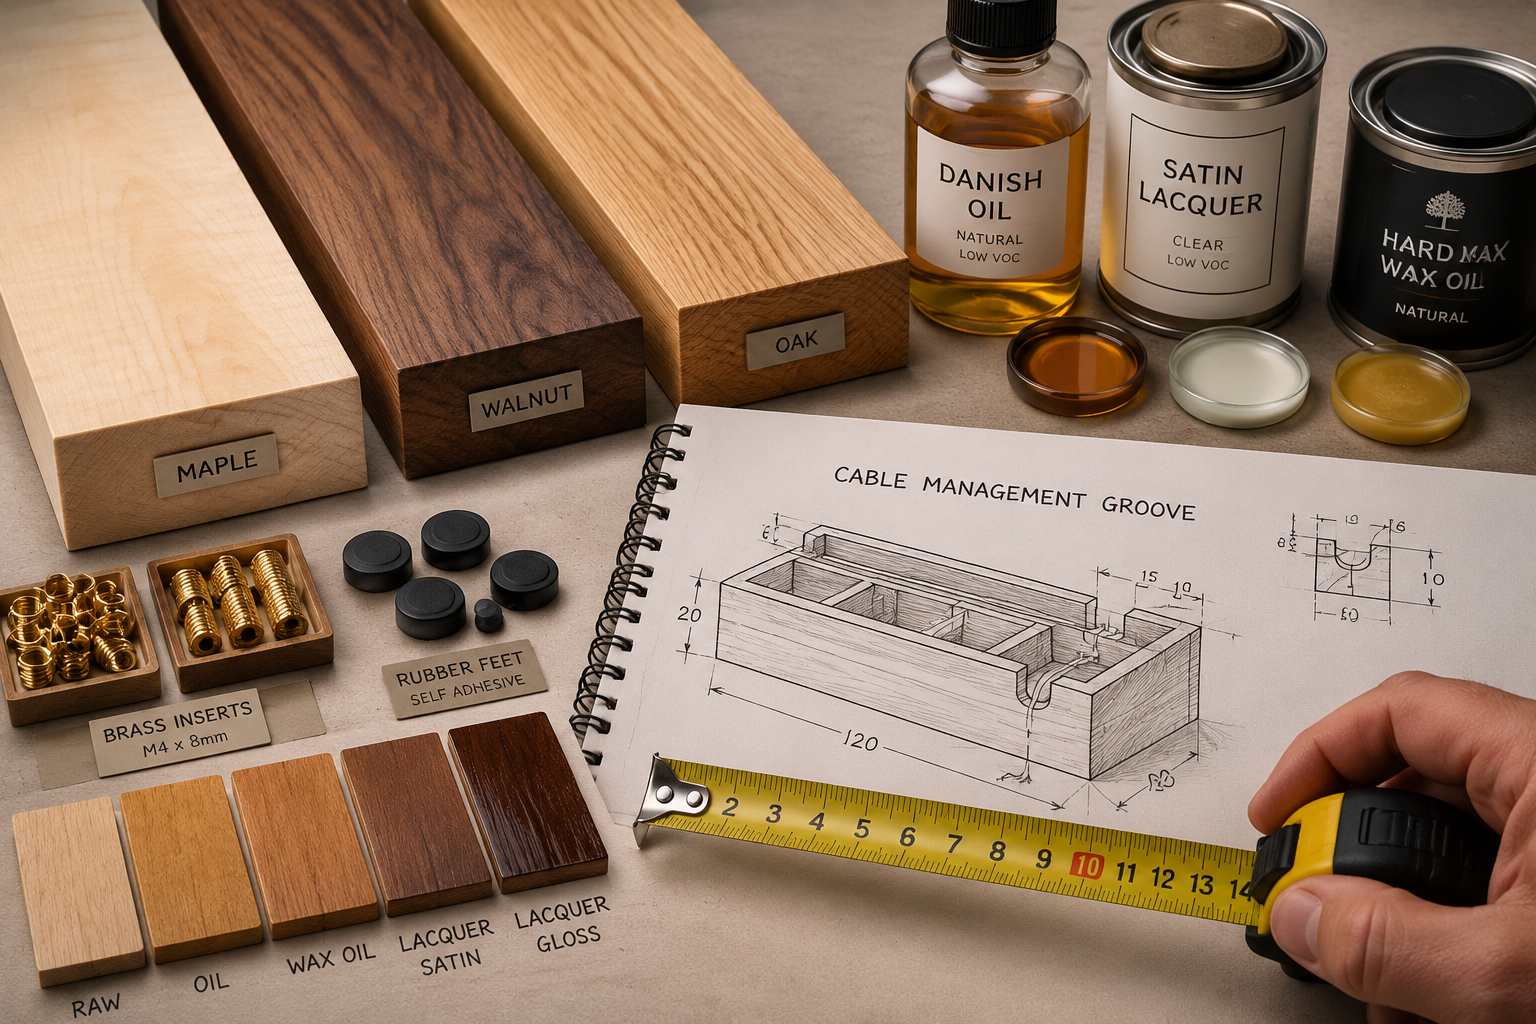
Wood Selection and Sourcing
- Hardwoods for Durability: Oak, walnut, maple, and cherry are excellent choices for desk organizers due to their durability, rich grain patterns, and ability to hold fine details.
- Walnut: Known for its deep, luxurious brown tones and fine grain.
- Maple: Offers a light, uniform color and exceptional hardness.
- Oak: Distinctive grain and robust nature, ideal for a classic look.
- Cherry: Ages beautifully, developing a rich, reddish patina over time.
- Softwoods for Ease of Work: Pine or cedar can be easier to work with, especially for beginners, though they may be less resistant to dents and scratches over time.
- Sustainable Sourcing: Consider sourcing wood from local sawmills, certified sustainable forests, or even reclaimed wood. This not only supports environmentally responsible practices but can also add unique character to your piece. For more on this, our article on “Sustainable Wood Sourcing for the Modern Woodworker: Beyond Reclaimed” offers valuable insights.
| Wood Type | Appearance | Hardness (Janka) | Ease of Work | Best For |
|---|---|---|---|---|
| Walnut | Rich dark brown, elegant grain | 1010 | Medium | Premium, sophisticated designs |
| Maple | Light, creamy, subtle grain | 1450 | Medium/Hard | Clean, modern aesthetics, high durability |
| Oak | Distinctive open grain, light to medium | 1290 (Red), 1360 (White) | Medium | Traditional, robust organizers |
| Cherry | Reddish-brown, smooth grain, darkens with age | 950 | Medium | Warm, classic look, fine detailing |
| Pine | Light yellow/white, knotty, soft | 380 | Easy | Beginner projects, rustic styles, painting |
Tools and Techniques
Basic woodworking tools will suffice for most desk organizers:
- Measuring & Marking: Ruler, pencil, combination square.
- Cutting: Hand saw, jigsaw, miter saw, or table saw.
- Shaping & Joinery: Chisels, wood files, sandpaper, router (for precise recesses and dados). For mastering joinery, “Mastering Dovetail Joints with Hand Tools” could be a valuable resource.
- Assembly: Wood glue, clamps. For robust bonds, refer to “The Ultimate Guide to Wood Glue“.
- Finishing: Sanding blocks, various grits of sandpaper, chosen finish (oil, polyurethane, wax).
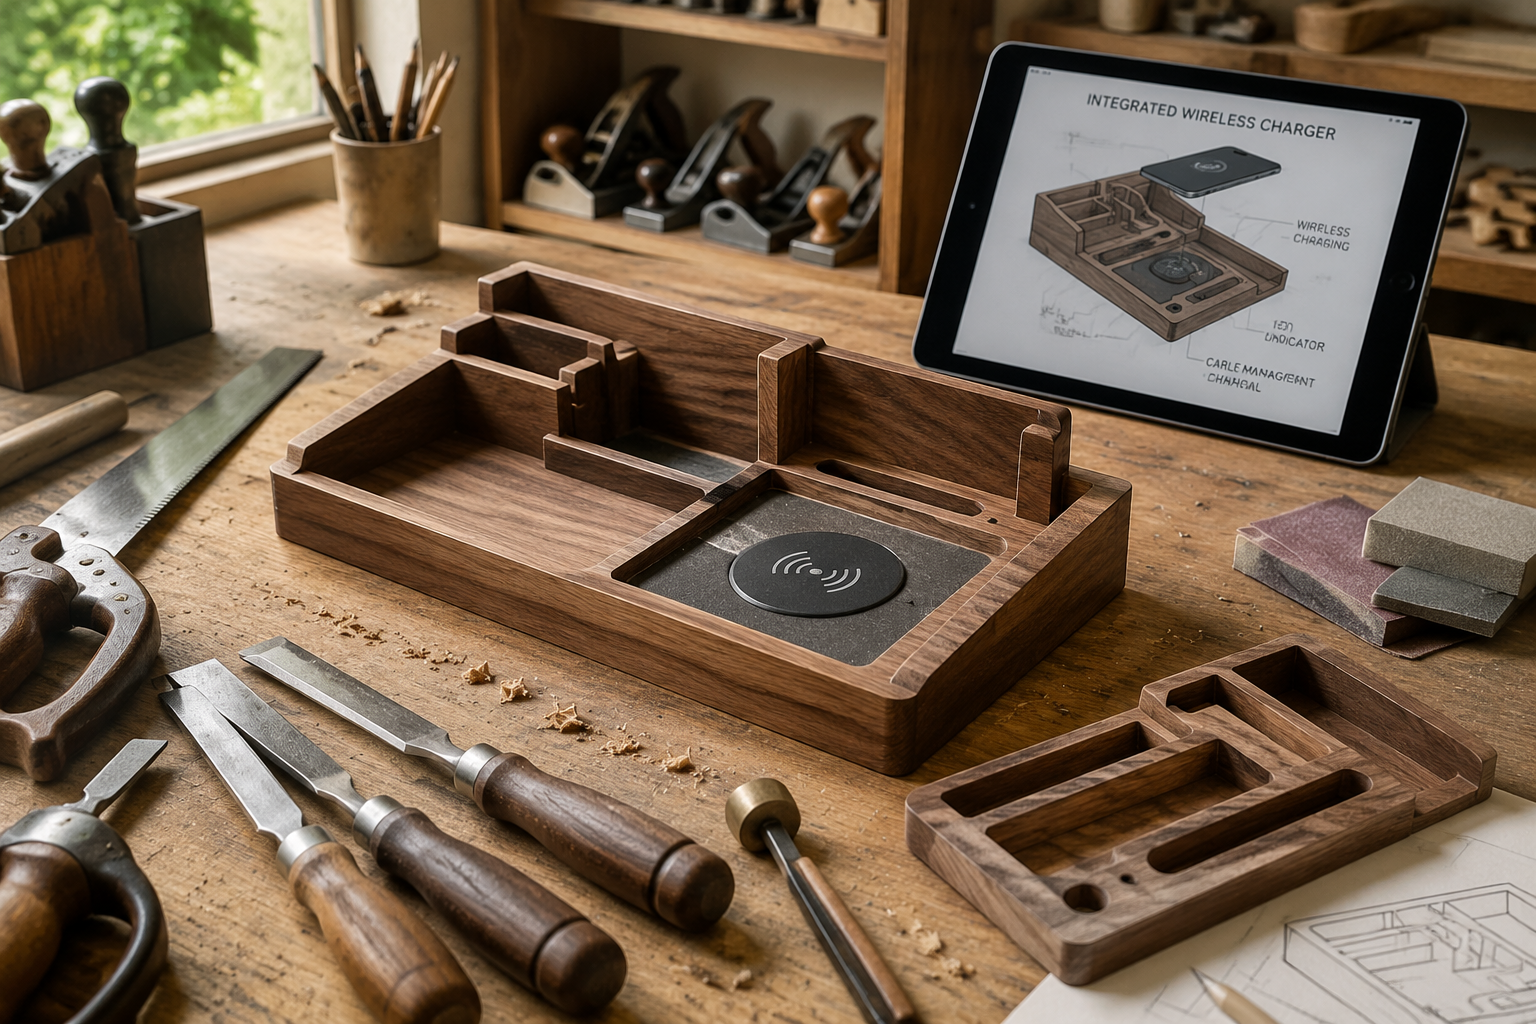
Crafting Process Overview:
- Measure and Cut: Based on your design, precisely cut all wooden components to size.
- Rout Recesses: Use a router to create precise recesses for wireless charging pads, cable channels, and any specific compartments that require routed edges. Test fit the charging pad frequently.
- Joinery: Assemble the components using appropriate joinery techniques. Dovetail joints add strength and beauty, but simpler butt joints reinforced with glue and screws can also be effective.
- Sanding: Thoroughly sand all surfaces, progressing through finer grits (e.g., 80, 120, 180, 220) for a smooth, professional finish.
- Finishing: Apply your chosen finish. Oil finishes enhance the natural grain, while polyurethane provides a durable protective layer. Allow adequate drying time.
- Tech Integration: Once the finish is dry, insert the wireless charging pad and route its cable through the pre-planned channels. Secure any other tech components.
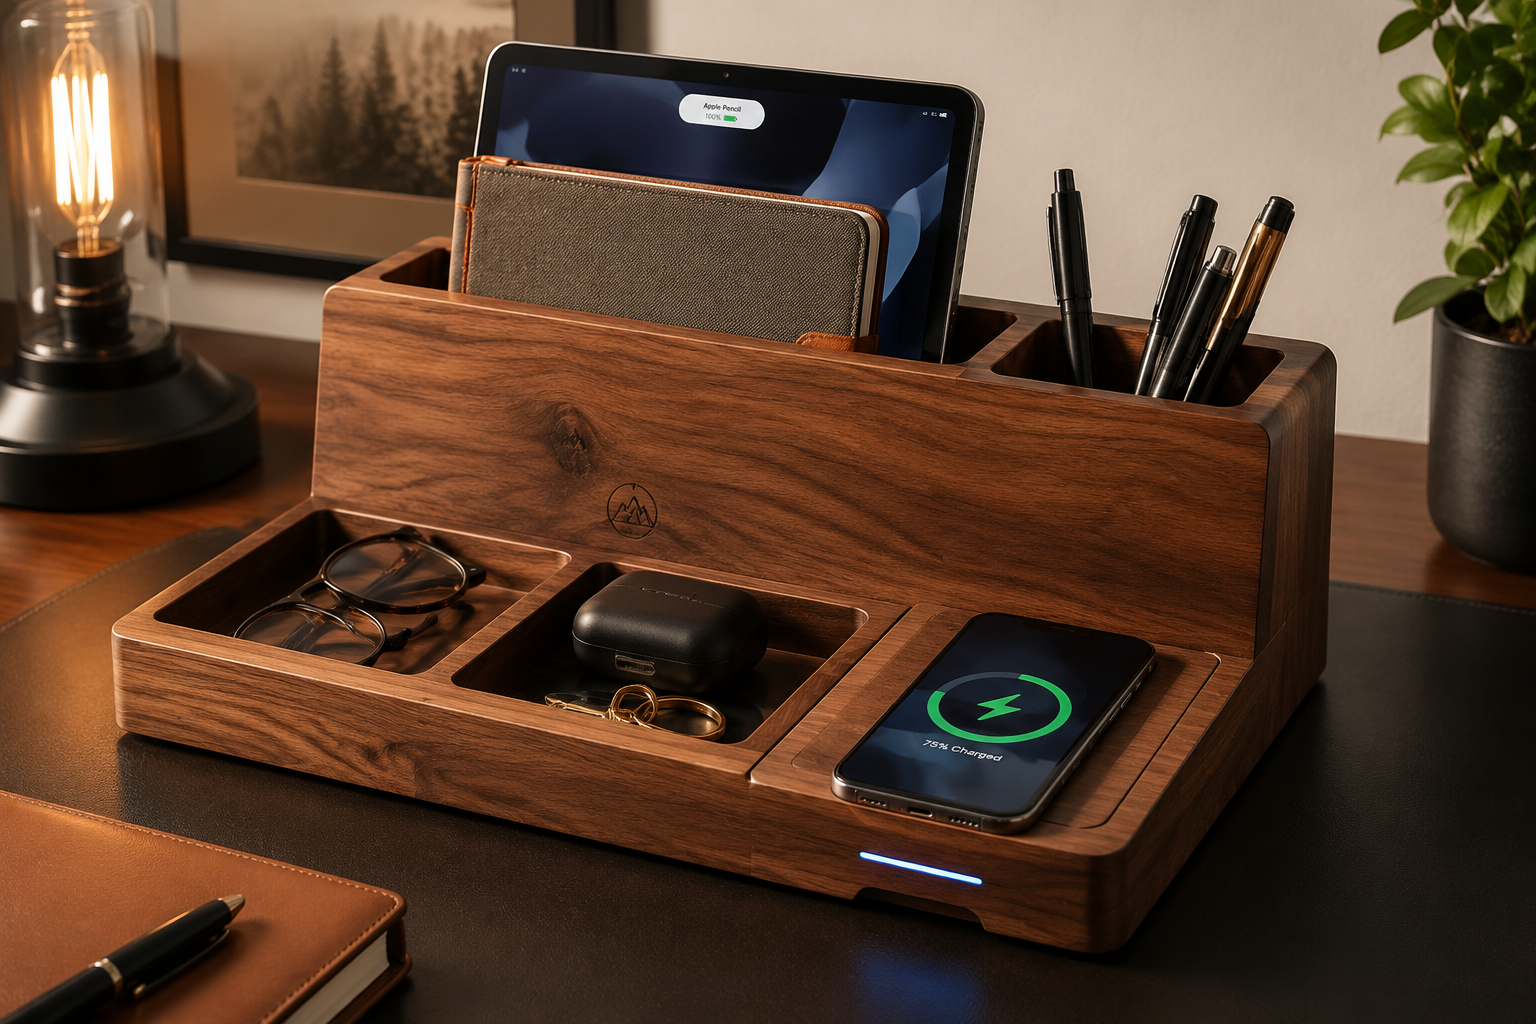
Integrating Modern Tech into Your Custom Desk Organizer
The true innovation of DIY Wooden Desk Organizers and Tech Chargers: Blending Craft with Modern Workspace Needs lies in the seamless integration of technology. This isn’t just about hiding wires; it’s about making your tech an intuitive part of your workspace’s design.
Wireless Charging Solutions
Wireless charging, specifically Qi standard, is a game-changer for desk organization.
- Choosing a Pad: Select a reputable wireless charging pad that fits your device and desired power output. Ensure its dimensions align with the recess you’ve planned in your wooden organizer. Some pads are designed specifically for flush mounting.
- Installation:
- Precise Routing: Use a router with a template or a jig to create a recess that is just deep enough for the charging pad to sit flush with the wood surface. The perimeter should be snug to prevent movement.
- Cable Channel: From the charging pad’s recess, rout a narrow channel or drill a hole leading to an inconspicuous exit point at the back or underside of the organizer. This will house the USB cable.
- Securing the Pad: A small amount of silicone adhesive or double-sided tape can be used on the underside of the charging pad to secure it in place once the finish is cured. Ensure the adhesive does not interfere with the charging coil.
Advanced Cable Management for a Clutter-Free Desk
Beyond the wireless charger, managing other device cables is vital for a clean aesthetic.
- Internal Channels: Design internal channels within the organizer to route cables from devices like monitors, keyboards, or lamps. These channels can exit at the rear of the desk, leading to a hidden power strip.
- Magnetic Cable Holders: Embed small magnets into the wood near device charging points. Paired with magnetic cable clips, these can hold cables upright and readily accessible when not in use, preventing them from falling off the desk.
- Power Grommets: Incorporate circular wooden grommets or simple drilled holes with a chamfered edge for passing cables from the desk surface down into a cable tray or power strip below.
- Hidden Power Hubs: Create a larger, easily accessible compartment at the back or side of the organizer to house a small power strip or USB charging hub. This centralizes power and keeps all bulky adapters out of sight.
When planning for power, remember safety. Ensure that any electrical components are properly housed and that wood does not restrict airflow around heat-generating devices. A well-designed DIY Wooden Desk Organizers and Tech Chargers: Blending Craft with Modern Workspace Needs creates an environment where technology works for you, seamlessly integrating into a space that inspires focus and creativity. This approach not only enhances your workspace but also showcases your skill in blending functionality with artisan craft.
Customization and Personalization for Your Workspace
The true power of crafting your own DIY Wooden Desk Organizers and Tech Chargers: Blending Craft with Modern Workspace Needs lies in the unparalleled ability to customize and personalize. This is where your organizer transcends mere functionality and becomes a unique reflection of your style and work habits.
Beyond Basic Compartments
Consider these advanced customization options:
- Integrated Lighting: Small, embedded LED strips or puck lights can illuminate specific compartments or provide subtle ambient light for your workspace. This requires careful wiring and housing within the wood structure.
- Secret Compartments: Add a hidden drawer or a lift-up panel for storing sensitive documents, small valuables, or simply keeping certain items out of immediate sight. Precision joinery and clever latch mechanisms are key here.
- Personalized Engravings: Use a wood burner, a CNC router, or even hand carving tools to add initials, a favorite quote, or a custom design to your organizer. This truly makes the piece your own. For those with access to CNC tools, our “Beginner’s Guide to CNC Routers for Small Woodshops” can help you explore possibilities.
- Material Accents: Incorporate small elements of other materials to add contrast and sophistication.
- Brass or Copper: Small inlays, feet, or decorative trim can elevate the design.
- Leather or Felt: Line compartments with soft materials to protect devices and prevent scratches.
- Resin Inlays: Fill engraved patterns or natural wood voids with colored epoxy resin for a modern touch.
Ergonomics and Workflow Enhancement
A custom organizer can also significantly improve the ergonomics of your workspace.
- Monitor Riser Integration: Extend your desk organizer to include a monitor riser. This elevates your screen to an ergonomic eye level, reducing neck strain. The space beneath the riser can then house keyboards, mice, or additional storage.
- Adjustable Components: Design certain sections to be adjustable, such as a phone stand with varying angles or modular trays that can be reconfigured. This flexibility adapts to changing needs.
- Integration with Other Furniture: If you’re building other custom pieces, like a custom wooden record player console, consider how your desk organizer might complement or integrate with those designs, creating a cohesive environment.
- Work-from-Home Specifics: In 2026, many professionals still work remotely. Design your organizer to manage personal and professional tech, ensuring a smooth transition between roles. Think about a dedicated spot for your webcam, microphone, or external hard drive.
By infusing your personality and addressing your specific workflow, your DIY wooden desk organizer becomes more than just a storage solution; it becomes an integral part of a functional, beautiful, and inspiring workspace. This blending of traditional craft with modern needs is what elevates a simple project into a truly bespoke creation.

Conclusion
Creating DIY Wooden Desk Organizers and Tech Chargers: Blending Craft with Modern Workspace Needs is a rewarding endeavor that transforms a cluttered desk into a hub of efficiency and aesthetic appeal. From the initial design sketches that map out every device and tool, through the careful selection of sustainable hardwoods, to the precise integration of wireless charging and advanced cable management, each step contributes to a highly personalized and functional workspace. This isn’t merely about building a box; it’s about crafting an environment that supports productivity, reflects individual style, and elevates the daily work experience in 2026.
By taking control of your workspace organization, you gain not only a tidier desk but also a sense of accomplishment and a unique piece of handcrafted furniture. Embrace the opportunity to combine timeless woodworking techniques with contemporary technological demands, and you will discover a workspace that is both inspiring and incredibly effective.
Actionable Next Steps:
- Assess Your Needs: Catalog all items currently on your desk and identify their optimal placement.
- Sketch Your Design: Create a detailed drawing of your ideal organizer, noting dimensions for each compartment and tech integration point.
- Choose Your Wood: Research and select a wood type that aligns with your aesthetic preferences and practical requirements. Consider sustainable sourcing options.
- Gather Tools & Materials: Acquire necessary woodworking tools, selected wood, and any tech components (wireless charger, USB hub) you plan to integrate.
- Start Building: Begin with precise cuts and careful joinery, paying close attention to routing for tech integration.
- Finish Strong: Apply a durable and aesthetically pleasing finish, then integrate your tech for a truly modern and organized workspace.
