
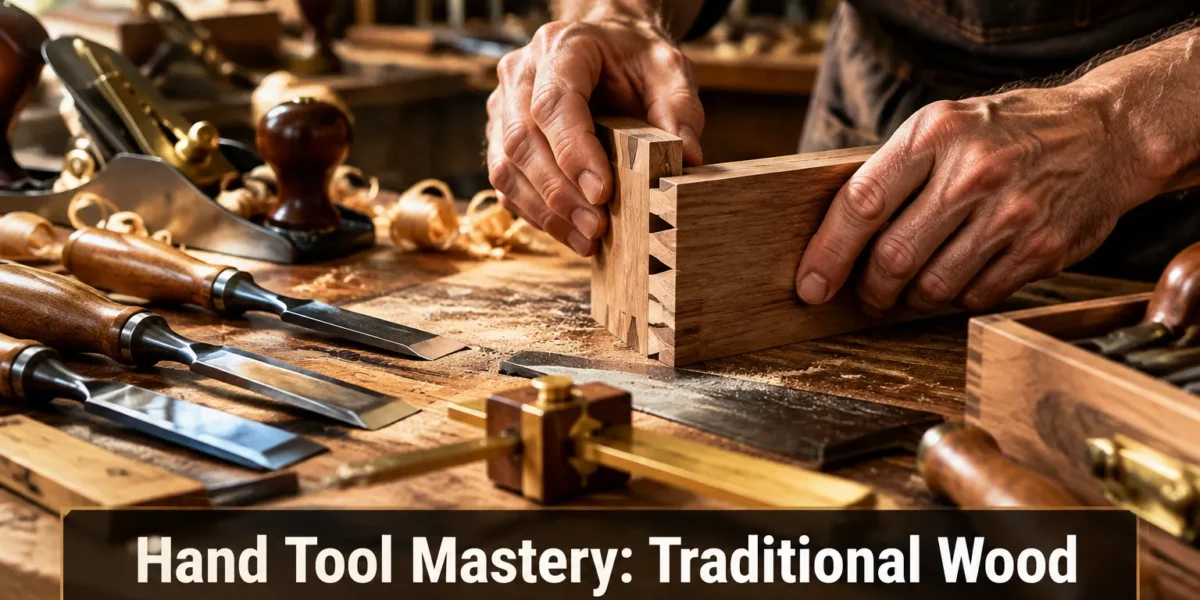
The profound strength and enduring beauty of traditional wood joinery techniques stem from a commitment to precision that rivals the most demanding crafts. Much like the American Bladesmith Society (ABS) sets rigorous standards for the metallurgy, heat treatment, and edge geometry of a blade, master woodworkers pursue an equally exacting level of fit, finish, and structural integrity in their joints. This article delves into the core principles of Hand Tool Mastery: Traditional Wood Joinery Techniques Inspired by American Bladesmith Society Standards, exploring how a bladesmith’s pursuit of a perfect edge and robust structure can inform and elevate the art of woodworking.
A common misconception is that power tools are synonymous with precision. However, true mastery in woodworking, particularly in joinery, often reverts to hand tools. The direct feedback, tactile connection, and unparalleled control offered by sharp chisels, planes, and saws allow for a level of finessed accuracy that machines frequently cannot replicate without elaborate jigs or setups. By adopting the meticulous mindset of a bladesmith, where every facet, every angle, and every stroke contributes to the ultimate performance and longevity, woodworkers can unlock a new echelon of craftsmanship in traditional wood joinery.
Key Takeaways
- Traditional hand tool joinery offers superior precision and control compared to many power tool methods.
- The American Bladesmith Society’s standards for edge geometry, material integrity, and structural soundness provide an excellent framework for achieving excellence in wood joinery.
- Mastering foundational joints like dovetails and mortise and tenons requires a deep understanding of wood mechanics and meticulous execution.
- Tool sharpening and maintenance are paramount, directly impacting the accuracy and quality of hand-cut joints.
- Adopting a systematic approach to layout, cutting, and fitting ensures consistency and reduces errors, echoing a bladesmith’s process.
The Bladesmith’s Ethos in Woodworking: Precision and Durability
The American Bladesmith Society certifies smiths based on their ability to forge blades that not only exhibit aesthetic beauty but also possess exceptional performance characteristics: keenness, edge retention, flexibility, and structural integrity. For woodworkers, these principles translate directly into the creation of joints that are not merely functional but inherently strong, aesthetically pleasing, and built to last generations. Wood Species Selection For Visible Joinery Choosing Materials That Showcase Hand Cut Joints In Contemporary Designs is an excellent resource for understanding how material choice impacts the final outcome.
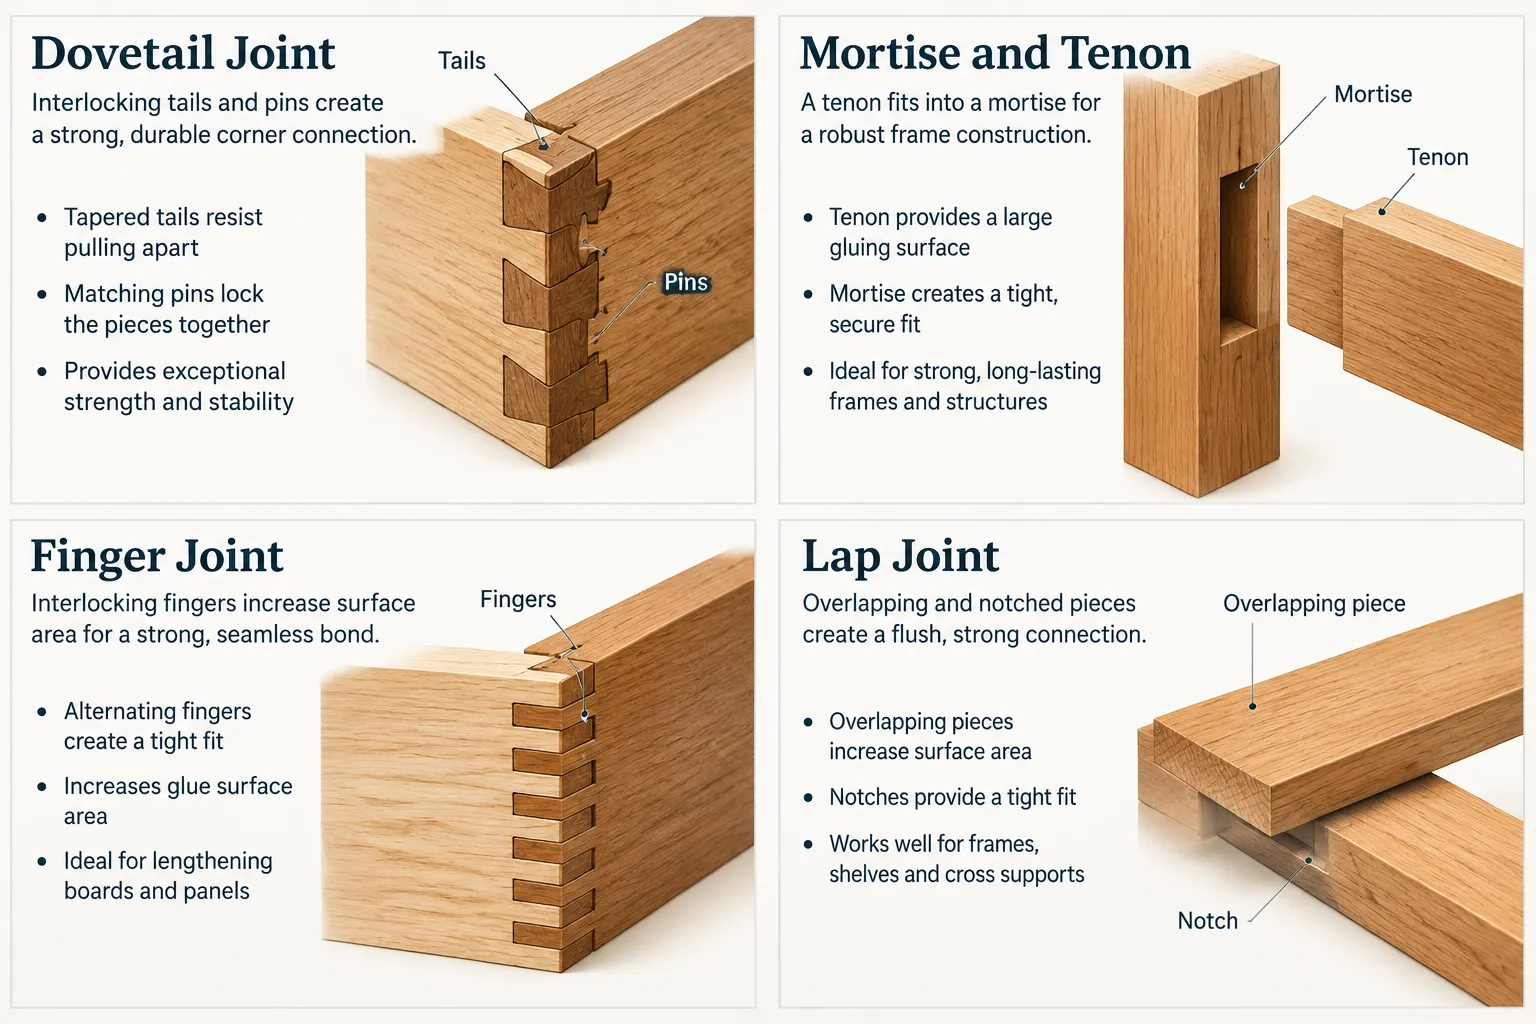
Think of a hand-cut dovetail joint. Its interlocking tails and pins are designed to resist pulling forces, creating a mechanical lock that is incredibly strong, even without glue. The precision required to cut these angles so they fit snugly, yet allow for swelling and contraction of the wood, demands a level of skill comparable to achieving a perfectly symmetrical blade bevel. The woodworker, like the bladesmith, must understand their material deeply, how it moves, how it cuts, and how different grain orientations affect strength.
Consider the fundamental tenets of a bladesmith’s work and their parallels in Hand Tool Mastery: Traditional Wood Joinery Techniques Inspired by American Bladesmith Society Standards:
- Material Selection and Understanding: A bladesmith chooses steel for its specific properties. A woodworker selects wood for its grain, density, and stability. Understanding how these factors influence cutting and joint strength is crucial.
- Precision in Form and Function: Every curve and angle on a blade serves a purpose. Similarly, every shoulder, cheek, and pin in a joint is meticulously designed for maximum strength and seamless appearance.
- Edge Geometry and Tool Sharpness: A razor-sharp blade is essential for a bladesmith. For a woodworker, exquisitely sharp chisels and planes are non-negotiable for clean, accurate cuts that lead to tight joints. Dull tools tear fibers, resulting in sloppy fits and frustration.
- Iterative Refinement and Quality Control: Bladesmiths constantly check their work, from initial forging to final polishing. Woodworkers engage in a similar process, frequently checking squareness, parallelism, and fit, making small adjustments until perfection is achieved.
This dedication to quality at every stage elevates a piece from mere assembly to a work of enduring art.
Essential Hand Tools and Their Bladesmith-Inspired Preparation
Achieving exceptional joinery with hand tools relies entirely on the quality and preparation of those tools. Just as a bladesmith devotes significant time to sharpening and maintaining their forge and finishing equipment, a woodworker must prioritize the care of their chisels, planes, and saws. This is where the principles of the American Bladesmith Society truly shine through in Hand Tool Mastery: Traditional Wood Joinery Techniques Inspired by American Bladesmith Society Standards.
The Foundation of Sharpness: Chisels and Hand Planes
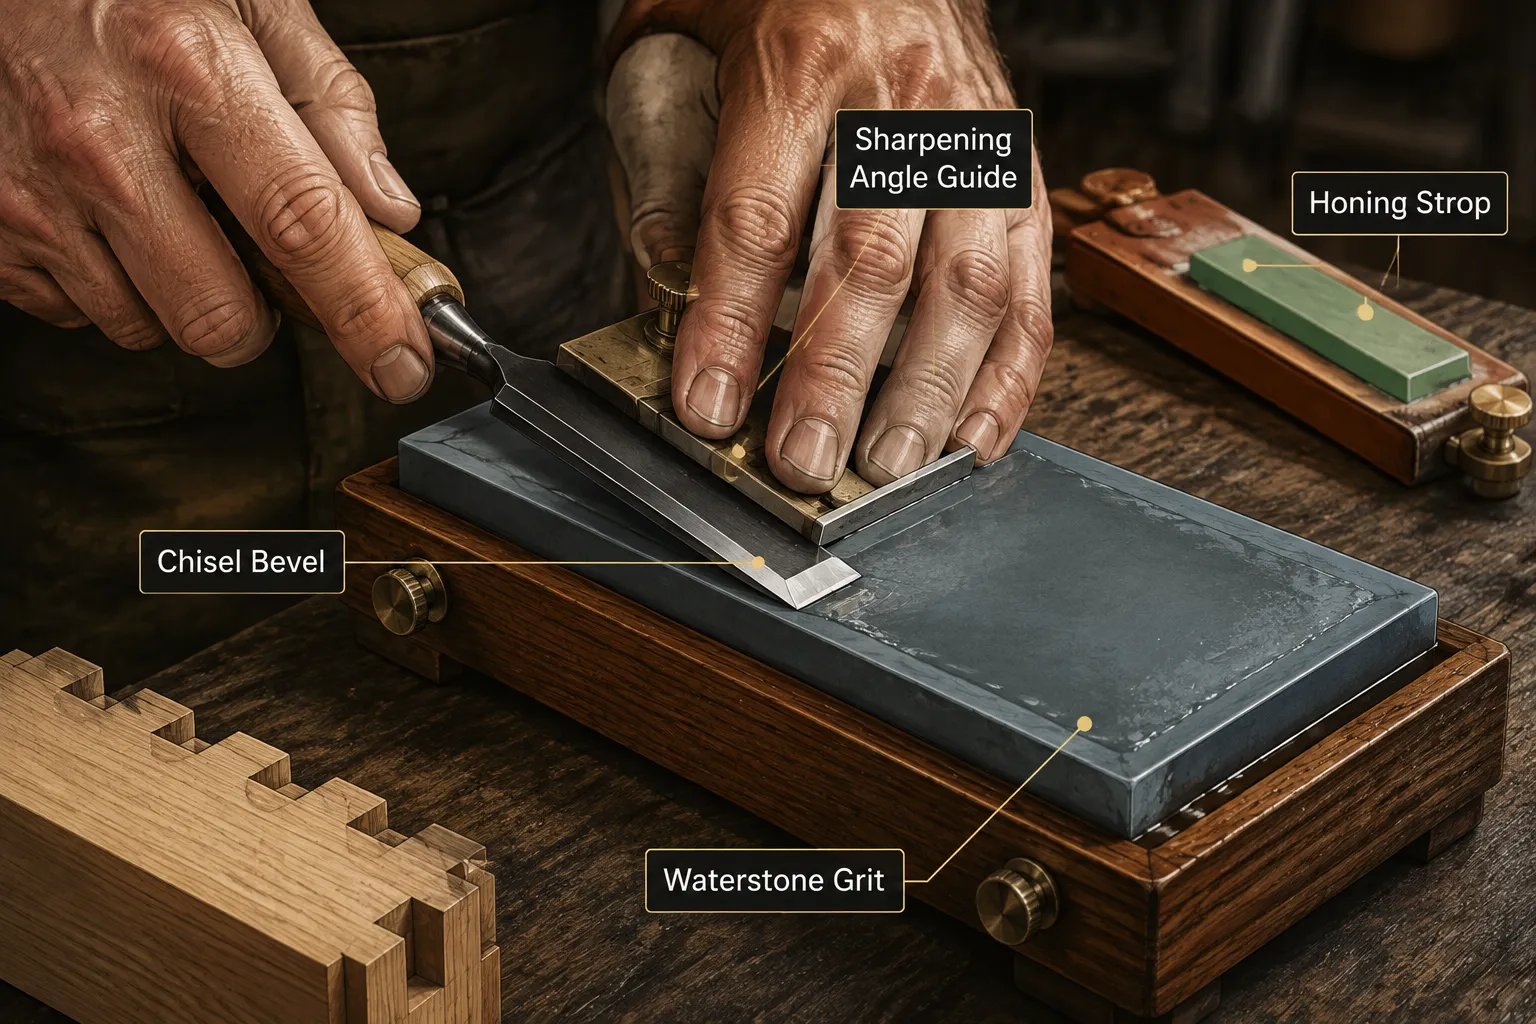
Chisels are the primary tool for paring, cleaning, and refining joinery. Their effectiveness is directly proportional to their sharpness. A truly sharp chisel will shave end grain cleanly, producing fine, wispy shavings without tearing.
- Grinding and Honing: This two-stage process is analogous to a bladesmith refining an edge. Grinding establishes the primary bevel, while honing refines it to a razor’s edge. Woodworkers often use waterstones or diamond plates in a progression of grits, typically from 1000 to 8000 or even higher, to achieve a mirror finish.
- Consistent Bevel Angle: Maintaining a consistent bevel angle is critical. Jigs can assist, but developing a steady hand is part of the mastery. A bladesmith understands the optimal edge angle for cutting and durability; a woodworker applies this to their chisels for clean severance of wood fibers.
- Flattening the Back: The back of a chisel or plane iron must be perfectly flat, especially near the cutting edge. This provides a stable reference surface and prevents the tool from digging in or skating across the wood, ensuring precise control.
Hand planes, crucial for preparing stock and refining surfaces, also depend on impeccable blade sharpness and precise setup. The plane iron must be sharp, and the frog, chip breaker, and sole all meticulously adjusted to work in harmony.
Saws for Precision Joinery
Japanese pull saws, dovetail saws, and coping saws are specialized tools for joinery. Their thin kerfs and specific tooth geometries are designed for accurate, clean cuts.
- Tooth Geometry: Each saw type has teeth optimized for cross-cutting (across the grain), ripping (with the grain), or a combination. Understanding these differences and using the correct saw for the task is vital.
- Setting the Teeth: The “set” refers to how much the teeth are bent outwards from the blade. A proper set prevents the blade from binding in the cut and allows for smoother operation. Too much set can lead to a rough cut; too little causes binding.
- Sharpening Saws: While often intimidating, sharpening a hand saw is a skill that directly impacts joinery quality. A sharp saw cuts effortlessly, following the line accurately.
Mastering these tools isn’t about owning the most expensive brands, but about understanding how they work and maintaining them to their peak performance, just as a bladesmith cherishes their tools. For further reading on achieving optimal tool performance, consider exploring techniques for Ultimate Guide To Wooden Cutting Boards End Grain Patterns Tool Sharpening And Food Safe Finishes, which often discusses sharpening in detail.
Mastering Traditional Wood Joinery Techniques
With sharp tools in hand, the focus shifts to the execution of the joints themselves. This is where the methodical precision of the bladesmith, their step-by-step approach to achieving a perfect form, provides a guiding star for Hand Tool Mastery: Traditional Wood Joinery Techniques Inspired by American Bladesmith Society Standards.
The Dovetail Joint: A Symbol of Craftsmanship
Often considered the hallmark of fine hand tool woodworking, the dovetail joint provides immense mechanical strength and aesthetic beauty.
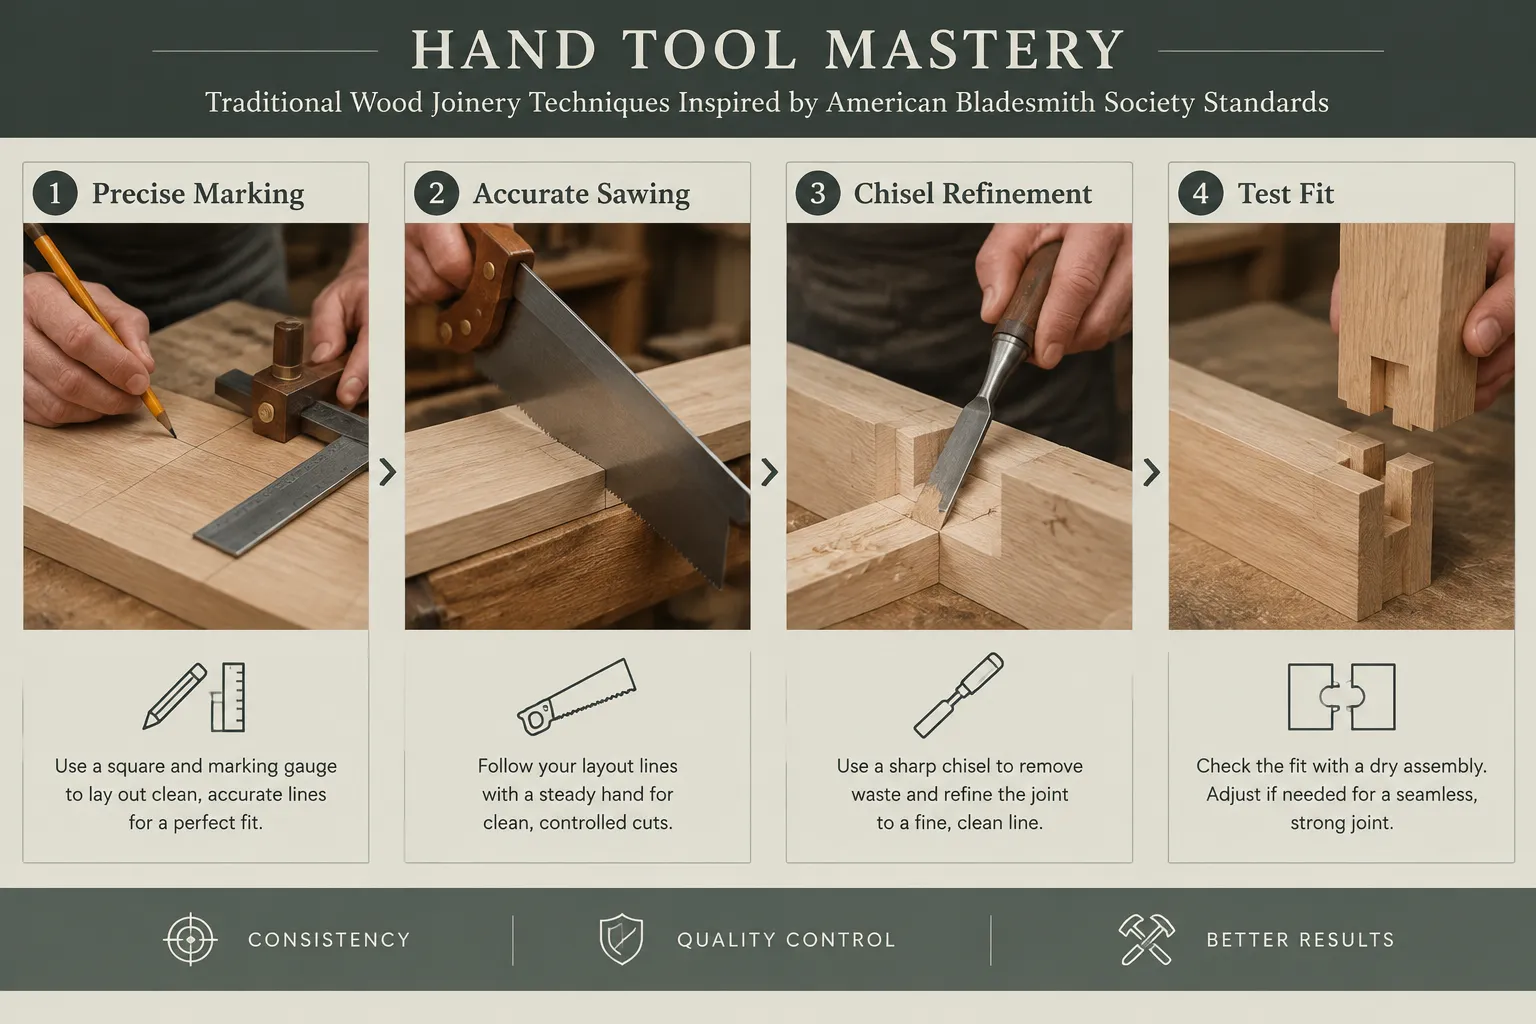
- Layout: Accurate marking is paramount. Use a sharp pencil or a marking knife to define the pins and tails, transferring measurements precisely. A dovetail marker aids in consistency.
- Cutting the Tails: Typically, the tails are cut first. Saw just to the waste side of the lines, then use a coping saw to remove the bulk of the waste.
- Paring to the Line: With a very sharp chisel, pare precisely to the marked lines, ensuring the shoulders are perfectly square and the cheeks are smooth.
- Transferring to the Pins: Place the cut tail board onto the pin board, precisely aligning shoulders. Use a marking knife to scribe the exact outline of the tails onto the pin board. This critical step ensures a perfect fit.
- Cutting and Paring the Pins: Saw the pins, again to the waste side of the lines, and remove waste with a coping saw. Then, carefully pare with a chisel to the knife lines.
- Test Fit: Gently try to assemble the joint. It should be snug, but not so tight that force is required, which could split the wood. Adjust as necessary with very light paring.
This systematic approach, focused on accuracy at each stage, is much like a bladesmith performing a specific sequence of grinds and polishes to achieve a perfect blade profile. For more advanced joinery, explore Beyond The Basic Box Advanced Joinery For Unique Wooden Gift Boxes And Keepsakes.
The Mortise and Tenon Joint: Structural Integrity
The mortise and tenon joint is a cornerstone of frame and panel construction, offering exceptional strength and stability.
- Layout: Mark the mortise and tenon precisely on both components, ensuring squareness and consistent dimensions.
- Cutting the Mortise:
- Drilling (Optional): Some woodworkers drill out the bulk of the waste within the mortise boundaries.
- Chopping: Use a mortise chisel, which has a thicker cross-section for strength, to chop out the waste. Work from the outside edges inwards, paring the walls smooth and plumb. Ensure the mortise depth is consistent.
- Cutting the Tenon:
- Shoulders First: Use a tenon saw to cut the shoulders of the tenon. This is often done by cutting across the grain.
- Cheeks Next: Saw down the cheeks, carefully staying to the waste side of the lines.
- Paring: Refine the tenon cheeks with a sharp chisel or shoulder plane until they are perfectly flat and the tenon fits snugly into the mortise.
- Test Fit: Dry fit the joint. It should slide together with moderate hand pressure, without requiring a hammer. Adjust as needed.
The attention to detail in dimensioning and fitting here is paramount, mirroring the bladesmith’s need for exacting tolerances in forging and grinding a blade. Just as a small deviation in a blade’s heat treatment can compromise its strength, an imprecise tenon or mortise can significantly weaken a wooden structure. Understanding the principles of joinery is key for projects like Custom Floating Shelves Design Fabrication And Installation Of Substantial Solid Wood Shelving or Diy Wooden Wall Clocks Precision Joinery And Modern Designs For Timeless Home Accents.
Conclusion
Embracing Hand Tool Mastery: Traditional Wood Joinery Techniques Inspired by American Bladesmith Society Standards is more than just a preference for traditional methods; it is a philosophy of craftsmanship. It emphasizes patience, precision, and an intimate understanding of both your materials and your tools. In 2026, as woodworking continues to evolve, the timeless principles of sharp tools, accurate layout, and meticulous execution remain the bedrock of creating truly exceptional pieces.
By adopting the bladesmith’s rigorous standards, focusing on impeccable edge geometry, structural integrity, and a systematic approach to every cut, woodworkers can elevate their craft to an art form. The satisfaction of a perfectly fitted, hand-cut joint, born from skill and patience, is a reward in itself. Invest in quality hand tools, learn to sharpen them to a razor’s edge, and practice these traditional joinery techniques. The journey towards mastery is continuous, but the results, stronger, more beautiful, and more enduring woodworking, are undeniably worth the effort.
References
- American Bladesmith Society. (n.d.). About the ABS. Retrieved from https://www.americanbladesmith.com/
- Schwarz, C. (2011). The Anarchist’s Tool Chest. Lost Art Press.
- Tage Frid. (1979). Tage Frid Teaches Woodworking: Joinery. Taunton Press.