
The year 2026 presents an exciting landscape for woodworkers, where the precision of digital fabrication meets the timeless craft of working with wood. Historically, intricate patterns and repetitive cuts demanded immense skill, patience, and often, specialized hand tools. Today, Computer Numerical Control (CNC) routing offers a transformative bridge, allowing hobbyist woodworkers to achieve unparalleled accuracy and complexity with relative ease. This “Introduction to CNC Routing for Woodworkers: From Design Software to First Cuts on Small Projects” article aims to demystify this powerful technology, guiding you from selecting your first entry-level machine to executing personalized projects like signs and decorative panels.
Key Takeaways
- CNC routing allows hobbyist woodworkers to achieve high precision and repeatable results previously only possible with advanced hand skills or industrial machines.
- Entry-level CNC machines are becoming more affordable and user-friendly, making them accessible for home workshops in 2026.
- Understanding CAD (Computer-Aided Design) for creating your models and CAM (Computer-Aided Manufacturing) for generating toolpaths is fundamental to the CNC workflow.
- Starting with small, manageable projects is crucial for building confidence and mastering the CNC process.
- Safety, proper machine setup, and material understanding are paramount for successful and enjoyable CNC woodworking.
Understanding the Basics: What is CNC Routing for Woodworkers?
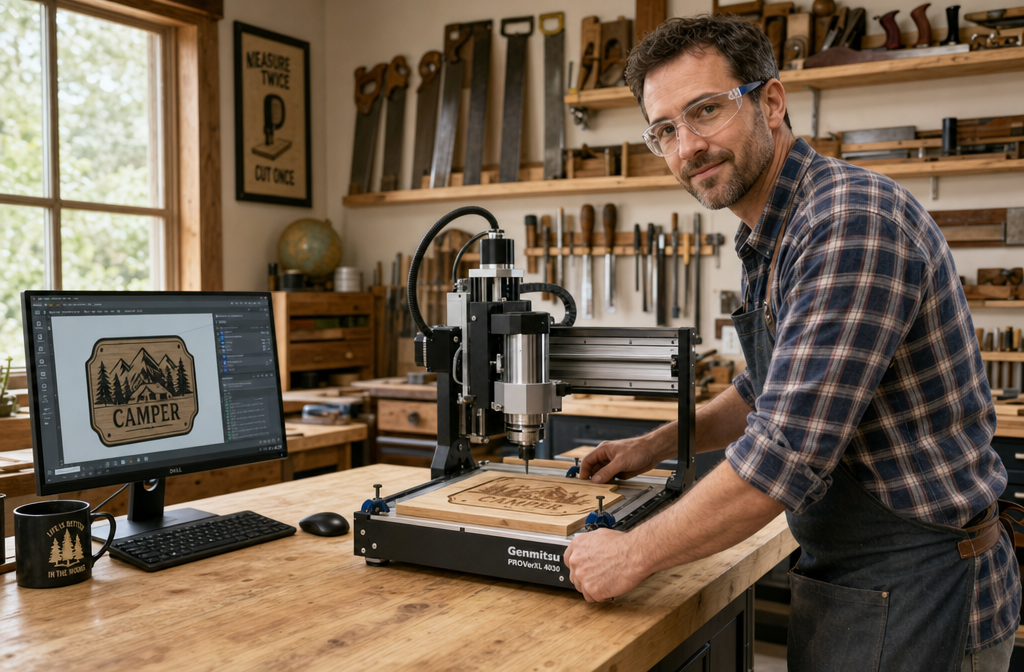
At its core, a CNC router is a computer-controlled cutting machine that uses a spinning bit to remove material from a workpiece. Unlike traditional routers, which are guided by hand, a CNC router follows precise instructions from a computer program. This allows for incredibly accurate, repeatable, and complex cuts that would be difficult or impossible to achieve manually. For woodworkers, this translates into the ability to create intricate carvings, precise joinery, custom signs, decorative panels, and even furniture components with unprecedented efficiency.
Why Consider CNC for Your Woodworking in 2026?
The appeal of CNC routing for hobbyist woodworkers in 2026 is multifaceted:
- Precision and Repeatability: Once a design is perfected, the CNC can replicate it flawlessly, time and again. This is invaluable for batch production of items like coasters, cabinet doors, or components for projects like a DIY Smart Home Integration with Custom Woodwork.
- Complex Geometries: CNC machines excel at cutting intricate shapes, curves, and 3D reliefs that would be highly challenging with hand tools. Think custom inlays, detailed engravings, or unique decorative elements.
- Time Savings: For repetitive tasks or complex cuts, a CNC can often complete the work faster than manual methods, freeing up time for other aspects of a project like finishing or assembly.
- Reduced Waste: Digital design allows for precise material nesting, minimizing scrap wood and maximizing yield. This is especially useful when working on projects that aim to maximize profit from scrap wood.
- Personalization: Easily engrave names, dates, or custom artwork onto your wooden creations, making them truly unique gifts or bespoke items.
Components of a CNC System
Before diving into design software and first cuts, it’s important to understand the main parts of a CNC routing system:
- CNC Machine (Router): The physical device with a spindle, cutting bit, work bed, and motors that move the bit along X, Y, and Z axes.
- Controller: The electronic brain that interprets the G-code (the machine’s language) and translates it into movements for the motors.
- Computer: Runs the CAD and CAM software and communicates with the controller.
- CAD Software (Computer-Aided Design): Used to create the 2D or 3D model of what you want to cut.
- CAM Software (Computer-Aided Manufacturing): Takes your CAD model and generates the toolpaths (the precise route the cutting bit will take) and then outputs G-code.
- Cutting Bits (End Mills): Specialized tools that attach to the spindle and do the actual cutting. Different shapes and sizes are used for different operations (e.g., carving, pocketing, profiling).
From Design Software to Toolpaths: Your Digital Workshop
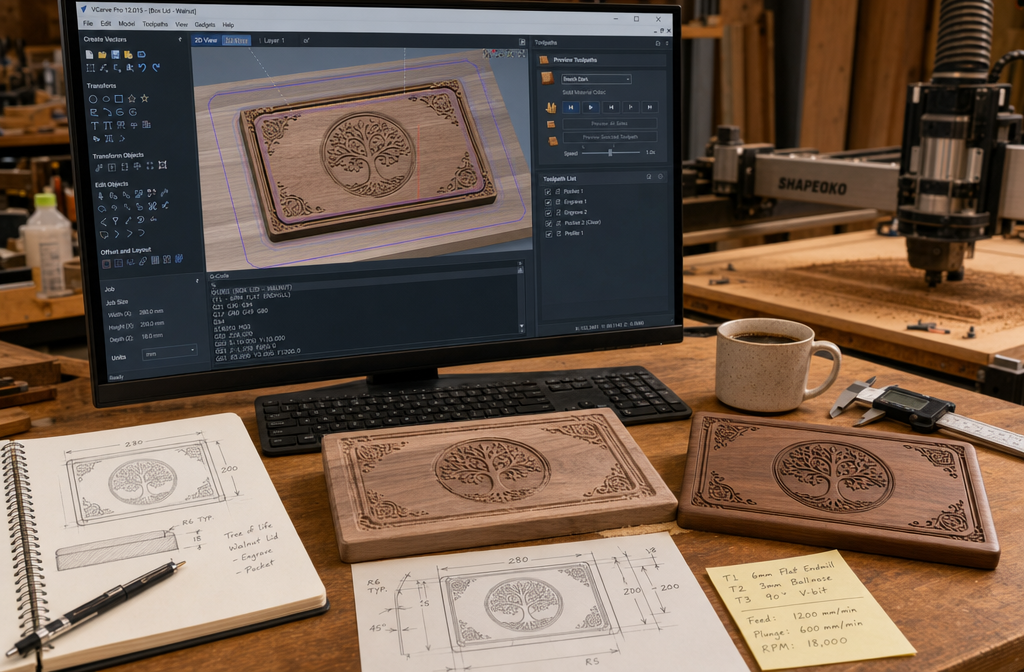
The journey from an idea to a finished CNC-routed piece begins in the digital realm. Understanding CAD and CAM software is fundamental. Think of CAD as your digital drawing board and CAM as your digital workshop planner.
CAD Software: Designing Your Projects
Computer-Aided Design (CAD) software is where you create the blueprint for your woodworking project. For beginners, 2D design is typically the starting point, perfect for signs, coasters, or simple decorative panels. As you gain experience, you can explore 3D design for more complex carvings or contoured shapes.
Popular CAD Software for Woodworkers:
- Vectric VCarve Desktop/Pro: A highly popular choice for woodworkers, known for its intuitive interface, excellent V-carving capabilities, and integrated CAM features. It’s ideal for signs, decorative panels, and 2.5D carving.
- Fusion 360 (Autodesk): A powerful 3D CAD/CAM software that offers robust modeling tools and comprehensive CAM features. While it has a steeper learning curve, its capabilities are extensive, and a free hobbyist license is available. It’s excellent for designing furniture components or intricate 3D shapes.
- Inkscape/CorelDRAW/Adobe Illustrator: These are 2D vector graphics programs often used for creating complex artistic designs, logos, and text that can then be imported into CAM software for toolpath generation.
- SketchUp: While primarily a 3D modeling program, it can be used for basic 2D designs, especially for joinery, and its extensions can help with CAM preparation.
When selecting CAD software, consider your project goals, learning style, and budget. Many offer free trials or hobbyist versions. Starting with simple 2D designs in software like Vectric VCarve or even Inkscape is a great way to ease into the process.
CAM Software: Generating Toolpaths and G-Code
Once your design is complete in CAD, the next step is to prepare it for the CNC machine using Computer-Aided Manufacturing (CAM) software. This is where you define how the machine will cut your design.
Key CAM Operations for Woodworkers:
- Profiling (Cutout): Cutting along the outline of a shape to cut a part entirely out of a larger piece of wood.
- Pocketing: Removing material from within a defined area to create a recessed pocket (e.g., for an inlay or a tray).
- V-Carving: Using a V-shaped bit to create carved letters or intricate designs with varying depths, giving a hand-carved look.
- Engraving: Using a small, sharp bit to engrave fine lines or details onto the surface.
- Drilling: Creating precise holes for hardware or joinery.
Steps in CAM Software:
- Import Design: Load your CAD file (e.g., DXF, SVG, AI) into the CAM software.
- Define Material: Specify the dimensions and thickness of your wood stock.
- Select Tool: Choose the appropriate cutting bit (end mill) for each operation. This includes bit diameter, flute count, and material.
- Set Cutting Parameters: Define critical settings like:
- Cut Depth: How deep the bit will go.
- Pass Depth: How much material the bit removes in a single pass (shallow for hardwoods).
- Feed Rate: How fast the bit moves horizontally.
- Plunge Rate: How fast the bit moves vertically into the material.
- Spindle Speed (RPM): How fast the bit rotates.
- Generate Toolpaths: The software calculates the precise path the bit will take based on your design and parameters.
- Simulate: Crucially, always simulate the toolpaths virtually to check for errors, collisions, or unexpected cuts before running on the machine.
- Post-Process (Generate G-code): Convert the toolpaths into G-code, the specific language your CNC machine understands. This file is then loaded into your CNC’s controller.
Understanding these parameters is vital for successful CNC routing. Incorrect settings can lead to broken bits, poor cut quality, or even damage to your machine. Always consult your machine’s documentation and bit manufacturer guidelines.
From G-Code to First Cuts: Your Initial Projects
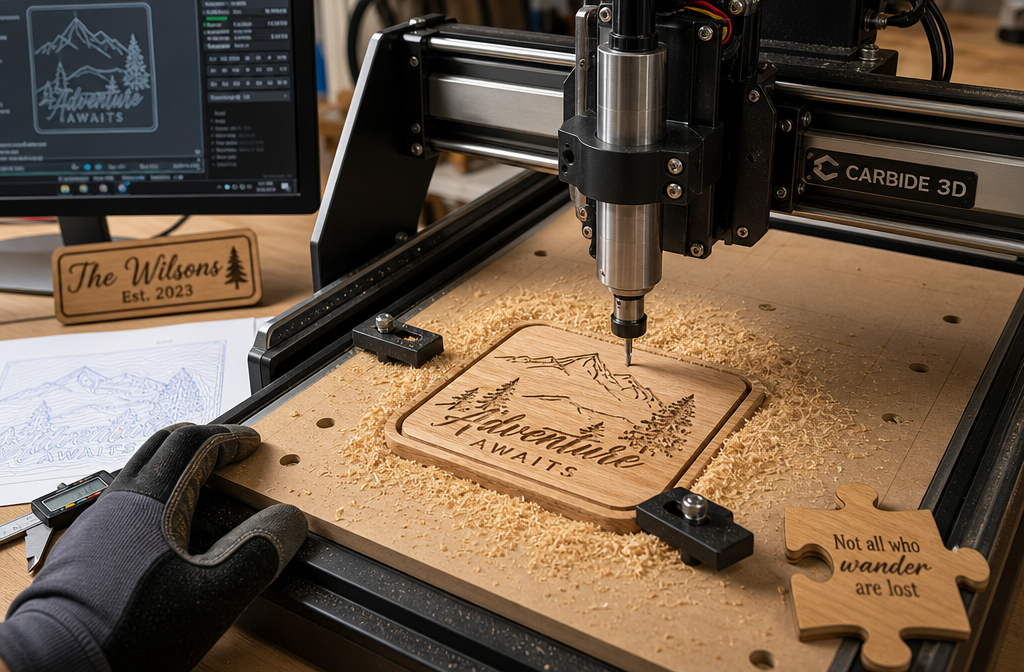
With your design created and toolpaths generated, you’re ready to make your first cuts. This is often the most exciting—and sometimes daunting—part of the “Introduction to CNC Routing for Woodworkers: From Design Software to First Cuts on Small Projects.” Starting with small, simple projects is key to building confidence and mastering the workflow.
Selecting Your Entry-Level CNC Machine
For hobbyist woodworkers, entry-level CNC routers have become highly accessible and capable in 2026.
Factors to Consider:
- Work Area (Bed Size): How large of a piece of wood can it accommodate? Common sizes for desktop units range from 12×12 inches to 24×24 inches.
- Spindle Power: Measured in watts or horsepower. More power means it can cut harder materials and take deeper passes, but also increases cost. For small projects, 300W-1.5kW is often sufficient.
- Rigidity: A more rigid frame reduces flex, leading to more precise cuts. Look for machines with aluminum or steel frames rather than plastic.
- Controller Software: Some machines use proprietary software, while others are compatible with popular open-source controllers like GRBL or Mach3/Mach4.
- Assembly: Some machines come fully assembled, while others require DIY assembly, which can be a good learning experience.
- Cost: Entry-level machines can range from a few hundred to a couple of thousand dollars.
Popular Entry-Level CNC Routers for Woodworking (as of 2026):
- Shapeoko (Carbide 3D): Highly popular, well-supported, and scalable machines known for their rigidity and ease of use.
- Onefinity: Known for its robust linear rails and powerful spindle options, offering excellent precision.
- SainSmart Genmitsu/3018 Series: Very affordable entry points, though often less rigid and smaller work areas. Great for learning.
- Inventables X-Carve: Another popular choice with a large community, offering good work area options.
Setting Up Your Machine for the First Cut
Before loading your G-code, proper machine setup is critical:
- Workpiece Securing: Secure your wood firmly to the CNC bed. Methods include clamps, double-sided tape, or a vacuum table. Any movement during cutting will ruin your project.
- Bit Installation: Insert the correct cutting bit into the collet of the spindle, ensuring it’s tightened securely but not over-tightened.
- Zeroing the Axes: This tells the CNC where the starting point (0,0,0) of your workpiece is relative to the cutting bit.
- X and Y Zero: Position the bit’s center over the desired origin point on your material (often a corner).
- Z Zero: Carefully lower the bit until it just touches the surface of your material. Many machines use a touch plate for precise Z-axis zeroing.
- Safety First: Always wear appropriate eye and ear protection. Ensure the work area is clear, and know where your emergency stop button is. Dust collection is also highly recommended; consider building a mobile dust collection cart to manage wood dust.
Your First Small Projects
Start with simple projects to get a feel for the entire workflow.
Recommended First Projects:
- Engraved Coasters: Design a simple shape (circle, square) and engrave your initials or a basic logo. This teaches profiling and engraving.
- Small Wooden Signs: Create a small sign with a name or a simple phrase using V-carving. This helps you master text toolpaths.
- Decorative Panels: Design a repetitive pattern or a simple motif to pocket out or engrave onto a small wooden panel. This introduces pocketing.
- Jigsaw Puzzle Piece: A single, simple jigsaw puzzle piece can teach you intricate internal and external profiling.
- Personalized Keychains: Small, quick projects perfect for practicing text and profiling.
Pro-Tips for First Cuts:
- Use Practice Material: Start with inexpensive wood like MDF or pine before moving to hardwoods.
- Run Slow: Use conservative feed rates and pass depths for your first few cuts. You can always increase them later.
- Stay Attentive: Never leave the machine unattended while it’s cutting. Listen for unusual sounds and observe the chip evacuation.
- Document Everything: Note down successful (and unsuccessful) parameters for different materials and bits. This builds your knowledge base.
- Join a Community: Online forums and communities are invaluable resources for troubleshooting and learning from others.
Conclusion
The introduction to CNC routing for woodworkers, from design software to first cuts on small projects, is an incredibly rewarding journey. It opens up a new world of possibilities, allowing you to bring complex and precise designs to life with digital accuracy. While the initial learning curve can seem steep, breaking it down into manageable steps—understanding your machine, mastering CAD and CAM software, and starting with simple projects—will set you up for success.
Embrace the blend of traditional woodworking skills with modern technology. As you gain experience, you’ll find CNC routing to be an invaluable tool, enhancing your creativity and efficiency. The year 2026 is an ideal time to dive into this exciting craft. So, choose your first small project, fire up that design software, and prepare to make your first precise cuts! The satisfaction of watching your digital design transform into a tangible wooden creation is truly unparalleled.
Actionable Next Steps:
- Research Entry-Level Machines: Explore the options mentioned, considering your budget and workspace.
- Download CAD/CAM Software Trials: Start experimenting with free versions of Vectric VCarve, Fusion 360, or Inkscape to get comfortable with the interface.
- Watch Online Tutorials: Platforms like YouTube are rich with tutorials specific to CNC routing for beginners.
- Join an Online Forum: Engage with the CNC woodworking community for advice and support.
- Plan Your First Simple Project: Design a small, manageable item like an engraved coaster or a personalized sign to build confidence.
SEO Meta Title: CNC Routing for Woodworkers: Design to First Cuts SEO Meta Description: Learn CNC routing for woodworking! Guide from design software (CAD/CAM) to first cuts on small projects like signs and panels for hobbyists in 2026.