
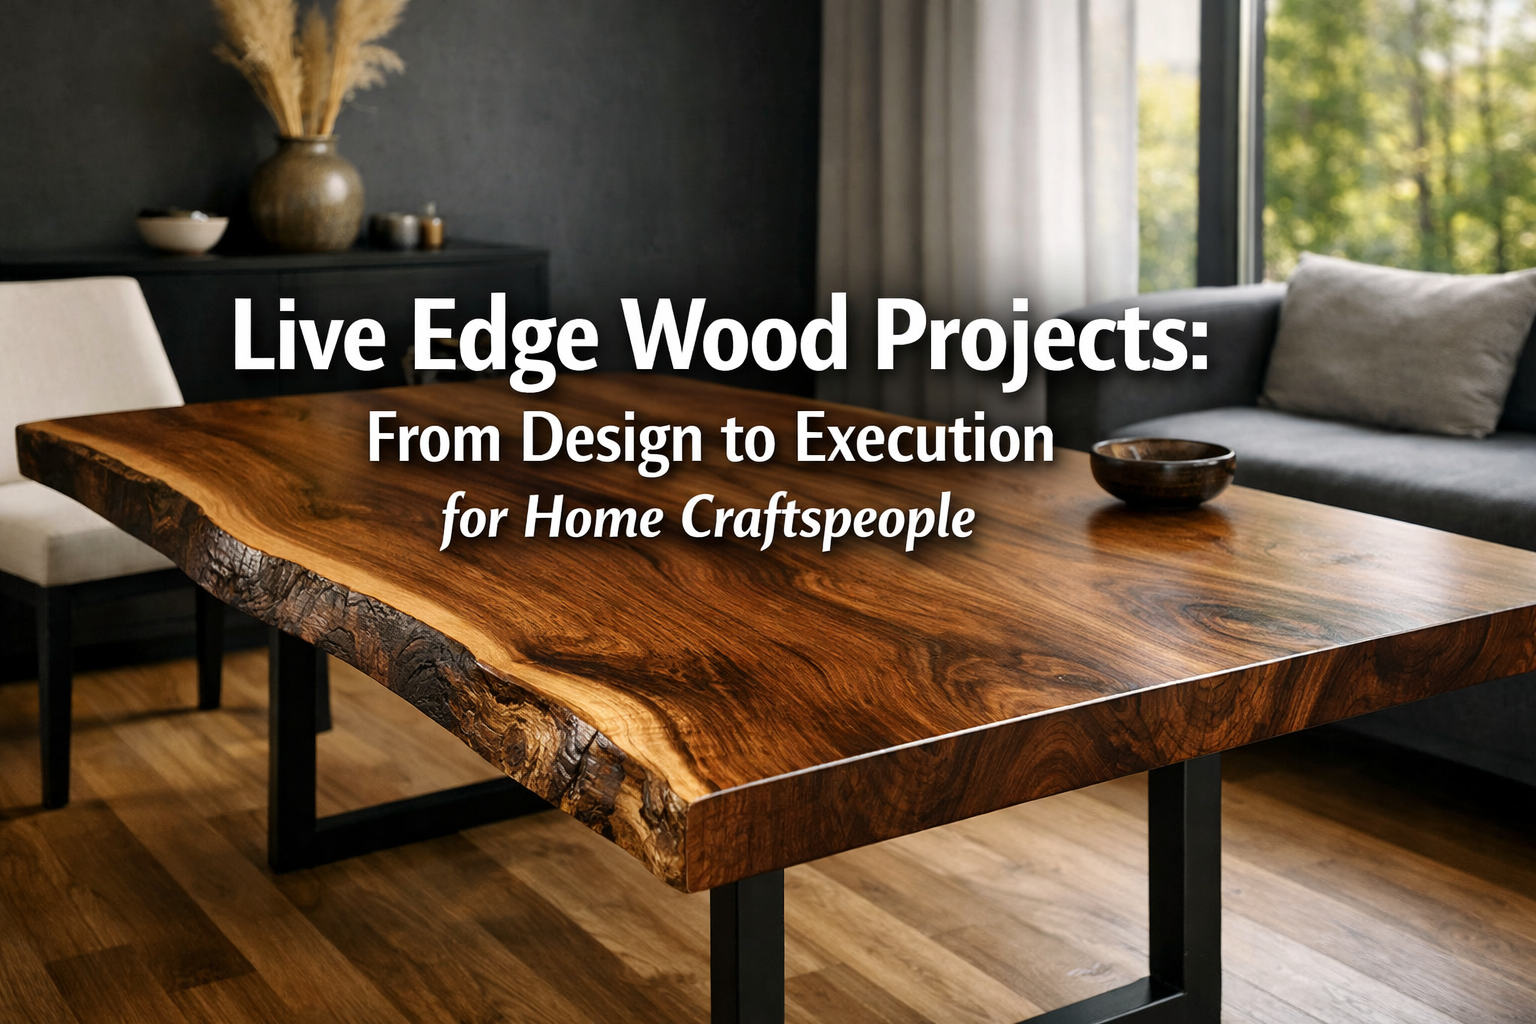

Live edge slabs are rapidly becoming a luxury standard in interior design, transforming ordinary spaces into extraordinary showcases of natural artistry. In 2026, home craftspeople have an unparalleled opportunity to tap into this trend, creating stunning live edge tables, shelves, and statement pieces that command attention in modern interiors. This comprehensive guide, “Live Edge Wood Projects: From Design to Execution for Home Craftspeople,” will walk you through the entire process, from understanding the unique characteristics of live edge wood to the meticulous steps involved in bringing a design to life. Embrace the natural beauty and rustic elegance that only live edge woodworking can offer.
Key Takeaways
- Embrace the Natural Form: Live edge woodworking celebrates the organic shape of the tree, requiring a shift in design philosophy from rigid plans to adapting to the wood’s inherent character.
- Careful Sourcing is Crucial: Selecting properly dried and stable slabs is paramount to project success and longevity. Understand moisture content and wood species characteristics.
- Master Essential Techniques: From flattening and stabilizing to crack repair and exquisite finishing, specific woodworking skills are vital for high-quality live edge projects.
- Finishing Defines the Piece: The chosen finish not only protects the wood but also dramatically impacts its aesthetic, highlighting the grain and natural edge.
- Safety First: Always prioritize personal protective equipment (PPE) and proper tool usage when working with large, often irregular, wood slabs.
Understanding Live Edge: Sourcing, Design Principles, and Wood Selection

Creating beautiful Live Edge Wood Projects: From Design to Execution for Home Craftspeople begins long before the first cut. It starts with a deep appreciation for the raw material and a thoughtful design process that respects the wood’s natural form.

What is Live Edge Wood?
Live edge wood, also known as natural edge wood, refers to a slab or board where at least one side retains the natural, untouched outer layer of the tree, complete with bark, unique contours, and sometimes even remnants of moss or lichen. This organic edge stands in stark contrast to the milled, straight edges typically found in traditional lumber. The appeal lies in its authenticity, its ability to tell the tree’s story, and the unique, one-of-a-kind character each piece possesses.
Sourcing Your Live Edge Slab
The foundation of any successful live edge project is the slab itself. Proper sourcing is critical for durability and aesthetic appeal.
Where to Find Slabs
- Local Sawmills: Often the best source for raw, rough-sawn slabs. You can discuss species, dimensions, and even commissioning custom cuts. This is frequently the most cost-effective option.
- Specialty Wood Suppliers: These suppliers often have kiln-dried, flattened, and sometimes even sanded slabs, ready for your finishing touches. While more expensive, they save significant preparation time.
- Arborists or Tree Removal Services: If you’re looking for a project from a specific tree, contacting local arborists might yield results, though these slabs will require extensive drying.
- Online Marketplaces: Platforms like Etsy or eBay can offer unique pieces, but always verify seller reputation, wood origin, and drying methods.
Critical Considerations for Slab Selection
- Moisture Content (MC): This is perhaps the most important factor. Wood must be properly dried to prevent warping, cracking, and movement after your project is complete. For interior furniture, the MC should be between 6-8%. Always use a moisture meter to verify. If the wood is too wet, it will need to air-dry or be kiln-dried.
- Wood Species: Different species offer distinct aesthetics and working properties.
- Walnut: Prized for its rich, dark color and beautiful grain. Excellent for high-end furniture.
- Oak (Red and White): Durable with prominent grain patterns. White oak is particularly resistant to moisture.
- Maple: Lighter in color, offering a clean, contemporary look. Can have stunning figure (curly, spalted).
- Cherry: Develops a beautiful reddish-brown patina over time. Softer than oak but still durable.
- Elm: Often has interesting grain and character, but can be prone to movement if not properly dried.
- Spalted Wood: Wood that has begun to decay, creating striking black lines and unique color variations. Requires stabilization.
- Size and Dimensions: Ensure the slab is large enough for your intended project, with enough allowance for trimming and squaring if needed.
- Defects and Character:
- Cracks and Voids: These are common in live edge wood. Decide if you want to stabilize them (e.g., with epoxy resin) or incorporate them into the design.
- Knots: Can add character but also be structurally weaker.
- Insect Damage: Check for active infestations, which can compromise the wood.
- Warping/Cupping: A slight amount can be milled out, but severely warped slabs can be challenging for home craftspeople without industrial equipment.
“The true art of live edge woodworking lies not in imposing your will on the wood, but in collaborating with its inherent beauty and form.”
Designing Your Live Edge Project
Designing with live edge wood is an iterative process. Instead of starting with a rigid blueprint, you often let the slab inspire the design.
Embracing the Natural Form
- Follow the Curves: Allow the natural edge to dictate the shape and flow of your project.
- Minimal Intervention: The goal is often to enhance, not overpower, the wood’s natural beauty.
- Consider Slab Orientation: How will the slab’s unique features be best displayed? Vertically for a console, horizontally for a tabletop?
Popular Live Edge Projects for Home Craftspeople
- Coffee Tables: A fantastic entry point. See our guide on DIY Coffee Table Plans for inspiration that can be adapted for live edge.
- Dining Tables/Desks: Larger projects that become stunning focal points.
- Shelves: Floating live edge shelves add rustic charm.
- Console Tables: Often narrower slabs, perfect for entryways.
- Serving Boards/Cutting Boards: Smaller, manageable projects that showcase beautiful grain. A sapele cutting board could be a great live edge candidate.
- Wall Art/Mirrors: Unique statement pieces. Consider adapting ideas from Reflect Your Craft: A Comprehensive Guide to Woodworking Mirrors.
Sketching and Planning
- Templates: Create paper or cardboard templates to visualize the slab’s final dimensions and how it will sit within your space.
- Base Design: How will the live edge top be supported?
- Metal Legs: Modern, industrial look (e.g., steel hairpin, square tubing).
- Wood Legs: Can be traditional (tapered, turned) or chunky slabs for a more rustic feel.
- Trestle Bases: Offers stability and a classic aesthetic.
- Functionality: Consider the use. A dining table needs a stable, level surface. A serving board needs to be food-safe.
The Art of Execution: Milling, Stabilization, and Shaping for Live Edge Wood Projects
Once the perfect slab is acquired and the design concept solidified, the real work of bringing your Live Edge Wood Projects: From Design to Execution for Home Craftspeople to life begins. This phase involves precise milling, careful stabilization, and thoughtful shaping.
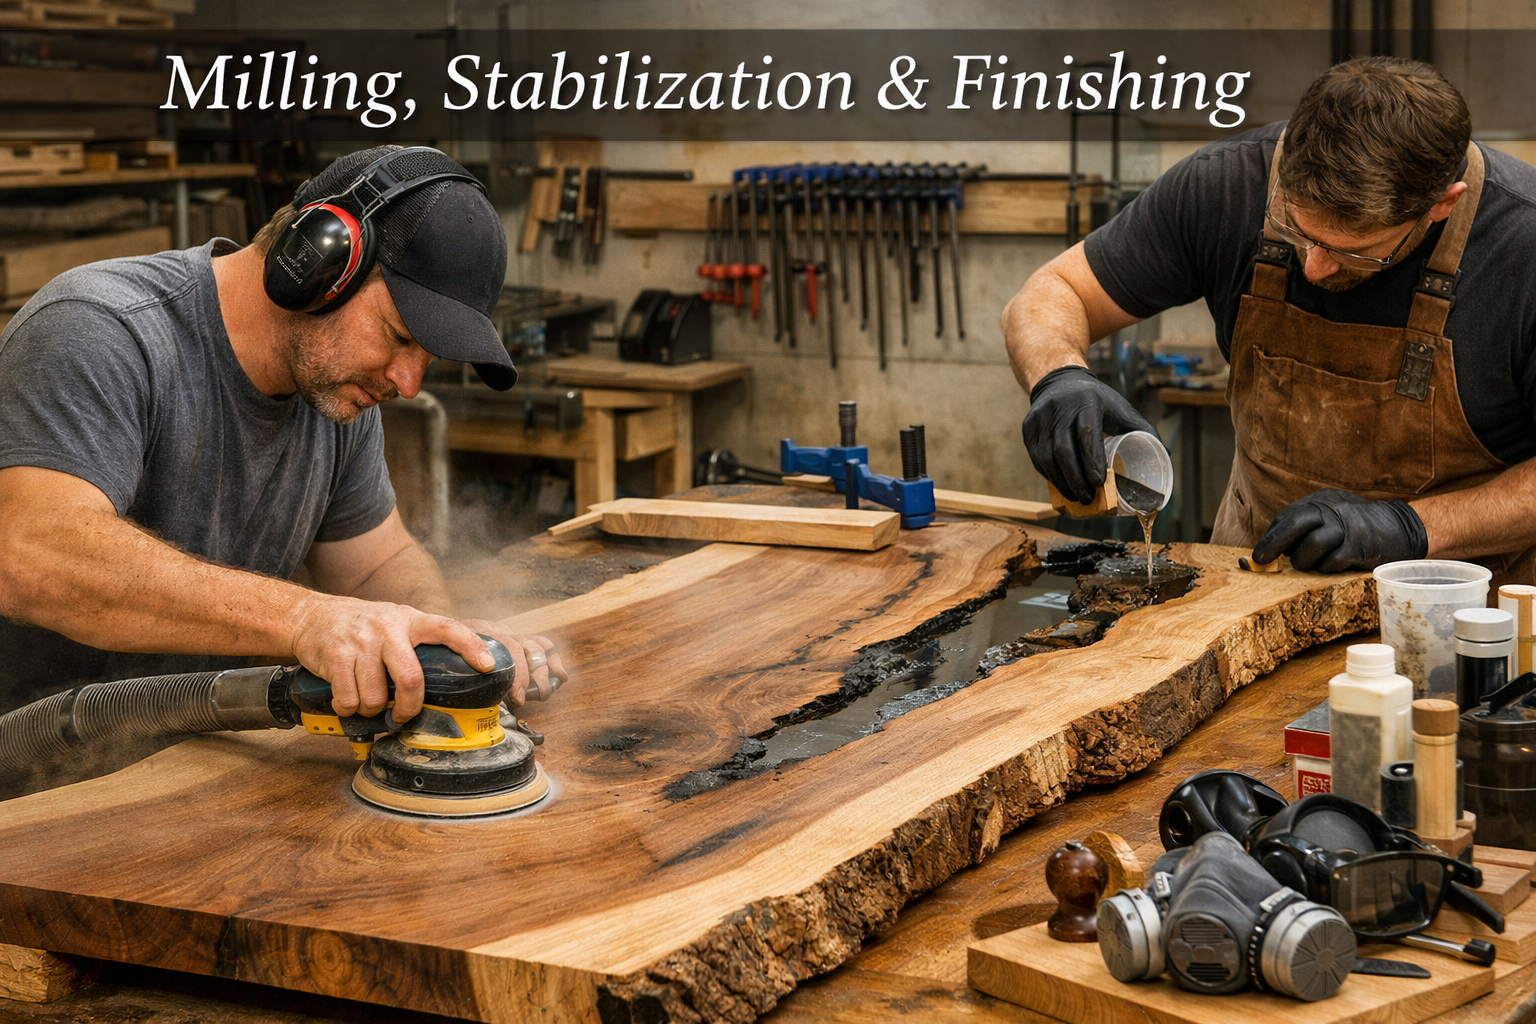
Milling and Flattening the Slab
Raw live edge slabs are rarely perfectly flat or uniform in thickness. Milling is essential to create a stable, usable surface.
Removing the Bark
The bark typically needs to be removed. It often harbors insects and will eventually detach, making the piece messy and unstable.
- Chisel and Scraper: Carefully use a chisel, wire brush, or even a drawknife to remove the bark, following the natural contours. Be gentle to avoid damaging the live edge underneath.
- Power Washer (Carefully!): For very stubborn bark, a power washer can be used, but allow the wood to thoroughly re-dry afterwards to prevent warping or checking.
Flattening the Slab
Achieving a flat surface is crucial for any furniture piece. For home craftspeople, several methods are available.
- Router Sled: This is the most common and accessible method for flattening slabs without a large planer.
- Construct a rigid sled that allows your router to travel across the slab on rails, gradually removing material until flat.
- Use a large-diameter flattening bit.
- Work in passes, removing a small amount of material with each pass to prevent tear-out.
- Hand Planes: For smaller slabs or minor inconsistencies, a long jointer plane can be effective. This requires skill and patience.
- Drum Sander (Large Scale): If you have access to a large drum sander at a community workshop or commercial mill, this can quickly flatten and thickness a slab.
- Traditional Planer (Limited Use): Standard woodworking planers are typically only 12-20 inches wide. For wider slabs, you would need to cut the slab into narrower pieces, plane them, and then re-glue – defeating the live edge aesthetic. The router sled is generally preferred for full-width slabs.
Tip: Flatten one side first, then flip the slab and flatten the second side parallel to the first.
Stabilizing Cracks and Voids
Live edge wood often contains natural imperfections like cracks, knots, and voids. These can be embraced and stabilized to enhance the piece’s character.
Epoxy Resin Inlays
Epoxy resin is the most popular method for filling cracks and voids, offering both structural integrity and aesthetic appeal.
- Clean the Area: Thoroughly clean out any loose debris, bark, or dust from the cracks and voids. Use compressed air if available.
- Seal the Bottom/Sides: Use clear packing tape, painter’s tape, or specialized damming tape to create a seal around the bottom and sides of the crack to prevent resin leakage.
- Mix Epoxy: Follow the manufacturer’s instructions precisely for mixing two-part epoxy resin. You can add color pigments (transparent or opaque) or metallic powders for unique effects.
- Pour Slowly: Pour the mixed resin slowly into the cracks and voids. Use a heat gun or torch (carefully, from a distance) to pop any surface bubbles.
- Cure Time: Allow ample time for the epoxy to cure fully, which can range from 24-72 hours depending on the product and ambient temperature.
- Sand Flush: Once cured, sand the epoxy flush with the wood surface. Start with a coarse grit (e.g., 80-120) and progress through finer grits.
Bowties (Butterfly Keys)
Bowties are traditionally used for crack stabilization, providing both structural reinforcement and an attractive visual detail.
- Layout: Mark the shape of the bowtie template across the crack.
- Router or Chisel: Use a router with a template guide or a sharp chisel to carefully mortise out the bowtie shape to a consistent depth.
- Fit and Glue: Create a matching bowtie piece from contrasting or complementary wood, ensuring a snug fit. Glue it into the mortise with wood glue.
- Flush: Once the glue is dry, trim and sand the bowtie flush with the slab surface.
Sanding and Preparing for Finish
Proper sanding is crucial for a professional-looking finish.
Sanding Schedule
- Start Coarse: Begin with a relatively coarse grit, typically 80-100, especially if there are milling marks or epoxy to level.
- Progress Gradually: Move through successive grits (e.g., 120, 150, 180, 220). Do not skip grits, as this leaves deeper scratches that finer grits cannot remove.
- Inspect Thoroughly: After each grit, wipe down the surface with mineral spirits or denatured alcohol to reveal any remaining scratches. Sand until all previous grit scratches are gone.
- Live Edge Attention: Don’t forget to carefully sand the live edge itself, removing any remaining bark fragments or sharp points. You can smooth it to your desired feel.
Dust Removal
Thorough dust removal is critical before finishing. Use compressed air, a tack cloth, or a vacuum with a brush attachment.

Finishing Your Live Edge Masterpiece and Assembly

The finishing stage is where your Live Edge Wood Projects: From Design to Execution for Home Craftspeople truly come alive, revealing the wood’s inherent beauty and protecting it for years to come.
Choosing the Right Finish
The choice of finish dramatically impacts both the aesthetics and durability of your live edge project.
Penetrating Oil Finishes
- Examples: Danish Oil, Linseed Oil, Tung Oil.
- Characteristics: Penetrate into the wood fibers, enhancing the natural grain and providing a soft, natural look and feel. They are relatively easy to repair but offer less protection against water and chemicals compared to film finishes.
- Application: Apply in multiple thin coats, wiping off excess between coats. Allow proper cure time.
Film-Building Finishes
- Examples: Polyurethane (oil-based or water-based), Lacquer, Varnish, Shellac.
- Characteristics: Form a protective layer on top of the wood, offering excellent durability and resistance to moisture, heat, and chemicals. Can achieve various sheens, from matte to high gloss.
- Application: Apply in multiple thin coats, sanding lightly between coats with fine-grit sandpaper (e.g., 320-400) to ensure adhesion and a smooth finish.
- Polyurethane: A popular choice for tabletops due to its durability. Sprayable water-based polyurethane offers a smooth application. Understand the differences between gloss vs semi-gloss poly.
- Epoxy Flood Coats: For an exceptionally durable and glass-like finish, a thick flood coat of clear epoxy resin can be applied. This is particularly popular for “river tables.”
Food-Safe Finishes (for cutting boards/serving trays)
- Examples: Mineral oil, beeswax, specialized “butcher block oil.”
- Characteristics: Non-toxic, safe for direct food contact. Requires regular reapplication.
Applying the Finish
Regardless of the finish chosen, proper application technique is key.
- Read Instructions: Always follow the manufacturer’s specific instructions for application, drying times, and recoating.
- Workspace: Work in a well-ventilated, dust-free area.
- Application Method:
- Brushing: Use a high-quality brush for film-building finishes.
- Wiping: Use lint-free cloths for oil finishes.
- Spraying: Achieves the smoothest finish, especially for spray vs brush polyurethane. This requires a sprayer and proper ventilation.
- Thin Coats: Apply multiple thin coats rather than one thick coat to prevent runs, drips, and uneven drying.
- Sanding Between Coats: For film finishes, light sanding (320-400 grit) between coats creates a smoother surface and aids adhesion.
- Full Cure: Allow the finish to fully cure (not just dry to the touch) before heavy use. This can take days or even weeks.
Attaching the Base/Legs
The final step is to securely attach the legs or base to your live edge slab.
- Wood Movement: Remember that wood expands and contracts with changes in humidity. For solid wood tops, it’s crucial to allow for this movement to prevent cracking.
- Mounting Methods:
- Z-Clips or Tabletop Fasteners: These metal fasteners slot into grooves in the apron or base and secure to the tabletop, allowing the top to expand and contract freely.
- Elongated Screw Holes: For bases where screws go directly into the tabletop, drill elongated holes in the base (not the tabletop) to allow for movement.
- Figure-8 Fasteners: Similar to Z-clips, these swivel to allow movement.
- Crossbars/Stretchers: For large slabs, consider incorporating wooden or metal crossbars underneath, secured with methods that allow for movement.
- Hardware: Use appropriate length screws. Predrill pilot holes to prevent splitting. Ensure the base is level and stable before final attachment.
- Mastering your craft: This final assembly step ensures not just stability, but longevity for your project. Consider building a woodworking storage bench to organize your hardware and tools.
By following these steps, home craftspeople can confidently create stunning Live Edge Wood Projects: From Design to Execution for Home Craftspeople that will be cherished pieces in any home.
Conclusion
Embarking on Live Edge Wood Projects: From Design to Execution for Home Craftspeople is a deeply rewarding endeavor. As we’ve explored, the journey from a raw, beautiful slab to a finished, functional piece of art requires patience, skill, and a respectful understanding of the wood itself. In 2026, the allure of natural, organic forms continues to grow, making live edge woodworking more popular and accessible than ever. By carefully selecting your material, embracing the unique characteristics of each slab, mastering essential milling and stabilization techniques, and applying a thoughtful finish, you can create pieces that are not only visually stunning but also rich with the story of the tree from which they came.
The beauty of live edge woodworking lies in its celebration of imperfection and individuality. Each knot, crack, and curve contributes to the piece’s unique identity, ensuring that no two projects are ever truly identical. This guide has provided a framework for home craftspeople to confidently approach these projects, transforming raw lumber into cherished heirlooms.
Actionable Next Steps
- Research Local Sawmills: Begin by identifying local suppliers for live edge slabs and inquire about available species, drying methods, and pricing.
- Invest in a Moisture Meter: A crucial tool for ensuring your wood is stable before you begin.
- Start Small: If new to live edge, consider a smaller project like a serving board or a floating shelf to gain experience before tackling a large table.
- Practice Finishing Techniques: Experiment with different finishes on scrap pieces of the same wood species to understand how they will look and behave. For inspiration, explore unique wood finishing techniques.
- Prioritize Safety: Always wear appropriate personal protective equipment (PPE) and understand the safe operation of all tools.
Embrace the journey, learn from each cut and sanding stroke, and soon you’ll be creating breathtaking live edge furniture that elevates any interior.
References
- Fine Woodworking Magazine. (n.d.). Live-Edge Basics: Working with Slabs. Retrieved from https://www.finewoodworking.com/
- The Wood Database. (n.d.). Wood Species Information. Retrieved from https://www.wood-database.com/
- Wood Magazine. (n.d.). How to Flatten a Wood Slab Without a Planer. Retrieved from https://www.woodmagazine.com/
SEO Meta Title: Live Edge Wood Projects: Design & Build Guide for Home Craftspeople SEO Meta Description: Master live edge wood projects in 2026! Learn to design, source, mill, finish, and assemble stunning tables & shelves for your home. Expert guide for craftspeople.
