
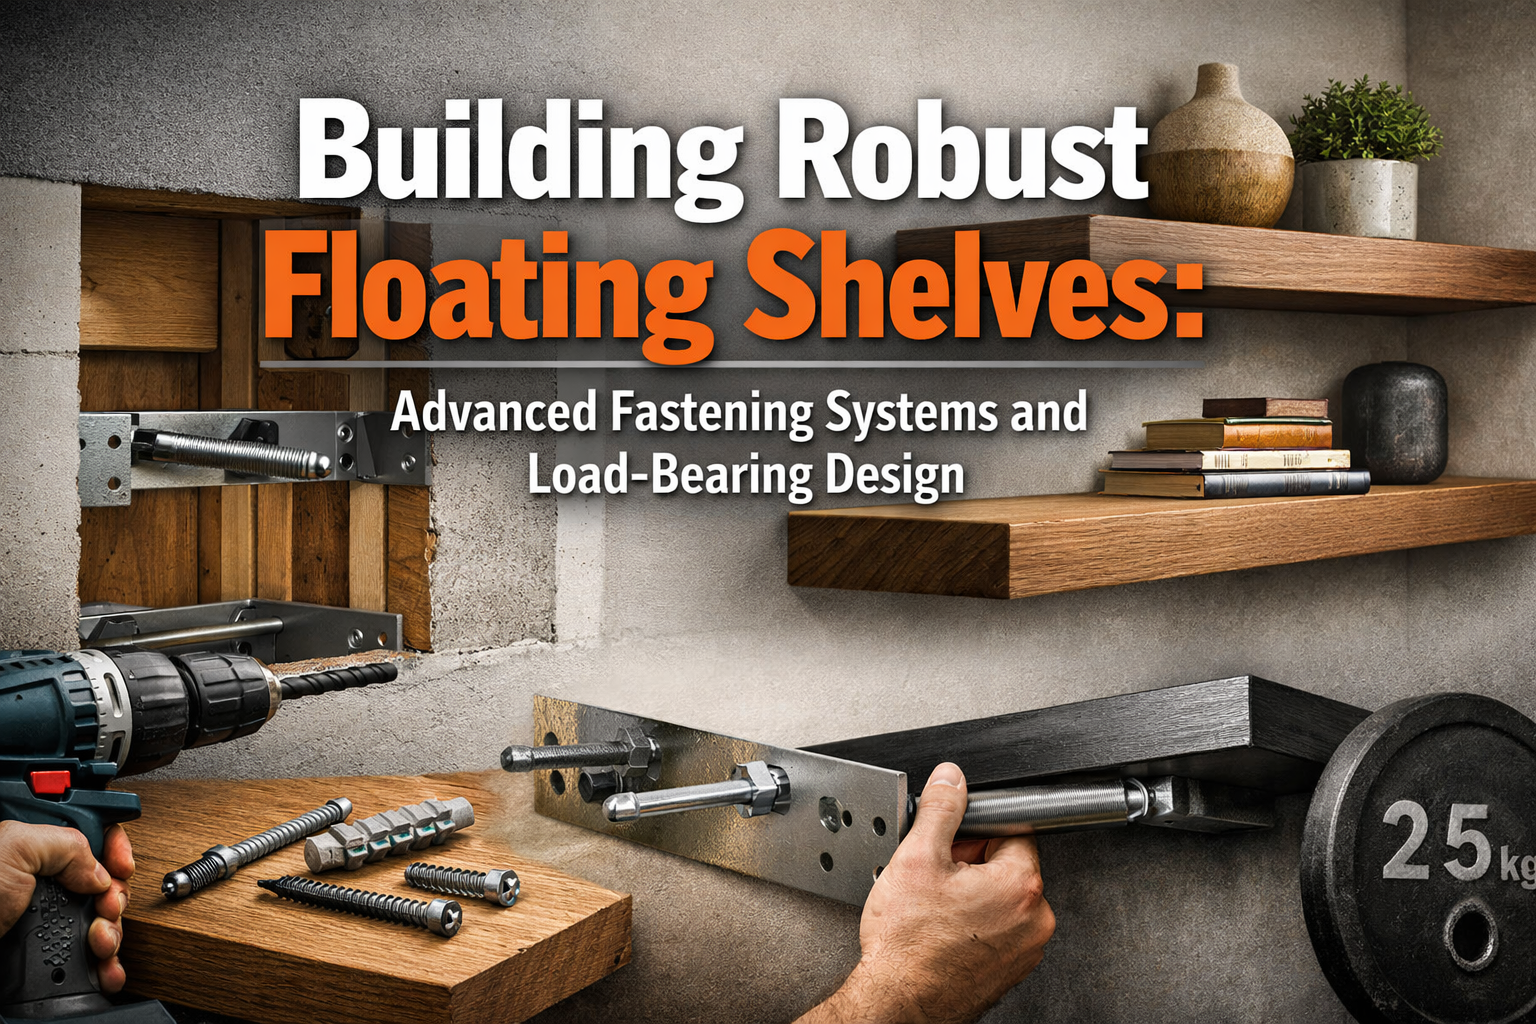

Imagine a thick, solid slab of wood effortlessly suspended on your wall, holding cherished books, weighty decor, or even a collection of ceramics. This isn’t magic; it’s the result of mastering the engineering behind Building Robust Floating Shelves: Advanced Fastening Systems and Load-Bearing Design. In 2026, as the Warm Minimalism trend continues to dominate interior design, the demand for substantial, visually striking floating shelves that appear to defy gravity is at an all-time high. This comprehensive guide delves into the advanced techniques and critical considerations for creating shelves that are not only beautiful but also incredibly strong and reliable.
The secret to a truly robust floating shelf lies beneath its surface: in the precision of its fastening system and the thoughtful calculation of its load-bearing capacity. Amateur installations often suffer from sagging, wobbling, or outright failure due to inadequate support or improper weight distribution. This article will empower you to move beyond basic DIY, equipping you with the knowledge to design and install floating shelves that stand the test of time and weight, flawlessly integrating into any sophisticated interior.

Key Takeaways
- Prioritize Structural Integrity: The primary goal is to ensure the shelf can safely bear its intended load without sagging or detaching from the wall.
- Choose the Right Fastening System: Advanced systems like heavy-duty steel rod brackets and concealed T-track supports offer superior strength and invisibility.
- Accurate Load-Bearing Calculations are Crucial: Understand material strengths, leverage points, and stud locations to prevent failure.
- Material Selection Matters: Shelf material (solid wood, plywood, MDF) directly impacts its strength and the type of fasteners required.
- Finishing Enhances Longevity: Proper finishing not only beautifies but also protects the shelf, extending its lifespan.
Understanding Advanced Fastening Systems for Floating Shelves
The core challenge of a floating shelf is making it appear unsupported. This illusion relies entirely on the strength and concealment of its mounting hardware. When Building Robust Floating Shelves: Advanced Fastening Systems and Load-Bearing Design, selecting the appropriate hidden bracket is paramount. Generic L-brackets or small lag screws simply won’t suffice for substantial shelves or heavy loads.
Types of Advanced Concealed Brackets
Several innovative systems offer superior strength and invisibility:
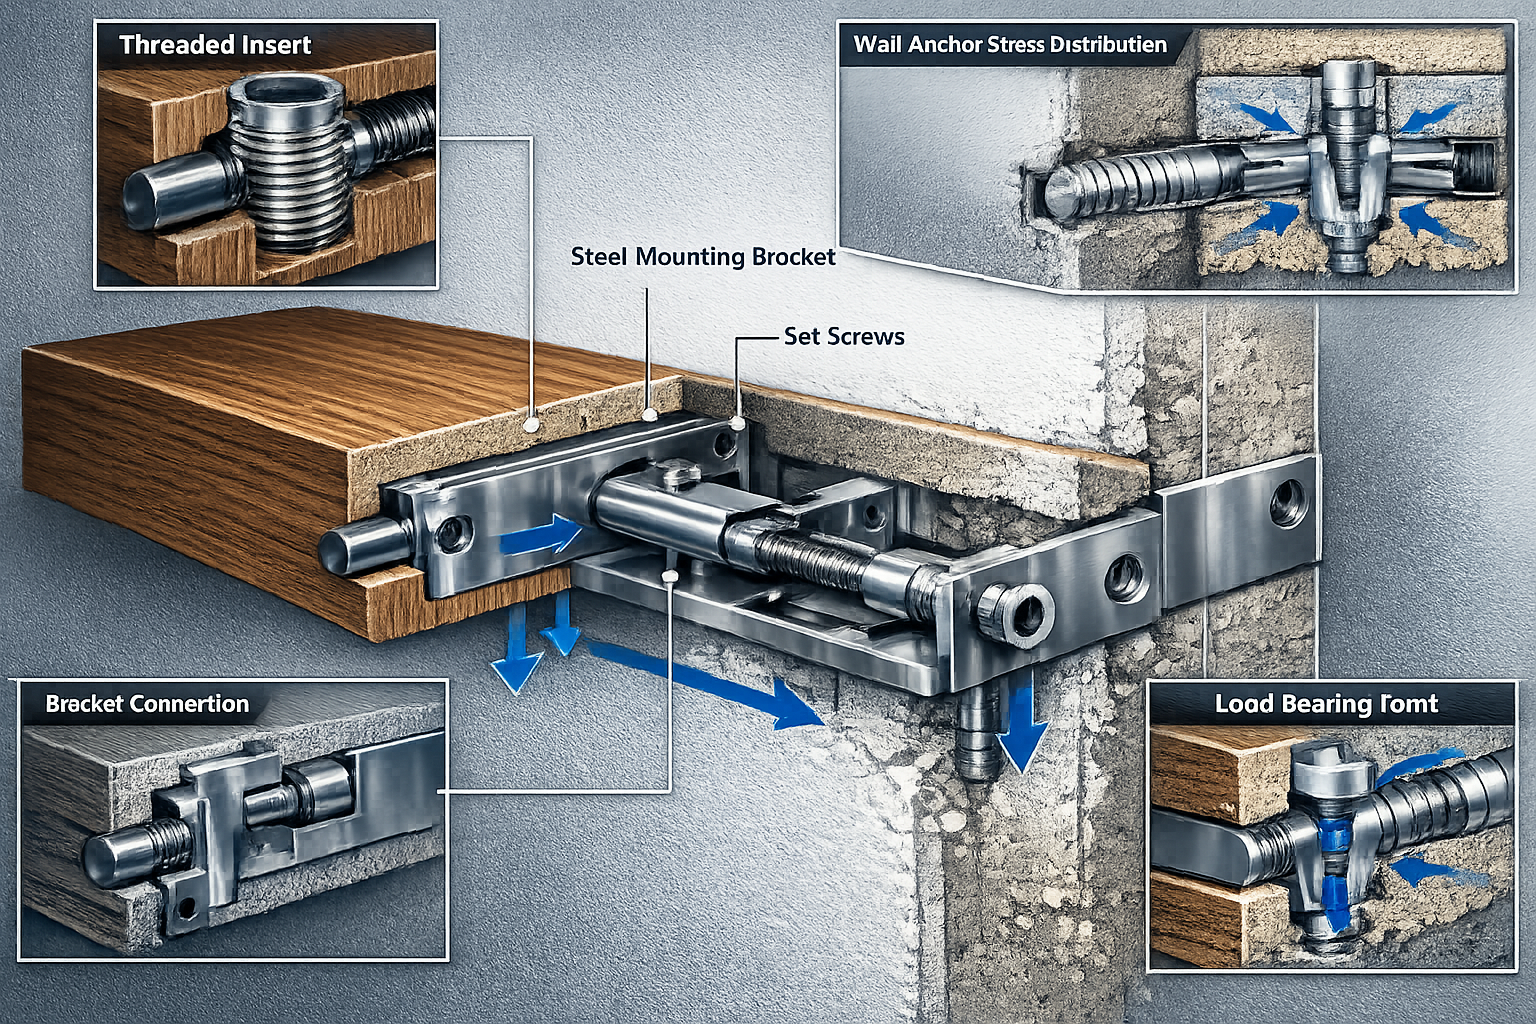
Heavy-Duty Steel Rod Brackets: These are perhaps the most popular choice for truly robust floating shelves.
- Description: Consist of stout steel rods (often 1/2″ to 1″ diameter) welded to a backplate that attaches to wall studs. The rods extend horizontally into precisely drilled holes within the shelf body.
- Advantages: Exceptional load capacity, completely hidden once installed, suitable for very thick and deep shelves.
- Considerations: Requires accurate drilling into the shelf to match rod spacing and ensure a snug fit. Shelf material must be thick enough to accommodate the rods without splitting (typically 1.5″ minimum).
Concealed T-Track or Channel Brackets:
- Description: A metal track or channel is securely fastened to the wall studs. The shelf then slides onto this track, often with corresponding dadoes or routed channels on its back edge.
- Advantages: Provides continuous support along the entire length of the shelf, distributing weight effectively. Can be very strong.
- Considerations: Requires precise routing on the shelf. Installation can be more complex than rod systems.
Flush-Mount Plate Brackets:
- Description: A sturdy metal plate, often with protruding pins or rods, mounts flush to the wall studs. The shelf then slides onto these pins, much like the rod brackets.
- Advantages: Offers a wide contact area with the wall, enhancing stability.
- Considerations: Similar to rod brackets in terms of drilling precision needed for the shelf.
Integrated Steel Frames:
- Description: For extremely heavy-duty applications or very long shelves, a full internal steel frame can be built into the shelf itself. This frame is then bolted directly to the wall studs.
- Advantages: Unparalleled strength, capable of supporting immense weight.
- Considerations: Highly complex to fabricate and integrate into the shelf design, often requires professional welding.
Anchoring to the Wall: The Critical Connection
Regardless of the bracket type, its connection to the wall is the ultimate determinant of the shelf’s strength.
- Locate Wall Studs: Always aim to anchor brackets directly into wooden wall studs. Use a reliable stud finder and verify locations by gently tapping the wall.
- Use Appropriate Fasteners: For wooden studs, heavy-duty construction screws (e.g., structural lag screws, GRK RSS screws) are essential. Length should be sufficient to penetrate the stud by at least 1.5-2 inches.
- Consider Masonry or Concrete Walls: For these surfaces, specialized anchors are required, such as wedge anchors, sleeve anchors, or epoxy anchors. Consult manufacturer specifications for load ratings.
- Avoid Drywall Anchors for Load-Bearing Shelves: Standard drywall anchors are generally unsuitable for floating shelves intended to hold significant weight. While toggle bolts can offer some support for lighter decorative items, they do not compare to stud-mounted systems for true robustness.
“The strength of your floating shelf is only as good as its weakest link. Overlooking the quality of wall anchors and their connection to the studs is a recipe for disaster.”
For additional insights into selecting the right fasteners for woodworking projects, consider reviewing our guide on Mastering Woodworking Screws: Your Ultimate Guide for 2026.
Load-Bearing Design and Material Selection for Robust Shelves
The perceived simplicity of a floating shelf belies the engineering principles required to ensure its structural integrity. Building Robust Floating Shelves: Advanced Fastening Systems and Load-Bearing Design necessitates careful consideration of the shelf’s material, dimensions, and the physics of weight distribution.
Understanding Load and Stress
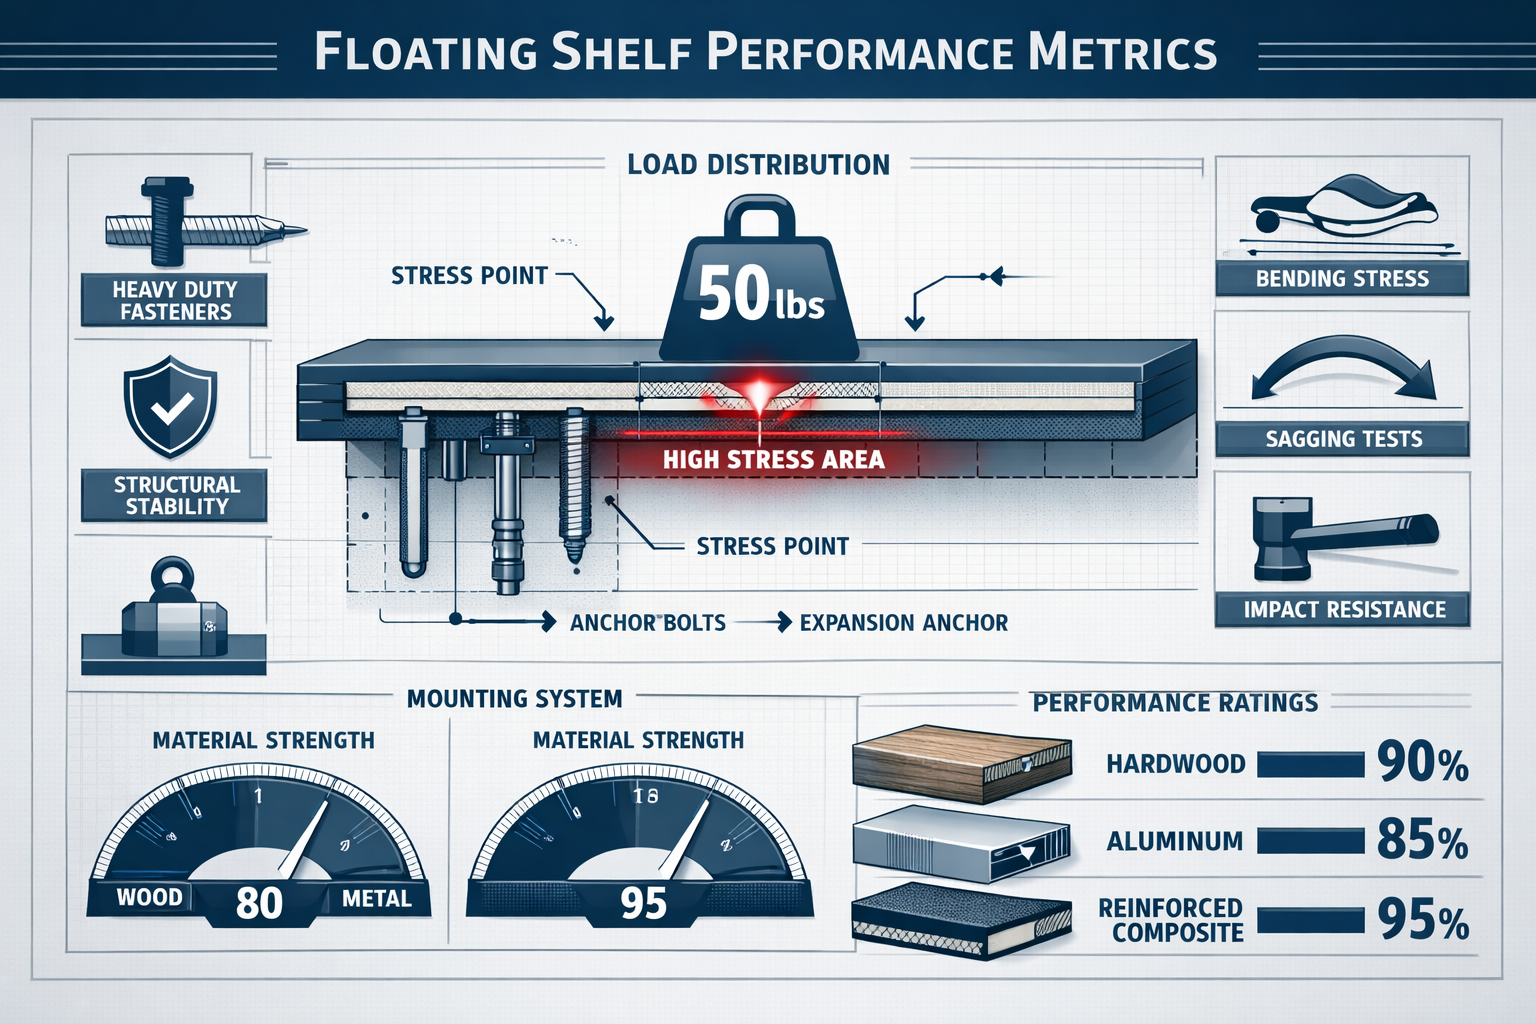
Every item placed on a shelf contributes to its total load. This load creates stress on the shelf material itself and on the fastening system.
- Distributed Load: Weight spread evenly across the shelf (e.g., a row of books).
- Point Load: Concentrated weight in one spot (e.g., a heavy vase). Point loads create more localized stress and can lead to sagging or material failure if not accounted for.
- Shear Stress: The force that tries to cut through the fastening system at the wall connection.
- Bending Stress (Deflection): The force that causes the shelf to sag or bend downwards. This is highly dependent on shelf material, thickness, and span.
Material Choices and Their Impact
The type of wood or engineered wood product chosen for the shelf directly influences its load-bearing capacity and suitability for different fastening systems.
| Material Type | Advantages | Disadvantages | Best For | Fastening System Fit |
|---|---|---|---|---|
| Solid Hardwood | Extremely strong, durable, beautiful grain, resists sagging. | Heavy, expensive, can warp or cup if not dried properly. | Heavy loads, long spans, premium appearance. | All advanced systems, especially rod brackets. |
| Solid Softwood | Lighter, less expensive than hardwood, easier to work with. | Less strong, more prone to denting, can sag over long spans. | Medium loads, shorter shelves. | Rod brackets (with larger diameter rods), channel brackets. |
| High-Quality Plywood | Very stable, strong for its weight, resists warping, consistent thickness. | Edges require finishing, visible layers. | Medium-heavy loads, good for built-in look. | Channel brackets, flush-mount. Can be “built up” for rod systems. |
| MDF (Medium-Density Fiberboard) | Very stable, smooth finish, affordable. | Heavy, poor screw-holding, prone to moisture damage, lower strength. | Light-medium loads, short shelves where aesthetics are primary. | Least suitable for advanced hidden systems requiring drilled holes; best with channel systems if heavily reinforced. |
For kitchen applications, where both aesthetics and load-bearing are critical, understanding materials is key. Our article on Custom Floating Shelves: Design & Install for 2026 Kitchens provides further context on material suitability for demanding environments.
Designing for Minimal Deflection and Maximum Strength
When Building Robust Floating Shelves: Advanced Fastening Systems and Load-Bearing Design, consider these design principles:
- Thickness is King: Thicker shelves inherently resist bending better. Aim for a minimum of 1.5″ to 2″ for solid wood, or build up plywood to achieve similar thickness.
- Depth Matters: Deeper shelves place more leverage on the fasteners. While aesthetically pleasing, ensure your bracket system can handle the increased moment arm.
- Minimize Span: Shorter shelves sag less. If a long shelf is desired, incorporate additional support points by hitting more wall studs.
- Internal Reinforcement: For hollow core shelves (e.g., plywood box construction), add internal blocking or bracing where the rods or channels will enter to provide solid material for the fasteners to grip.
- Calculate Estimated Load: Before building, estimate the maximum weight your shelf will hold. Books can be surprisingly heavy (e.g., 20-30 lbs per linear foot). Factor in a safety margin (e.g., design for 1.5x the estimated maximum load).
Example Calculation (Simplified): Let’s assume a 36-inch long, 10-inch deep, 2-inch thick solid hardwood shelf.
- Shelf Material Weight: ~15-20 lbs (depends on wood species).
- Estimated Item Weight: If holding books, roughly 25 lbs/linear foot. For 3 feet, that’s 75 lbs.
- Total Estimated Load: ~90-95 lbs.
- Bracket Capacity: Choose a system rated for at least 150 lbs, providing a healthy safety margin.
This systematic approach ensures that your beautiful floating shelves are not just decorative but genuinely functional and safe.
Installation Techniques and Finishing for Longevity
The final steps of installation and finishing are crucial for both the aesthetic appeal and the long-term durability of your robust floating shelves. Precision in these stages is as important as the initial design and material selection when Building Robust Floating Shelves: Advanced Fastening Systems and Load-Bearing Design.
Precise Installation Steps
Layout and Leveling:
- Mark Shelf Location: Use a laser level or a long level and pencil to mark the exact horizontal line for the bottom of your shelf.
- Find and Mark Studs: Use a reliable stud finder to locate all wall studs that the shelf will span. Mark their centerlines clearly. For a truly robust shelf, aim to hit at least two, preferably three or more, studs.
- Transfer Bracket Positions: Hold your chosen bracket against the wall, aligning its top edge with your level line. Mark the exact locations for drilling pilot holes into the studs.
Mounting the Brackets:
- Pilot Holes: Drill pilot holes into the marked stud locations. The pilot hole size should be slightly smaller than the shank of your chosen lag screws or structural fasteners to ensure maximum grip.
- Secure Brackets: Fasten the brackets securely to the wall studs using heavy-duty screws. Use an impact driver for efficiency and ensure the screws are driven fully and tightly.
- Verify Level: After mounting, double-check that the brackets are perfectly level and aligned with each other. Minor adjustments may be necessary before the shelf is installed.
Preparing the Shelf for Installation:
- Drill Shelf Holes: This is a critical step for rod or pin-style brackets. Using a drill press with a fence or a high-quality hand drill guide, precisely drill the corresponding holes into the back edge of your shelf.
- Accuracy is Key: The diameter of these holes should be just slightly larger than the diameter of the bracket rods/pins for a snug fit. The depth must match the length of the rods. Any misalignment will make installation difficult or compromise strength.
- Test Fit: Before final installation, carefully test fit the shelf onto the brackets to ensure a smooth slide and flush fit against the wall.
Final Shelf Installation:
- Slide On: Carefully slide the shelf onto the mounted brackets. It should fit snugly without excessive play.
- Secure (If Applicable): Some systems allow for set screws or small fasteners to secure the shelf to the rods from underneath, providing additional stability and preventing accidental removal.
Finishing Techniques for Enhanced Durability
A properly finished shelf not only looks better but is also protected from moisture, scratches, and everyday wear, extending its lifespan.

- Sanding: Start with a coarse grit (e.g., 80 or 100) to remove imperfections, then progressively move to finer grits (150, 220) for a smooth finish. Sand with the grain.
- Staining (Optional): If desired, apply a wood stain to achieve your preferred color. Ensure even application and wipe off excess according to product instructions.
- Protective Topcoats: This is where true durability comes in.
- Polyurethane: A highly durable and water-resistant finish, available in oil-based or water-based formulas. Water-based polyurethanes are great for a quick-drying, low-VOC option. Learn more about spraying water-based poly for a smooth, professional look.
- Varnish: Offers excellent protection and hardness, often used for furniture.
- Oil Finishes: Penetrating oils (like Danish oil or tung oil) provide a natural, rich look and good protection, though less durable against scratches than poly or varnish. For specific guidance on different finishes, explore our general wood finishing techniques.
- Wax over Polyurethane: For an even smoother feel and an extra layer of protection, especially for solid wood shelves, applying wax over polyurethane can be a beneficial final step.
Apply multiple thin coats of your chosen topcoat, sanding lightly with very fine grit (320 or 400) between coats to achieve a silky-smooth, professional result.
✨ “The beauty of a robust floating shelf is in its seamless integration. The more invisible your supports and the more flawless your finish, the more impactful the design.”
By meticulously following these installation and finishing guidelines, your advanced floating shelves will not only hold their substantial loads with confidence but will also serve as a testament to skilled craftsmanship, fitting perfectly into the refined aesthetics of 2026.
Conclusion
Building Robust Floating Shelves: Advanced Fastening Systems and Load-Bearing Design is a craft that blends aesthetic vision with rigorous engineering. By understanding the critical role of advanced fastening systems, making informed material choices, and meticulously planning for load distribution, you can create stunning, gravity-defying shelves that are both beautiful and exceptionally strong. From heavy-duty steel rod brackets to precise drilling and durable finishes, each step contributes to a final product that aligns with the sophisticated demands of modern interiors in 2026.
Taking the time to research, plan, and execute with precision will transform your woodworking projects from simple DIY to professional-grade installations. Embrace the challenge of these advanced techniques, and you’ll soon be enjoying the functionality and elegance of truly robust floating shelves.
Actionable Next Steps:
- Assess Your Needs: Determine the intended load and aesthetic requirements for your next floating shelf project.
- Research Fasteners: Select the appropriate advanced concealed bracket system based on your shelf’s dimensions and load.
- Plan Materials: Choose a shelf material that offers the necessary strength and complements your design.
- Practice Precision: If new to advanced drilling, practice on scrap material to perfect your technique before working on your final shelf.
- Invest in Quality: Use high-quality tools, fasteners, and finishing products for the best results and longevity.
