
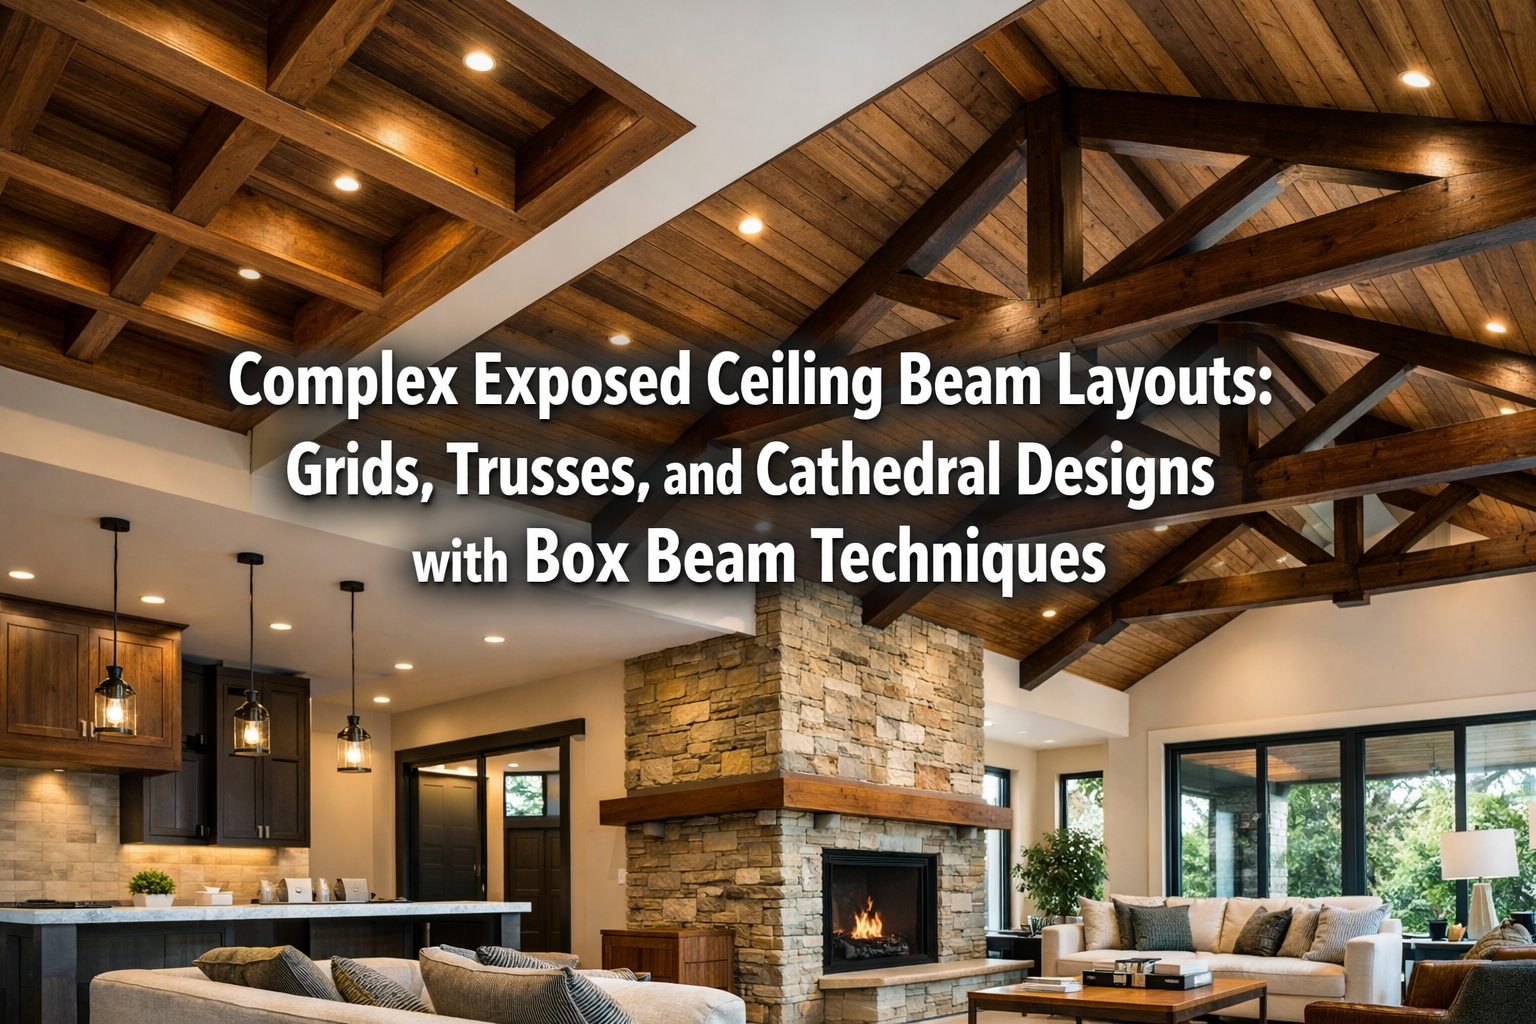

The ceiling, often overlooked, is rapidly reclaiming its status as a fifth wall – a canvas for architectural expression that profoundly shapes a room’s character. In 2026, we are witnessing a significant resurgence in the trend of exposed ceilings, particularly those featuring Complex Exposed Ceiling Beam Layouts: Grids, Trusses, and Cathedral Designs with Box Beam Techniques. This movement isn’t just about aesthetics; it’s about leveraging innovative construction methods, like the versatility of lightweight box beams, to bring grand designs within reach for even small workshops and modern homes embracing high ceilings.
Imagine transforming a plain ceiling into a breathtaking display of craftsmanship, without the daunting weight or cost of solid timbers. This article will dive deep into the world of multi-beam configurations, offering insights into designing, building, and installing these intricate ceiling features, perfect for adding timeless beauty and structural interest to any space.

Key Takeaways
- Box Beam Advantage: Box beam construction offers a lightweight, cost-effective alternative to solid timbers, making complex exposed ceiling beam layouts feasible for DIYers and small workshops.
- Design Versatility: Grids, trusses, and cathedral ceiling designs can all be achieved with box beam techniques, allowing for extensive customization and aesthetic impact.
- Structural vs. Decorative: Understand the distinction between load-bearing beams and decorative elements to ensure both safety and desired visual outcome.
- Installation Focus: Proper planning, accurate measurement, and secure fastening are crucial for a successful and safe installation of complex beam systems.
- Finishing Touches: The chosen finish significantly impacts the final look, ranging from rustic to modern, and can be customized to match existing decor.
The Resurgence of Exposed Ceilings and Box Beam Innovation
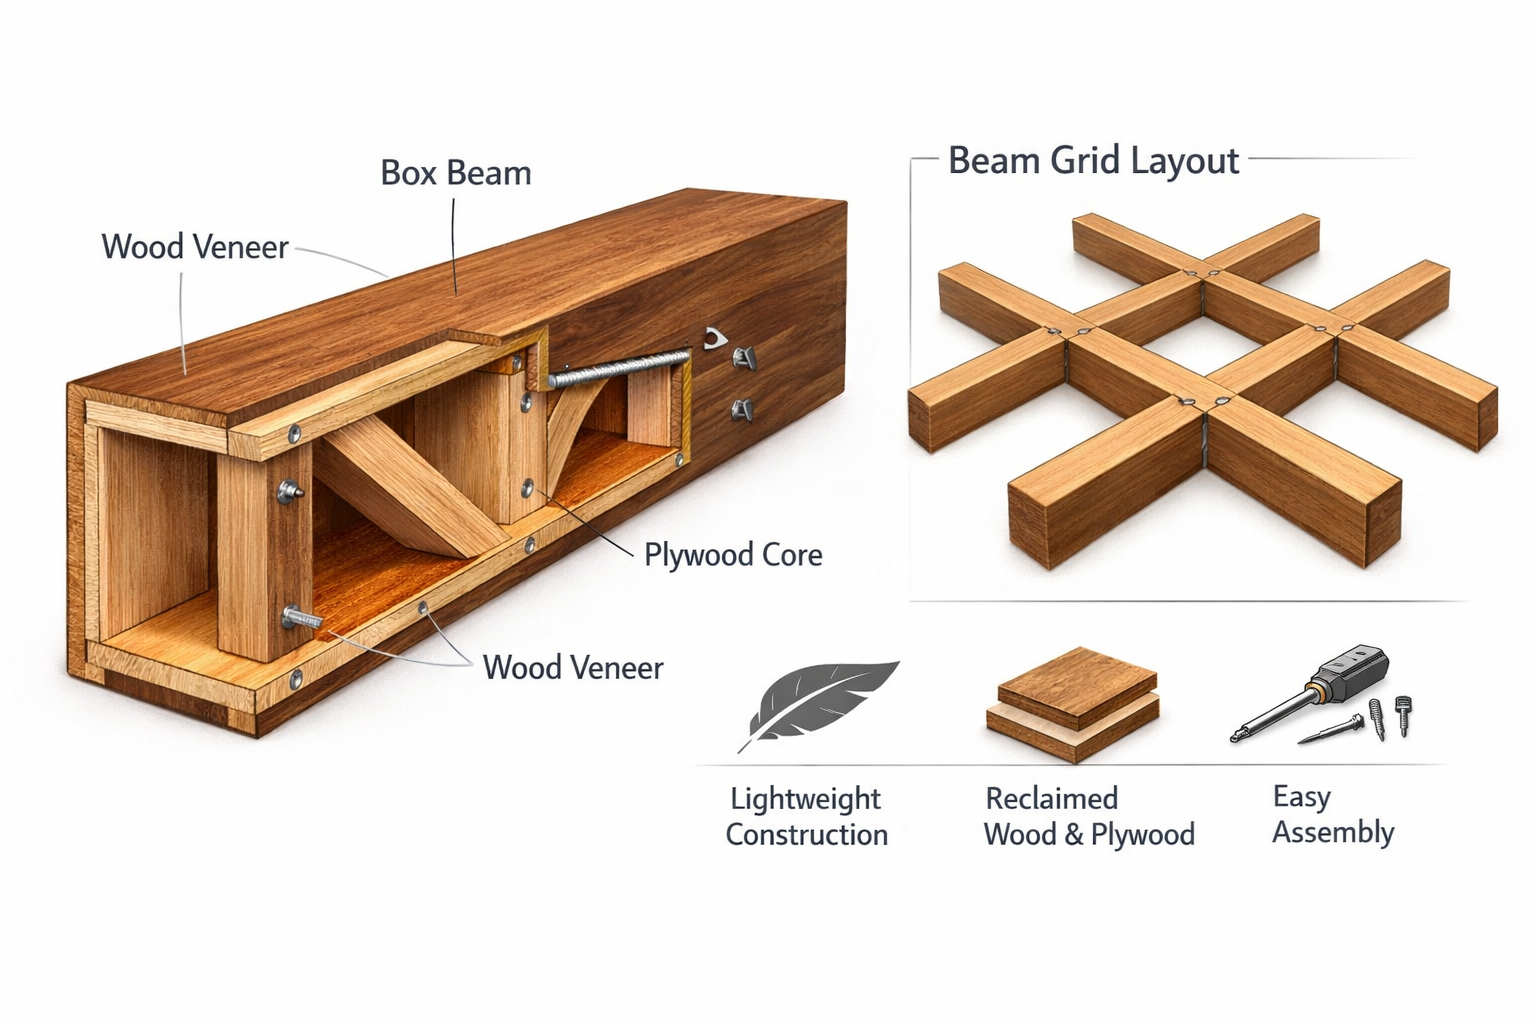
Exposed ceiling beams offer an unparalleled sense of warmth, history, and architectural drama. They can define a space, add visual texture, and draw the eye upward, creating an illusion of grandeur. For decades, solid timber beams were the go-to, but their weight, cost, and difficulty in installation made them a challenging prospect for many. Enter the box beam – a game-changer for Complex Exposed Ceiling Beam Layouts: Grids, Trusses, and Cathedral Designs with Box Beam Techniques.
Box beams are essentially hollow structures, typically made from three or four pieces of wood (plywood, MDF, or solid wood strips) joined to form a box-like cross-section. They are significantly lighter than solid beams of comparable size, easier to handle, and more cost-effective. This innovation means that creating stunning, multi-beam configurations is now more accessible than ever, allowing woodworkers with even small workshops to tackle projects previously reserved for professional contractors. The aesthetic flexibility is immense, as the exterior can be finished with high-quality veneers to mimic any wood species, from rustic reclaimed lumber to sleek, modern maple. You can even explore unique wood finishing techniques to achieve a truly custom look.
Why Choose Box Beams for Complex Layouts?
The advantages of using box beams for intricate ceiling designs are compelling:
- Weight Reduction: Crucial for existing structures where adding significant load is problematic.
- Cost-Effectiveness: Uses less high-grade lumber, reducing material costs.
- Ease of Installation: Lighter beams are simpler to maneuver and secure, often requiring fewer specialized tools or personnel.
- Design Flexibility: Can be fabricated to almost any dimension, accommodating diverse design visions.
- Hidden Utilities: The hollow interior can conceal wiring, plumbing, or recessed lighting, providing a clean, uncluttered aesthetic.
- Sustainable Choice: Can utilize reclaimed or sustainably sourced wood veneers, contributing to eco-friendly building practices. Discover more about green woodworking techniques.
Designing Complex Exposed Ceiling Beam Layouts: Grids, Trusses, and Cathedral Designs
The true artistry of exposed beams lies in their layout. Moving beyond simple parallel beams, complex designs involve interlocking patterns, structural expressions, and dramatic architectural features.
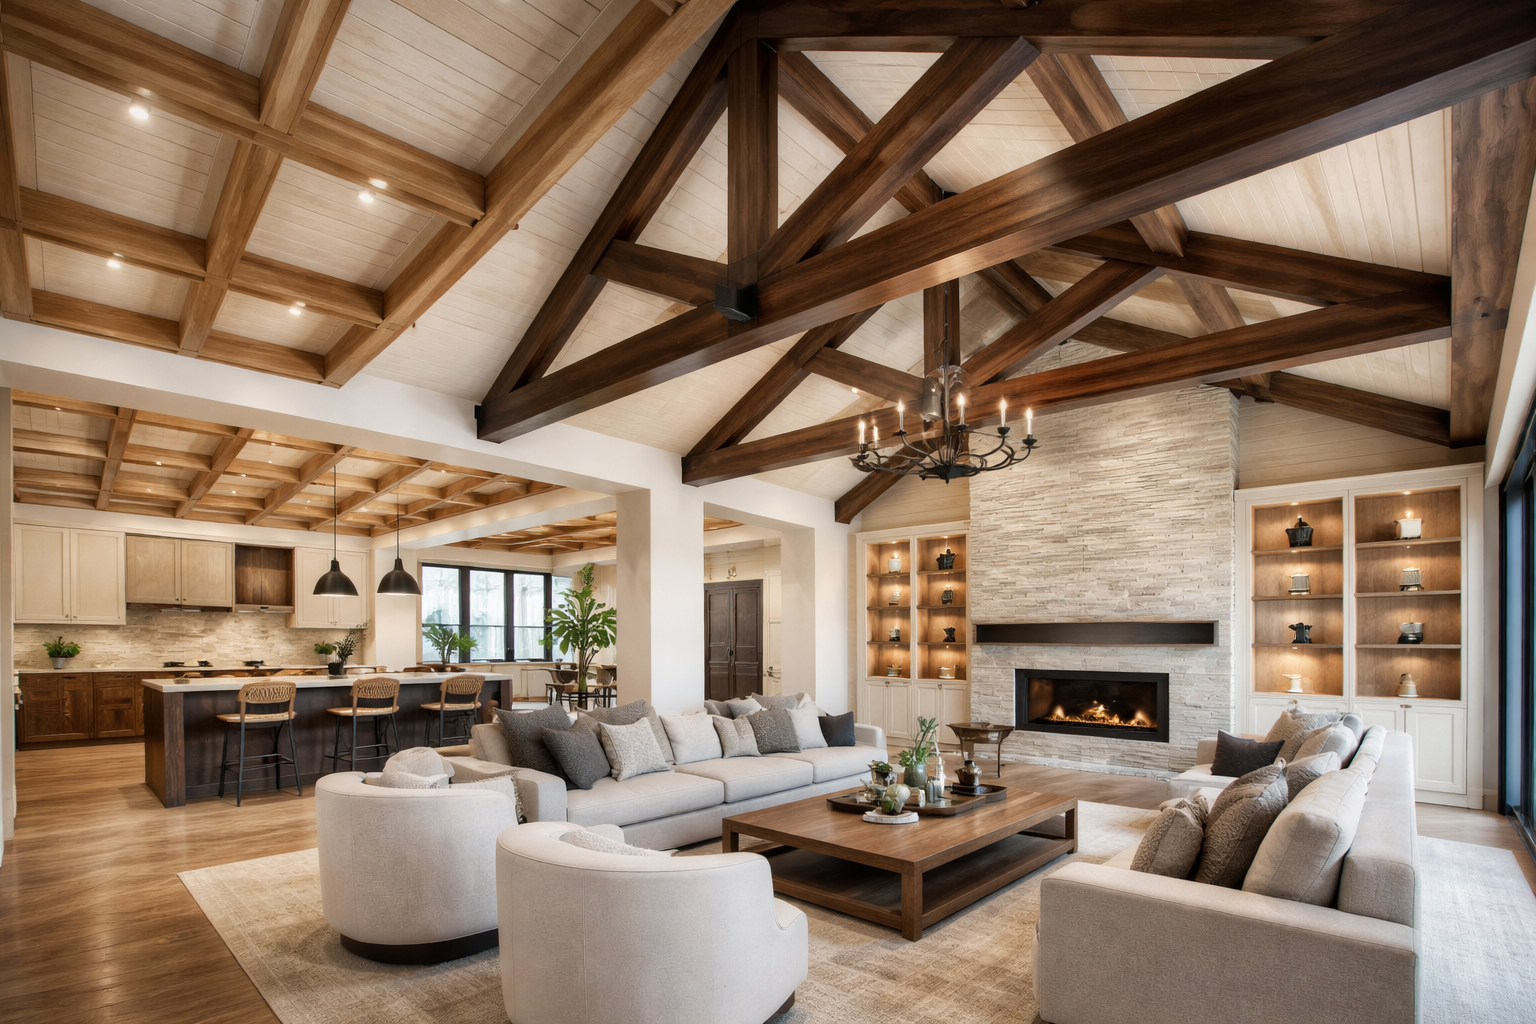
Grid Systems: The Geometric Appeal
Grid systems involve beams crossing each other, forming a series of squares or rectangles. This layout provides a strong sense of order, sophistication, and balance.
Types of Grids:
- Basic Grid: Parallel beams running in two perpendicular directions.
- Coffered Ceiling Effect: Deeply recessed panels within the grid, often achieved by adding trim or panels between the beams.
- Diagonal Grids: Beams arranged at 45-degree angles to the walls, adding dynamic visual interest.
Design Considerations for Grids:
- Beam Spacing: Dictates the size of the grid squares/rectangles and the overall visual density. Wider spacing creates a more open feel, while tighter spacing is more ornate.
- Beam Depth: Deeper beams create more shadow and a more dramatic effect.
- Room Proportion: Ensure the grid pattern complements the room’s dimensions and existing architectural features.
Building Box Beam Grids:
- Fabricate Individual Beams: Create box beams to your desired dimensions.
- Determine Layout: Mark the ceiling carefully, accounting for beam width and intersections.
- Install Perimeter Beams: Begin by attaching beams along the walls or main structural lines.
- Install Cross Beams: Precisely cut and fit the intersecting beams. Advanced joinery techniques, such as lap joints or dadoes, can be used to create seamless intersections, even if decorative. For projects requiring precision joinery, check out our guide on wood species selection for visible joinery.
- Secure Fasteners: Use strong screws, lag bolts, or construction adhesives, ensuring all connections are robust.
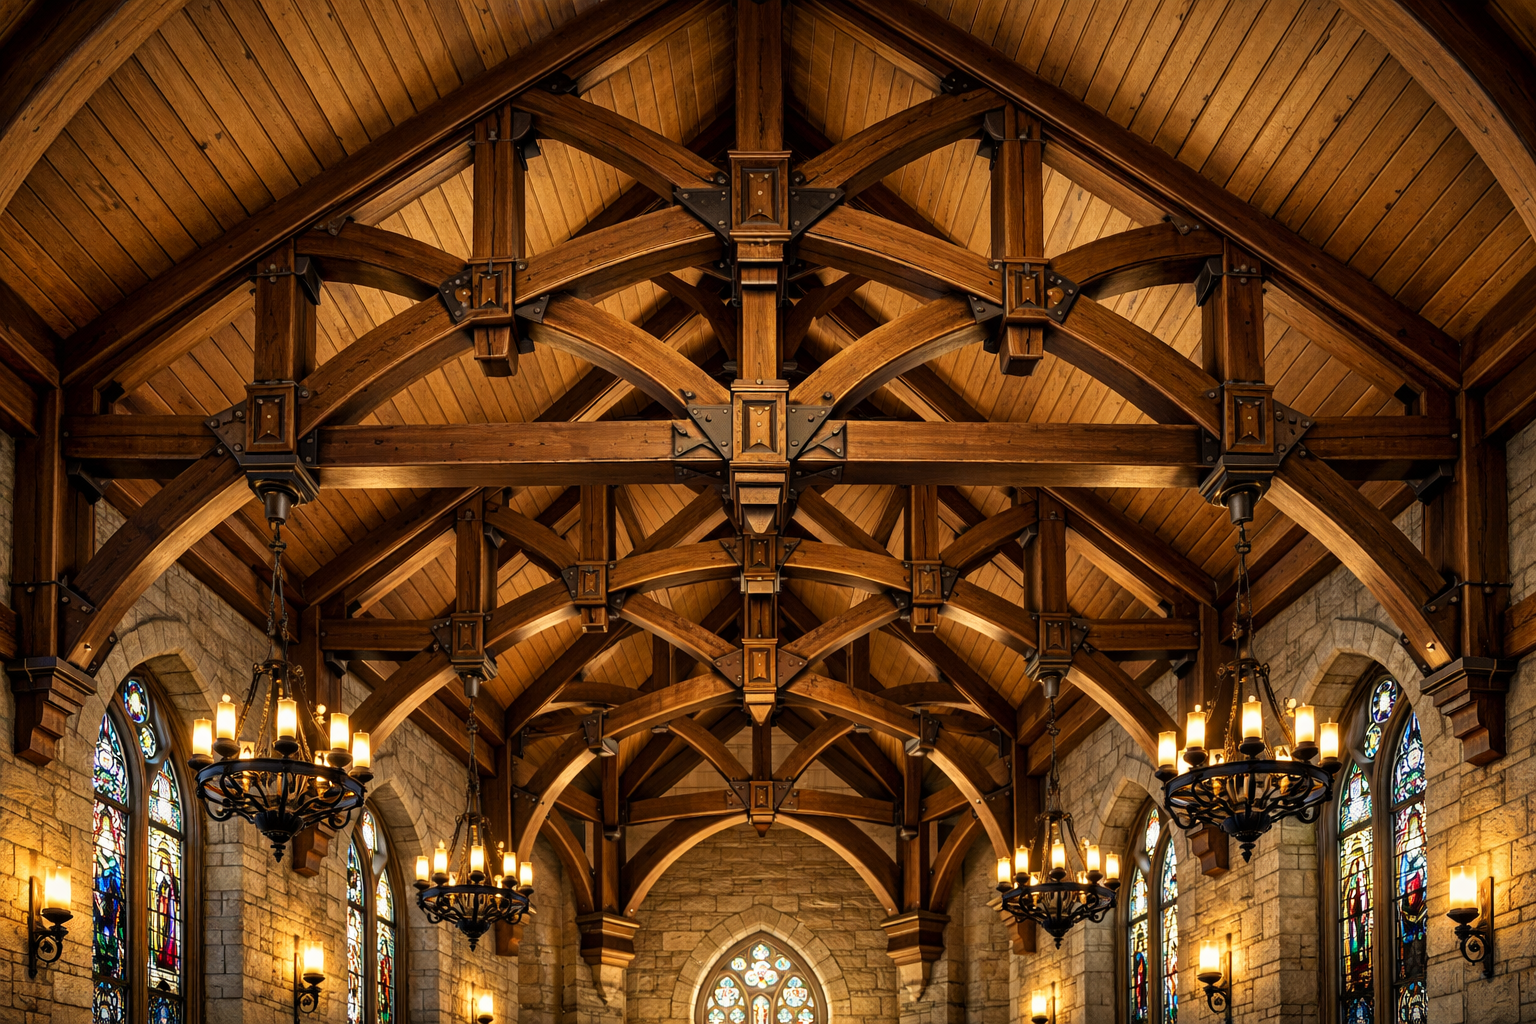
Trusses: Structural Elegance with Box Beam Techniques
Trusses are triangular frameworks often seen in vaulted or cathedral ceilings. While traditional trusses are load-bearing, decorative box beam trusses can emulate this structural aesthetic without the heavy engineering requirements, making them perfect for adding a sense of grandeur to high-ceiling modern homes.
Common Truss Styles for Exposed Ceilings:
- King Post Truss: Features a central vertical post (king post) supported by two angled struts.
- Queen Post Truss: Similar to a king post but with two vertical posts, creating a wider span.
- Scissor Truss: Angled bottom cords create a vaulted interior ceiling while maintaining a flatter roofline.
Design Considerations for Trusses:
- Scale: The size of the truss should be proportionate to the room’s volume and ceiling height. Overly large trusses can overwhelm a space, while too small can look insignificant.
- Architectural Style: Trusses can range from rustic and chunky to sleek and modern. Match the design to your home’s aesthetic.
- Mock-ups: Consider creating a scaled-down mock-up or drawing to visualize the truss’s impact before fabrication.
Building Box Beam Trusses:
- Plan Detailed Joinery: Even if purely decorative, precise angles and cuts are essential for a professional look. Traditional joinery can be simulated for aesthetic appeal.
- Pre-Assemble Components: Fabricate the individual box beam elements (top chords, bottom chords, vertical posts, diagonal web members).
- Assemble on the Ground (if possible): For simpler trusses, assembling on the floor ensures accuracy before lifting.
- Lift and Secure: Carefully lift the assembled or partially assembled truss into place and securely fasten it to ceiling joists or blocking.
Cathedral Designs: Soaring Heights with Box Beams
Cathedral ceilings, with their high, sloped designs, naturally lend themselves to exposed beams. Box beam techniques allow for the creation of massive, imposing beams that enhance the feeling of spaciousness and architectural drama without the excessive weight of solid lumber.

Design Considerations for Cathedral Ceilings:
- Beam Orientation: Typically, beams run parallel to the roofline, following the slope.
- Apex Treatment: How the beams meet at the highest point (apex) is critical. This can be a simple mitered joint, or a more elaborate king post or decorative boss.
- Lighting Integration: The depth of box beams provides an excellent opportunity to integrate recessed lighting or uplighting, enhancing the architectural features.
Building Box Beams for Cathedral Ceilings:
- Accurate Angle Cuts: The slopes of cathedral ceilings require precise angle cuts for all beam ends to ensure tight, professional-looking joints.
- Secure Blocking: Ensure adequate blocking is installed within the ceiling joists to provide solid fastening points for the beams.
- Lifting and Temporary Support: Due to the height and angles, lifting and temporarily supporting long beams can be challenging. Scaffolding and extra hands are often necessary.
Box Beam Techniques: Fabrication and Installation
The success of Complex Exposed Ceiling Beam Layouts: Grids, Trusses, and Cathedral Designs with Box Beam Techniques hinges on meticulous fabrication and secure installation.
Fabrication Steps for Box Beams
- Material Selection:
- Core: Plywood (minimum 3/4″), MDF, or even solid wood strips for stability.
- Veneer/Exterior: Choose a wood species that matches your aesthetic. Common choices include pine, oak, fir, or engineered wood veneers. Consider reclaimed wood mantels for inspiration on sourcing unique finishes.
- Cutting Components:
- Side Panels: Cut two pieces to the desired beam depth and length.
- Bottom Panel: Cut one piece to the desired beam width and length.
- Optional Top Panel/Stiffener: For very large beams or for hiding utilities, a top panel can be added, or internal blocking can serve as a stiffener.
- Assembly:
- Glue and Fasten: Apply high-quality wood glue along the edges where panels meet. Use screws (pre-drill to prevent splitting) or nails to secure the panels together. Clamping is essential for tight joints.
- Squareness: Ensure the beam remains perfectly square during assembly to prevent twisting or bowing.
- Finishing (Optional Before Installation): Applying a finish before installation can be easier for detailed work, especially if you’re using antique wood finishing techniques or rustic wood finishing techniques.
Installation Best Practices
Installing complex beam layouts requires precision, patience, and a focus on safety.
- Planning and Layout:
- Measure Twice, Cut Once: This adage is particularly true for ceiling beams.
- Snap Chalk Lines: Use a chalk line to mark the exact position of each beam on the ceiling.
- Locate Joists: Use a stud finder to locate existing ceiling joists. These are your primary fastening points.
- Add Blocking: If joists don’t align with your beam layout, install additional blocking between joists to create secure attachment points.
- Attaching Beams:
- Initial Fastening: Start by attaching a sturdy cleat or ledger board to the ceiling along the chalk line. This provides a temporary resting place for the beam and helps align it.
- Secure with Lag Screws/Bolts: Drive long lag screws or structural screws through the top of the box beam directly into the ceiling joists or blocking. Use washers under screw heads for better holding power.
- Construction Adhesive: Apply a strong construction adhesive to the top edge of the beam before lifting it into place for extra bond.
- Temporary Supports: Use T-supports or a deadman support to hold beams in place while they are being fastened. This is crucial for long or heavy box beams.
- Intersections and Joinery:
- Mitered Joints: For corners or intersections, precise mitered cuts ensure a seamless look.
- Lap Joints/Dadoes (Faux): For a more authentic look in grid patterns, you can create shallow dadoes or lap joints in the top of intersecting beams to give the illusion of structural interlocking.
- Concealed Fasteners: Where possible, use pocket screws or other concealed fasteners for a clean finish.
- Finishing:
- Sanding: Thoroughly sand all surfaces to prepare for finishing.
- Stain/Paint: Apply your chosen stain, paint, or clear coat. This is where your chosen maple wood finishing techniques or other species-specific methods come into play.
- Caulking: Fill any small gaps between beams and the ceiling with paintable caulk for a polished appearance.
Conclusion
The allure of exposed ceiling beams in 2026 is undeniable, and with the advancements in box beam techniques, creating Complex Exposed Ceiling Beam Layouts: Grids, Trusses, and Cathedral Designs with Box Beam Techniques is more achievable than ever before. Whether you’re aiming for the geometric precision of a grid, the structural elegance of a truss, or the soaring drama of a cathedral design, box beams offer a lightweight, cost-effective, and versatile solution.
For the passionate DIYer or small workshop owner, this opens up a world of architectural possibilities, transforming ordinary ceilings into extraordinary focal points. By understanding the design principles, mastering fabrication techniques, and employing careful installation methods, you can elevate your home’s aesthetic and value. So, go ahead, look up, and envision the masterpiece waiting to be crafted above you.
Actionable Next Steps
- Sketch Your Design: Begin by drawing out your desired beam layout, considering the room’s dimensions and existing architectural style.
- Calculate Materials: Determine the number and dimensions of box beams needed, factoring in material for the core and exterior veneer.
- Gather Tools: Ensure you have the necessary tools for accurate cutting, assembly, and safe installation (e.g., miter saw, table saw, clamps, stud finder, lag screws, T-supports).
- Practice Joins: For complex intersections, practice cuts on scrap material to perfect your technique before cutting your final beam components.
- Consult a Professional (If Needed): For structural concerns or very complex installations, consider consulting a structural engineer or experienced contractor.
