

Dive into the captivating world of wood turning with this beginner-friendly guide, covering essential safety, basic cuts, and step-by-step instructions for your first beautiful wooden bowl. Wood turning is an ancient craft that allows you to transform raw lumber into stunning, symmetrical objects limited only by your imagination. For those seeking an engaging and rewarding woodworking hobby, an Introduction to Wood Turning for Beginners: Mastering Basic Lathe Operations and Simple Bowl Projects offers the perfect starting point. This comprehensive article will equip you with the fundamental knowledge and practical steps needed to embark on your woodturning journey in 2026.
Turning wood on a lathe involves spinning a piece of wood at high speeds while using specialized tools to shape it. It’s a therapeutic and creative process that quickly yields tangible results. From elegant bowls to intricate spindles, the possibilities are vast. This guide focuses on getting you comfortable with the basics, ensuring a safe and enjoyable experience as you learn to master basic lathe operations and complete simple bowl projects.

Key Takeaways
- Safety First: Always prioritize personal protective equipment (PPE) and understand your lathe’s functions before beginning any project.
- Lathe Essentials: Familiarize yourself with the main components of a wood lathe and their roles in the turning process.
- Basic Cuts are Foundation: Mastering fundamental cutting techniques like roughing, planing, and shaping is crucial for all subsequent projects.
- Simple Bowl Project: Follow a structured approach to turn your first functional and aesthetically pleasing wooden bowl.
- Practice and Patience: Wood turning requires consistent practice and patience to develop skill and achieve desired results.
Setting Up for Success: Essential Equipment and Safety for Introduction to Wood Turning for Beginners
Before any wood begins to spin, proper setup and an unwavering commitment to safety are paramount. Entering the world of wood turning requires understanding both the tools of the trade and the protective measures that safeguard against injury. This section will guide you through selecting your basic equipment and establishing a safe workspace.
Essential Equipment for Beginners
Starting with the right equipment makes the learning process smoother and more enjoyable. Here’s what you’ll need:
- Wood Lathe: For beginners, a midi or mini lathe is ideal. These are compact, more affordable, and sufficient for small to medium-sized projects like bowls up to 10-12 inches in diameter. Look for models with variable speed control, which is crucial for different turning stages and wood types.
- Turning Tools (Chisels): A basic set typically includes:
- Roughing Gouge: For quickly reducing square blanks to round.
- Spindle Gouge: For shaping curves and details on spindle work.
- Bowl Gouge: Essential for shaping the exterior and hollowing the interior of bowls.
- Scraper: For refining surfaces and creating smooth finishes.
- Parting Tool: For cutting off excess wood or creating grooves.
- Chucks and Faceplates:
- Faceplate: A metal disk that screws onto the headstock spindle. The wood blank is then screwed onto the faceplate, providing a secure mount for bowl turning.
- Four-Jaw Chuck: A versatile accessory that grips the workpiece internally or externally, often used for re-chucking bowls to finish their bases.
- Live Center and Drive Center: The drive center holds the wood firmly at the headstock (spinning end), while the live center supports the other end from the tailstock, allowing it to rotate freely.
- Wood Blanks: Start with easy-to-turn woods like maple, cherry, or poplar. Ensure they are dry and free of defects.
- Sharpening System: Sharp tools are safe and effective tools. A basic grinding wheel or a dedicated sharpening jig is essential for maintaining tool edges.
- Finishing Supplies: Sandpaper in various grits, wood finishes (e.g., mineral oil, wax, lacquer), and shop towels.
For those looking to turn shop scraps into unique features, understanding different wood types and their turning properties can be beneficial. Check out our article on Turning Shop Scraps into Design Features: Mixed-Wood Techniques and Offcut Utilization for Zero-Waste Woodworking for inspiration.
Crucial Safety Precautions
Safety is non-negotiable in wood turning. The spinning wood and sharp tools present significant hazards if proper precautions are not followed.
<code>"The spinning wood and sharp tools in wood turning present significant hazards if proper precautions are not followed."
</code>- Personal Protective Equipment (PPE):
- Face Shield: Absolutely mandatory. This protects your eyes and face from flying debris, wood chips, and potential tool kickbacks. Goggles are not sufficient.
- Dust Mask/Respirator: Wood dust can cause respiratory issues. A good quality dust mask or respirator is vital, especially when sanding.
- Hearing Protection: Lathes can be noisy. Earplugs or earmuffs protect your hearing.
- No Loose Clothing or Jewelry: Loose items can get caught in the spinning lathe, causing serious injury. Tie back long hair.
- Workspace Safety:
- Clear Area: Keep the area around your lathe clear of clutter and tripping hazards.
- Good Lighting: Adequate lighting is crucial for visibility, especially when making fine cuts.
- Dust Collection: A dust collection system or shop vacuum is highly recommended to manage wood dust.
- Machine Safety:
- Read the Manual: Understand your lathe’s specific operation, safety features, and maintenance requirements.
- Secure Workpiece: Always ensure the wood blank is securely mounted to the faceplate or between centers before starting the lathe.
- Check for Cracks/Defects: Inspect wood blanks for cracks, knots, or inclusions that could cause the wood to fly apart during turning.
- Correct Speed: Start at a low speed, especially with large or out-of-balance workpieces, and gradually increase as needed.
- Tool Rest Position: Position the tool rest as close as possible to the workpiece (about 1/8 inch or 3mm) and slightly below center to prevent tools from being pulled in or kicked back.
- Always Turn Off Lathe: Never adjust the tool rest or measure the workpiece while the lathe is running.
Mastering Basic Lathe Operations and Cuts for Your First Project
With your safety gear on and the lathe ready, it’s time to learn the fundamental operations and cutting techniques that form the core of wood turning. This section covers mounting wood, starting the lathe, and executing essential cuts.
Mounting the Wood Blank
For a simple bowl project, you’ll typically start with a square block of wood mounted on a faceplate.
- Prepare the Blank: If starting with a rough sawn blank, it helps to cut the corners off with a bandsaw or jigsaw to make it more octagonal. This reduces vibration and strain on the lathe initially.
- Attach Faceplate: Center the faceplate on one side of your wood blank and secure it with appropriate screws. Ensure the screws are long enough for a firm hold but won’t interfere with your final project design.
- Mount to Lathe: Screw the faceplate (with the wood blank attached) onto the headstock spindle of your lathe.
- Position Tailstock (Optional for bowls): For initial roughing of a square blank, bringing the tailstock up with a live center to support the workpiece can provide added stability, especially if the blank is out of balance. Remove it once the blank is mostly round.
Basic Lathe Operations and Cutting Techniques
Once the wood is securely mounted, you can begin the turning process. Remember to always start at the lowest speed and gradually increase.
- Roughing to Round:
- Tool: Roughing Gouge or a strong Bowl Gouge.
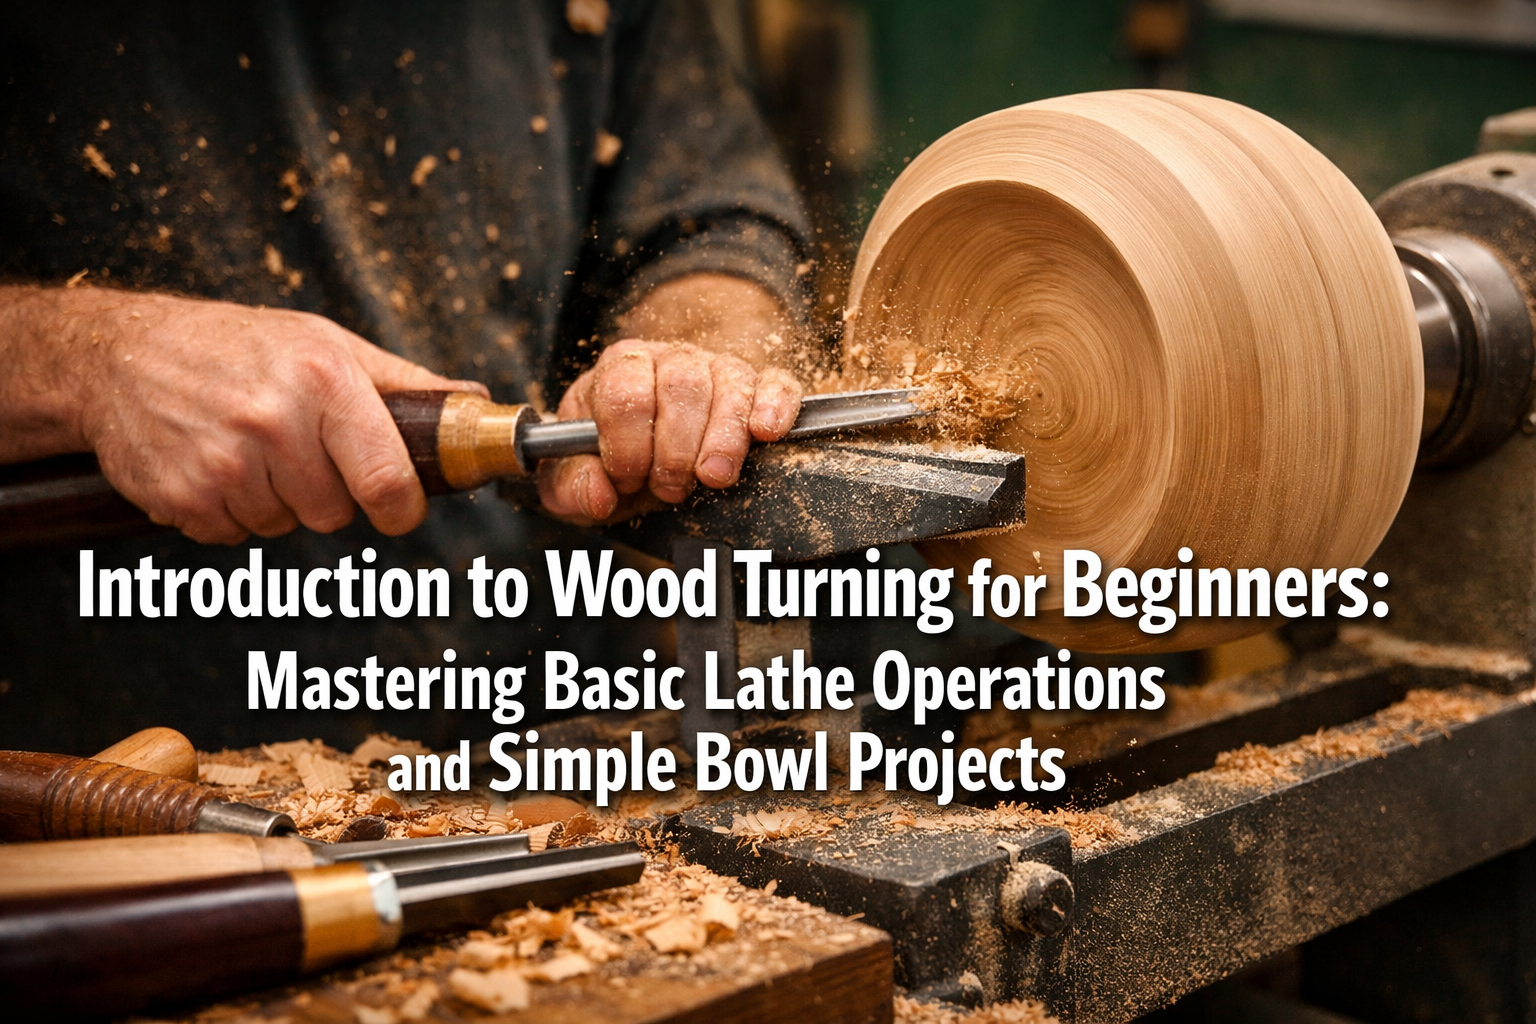
- Technique: With the lathe at a low speed, gently bring the tool to the spinning wood, starting from the outside edge and working inwards. Take light, shearing cuts to remove the corners and turn the square blank into a cylinder or a rough disc shape. Keep the handle low and the flute of the gouge pointing in the direction of the cut.
- Forming the Exterior (Bowl Shape):
- Tool: Bowl Gouge.
- Technique: Once the blank is round, you can begin to shape the exterior of your bowl. Use smooth, sweeping cuts, moving from the smaller diameter (towards the tailstock end, if still present, or the center of the face of the blank) towards the larger diameter (rim). Focus on creating a pleasing curve. Adjust your tool rest to maintain close proximity to the work.
- Tip: Think about the “cuff” of wood you are removing, aiming for consistent curls rather than dust.
- Creating a Tenon or Recess for Chuck (if finishing the bottom):
- Tool: Parting Tool or a Bowl Gouge.
- Technique: If you plan to finish the bottom of the bowl after turning the interior, you’ll need to create a way to re-mount it. This often involves turning a small tenon (a raised ring) or a recess (a small indentation) on the bottom of the bowl that your chuck can grip.
- Hollowing the Interior:
- Tool: Bowl Gouge or specialized Hollowing Tools.
- Technique: Start at the center of the bowl’s face and gradually work outwards, creating the interior curve. Begin with shallow cuts and slowly increase depth, aiming for an even wall thickness. Keep your handle low and your body positioned to avoid kickback. As you get deeper, the force on the tool increases, so maintain a firm grip.
- Refining and Smoothing:
- Tool: Scraper or a finely ground Bowl Gouge.
- Technique: Use scrapers with the tool rest set slightly above center to gently remove tool marks and achieve a smoother surface. For a very clean cut, a sharp, properly presented gouge can often produce a surface requiring minimal sanding.
Learning these basic operations forms the bedrock for more advanced projects. For a deeper dive into various projects, consider exploring the Ultimate Guide to Wood Lathe Turning: Pens, Bowls, and Advanced Curve Designs.
Your First Simple Bowl Project: Step-by-Step for Introduction to Wood Turning for Beginners
Turning your first bowl is an incredibly satisfying milestone. This section outlines the process for a basic wooden bowl, building on the techniques you’ve learned.
Project: A Small Wooden Utility Bowl
Materials Needed:
- Dry wood blank (e.g., maple, cherry, or poplar), 6″x6″x3″
- Faceplate and screws
- Bowl gouge, roughing gouge, parting tool, scraper
- Sandpaper (100, 150, 220, 320 grits)
- Wood finish (food-safe if for edibles)
Steps:
Prepare the Blank:
- Cut your chosen wood blank to approximately a square shape, slightly larger than your desired bowl diameter.
- Locate the center on one face and attach the faceplate securely with screws.
- Mount the faceplate (with blank) onto the headstock of your lathe.
- Position the tool rest about 1/8 inch away from the blank, slightly below the center line.
Roughing Out the Exterior:
- Start the lathe at a low speed.
- Using a roughing gouge, begin to turn the square blank into a round cylinder or disk. Take light cuts and slowly increase speed as the blank becomes more balanced.
- Once round, switch to a bowl gouge and start shaping the exterior curve of your bowl. Think about the overall form – a gentle curve from the rim to the base.
- Ensure the tool rest is always close to the wood and adjusted as the diameter of the turning changes.
Shaping the Foot/Tenon:
- Decide how you will hold the bowl for the second turning operation (to hollow the interior). You can create either a tenon (a projecting stub that fits into a chuck) or a recess (an indentation for chuck jaws to expand into) at the bottom of the bowl.
- Using a parting tool or a bowl gouge, carefully create this feature on the base of the bowl while it’s still attached to the faceplate. Make sure it’s sized correctly for your chuck.
- Important: Do not cut through to the faceplate! Leave a web of wood connecting the bowl to the faceplate until the exterior is fully shaped and sanded.
Sanding the Exterior:
- Once the exterior shape is pleasing, and you’ve refined it with a scraper, it’s time to sand.
- Turn the lathe to a low speed (or even off for finer grits).
- Start with 100 or 150-grit sandpaper to remove tool marks. Move the sandpaper back and forth across the turning, avoiding sanding in one spot.
- Progress through finer grits (220, 320) until the surface is smooth to the touch.
- Always wipe away dust between grits.
Re-chucking and Hollowing the Interior:
- Turn off the lathe. Remove the bowl from the faceplate by unscrewing it.
- Mount your four-jaw chuck onto the headstock.
- Carefully secure the bowl in the chuck, using the tenon or recess you created. Ensure it’s centered and held firmly.
- Position your tool rest for hollowing the interior, again about 1/8 inch from the rim and slightly below center.
- Start the lathe at a low speed.
- Using a bowl gouge, begin hollowing the interior from the center outwards. Take light cuts, guiding the flute of the gouge to control the depth and curve.
- Work slowly, aiming for an even wall thickness. You can use calipers to measure thickness as you go.
Sanding and Finishing the Interior:
- Once the interior is hollowed to your satisfaction, refine any tool marks with a scraper.
- Sand the interior just as you did the exterior, progressing through grits from 150 to 320.
- Apply your chosen wood finish. For a simple utility bowl, mineral oil or a beeswax/mineral oil blend is a good, food-safe option. Apply while the lathe is spinning slowly, allowing the friction to help penetrate the wood. Buff off excess.
Parting Off and Finishing the Foot:
- With the bowl’s interior finished and sanded, turn off the lathe.
- Carefully remove the bowl from the chuck.
- The small tenon or recess (if you left a small attachment point) will still be present. You can remove this by hand-sanding or, with practice, by carefully cutting it off on the lathe with a jam chuck.
- Sand and finish the bottom of the bowl to complete your project.
Congratulations on turning your first bowl! This foundational project opens the door to countless possibilities. If you enjoyed this, you might be interested in creating more Wooden Fruit Bowls: Lathe-Turned and Segmented Builds for Kitchen Statement Pieces or even exploring Profitable Woodworking for Beginners: Building and Selling High-Demand Small Projects.
Conclusion
Embarking on the journey of wood turning with an Introduction to Wood Turning for Beginners: Mastering Basic Lathe Operations and Simple Bowl Projects is a deeply rewarding experience. By prioritizing safety, understanding your equipment, and diligently practicing basic cuts, you can transform raw timber into beautiful, functional works of art. The creation of your first simple wooden bowl is not just about the finished product; it’s about the satisfaction of mastering a new skill, the rhythm of the lathe, and the unique connection to the material.

Remember that wood turning, like any craft, thrives on practice and patience. Don’t be discouraged by initial imperfections; each cut, each project, refines your technique and deepens your understanding. As you gain confidence, you’ll find yourself exploring more complex forms and challenging yourself with different wood types. The world of wood turning is vast and continually inspiring. So, keep turning, keep learning, and enjoy the creative process!
Actionable Next Steps:
- Review Safety Protocols: Re-read the safety section and ensure your workshop and practices are up to standard.
- Practice Tool Sharpening: A sharp tool is key. Dedicate time to learning and practicing effective sharpening techniques.
- Experiment with Different Woods: Try turning small pieces of various woods to understand their unique characteristics.
- Join a Community: Connect with local woodworking clubs or online forums. Sharing knowledge and experience is invaluable.
- Consider Further Learning: Explore advanced techniques through books, videos, or workshops to expand your skills beyond basic bowl projects.
References
- Raffan, R. (2001). Turning Wood. Taunton Press.
- Conover, J. (2010). Woodturning for the Fun of It. Fox Chapel Publishing.
