
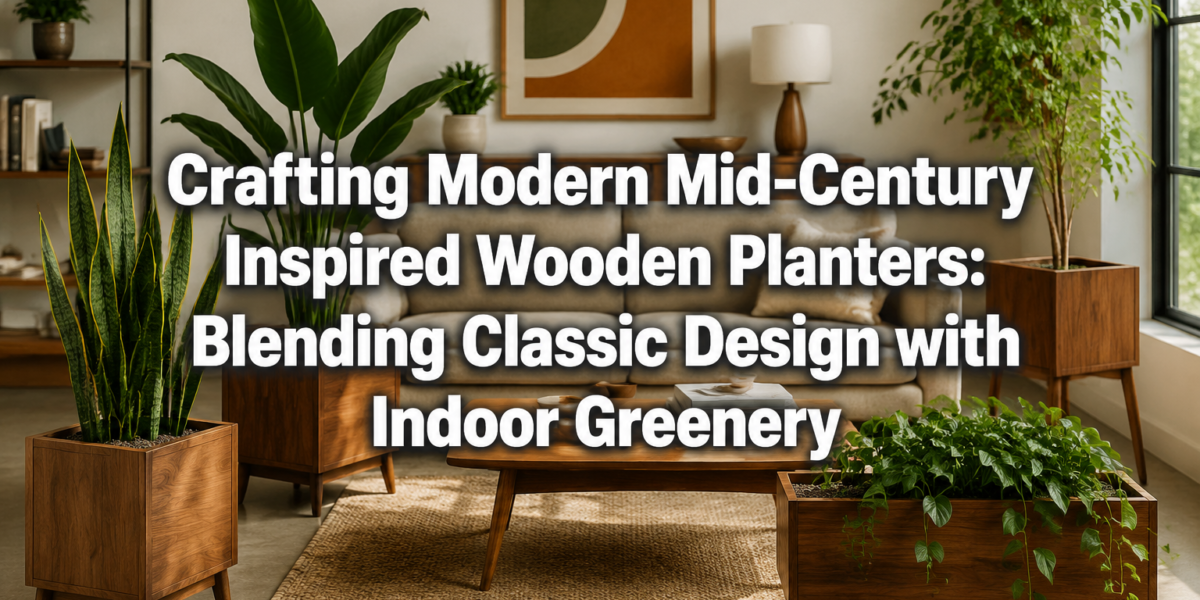

The resurgence of biophilic design, which integrates nature into built environments, has made indoor greenery more popular than ever. In 2026, one of the most stylish ways to showcase these botanical beauties is through crafting modern mid-century inspired wooden planters, blending classic design with indoor greenery. This timeless aesthetic, characterized by clean lines, organic shapes, and a focus on natural materials, provides the perfect complement to lush houseplants, transforming ordinary spaces into serene, sophisticated havens. These planters are not just containers; they are integral design elements that elevate the entire room’s ambiance.
Key Takeaways

- Mid-century modern design principles, emphasizing simplicity and natural materials, are ideal for enhancing indoor plant displays.
- Selecting the right wood and joinery techniques is crucial for creating durable, aesthetically pleasing planters that embody the mid-century look.
- Proper finishing and drainage are essential for the longevity of both the planter and the plant.
- DIY wooden planters offer a sustainable and customizable way to integrate iconic design into your home.
- Crafting modern mid-century inspired wooden planters is an achievable project for woodworkers of varying skill levels.
Embracing Mid-Century Modern Aesthetics in Planter Design
The mid-20th century, roughly from the 1930s to the 1960s, gave birth to a design movement celebrated for its functional elegance and enduring appeal. Mid-century modern (MCM) aesthetics prioritize simplicity, clean lines, and a harmonious relationship with nature. When applied to planters, this translates into designs that are often elevated on slender legs, feature geometric forms, and highlight the natural beauty of the wood itself. This commitment to form and function makes crafting modern mid-century inspired wooden planters a rewarding endeavor.
A key characteristic of MCM design is its use of natural materials. Wood, in particular, was a favorite, chosen for its warmth, texture, and ability to be shaped into minimalist forms. Think teak, walnut, or oak – woods that offer rich tones and distinctive grain patterns. These materials, combined with thoughtful design, allow for planters that are both sturdy and visually light, capable of blending seamlessly into various interior styles, from contemporary minimalist to eclectic.
Consider the classic bullet planter or the iconic planter on a stand. These designs elevate the plant, literally and figuratively, making it a focal point rather than just an accessory. The elevation also serves a practical purpose, aiding in air circulation around the plant and allowing for easier watering without stooping. The goal is to create a piece that is both a beautiful home for your plant and a statement of sophisticated design.
Essential Materials and Tools for Crafting Modern Mid-Century Inspired Wooden Planters
Embarking on a woodworking project, especially one focused on specific aesthetics like mid-century modern, requires careful selection of materials and tools. The right choices ensure both the authenticity of the design and the durability of the finished product.
Wood Selection: The Foundation of Your Planter
The choice of wood is paramount for achieving that distinctive mid-century look. Here’s a breakdown of popular options:
- Walnut: Prized for its rich, dark brown color and elegant grain. It’s a premium choice that exudes sophistication.
- Teak: Known for its golden-brown hue, durability, and natural resistance to moisture, making it excellent for planters, though often more expensive.
- Oak (Red or White): A classic, strong, and readily available wood. White oak, with its subtle grain and lighter color, can be stained to mimic other woods.
- Maple: Offers a lighter, creamier tone with a fine, even grain, perfect for a more understated look or for painting.
- Plywood (Baltic Birch): For interior planter boxes that will be hidden or clad, high-quality plywood can be a cost-effective and stable option.
When sourcing wood, look for straight, knot-free pieces that complement your desired aesthetic. The natural grain should be a feature, not an afterthought. For sustainability, consider sourcing and restoring urban harvested and reclaimed wood which can add unique character and an eco-friendly dimension to your project.
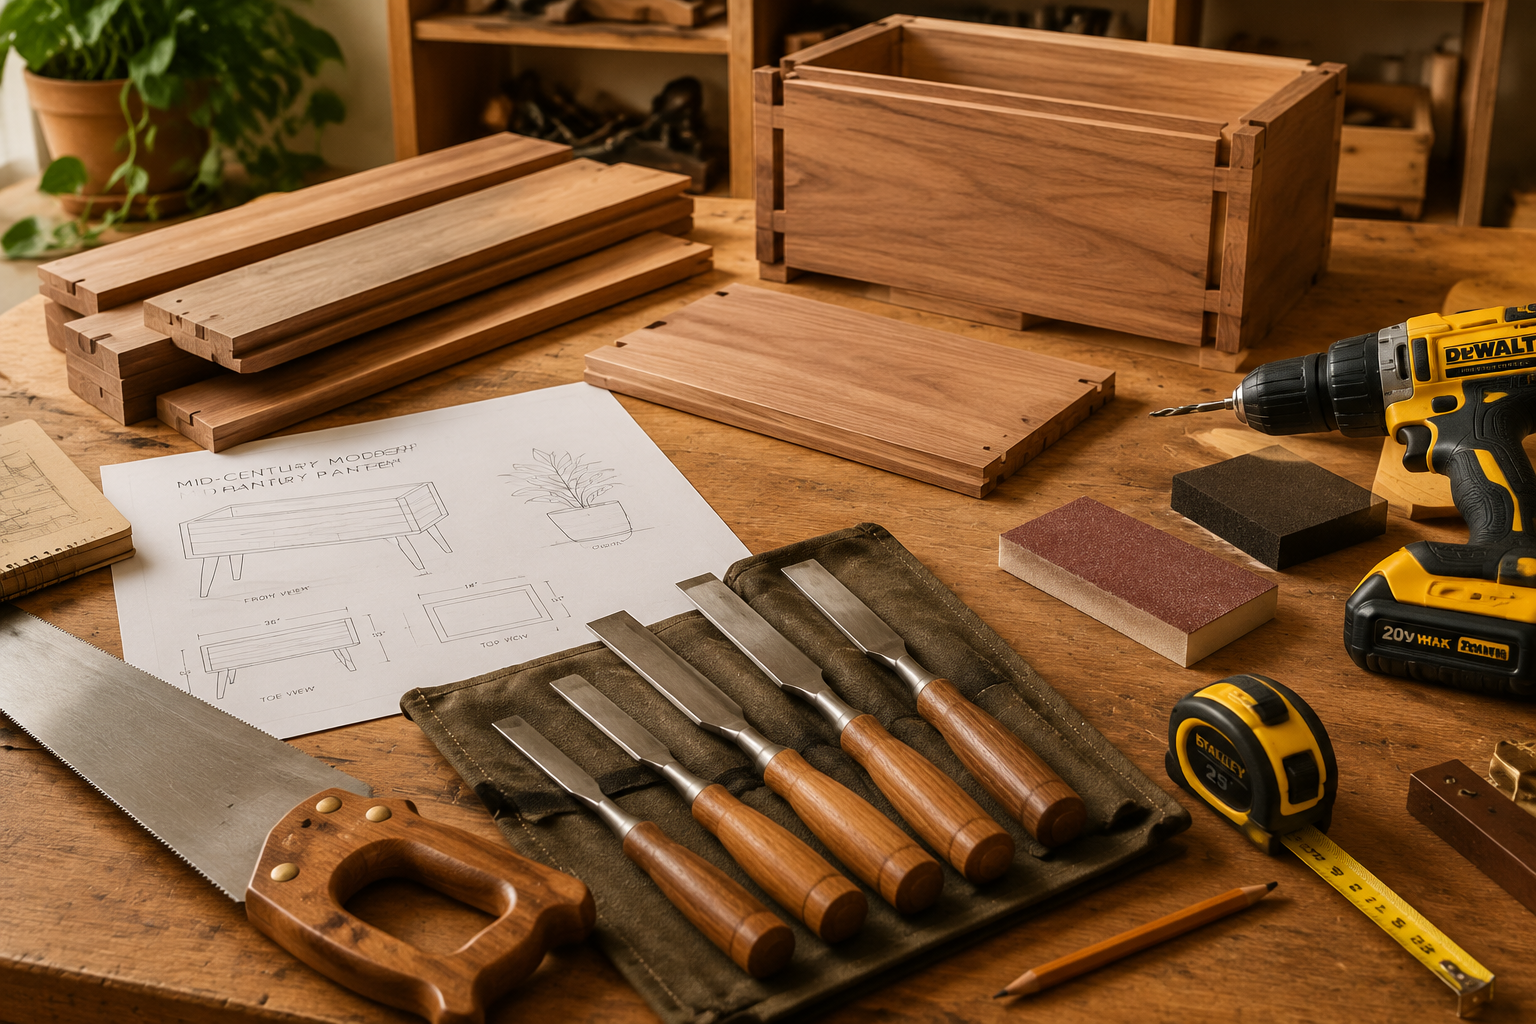
Tools for Precision and Craftsmanship
Even simple designs benefit from precise cuts and secure joinery. You don’t need a professional workshop, but certain tools will make the process smoother and the results more professional.
Hand Tools:
- Measuring Tape & Ruler: Accuracy is key.
- Pencils: For marking cuts.
- Hand Saw: A Japanese pull saw or a fine-toothed panel saw for precise cuts.
- Chisels: For cleaning up joints and fine-tuning.
- Sanding Blocks & Sandpaper: Essential for smooth finishes.
Power Tools (Optional but Recommended):
- Miter Saw or Table Saw: For accurate crosscuts and rip cuts. These will dramatically improve efficiency and precision.
- Drill/Driver: For pilot holes and assembly with screws.
- Orbital Sander: Speeds up the sanding process significantly.
- Router: Useful for creating dados, rabbets, or decorative edges, especially if you’re interested in mastering the router table.
- Safety Gear: Always wear safety glasses, hearing protection, and a dust mask.
Remember, the quality of your tools influences the quality of your work. Investing in decent tools, even for simple projects like these, pays off in the long run.
Designing and Building Your Mid-Century Inspired Planter
The beauty of crafting modern mid-century inspired wooden planters lies in their often straightforward design, which belies their significant aesthetic impact. This section will guide you through design considerations, joinery techniques, and the construction process.
Design Principles: Simplicity and Function
Mid-century modern planters typically adhere to a few core design principles:
- Clean Lines: Avoid excessive ornamentation. The form itself should be the decoration.
- Geometric Shapes: Squares, rectangles, and cylinders are common. Legs are often angled or tapered, adding dynamic visual interest.
- Elevation: Raising the planter off the ground on a stand is a hallmark of MCM design. This makes plants more visible and integrates them into the room’s vertical space.
- Proportion: Ensure the planter’s size and height are appropriate for the plant it will hold and the space it will occupy. A tall plant in a short, wide planter can look disproportionate, and vice-versa.
Start with sketches. Explore different leg designs (splayed, straight, hairpin) and planter box shapes. Consider whether you want an open-slatted design or a solid box.

Joinery Techniques for Durability and Style
For modern mid-century inspired wooden planters, visible joinery can be a design feature, while hidden joinery creates a sleek, seamless look.
- Butt Joints with Fasteners: The simplest method, using wood glue and screws. For a cleaner look, counter-sink screws and plug the holes with wood dowels or matching wood putty.
- Rabbet Joints: Create a strong, clean corner by cutting a groove along the edge of one piece of wood, into which the end of another piece fits. Ideal for square or rectangular planter boxes.
- Dado Joints: Similar to rabbets but cut across the grain, these are excellent for shelves or internal supports.
- Miter Joints: For a sophisticated look where end grain is hidden, mitered corners (cut at 45 degrees) are often used. These require precision but yield a very clean aesthetic. Reinforce with splines or biscuits. For more advanced joinery techniques, explore hand tool joinery for visible wood joints.
- Doweling: A method for joining pieces of wood together using small wooden pegs (dowels) and glue. It’s effective for strong, hidden joints in legs or frames. For a deeper dive into this, see our guide on doweling jigs.
For the planter legs, often a mortise and tenon joint or sturdy half-lap joint is used where the legs cross or join the planter box, providing structural integrity and visual appeal.
Construction Steps for a Basic Planter with Stand
Let’s outline the general steps for building a common mid-century design: a rectangular planter box on an elevated, crossed leg stand.
- Measure and Cut Wood: Based on your design, cut all pieces to size for the planter box and the stand legs. Ensure all cuts are square and accurate.
- Assemble the Planter Box:
- Apply wood glue to the joint surfaces.
- Assemble the sides using your chosen joinery (rabbet or miter joints are common).
- Reinforce with screws or nails as needed, clamping firmly while the glue dries.
- Cut and attach the bottom panel. Crucially, drill several drainage holes (at least 0.5-inch diameter) in the bottom. Without proper drainage, your plants will suffer.
- Construct the Stand:
- Cut the legs to length, often with an angle at the top for a splayed look.
- If using a crossed-leg design, cut half-lap joints where the legs intersect. This involves removing half the thickness from each leg where they cross, allowing them to sit flush.
- Assemble the legs with glue and screws.
- Ensure the top cross-members of the stand are perfectly sized to support the planter box securely.
- Sanding: Once the glue is dry, sand all surfaces. Start with a coarser grit (e.g., 80 or 100) to remove imperfections, then progressively move to finer grits (150, 220) for a smooth finish. Pay attention to edges and corners.
- Finishing: Apply your chosen finish. (Details in the next section).
Finishing, Plant Selection, and Maintenance for Your Wooden Planters
The final stages of crafting modern mid-century inspired wooden planters are just as important as the initial build. Proper finishing protects the wood and enhances its beauty, while careful plant selection ensures your greenery thrives in its new, stylish home.
Protecting Your Investment: Finishing Techniques
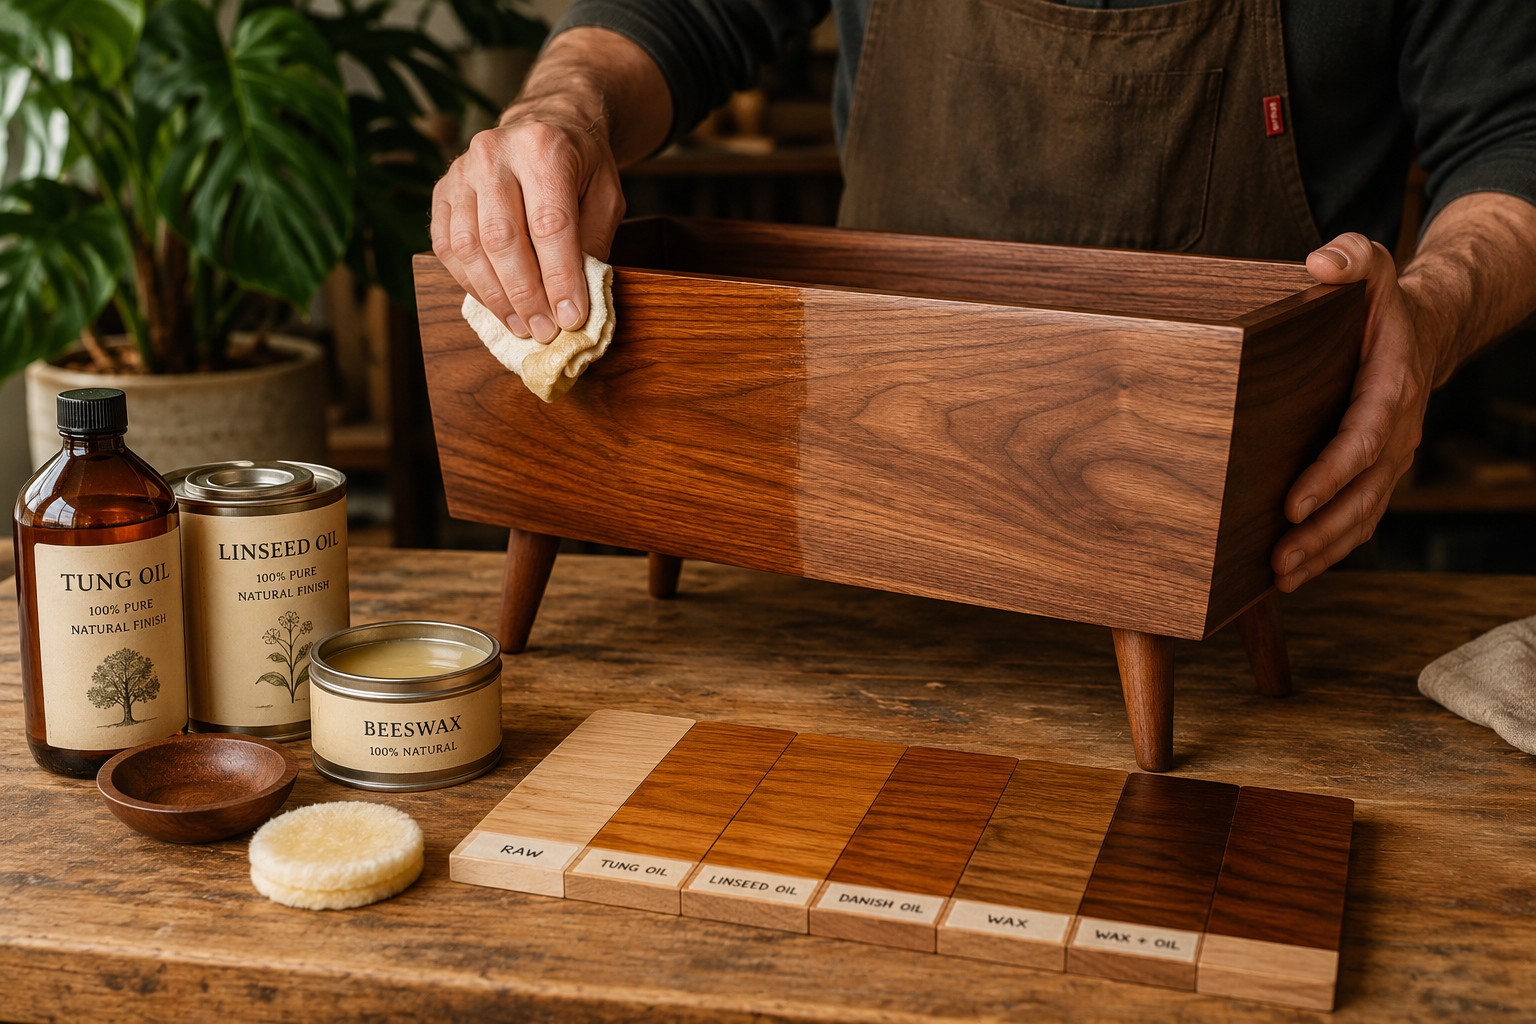
The right finish not only protects the wood from moisture and wear but also defines the planter’s aesthetic. For an authentic mid-century look, finishes that highlight the natural wood grain are preferred.
- Oils (Tung Oil, Linseed Oil, Danish Oil): These penetrate the wood, providing a natural, matte to semi-gloss finish that enhances the grain and offers good water resistance. They are easy to apply and repair. Multiple coats are typically needed.
- Polyurethane: A durable, clear protective coating that comes in various sheens (matte, satin, gloss). It forms a plastic-like barrier on the wood surface, offering excellent water and scratch resistance. For tips on application, especially in challenging conditions, consider our guide on applying polyurethane in high humidity.
- Varnish: Similar to polyurethane but often provides a warmer, richer look. Offers good protection, especially for outdoor use if formulated as marine varnish.
- Wax (Paste Wax): Provides a soft, low-sheen finish and adds a layer of protection. Often used over oil finishes for added depth and polish.
 Considerations for Planters:
- Water Resistance: Since planters will be exposed to moisture, choose a finish with good water-repelling properties. Oils and polyurethane are excellent choices.
- Food-Safe Finishes: If there’s any chance of edible plants coming into contact with the wood (though unlikely for external planters), ensure your finish is food-safe.
- Interior vs. Exterior: For outdoor planters, choose finishes specifically designed for exterior use, as they contain UV inhibitors and are more resistant to weathering.
Before applying any finish, ensure the wood is completely clean and dust-free. Always test your chosen finish on a scrap piece of the same wood to see how it looks and behaves.
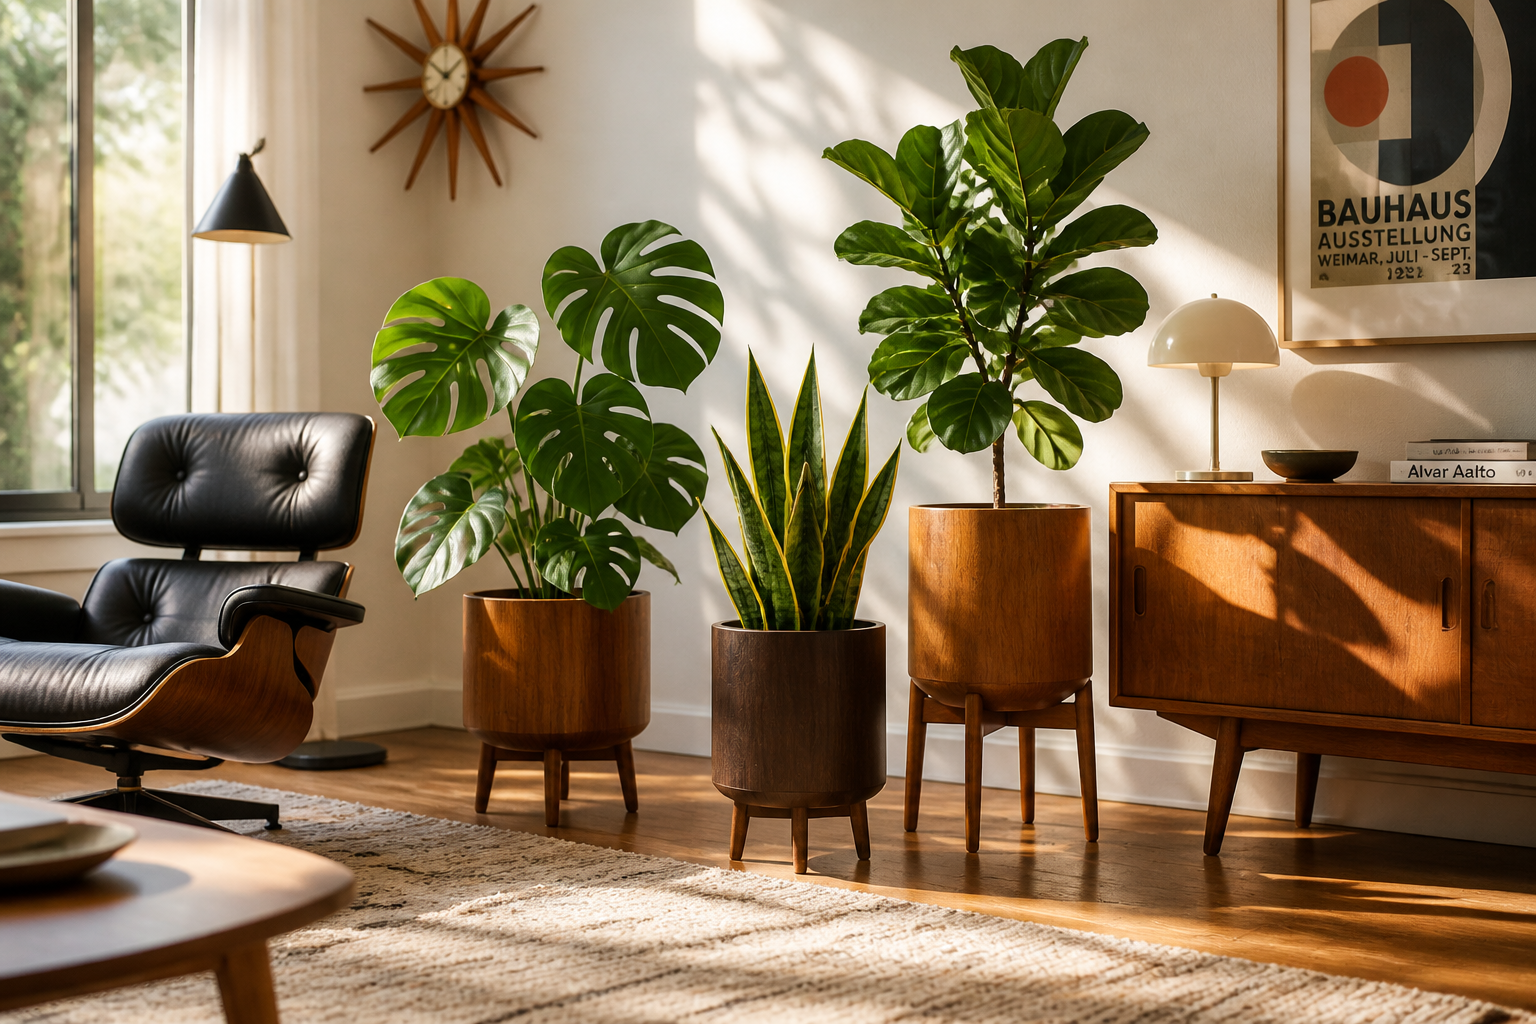
Choosing the Right Plants for Your Mid-Century Planters
The plants you select are the living heart of your mid-century inspired display. The goal is to choose plants that complement the clean lines and natural aesthetic of the planter.
- Architectural Plants: Look for plants with strong, distinct shapes that echo the geometric nature of MCM design.
- Fiddle Leaf Fig (Ficus lyrata): Large, dramatic leaves make a bold statement.
- Monstera Deliciosa: Iconic, broad, fenestrated leaves that are instantly recognizable.
- Snake Plant (Sansevieria trifasciata): Upright, sword-like leaves are perfect for vertical interest and minimalist appeal.
- ZZ Plant (Zamioculcas zamiifolia): Glossy, dark green leaves and an upright growth habit.
- Trailing Plants: For planters on higher stands, trailing plants can soften the edges and add a lush, cascading element.
- Pothos (Epipremnum aureum): Easy to care for with beautiful trailing vines.
- Philodendron (various species): Many varieties offer beautiful foliage and a graceful drape.
- Succulents/Cacti: For smaller planters, succulents and cacti offer low-maintenance options with unique textures and forms.
When pairing, consider the plant’s size at maturity relative to the planter. The plant should fit comfortably, with room to grow, without overwhelming the planter or appearing too small.
Maintenance and Longevity
Proper care will ensure your wooden planter and its green inhabitant thrive for years to come.
- Drainage is Non-Negotiable: Reiterate the importance of drainage holes in the planter bottom. Place a saucer or tray underneath the planter to catch excess water and protect your floors. Using a plastic nursery pot inside the wooden planter can offer an additional layer of protection and ease of watering.
- Watering Wisely: Avoid overwatering, which can lead to root rot and can also sit in the wood, potentially causing damage over time. Check soil moisture before watering.
- Cleaning: Dust your wooden planter regularly with a soft cloth. For spills, wipe immediately. Periodically, you might want to reapply your chosen wood finish, especially if it’s an oil, to maintain its protective qualities and luster.
- Sunlight and Environment: Place your planter and plant in a location that meets the plant’s light requirements. Ensure the room’s humidity and temperature are suitable for your specific plant species.
By thoughtfully selecting your wood, employing sound joinery, applying a protective finish, and choosing the right plant, you’re not just crafting a container – you’re creating a timeless piece of functional art that enhances your indoor environment and celebrates the beauty of both natural materials and living greenery.
Conclusion
Crafting modern mid-century inspired wooden planters is a deeply satisfying project that allows you to blend the iconic elegance of a bygone era with the vibrant, life-affirming presence of indoor greenery. From selecting the perfect walnut or teak to executing precise joinery and applying a protective finish, each step contributes to a final product that is both beautiful and functional. These planters are more than just homes for plants; they are meticulously designed pieces that embody warmth, simplicity, and a connection to nature, elevating any interior space in 2026.

By following the principles of mid-century modern design – emphasizing clean lines, natural materials, and thoughtful elevation – you can create planters that are truly enduring. The journey of making them is as rewarding as seeing your thriving plants nestled within. So, gather your tools, choose your wood, and embark on crafting a piece that brings classic design and natural beauty into your home.
