
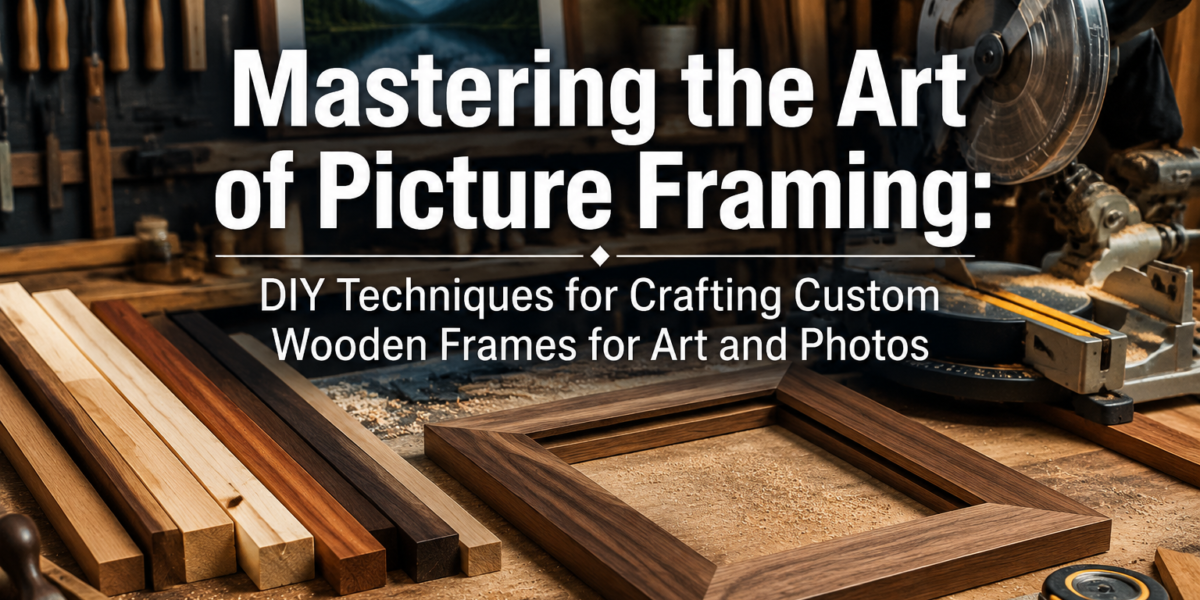

Creating a custom wooden frame transforms a piece of art or a cherished photograph from a simple display into a centerpiece, adding depth, character, and a personal touch that off-the-shelf options rarely achieve. Far from being an intimidating task, Mastering the Art of Picture Framing: DIY Techniques for Crafting Custom Wooden Frames for Art and Photos is an accessible journey for hobbyists and seasoned woodworkers alike. This comprehensive guide will walk you through the essential steps, from selecting the right materials to applying the perfect finish, ensuring your frames not only protect but also enhance the beauty of your chosen pieces in 2026.
Key Takeaways
- Material Selection is Crucial: Choose appropriate wood species and molding profiles that complement your artwork and home decor.
- Precision in Cutting: Accurate miter cuts are fundamental for strong, seamless frame joints.
- Effective Joinery: Understand various methods for assembling frame corners, with gluing and clamping being paramount.
- Thoughtful Finishing: Proper sanding, staining, painting, and sealing techniques elevate the frame’s aesthetic and durability.
- Art Protection: Learn how to correctly insert glazing, matting, artwork, and backing for optimal preservation.
Getting Started: Tools, Materials, and Design Principles for Mastering the Art of Picture Framing
Embarking on the journey of custom picture framing begins with understanding your tools, selecting the right materials, and appreciating fundamental design principles. This foundational knowledge ensures that each frame you craft is both structurally sound and aesthetically pleasing.

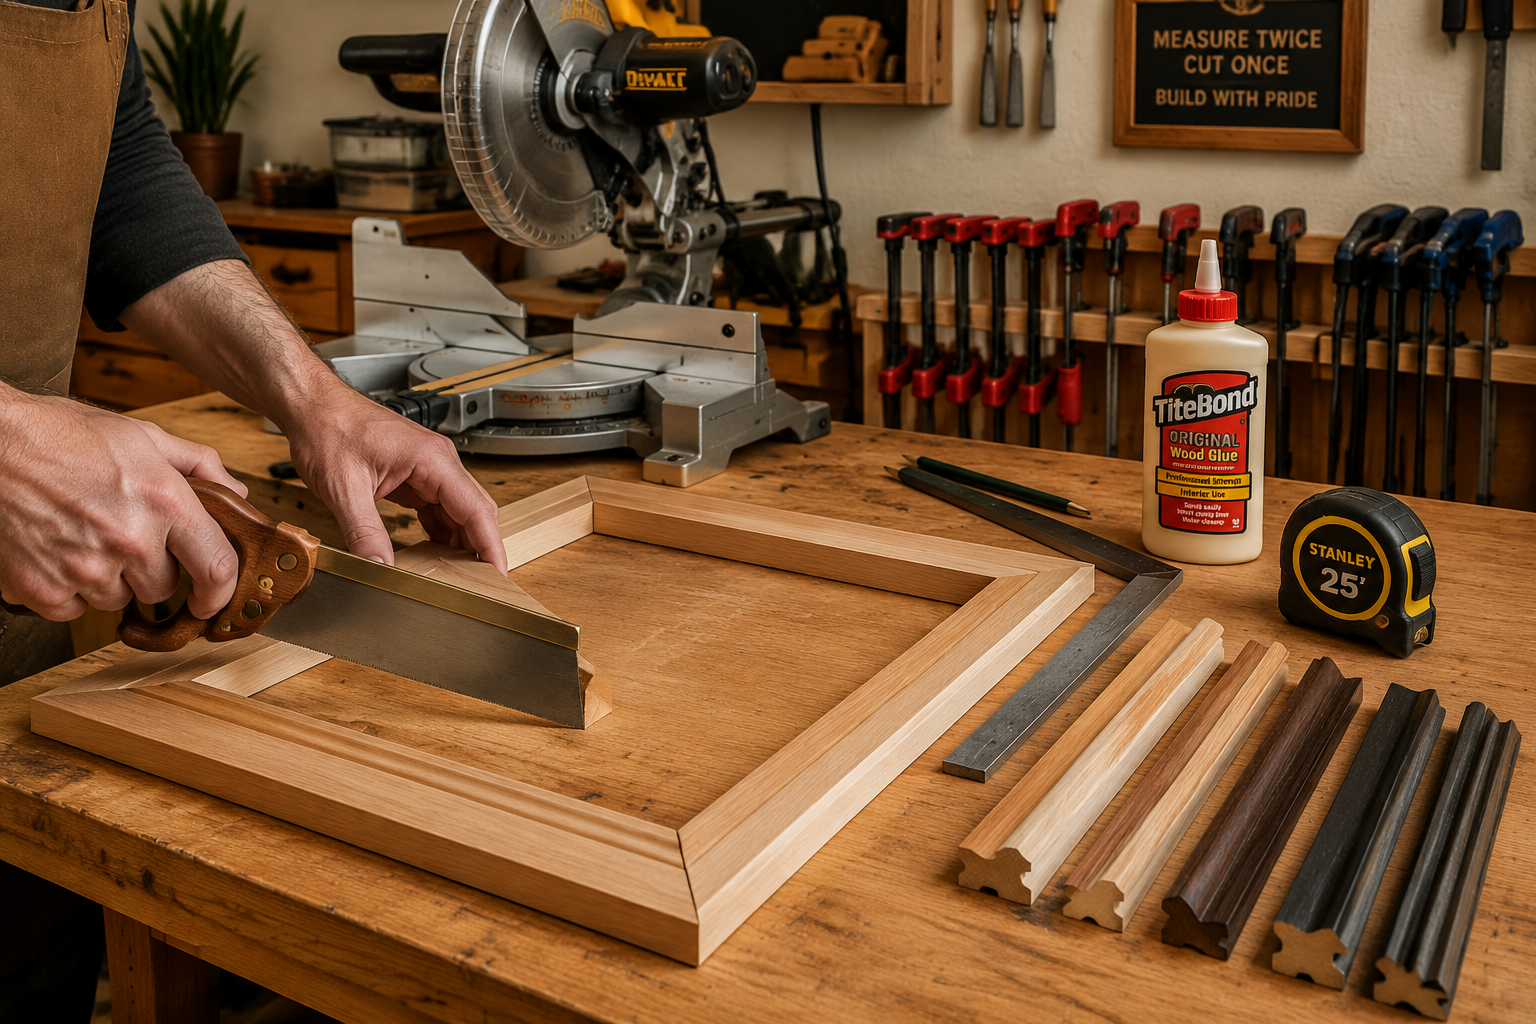
Essential Tools for Frame Making
A well-equipped workshop is key to successful picture framing. While some specialized tools can be acquired over time, several are essential from the outset:
- Miter Saw: Absolutely critical for making precise 45-degree angle cuts for frame corners. A good quality miter saw will significantly improve the accuracy of your joints.
- Measuring Tape/Ruler: For accurate measurements of your artwork and frame components.
- Clamps: Corner clamps or strap clamps are indispensable for holding frame pieces together securely while glue dries.
- Wood Glue: High-quality wood glue forms strong, durable joints.
- Sandpaper: Various grits (80, 120, 180, 220) for preparing wood surfaces and smoothing finishes.
- Finishing Supplies: Brushes, rags, stains, paints, and sealants (polyurethane, lacquer, wax) depending on your desired finish.
- Safety Gear: Safety glasses, hearing protection, and dust mask are non-negotiable.
For those interested in exploring different woodworking tools and techniques, resources like “The Essential Guide to Router Bits: Choosing the Right Profile,” can expand your repertoire beyond basic framing.
Selecting the Right Wood and Molding
The choice of wood greatly influences the final look and feel of your custom frame.
Consider the following:
- Wood Species:
- Pine: Affordable, easy to work with, takes stain well. Ideal for rustic or painted frames.
- Oak: Durable, strong grain, excellent for traditional or sturdy frames.
- Maple: Fine grain, very durable, takes finishes smoothly, perfect for modern, clean aesthetics.
- Cherry: Rich color that deepens with age, suitable for elegant, classic frames.
- Walnut: Dark, luxurious, and highly prized for its grain, often used for high-end pieces.
- Molding Profile: The shape of the wood strip chosen for the frame. Profiles range from simple flats to ornate carved designs. Consider the artwork’s style and the room’s decor. A simple flat profile might suit contemporary art, while a more intricate design could enhance a classical painting.
- Dimensions: The width and thickness of the molding should be proportionate to the artwork. A large artwork demands a wider, more substantial frame, while a smaller piece might be overwhelmed by a bulky frame.
Designing Your Custom Frame
Thoughtful design is a hallmark of Mastering the Art of Picture Framing: DIY Techniques for Crafting Custom Wooden Frames for Art and Photos.
- Complement the Artwork: The frame should enhance, not compete with, the art. Match its style, colors, and mood.
- Consider the Room: Think about the existing decor. A rustic frame might clash in a minimalist space.
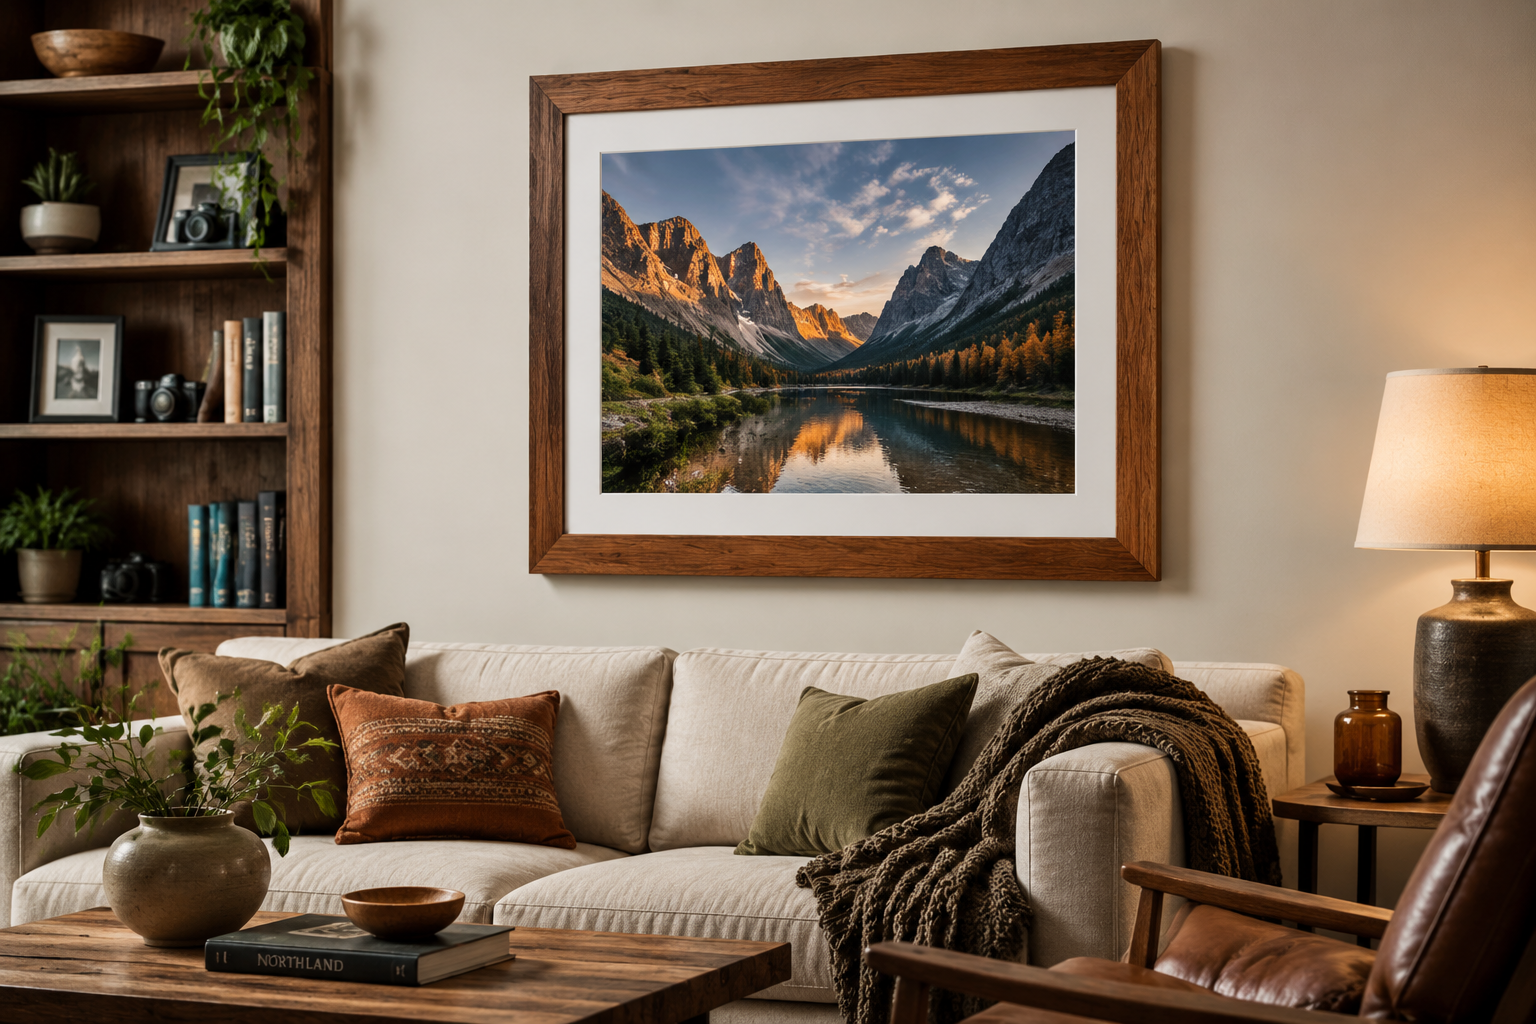
- Proportion and Balance: The frame’s dimensions should feel balanced against the artwork. The “golden ratio” (approximately 1.618) can be a useful guide for determining pleasing proportions.
- Matting: A mat (a border cut from thick paperboard) provides breathing room between the artwork and the frame, drawing the eye inward and protecting the art from touching the glazing. It also allows for greater flexibility in sizing.
The Craft of Construction: Cutting, Joining, and Finishing for Custom Wooden Frames
With your materials chosen and design principles in mind, the next phase involves the precise techniques of cutting, joining, and finishing that bring your custom frame to life.
Precise Cutting of Frame Components
Accuracy in cutting is paramount for seamless frame corners.
- Measure Accurately: Measure your artwork’s exact dimensions. Add twice the desired frame rail width (plus any matting thickness) to determine the overall length and width of the frame. Remember to account for the rabbet (the groove on the back of the molding where the art, mat, and backing sit).
- Set Up Your Miter Saw: Ensure your miter saw is perfectly calibrated to cut at a precise 45-degree angle. Even a slight deviation will result in gaps at the corners.
- Cut the Short Sides First: Cut the two shorter frame pieces. Measure from the inside edge of the rabbet to the inside edge of the rabbet.
- Cut the Long Sides: Repeat the process for the two longer frame pieces.
- Test Fit: Dry-fit the four pieces together to check for tight, gap-free corners. Adjust as necessary.
“Precision in every miter cut is the secret to a professional-looking frame. Take your time, measure twice, cut once.”
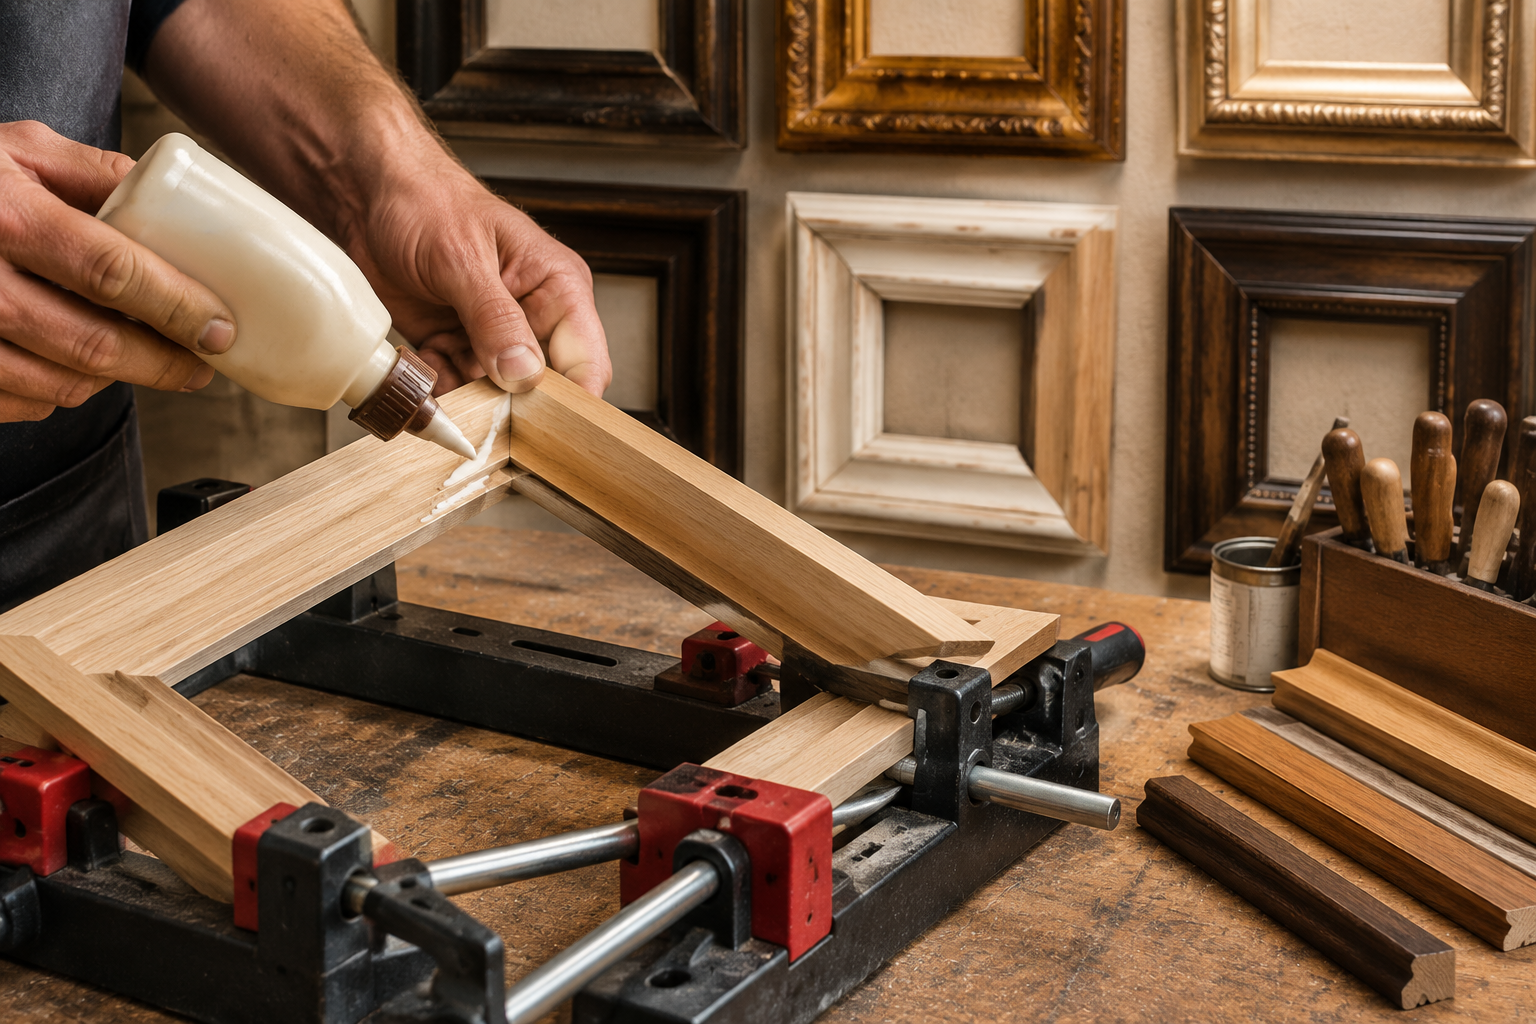
Joining the Frame Corners
Strong, invisible joints are crucial for the integrity and aesthetic of your frame.
- Gluing: Apply a thin, even coat of wood glue to both mating surfaces of each miter joint.
- Clamping: Use specialized frame clamps or strap clamps to hold the corners together firmly. Ensure the frame remains square as the clamps are tightened. Alternatively, a combination of corner clamps and bar clamps can be effective. Brad nails or V-nails (driven by a specialized V-nailer) can be used for added strength, especially for larger frames.
- Wipe Away Excess Glue: Immediately wipe off any squeeze-out glue with a damp cloth. Dried glue can prevent stain from penetrating evenly.
For those looking to delve deeper into joinery, our “Beginner’s Guide to Essential Woodworking Joints: When to Use Which” provides excellent insights into various techniques.
Sanding and Finishing Techniques
The finishing process transforms raw wood into a refined display piece.
- Sanding: Start with a coarser grit sandpaper (e.g., 80 or 120) to remove any imperfections or saw marks. Progress through finer grits (180, 220) to achieve a smooth surface. Always sand with the grain of the wood. For an even smoother finish, lightly dampen the wood with a wet rag (this raises the grain), let it dry, then sand lightly with the finest grit.
- Cleaning: Thoroughly remove all sanding dust using a tack cloth or compressed air.
- Finishing Options:
- Staining: Apply wood stain evenly with a brush or rag, wiping off excess according to the product instructions. This enhances the wood’s natural grain and color. For more advanced finishing, consider techniques discussed in “Wood Finishing Techniques”.
- Painting: For a solid color, apply primer first, then two thin coats of paint, sanding lightly between coats.
- Sealing/Protective Coat: Once dry, apply a protective finish such as polyurethane, lacquer, shellac, or wax. These protect the wood and provide durability. Choose a finish (matte, satin, semi-gloss, gloss) that complements the artwork and desired aesthetic. Water-based polyurethanes are often easier to work with and clean up.
Displaying Your Art: Matting, Glazing, Backing, and Hanging Your Custom Creation
The final stage of Mastering the Art of Picture Framing: DIY Techniques for Crafting Custom Wooden Frames for Art and Photos involves assembling the internal components and preparing your framed piece for display. This ensures both protection for your art and an elegant presentation.
Assembling Internal Components: Glazing, Matting, and Backing
Proper assembly is vital for protecting your artwork and presenting it professionally.
- Glazing (Glass or Acrylic):
- Purpose: Protects the artwork from dust, UV light, and physical damage.
- Types: Clear glass, anti-reflective glass, UV-protective glass, or acrylic (plexiglass). Acrylic is lighter and more shatter-resistant, making it ideal for larger frames or areas where safety is a concern.
- Cutting: If cutting your own glass, use a glass cutter and follow safety precautions. For acrylic, a scoring tool or a fine-tooth blade on a saw works. Many hardware stores offer custom cutting services.
- Matting:
- Purpose: Provides a visual border around the artwork, separating it from the glazing and preventing it from sticking. It also enhances the aesthetic appeal.
- Types: Acid-free mats are crucial for archival preservation, preventing damage to the artwork over time.
- Cutting: Mat cutters range from simple handheld tools to professional-grade machines. Measure carefully and ensure clean, bevel-cut edges.
- Artwork Insertion:
- Mounting: Secure the artwork to the backing board (or mat) using acid-free tape (e.g., linen tape or photo corners). Avoid glues or adhesives that might damage the art.
- Placement: Carefully position the artwork behind the mat opening, ensuring it is centered and straight.
- Backing Board:
- Purpose: Provides structural support and protection for the artwork.
- Materials: Acid-free foam core or sturdy mat board are common choices.
- Assembly: Place the glazing, mat, artwork, and backing board into the frame’s rabbet in that order. Ensure everything is clean and free of dust before sealing.
For additional projects that enhance your home decor, consider exploring “DIY Wooden Plant Stands: Elevate Your Indoor Garden with Cus”.
Securing the Back and Hanging Hardware
Once all internal components are in place, the final steps involve securing them and preparing the frame for hanging.
- Securing the Back:
- Flexi-points/Framing Points: These are small metal tabs that you insert into the back of the frame, bending them over the backing board to hold everything securely. A point driver tool makes this easy.
- Turn Buttons: Small rotating clips that screw into the back of the frame, allowing easy access to change artwork.
- Brads/Small Nails: Can be gently tapped in along the edge of the backing board for a secure fit.
- Dust Sealing (Optional but Recommended): Apply archival paper or specialized framing tape over the entire back of the frame, covering the gap between the backing board and the frame. This prevents dust and insects from entering and damaging the artwork.
- Attaching Hanging Hardware:
- D-Rings/Screw Eyes: Screw these into the side rails of the frame, typically one-third of the way down from the top.
- Picture Wire: Thread sturdy picture wire through the D-rings or screw eyes, leaving a slight slack. Ensure the wire is strong enough for the weight of the framed piece.
- Sawtooth Hangers: Small, toothed metal plates that screw into the top center of the frame, suitable for lighter frames.
- Wall Hooks: Use appropriate wall hooks (e.g., picture hooks, drywall anchors) depending on the weight of the frame and the type of wall.
Maintenance and Care
To ensure your custom wooden frames last for years:
- Clean Glazing: Use a soft, lint-free cloth and a non-ammonia glass cleaner (or a specialized acrylic cleaner for acrylic glazing). Spray cleaner onto the cloth, not directly onto the frame, to avoid seepage.
- Dust Frame: Gently dust the wooden frame with a soft cloth.
- Avoid Direct Sunlight: Prolonged exposure to direct sunlight can fade artwork and damage wood finishes.
- Control Humidity: Extreme fluctuations in humidity can cause wood to warp or crack.
- Inspect Hardware: Periodically check hanging hardware for wear and tear.
Conclusion
Mastering the Art of Picture Framing: DIY Techniques for Crafting Custom Wooden Frames for Art and Photos is a rewarding endeavor that allows you to transform cherished art and photographs into stunning, personalized displays. From the careful selection of wood and the precision of miter cuts to the meticulous application of finishes and the final assembly, each step contributes to a bespoke creation that reflects your unique style and craftsmanship.

By following the techniques outlined in this guide, you gain not only the ability to craft beautiful frames but also a deeper appreciation for woodworking and design. The satisfaction of seeing your artwork beautifully encased in a frame you built with your own hands is truly unparalleled. In 2026, let your creativity flow and elevate your home décor with the timeless elegance of custom wooden frames.
Actionable Next Steps:
- Start Small: Begin with a simple frame for a small photo to practice your cutting and joining techniques.
- Invest in Quality Tools: A good miter saw and quality clamps will make a significant difference in your results.
- Experiment with Woods and Finishes: Try different wood species and finishing products to discover your preferences.
- Explore Advanced Joinery: Once comfortable with miter joints, consider exploring other joinery techniques for frames, such as splined miters or even hand-cut dovetails for a truly unique look. Refer to “Hand Tool Joinery for Visible Wood Joints: Dovetails, Mortis” for inspiration.
- Share Your Creations: Display your framed art proudly and inspire others!
References
- Fine Woodworking Magazine. (2018). Framing Fundamentals: A Guide to Building Picture Frames. Taunton Press.
- Jackson, N. (2015). The Art of Picture Framing. GMC Publications.
SEO Meta Title: DIY Wooden Picture Frames: Craft Custom Art & Photo Frames SEO Meta Description: Master DIY picture framing in 2026. Learn techniques for cutting, joining, and finishing custom wooden frames for your art and photos with expert guidance.
