
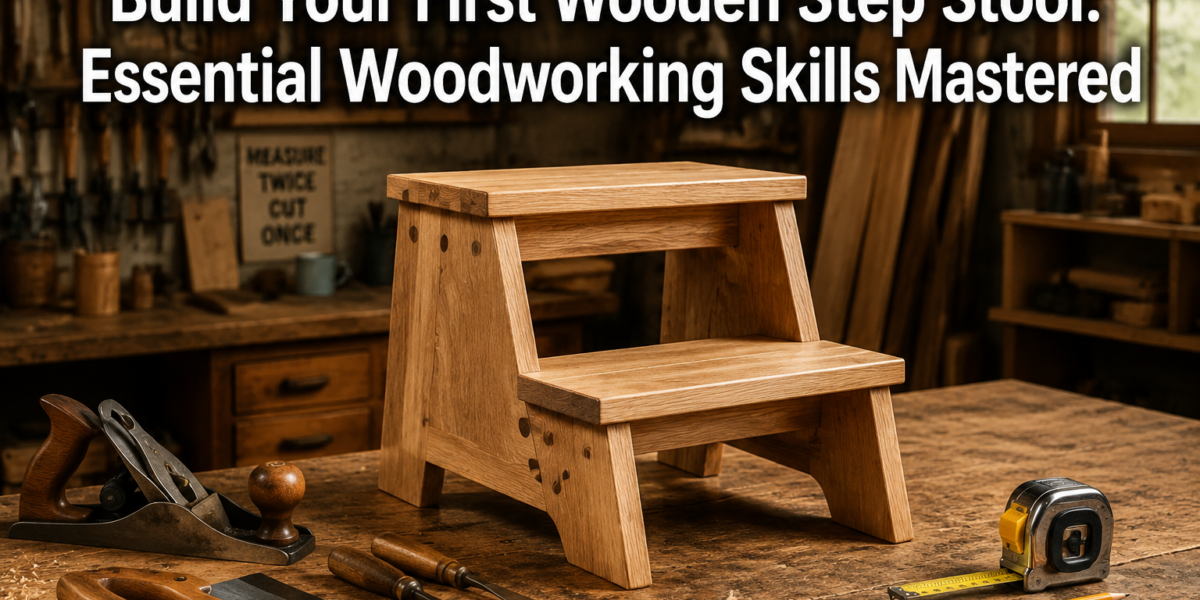

The satisfying thud of solid wood joining perfectly, the scent of freshly cut lumber, and the pride of creating something tangible with your own hands – these are the hallmarks of woodworking. Far from being a niche pursuit, woodworking offers a profound connection to craftsmanship and practicality. For those eager to embark on this rewarding journey, there is no better starting point than Building a Simple Wooden Step Stool: A Classic Project for Developing Essential Woodworking Skills. This foundational project doesn’t just result in a useful household item; it serves as a robust curriculum for learning critical techniques that will underpin all future woodworking endeavors.
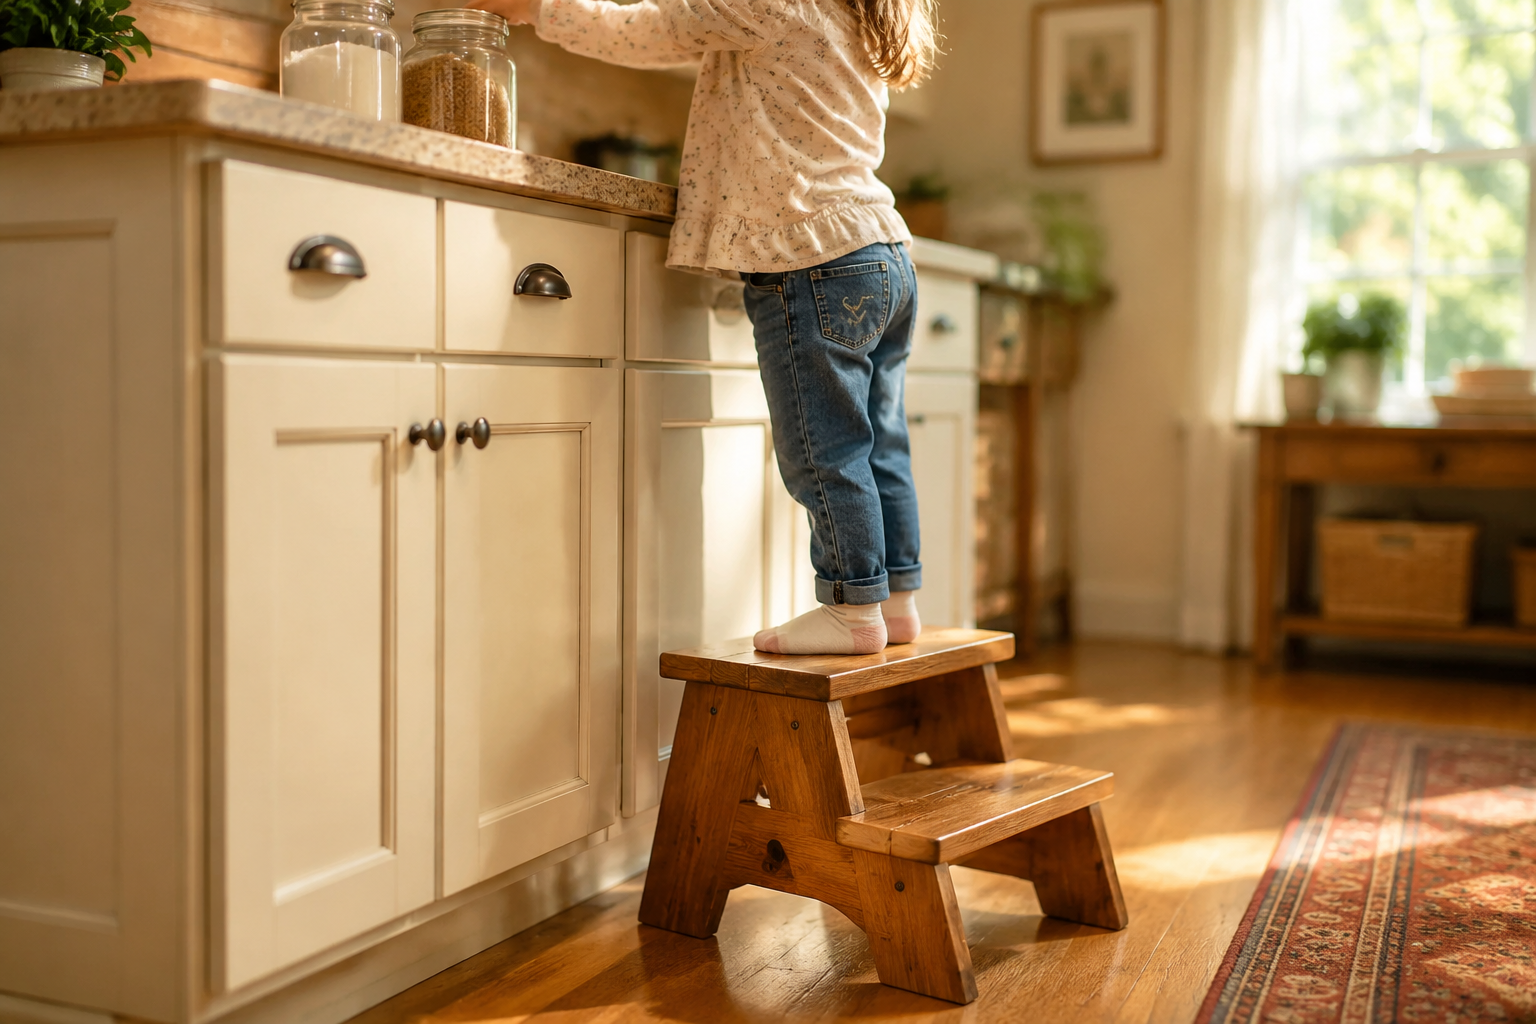
Whether you’re reaching that top shelf in the kitchen, helping a child access the sink, or simply need a sturdy perch, a handmade wooden step stool is invaluable. More importantly, constructing one guides beginners through fundamental skills such as accurate measuring, precise cutting, simple joinery, and effective finishing, making it an ideal first step for aspiring woodworkers in 2026.

Key Takeaways
- Foundation of Skills: Building a simple step stool teaches essential woodworking skills like accurate measuring, precise cutting, basic joinery, and effective finishing.
- Practical Application: The project results in a highly functional household item, providing immediate gratification and utility.
- Tool Familiarization: It offers hands-on experience with common hand tools and basic power tools, building confidence and competence.
- Problem-Solving: Encountering and overcoming challenges during construction fosters critical thinking and problem-solving abilities.
- Gateway Project: Success with a step stool opens the door to more complex projects, setting a strong foundation for a woodworking hobby or career.
Choosing Your Materials and Preparing Your Workspace
The success of any woodworking project, especially for beginners, hinges significantly on proper preparation. Before you even think about making your first cut when Building a Simple Wooden Step Stool: A Classic Project for Developing Essential Woodworking Skills, dedicating time to selecting suitable materials and setting up a safe, organized workspace is crucial.
Wood Selection for Your Step Stool
For a simple step stool, the choice of wood is paramount. You need something stable, easy to work with, and aesthetically pleasing.
- Pine: An excellent choice for beginners. It’s affordable, widely available, and soft enough to cut and shape easily. Its light color also takes stain well.
- Poplar: Slightly harder than pine, poplar offers a smoother finish and fewer knots. It’s still relatively inexpensive and works well for painted projects.
- Maple or Oak: For a more durable and robust stool with a finer grain, these hardwoods are excellent. They are more challenging to work with and more expensive but result in a piece that can last generations.
Regardless of your choice, ensure the wood is straight, free from significant knots, warps, or cracks. Look for “kiln-dried” lumber, which means it has been dried to a stable moisture content, reducing the likelihood of future movement. A standard 1×10 or 1×12 board (which actually measures 3/4″ x 9 1/4″ or 11 1/4″) is often sufficient for most step stool designs.
Essential Tools for the Project
While woodworking can involve an impressive array of tools, a simple step stool requires only a handful of basics. Think of this project as an opportunity to become comfortable with these fundamental instruments.
Hand Tools:
- Measuring Tape and Pencil: For accurate layout.
- Combination Square: Essential for marking straight lines and checking squareness.
- Handsaw or Backsaw: For making precise cuts.
- Chisels: A sharp set of chisels (1/2″ and 3/4″ are good starters) is invaluable for cleaning up joints and fine-tuning. For more intricate work, consider exploring Hand Tool Mastery for Detail Work: Chisels, Hand Planes, and Rasps for Refined Joinery and Finishing.
- Mallet: For driving chisels and seating joints.
- Hand Plane: A block plane or No. 4 bench plane can be useful for slight adjustments and smoothing.
- Clamps: Essential for holding pieces together during gluing and assembly. At least four F-clamps or parallel clamps (12-18 inches) are recommended.
- Sandpaper: Various grits (80, 120, 180, 220) for smoothing.
Power Tools (Optional, but helpful):
- Miter Saw: For precise crosscuts.
- Jigsaw: For cutting curves or notches if your design includes them.
- Orbital Sander: Speeds up the sanding process significantly.
- Drill/Driver: For pilot holes and screws (if using screws).
Remember, safety always comes first. Ensure you have safety glasses, hearing protection, and proper ventilation if using finishes.
Setting Up Your Workspace
A clean, well-organized, and well-lit workspace is vital.
- Clear the Area: Remove clutter to provide ample room to work safely.
- Sturdy Workbench: A solid, stable surface is non-negotiable. If you don’t have one, consider building a Portable Workbench: Designs for Small Spaces and On-the-Go Woodworking as a subsequent project.
- Lighting: Good lighting helps prevent errors and reduces eye strain.
- Dust Management: Woodworking creates dust. A simple shop vacuum is a good start, or consider a basic dust collection system.
- Tool Accessibility: Arrange tools logically so they are within easy reach but not scattered.
Measuring, Cutting, and Basic Joinery
With your materials and workspace ready, the real fun begins. This stage of Building a Simple Wooden Step Stool: A Classic Project for Developing Essential Woodworking Skills focuses on transforming raw lumber into precisely sized components and fitting them together.
Step Stool Design Considerations
While “simple” is the goal, a basic design ensures structural integrity and ease of construction. Most step stools consist of:
- Top: The platform you stand on.
- Legs/Sides: Provide vertical support.
- Stretchers/Rungs: Connect the legs and provide stability.
- Optional Shelf: A lower shelf for added storage and stability.
A common beginner-friendly design uses butt joints reinforced with screws and glue, or simple dadoes for stronger connections. For a more traditional approach, half-lap joints can be introduced once comfortable with basic cuts.
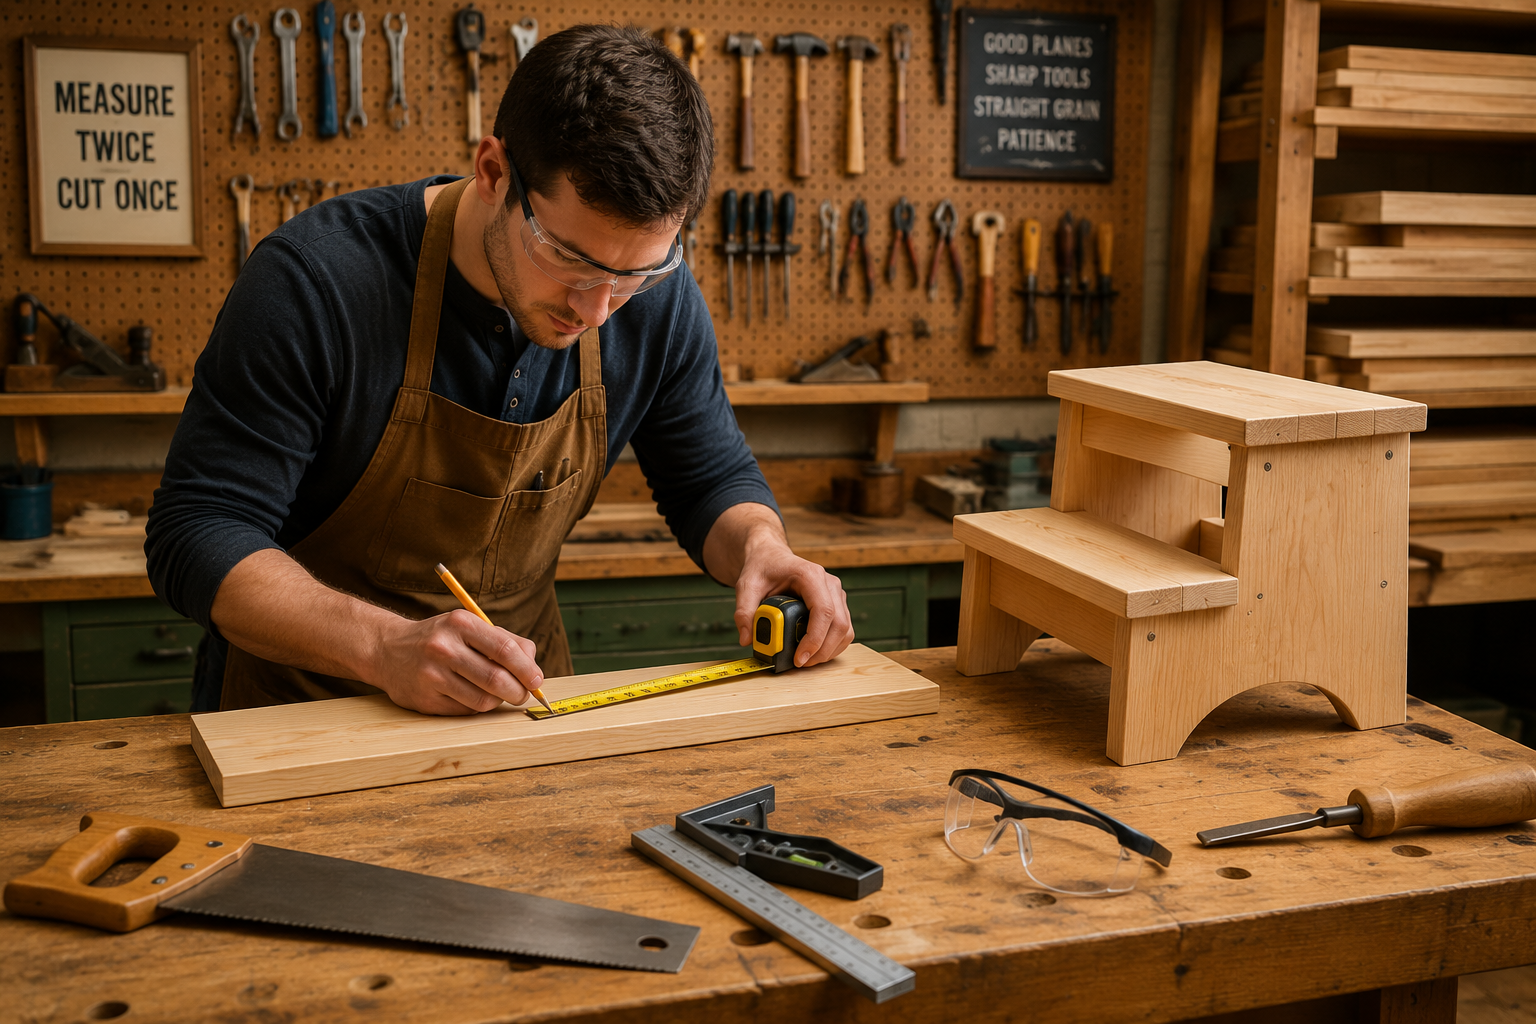
Precise Measuring and Marking
Accuracy here is critical. “Measure twice, cut once” is the golden rule.
- Create a Cut List: Draw a simple sketch of your step stool and list all the parts with their exact dimensions.
- Example Cut List (Dimensions are illustrative):
- Top: 1 piece, 18″ L x 10″ W x 3/4″ T
- Legs: 2 pieces, 10″ H x 9″ W x 3/4″ T
- Stretchers (front/back): 2 pieces, 16.5″ L x 2.5″ W x 3/4″ T
- Stretchers (side): 2 pieces, 7.5″ L x 2.5″ W x 3/4″ T
- Example Cut List (Dimensions are illustrative):
- Mark Clearly: Use your measuring tape and combination square to mark all cut lines precisely on your chosen lumber. Ensure lines are square to the edge.
Making Accurate Cuts
This is where you bring your saw into play.
- Crosscuts: For cutting across the grain to length.
- Handsaw: Use a bench hook or miter box for stability and square cuts. Take slow, deliberate strokes.
- Miter Saw: If using a power tool, ensure the blade is set to 90 degrees and make practice cuts on scrap wood first.
- Rip Cuts: For cutting with the grain to width (less common for simple stool parts if using pre-sized lumber).
- Handsaw: Requires more control and a steady hand.
- Table Saw: The most efficient and accurate for rip cuts, but requires careful setup and safety precautions.
Always cut slightly outside your marked line, then refine it to the line with sanding or planing if necessary.
Basic Wood Joinery Techniques
For a simple step stool, robust and straightforward joinery is key.

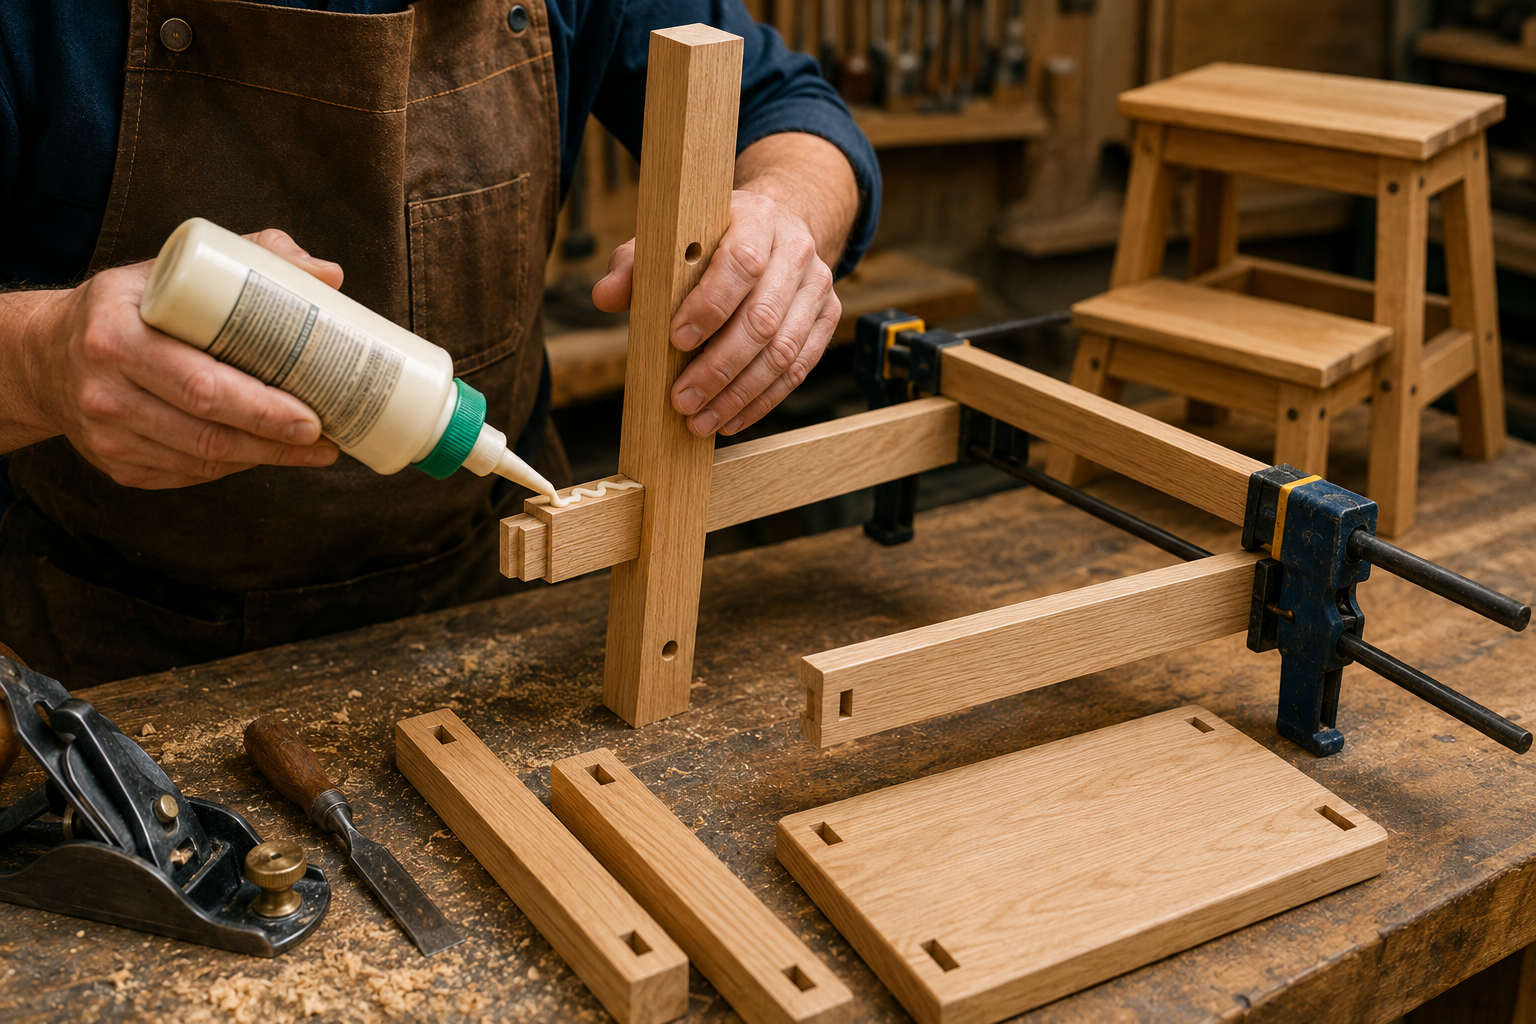
- Butt Joints with Screws and Glue: The simplest method. The end grain of one piece is butted against the face grain of another.
- Process: Apply a generous amount of wood glue to both surfaces. Clamp the pieces together. Drill pilot holes to prevent splitting, then drive screws to secure the joint. Wipe away excess glue immediately.
- Tip: Countersink screw heads for a cleaner finish.
- Dado Joints (Optional, but stronger): A groove cut across the grain of one piece into which the end of another piece fits.
- Process: Requires a router or table saw with a dado stack. This creates a strong mechanical joint.
- Benefit: Increases surface area for glue, providing a very strong, stable connection.
- Pocket Hole Joinery: A popular method using specialized jigs to drill angled holes, allowing screws to draw pieces together.
- Process: Use a pocket hole jig to drill angled holes into one piece. Apply glue, then drive self-tapping screws into the holes.
- Benefit: Strong, hidden fasteners that are quick to assemble.
Regardless of the joint type, always dry-fit your pieces before applying glue. This ensures everything aligns correctly and gives you a chance to make any minor adjustments. For projects requiring even more advanced joinery, explore resources like Mastering Dovetail Joints with Hand Tools.
Assembly, Sanding, and Finishing Your Step Stool
The final stages of Building a Simple Wooden Step Stool: A Classic Project for Developing Essential Woodworking Skills bring your project to life. This is where patience and attention to detail truly pay off, transforming cut wood into a functional and beautiful piece.
Step-by-Step Assembly
Once all your parts are cut and dry-fitted, it’s time for the final assembly. Work systematically and keep your clamps ready.
- Sub-assemblies: Often, it’s easier to build sections first. For instance, attach the side stretchers to the legs to form two “H” shapes.
- Apply wood glue evenly to all mating surfaces.
- Bring the pieces together, ensuring they are square using your combination square.
- Clamp firmly. Don’t overtighten, which can squeeze out too much glue.
- Main Assembly: Connect your sub-assemblies with the remaining stretchers.
- Again, apply glue, position pieces, and clamp.
- Use a rubber mallet to gently tap joints into place if needed.
- Check squareness diagonally and across all dimensions. Any twist or wobble now will be permanent.
- Attaching the Top: Once the base is solid and dry (allow glue to cure for the recommended time, typically 30-60 minutes before removing clamps, and 24 hours for full strength), attach the top.
- You can use screws driven up through the stretchers into the underside of the top, or use wood dowels for a hidden fastening method.
- Ensure the top is centered and flush with the edges, or with your desired overhang.
The Art of Sanding
Sanding is crucial for a smooth, professional finish. Many beginners underestimate its importance.
- Start Coarse, Finish Fine:
- 80-100 grit: To remove any major imperfections, saw marks, or glue squeeze-out. Be careful not to round over crisp edges excessively.
- 120-150 grit: To remove scratches left by the coarser grit.
- 180-220 grit: For a final, silky-smooth surface ready for finishing.
- Sand with the Grain: Always sand in the direction of the wood grain to prevent noticeable scratches.
- Edges and Corners: Gently ease sharp edges with a light pass of sandpaper to make the stool more comfortable and less prone to chipping.
- Dust Removal: After each grit, thoroughly wipe down the entire piece with a tack cloth or a damp rag to remove all dust. Remaining dust will contaminate your finish.
Applying a Protective Finish
Choosing and applying the right finish protects your step stool and enhances its beauty.
- Oil Finishes (e.g., Danish Oil, Tung Oil): These penetrate the wood, offering a natural look and feel. They are easy to apply (wipe on, wipe off) and repair. Multiple coats are typically needed. For more on natural finishes, see our guide on Natural Wood Finishing Techniques.
- Varnish or Polyurethane: These create a durable, protective film on the surface. They offer excellent resistance to wear and moisture, making them ideal for a utility item like a step stool.
- Application: Apply thin, even coats with a good quality brush or foam applicator. Lightly sand with 220-grit sandpaper between coats (after drying) to ensure adhesion and a smooth finish. Wipe away dust. Usually, 2-3 coats are sufficient.
- Paint: If you prefer a colored finish, prime the wood first, then apply 2-3 coats of high-quality acrylic or latex paint, sanding lightly between coats.
- Stain (Optional): If you want to change the wood’s color before applying a clear topcoat, apply wood stain according to the manufacturer’s instructions. Always test on scrap wood first!
Allow the finish to cure fully according to product recommendations before putting your step stool into service. This can take several days to weeks, depending on the product and environmental conditions.
Conclusion
Building a Simple Wooden Step Stool: A Classic Project for Developing Essential Woodworking Skills is more than just constructing a piece of furniture; it’s an immersive entry into the rewarding world of woodworking. From the initial selection of materials to the final coat of finish, each step offers invaluable lessons in precision, patience, and practical problem-solving. You’ve learned to accurately measure, make crucial cuts, understand basic joinery, and apply a protective finish – skills that are transferable to countless other projects.
The satisfaction of using an item you crafted with your own hands is truly unique. This sturdy, functional step stool is a testament to your newfound abilities and a tangible symbol of your journey into craftsmanship. As you admire your completed project, you’ll not only see a useful household item but also the foundation of a rewarding hobby.
What’s Next?
With the fundamental skills now firmly established, the world of woodworking is yours to explore. Consider these next steps:
- Refine Your Skills: Practice your joinery on scrap wood, aiming for tighter, more precise fits. Experiment with different types of wood and finishes.
- Build Another Stool: Try a variation with a different joinery method, like pocket holes or even simple dadoes, to further reinforce your understanding.
- Expand Your Toolset: Based on your experience, you might now have a better idea of what tools would genuinely enhance your workflow. Perhaps a Ultimate Guide to Sharpening Woodworking Chisels and Planes would be beneficial.
- Tackle a New Project: Look for other beginner-friendly projects. Perhaps simple shelves, a small storage box, or even a basic picture frame. Projects like 3 Profitable Scrap Wood Projects That Sell in 2026 or High-Demand Woodworking Projects for 2026: Coffee Tables, Wine Racks, and Clocks offer great ideas.
Embrace the learning process, enjoy the sawdust, and celebrate each finished piece. Your journey in woodworking has just begun!
References
- Fine Woodworking Magazine. (2018). The Essential Guide to Woodworking Hand Tools. Taunton Press.
- Schwarz, C. (2010). The Anarchist’s Tool Chest. Lost Art Press.
- Tage Frid. (1979). Tage Frid Teaches Woodworking: Joinery. Taunton Press.
SEO Meta Title: Build a Wooden Step Stool: Essential Woodworking Skills SEO Meta Description: Master woodworking basics in 2026 by building a simple wooden step stool. Learn cutting, joinery, and finishing for a functional home project.
