
Falls are a leading cause of injury in both homes and workshops, with many incidents occurring when individuals overreach or stand on unstable objects to access elevated areas. A reliable step stool is not merely a convenience; it’s a fundamental safety device. This article offers a comprehensive guide to Building a Sturdy Wooden Step Stool: A Practical Project for Home and Workshop Safety that will serve you reliably for years. From selecting the right materials to mastering essential joinery techniques, this project emphasizes durability and stability, ensuring you have a safe platform whenever you need one, whether reaching for a top-shelf spice or accessing tools high on a workshop rack.
Key Takeaways
- Safety First: A well-built step stool prevents falls, a common cause of injury in homes and workshops.
- Material Selection Matters: Choosing appropriate hardwoods or stable plywood ensures longevity and strength.
- Strong Joinery is Crucial: Mortise and tenon, dado, or reinforced screw joints are key to a sturdy build.
- Thoughtful Design Enhances Stability: Wider bases and appropriate height-to-footprint ratios improve safety.
- Finishing Protects and Beautifies: A durable finish extends the life of your step stool and integrates it into your space.
Designing for Stability and Durability: The Foundation of Your Step Stool
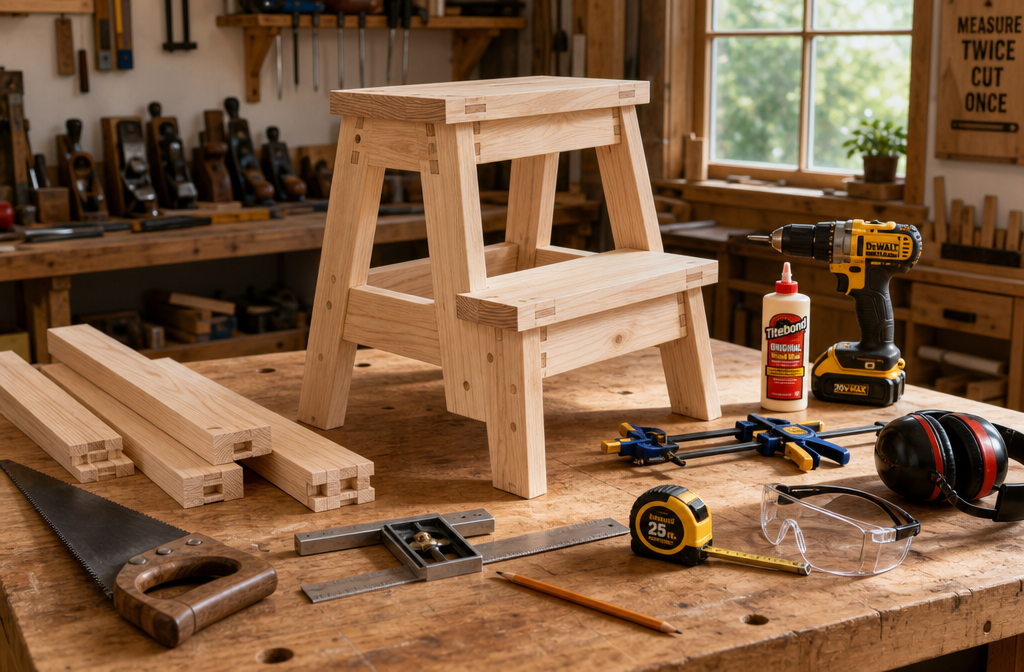
Before cutting any wood, thoughtful design is paramount when Building a Sturdy Wooden Step Stool: A Practical Project for Home and Workshop Safety. The goal is a piece that is not only functional but also inherently safe, capable of supporting significant weight without wobbling or collapsing. This section delves into critical design considerations, material selection, and essential tools.
Crucial Design Considerations
The ideal step stool design balances height, footprint, and weight capacity. A common height for a single-step stool is 8-10 inches (20-25 cm), while two-step versions might range from 14-18 inches (35-45 cm). The footprint (base dimensions) should be wide enough to prevent tipping, especially when weight is applied near the edges. A good rule of thumb is that the base should be at least 1.5 times wider than the top step’s surface. Tapered legs or splayed leg designs can enhance stability by increasing the effective footprint.
Consider the user and intended environment. For kitchen use, a sleek design might be preferred. For a workshop, ruggedness and perhaps a slightly larger top surface for tools might be beneficial. Adding features like non-slip treads on the steps or rubber feet on the bottom can further improve safety.
Material Selection for a Lasting Build
The choice of wood directly impacts the step stool’s strength and longevity.
- Hardwoods: Species like oak, maple, cherry, or birch are excellent choices. They are dense, durable, and resistant to dents and scratches. While more expensive, they provide superior strength and a beautiful finish.
- Softwoods: Pine, fir, or spruce can be used for a lighter, more economical option, but they are less durable and more prone to wear. If using softwoods, ensure dimensions are generous to compensate for lesser density.
- Plywood: High-quality baltic birch or cabinet-grade plywood (¾ inch or 19mm) offers excellent stability, strength, and resistance to warping. It’s often easier to work with than solid lumber for large, flat panels like step surfaces and sides. Avoid cheap, void-filled plywood.
Regardless of your choice, select straight, knot-free lumber to ensure maximum strength and ease of construction.
Essential Tools and Safety Gear
Having the right tools makes the project smoother and safer.
Hand Tools:
- Measuring tape and ruler
- Pencil and marking gauge
- Square (combination or framing)
- Hand saw or Japanese pull saw
- Chisels (for joinery)
- Mallet
- Sanding blocks
- Clamps (bar or pipe clamps are ideal for holding glued joints)
- Screwdrivers or impact driver
Power Tools (Optional, but highly recommended):
- Circular saw or miter saw (for accurate cross-cuts)
- Table saw (for ripping boards to width and cutting dados)
- Router (for edge profiling, dadoes, or mortises)
- Drill/driver (for pilot holes and fasteners)
- Orbital sander
Safety Gear:
- Safety glasses 👓
- Hearing protection 🎧
- Dust mask or respirator 😷
- Gloves 🧤
Remember, proper safety gear is non-negotiable in any woodworking project. For those looking to optimize their workspace and integrate smart solutions, exploring resources like “DIY Smart Workshop Upgrades: Integrating AI and IoT for Enhanced Precision and Safety” can provide further inspiration for creating a safer and more efficient environment.
Step-by-Step Construction: Building a Sturdy Wooden Step Stool
This section breaks down the construction process into manageable steps, focusing on joinery and assembly for maximum strength. While specific dimensions will vary based on your design, the principles remain consistent.
1. Cutting the Components
Precision is key. Take your time to measure and cut each piece accurately.
- Legs (or Side Panels): If using solid wood for legs, ensure they are identical in length and any tapers are cut consistently. For side panel designs (like an A-frame stool), cut these panels, making sure they are perfectly square.
- Step Surfaces: Cut the top step and any intermediate steps to your desired dimensions.
- Stretchers/Rungs: These pieces connect the legs or side panels and provide structural rigidity. Cut them to length.
- Supports/Bracing: Any additional bracing for the steps or base should be cut now.
Use a table saw for accurate rips and a miter saw for precise cross-cuts. Mark all pieces clearly (e.g., ‘Leg Front Left’, ‘Top Step’).
2. Crafting Strong Joinery
The integrity of your step stool hinges on robust joinery. Here are a few strong options:
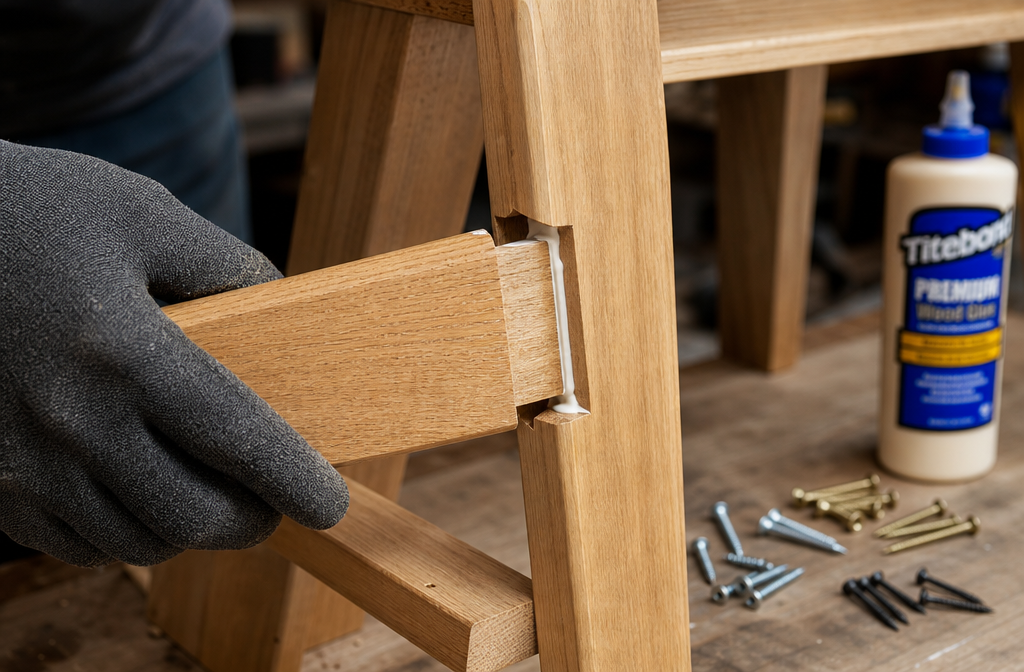
- Mortise and Tenon Joints: This classic woodworking joint offers exceptional strength and resistance to racking. It involves cutting a slot (mortise) into one piece and a projecting tab (tenon) on another that fits snugly into the mortise. They are ideal for connecting legs to stretchers or step supports. For guidance on creating these, consider exploring “Hand Tool Joinery for Visible Wood Joints: Dovetails, Mortis”.
- Dado Joints: A dado is a groove cut across the grain of a board, into which another board fits. This is excellent for attaching steps to side panels, providing a large gluing surface and mechanical strength.
- Reinforced Butt Joints (with Screws and Glue): While less elegant, a well-executed butt joint reinforced with screws and good wood glue can be very strong. Ensure pilot holes are drilled to prevent splitting, and countersink screw heads for a flush finish. Use screws long enough to penetrate well into both pieces.
- Pocket Hole Joinery: This modern technique uses a specialized jig to drill angled holes, allowing screws to draw pieces together securely. It’s fast, strong, and largely invisible if placed on interior surfaces.
Always dry-fit your joints before applying glue to ensure a perfect fit. Minor adjustments can be made with sandpaper or a chisel.
3. Assembly and Gluing
This is where your step stool truly takes shape.
- Apply Glue: Use a high-quality wood glue. Apply an even coat to both mating surfaces of your joints. For best results, refer to “The Ultimate Guide to Wood Glue: Choosing the Right Adhesive for”.
- Assemble Sub-assemblies: If your design has multiple legs and stretchers, assemble these into smaller units first (e.g., two leg assemblies).
- Clamp: Clamp your glued joints firmly but not excessively. Too much pressure can starve the joint of glue. Ensure all components are square before the glue sets. Wipe away any excess glue with a damp cloth promptly.
- Attach Steps: Once the leg assemblies or side panels are dry, attach the step surfaces. Use glue and screws, or dado joints for maximum strength.
- Allow Curing Time: Let the glue cure completely, typically 24 hours, before putting any stress on the joints. Rushing this step can compromise the structural integrity.
4. Sanding and Finishing
A good finish protects the wood and enhances its appearance.
- Initial Sanding: Start with a coarser grit sandpaper (e.g., 80 or 100-grit) to remove any pencil marks, glue squeeze-out, or minor imperfections.
- Progressive Sanding: Gradually move to finer grits (120, 150, 180, and finally 220-grit) for a smooth, ready-to-finish surface. Sand with the grain.
- Dust Removal: Thoroughly clean the surface to remove all sanding dust using a shop vacuum and a tack cloth.
- Apply Finish:
- Oil Finish: Penetrating oils (like Danish oil or tung oil) provide a natural look and feel, enhancing the wood grain. They offer good protection against moisture.
- Polyurethane: A durable, clear coat that offers excellent protection against wear and tear, moisture, and chemicals. Available in water-based (easier cleanup) and oil-based (more durable) varieties. Apply multiple thin coats, sanding lightly between coats.
- Paint: For a pop of color or to match existing decor, painting is an option. Use a primer first, followed by two coats of durable interior/exterior paint.
Always follow the manufacturer’s instructions for drying times and application techniques for your chosen finish.
Safety Enhancements and Workshop Integration in 2026
With your sturdy wooden step stool complete, it’s time to consider how to maximize its safety features and integrate it seamlessly into your home or workshop environment. In 2026, safety and efficiency go hand-in-hand, even for simple projects like this.
Enhancing Step Stool Safety
Beyond the core construction, several additions can significantly boost your step stool’s safety profile:
- Non-Slip Treads: Apply adhesive-backed non-slip tape or strips to the step surfaces. This is especially crucial in workshops where sawdust or spills can create slick conditions.
- Rubber Feet: Attach rubber or felt pads to the bottom of the legs. This prevents the stool from sliding on smooth floors (like tile or concrete) and protects floors from scratches.
- Handle/Handhold: For taller stools, consider routing a small handhold into the top step or adding a simple handle for easier carrying and repositioning.
- Weight Testing: Before regular use, perform a controlled weight test. Gradually apply weight, checking for any signs of weakness or instability.
Integrating the Step Stool into Your Workshop
A well-placed, sturdy step stool is invaluable in a functional workshop. Consider these integration tips:
- Dedicated Storage: Designate a specific, easily accessible spot for your step stool so it’s always within reach when needed, but not a tripping hazard. This aligns with principles found in Smart Workshop Storage Solutions: Maximizing Small Spaces with Modular Systems and DIY Organizers.
- Multiple Stools: Depending on the size of your workshop, having a few strategically placed stools can improve workflow and safety. For instance, one near a tall tool cabinet and another near a wall-mounted dust collection system.
- Ergonomic Access: Use the step stool to achieve a comfortable working height for various tasks, reducing strain. This complements ideas explored in Creating Ergonomic Workshop Furniture: Building Custom Workbenches.
- Maintenance Platform: Your step stool can also serve as a stable platform for performing maintenance on taller machinery or accessing overhead lighting.
- Dust Collection Access: In workshops with modern dust collection systems, a step stool can provide safe access for emptying bins or changing filters, particularly relevant for setups like those discussed in Building a DIY Smart Workshop Dust Collection System: Integrating IoT.
By proactively considering these safety enhancements and integration strategies, your handcrafted step stool becomes more than just a piece of furniture; it becomes a critical tool for preventing accidents and improving efficiency in both your home and workshop throughout 2026 and beyond.
Conclusion
Building a Sturdy Wooden Step Stool: A Practical Project for Home and Workshop Safety is a rewarding endeavor that yields a highly functional and essential item. By focusing on robust design, selecting quality materials, and employing strong joinery techniques, you can create a step stool that not only enhances safety by preventing falls but also stands as a testament to your woodworking skills.
This project offers an excellent opportunity to practice fundamental woodworking principles, from precise cutting and joinery to careful sanding and finishing. The satisfaction of crafting something with your own hands that provides genuine utility and safety is immense.
Don’t underestimate the impact of a well-made step stool. It empowers you to reach new heights safely and confidently, whether it’s retrieving that forgotten item from the top shelf or safely adjusting equipment in your workshop. Take the plunge, gather your tools, and embark on this practical project – your future self (and potentially fewer bumps and bruises) will thank you.
Next Steps:
- Plan Your Design: Sketch out your desired step stool, noting dimensions and joinery types.
- Source Materials: Choose a durable wood species or high-quality plywood.
- Gather Tools: Ensure you have the necessary hand and power tools, along with crucial safety gear.
- Execute with Precision: Take your time with each cut, joint, and assembly step.
- Finish Strong: Apply a protective finish and add safety enhancements like non-slip treads.
References
- American Wood Council. (2018). National Design Specification for Wood Construction (NDS).
- Fine Woodworking Magazine. (Various Issues). Techniques and Articles on Joinery and Furniture Making.
- Wood Magazine. (Various Issues). Project Plans and Woodworking Tips.
SEO Meta Title: Build a Sturdy Wooden Step Stool for Home & Workshop Safety SEO Meta Description: Learn to build a durable wooden step stool in 2026. Our guide covers design, materials, and strong joinery for home and workshop safety. Prevent falls!