
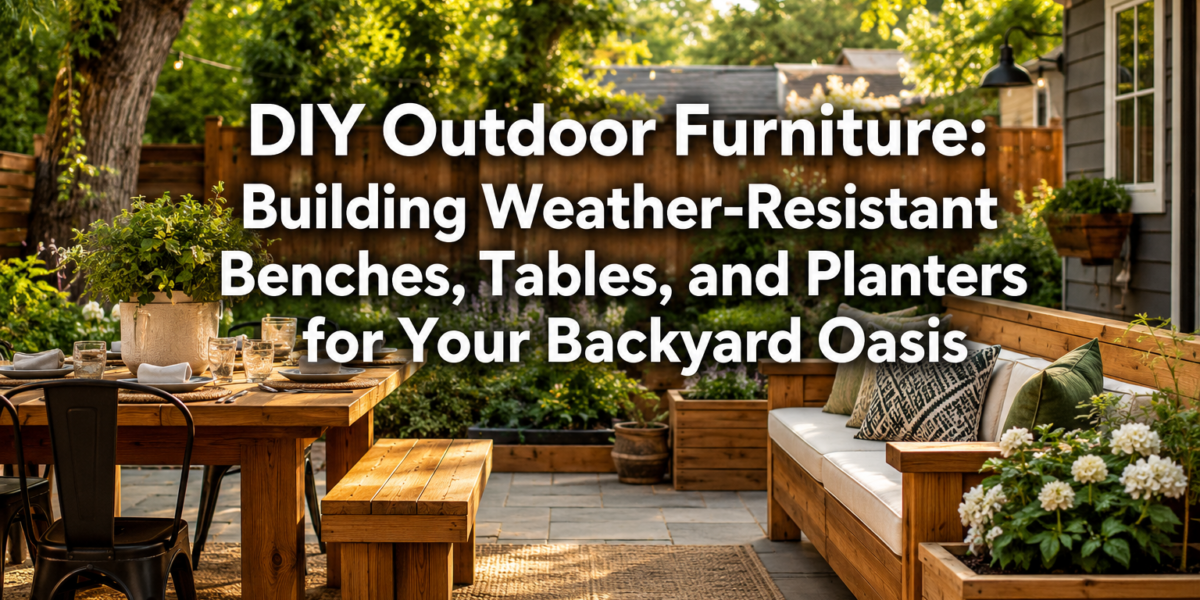
Fewer than 1% of homeowners fully optimize their outdoor living spaces for year-round enjoyment. Yet, creating a personal backyard oasis with durable, aesthetically pleasing furniture doesn’t require a commercial budget or professional designers. Instead, consider the immense satisfaction and significant savings offered by embracing DIY Outdoor Furniture: Building Weather-Resistant Benches, Tables, and Planters for Your Backyard Oasis. This comprehensive guide provides step-by-step plans and material recommendations for constructing pieces that not only enhance your outdoor environment but are built to withstand the elements, ensuring longevity and lasting beauty.
Key Takeaways
- Material Selection is Crucial: Choosing the right weather-resistant wood or composite material is the foundation of durable outdoor furniture.
- Design for Durability: Incorporate joinery techniques and structural considerations that prevent water pooling and minimize wood movement.
- Protection is Paramount: Proper sealing, staining, or painting is essential to shield your DIY outdoor furniture from UV rays, moisture, and pests.
- Maintenance Extends Life: Regular cleaning and reapplication of protective finishes will significantly extend the lifespan of your handmade pieces.
- Personalize Your Oasis: DIY projects allow for complete customization, letting you create furniture that perfectly matches your aesthetic and functional needs.
Selecting Materials for Weather-Resistant DIY Outdoor Furniture: Building Weather-Resistant Benches
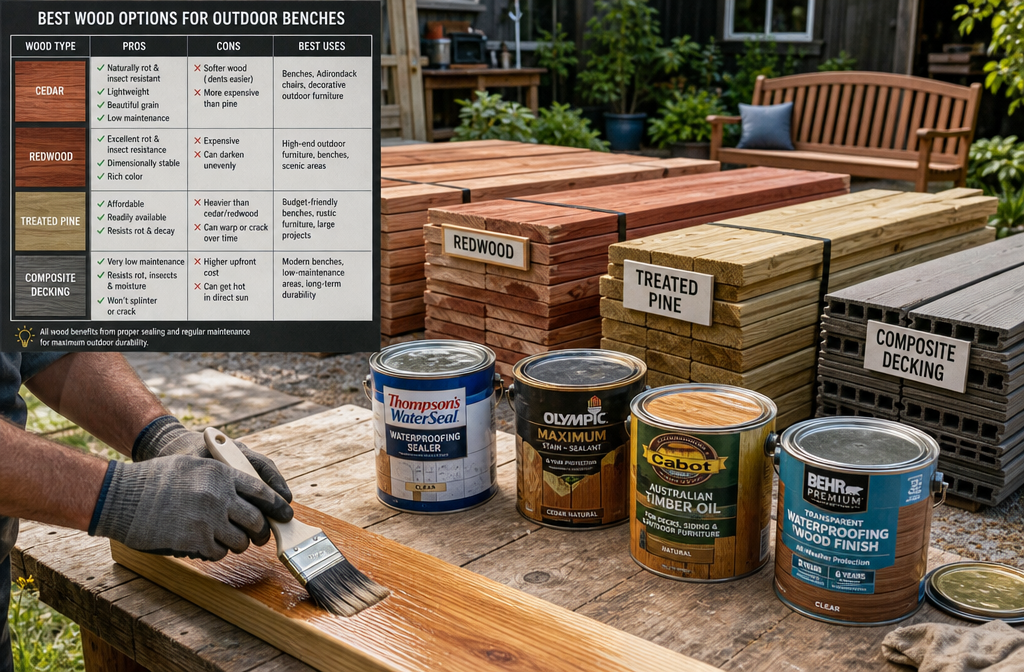
Building outdoor furniture requires materials that can endure sun, rain, snow, and fluctuating temperatures without succumbing to rot, warping, or insect damage. The foundation of any lasting piece lies in the careful selection of lumber and protective finishes.
Best Wood Species for Outdoor Use
When it comes to wood, some species naturally perform better outdoors due to their inherent resistance to moisture and decay.
- Cedar (Western Red and Eastern White): Renowned for its natural aromatic oils that repel insects and resist rot. Cedar is lightweight, easy to work with, and ages beautifully to a silvery-gray patina if left untreated. It’s an excellent choice for benches and planters where natural aesthetics are desired.
- Redwood: Similar to cedar, redwood boasts natural resistance to insects and decay. It’s incredibly stable, less prone to warping or shrinking, and offers a rich, reddish-brown color. Redwood is a premium option, often used for high-end outdoor furniture.
- Treated Pine: Pressure-treated pine is a cost-effective option, chemically infused to resist rot, fungi, and insect infestation. While it’s highly durable, it can be prone to checking (cracking) and warping if not properly sealed. It’s often used for structural components or hidden parts. Always ensure it’s rated for ground contact if your project requires it.
- Teak: The gold standard for outdoor furniture. Teak contains natural oils and a tight grain that makes it exceptionally resistant to water, rot, and insects. It’s incredibly durable and can last for decades with minimal maintenance, though it comes at a higher price point.
- Cypress: A durable and attractive wood that offers good resistance to insects and decay, though it may not be as readily available as cedar or treated pine in all regions.
Alternative Materials
Beyond natural wood, several manufactured materials offer superior weather resistance:
- Composite Lumber: Made from a blend of wood fibers and recycled plastic, composite lumber is virtually maintenance-free, highly resistant to rot, insects, and splintering. It comes in various colors and textures, mimicking wood, and never needs painting or staining. It’s heavier than wood and can be more expensive upfront, but its longevity often offsets the cost.
- Recycled Plastic Lumber: Made entirely from recycled plastics, this material is impervious to moisture, rot, insects, and UV damage. It’s extremely durable, often heavier than wood, and available in many colors. It’s an environmentally friendly choice that requires almost no upkeep.
Essential Protective Finishes
Even the most weather-resistant woods benefit from proper protection.
| Finish Type | Benefits | Application Frequency (Approx.) | Notes |
|---|---|---|---|
| Water Sealant | Prevents water absorption, reduces cracking/warping | Every 1-2 years | Clear, maintains natural wood look. Simple brush or spray application. |
| Stain + Sealant | Adds color, UV protection, water repellency | Every 2-3 years | Enhances aesthetics, good for treated pine or cedar. Penetrates wood. |
| Exterior Paint | Maximum protection from elements and UV rays | Every 3-5 years | Opaque finish, offers complete color change. Requires proper priming. |
| Marine Varnish | High-gloss, extremely durable, water-resistant | Every 2-4 years | Excellent for tabletops, provides deep, rich finish. Can yellow over time. |
| Penetrating Oil | Nourishes wood, enhances natural grain, water-repellent | Annually | Best for hardwoods like teak, provides a matte finish, easy reapplication. |
When selecting a finish, always choose products specifically designed for outdoor use and follow manufacturer instructions. For a deeper dive into protecting your woodworking projects, consider exploring understanding wood movement.

Designing and Building Weather-Resistant Tables and Benches
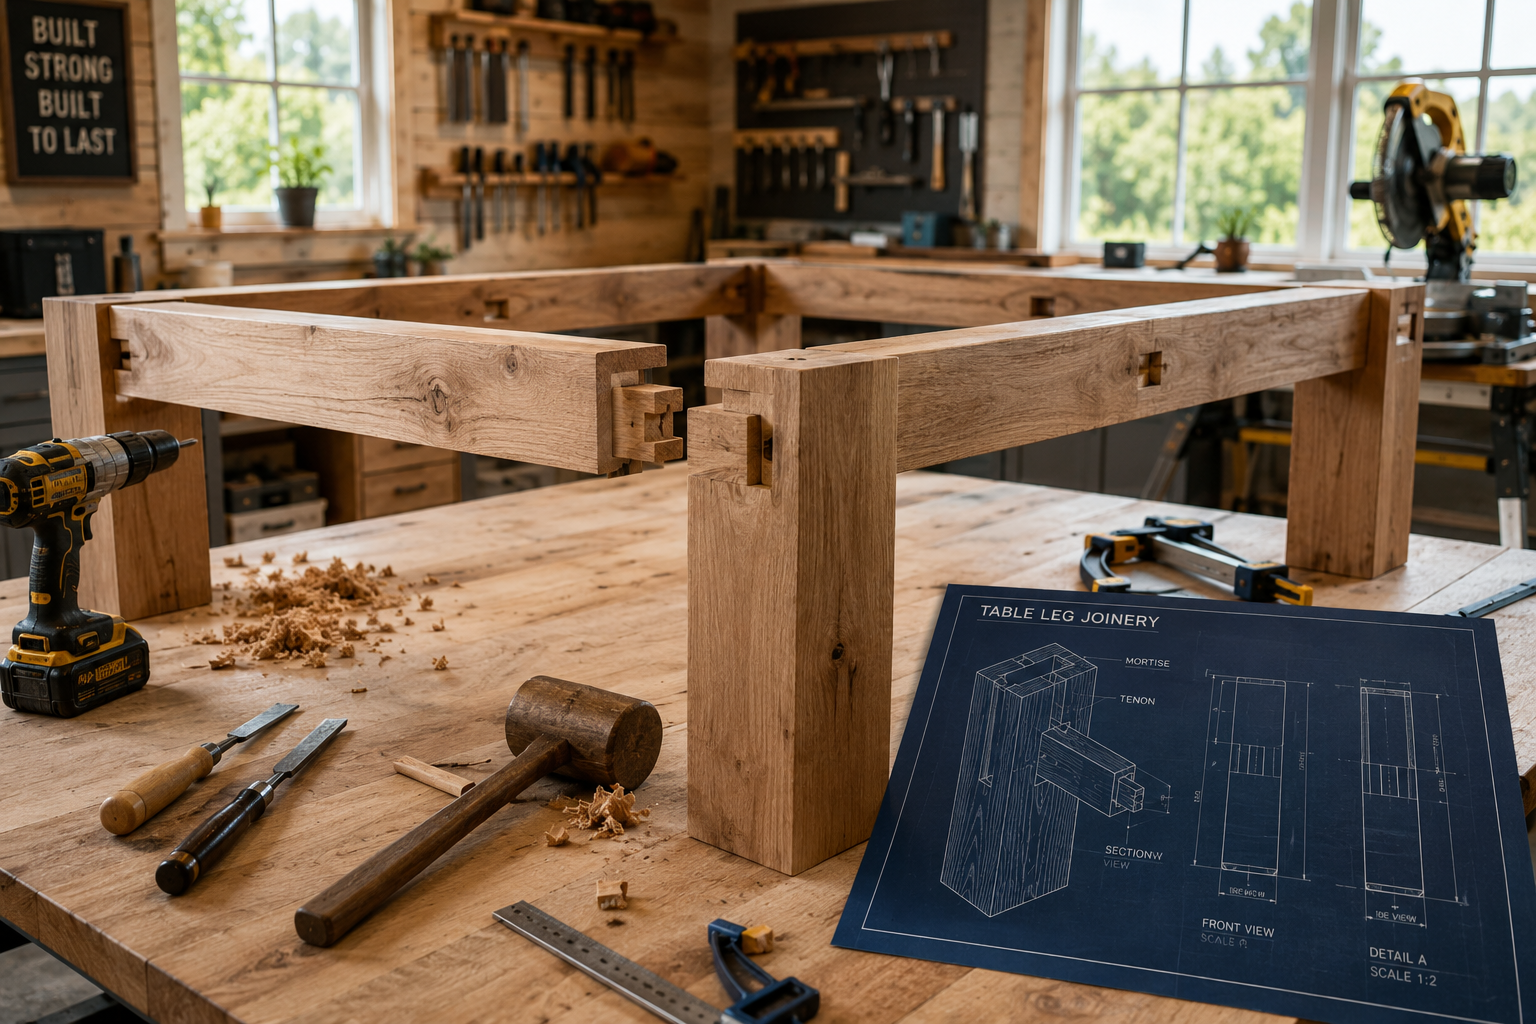
The design and construction methods you employ are just as crucial as material selection for creating durable outdoor furniture. Thoughtful joinery, proper drainage, and sturdy construction prevent common outdoor furniture failures.
Design Principles for Longevity
- Water Drainage: Design surfaces (tabletops, bench seats) with a slight slope or gaps between planks to allow water to run off, preventing pooling and subsequent rot.
- Airflow: Ensure good airflow around and under the furniture to facilitate drying after rain. Avoid designs that trap moisture against the ground or other surfaces.
- Joint Strength: Use robust joinery methods that can withstand expansion and contraction caused by temperature and humidity changes.
- Stable Footing: Design legs and bases that provide stability on uneven outdoor surfaces and prevent direct wood-to-ground contact.
Building a Sturdy Outdoor Bench
A simple, robust bench can be a cornerstone of your backyard oasis.
Materials (for a 4-foot bench, adjust as needed):
- 2×4 or 2×6 weather-resistant lumber (e.g., cedar, treated pine) for frame and legs
- 1×4 or 1×6 weather-resistant lumber for seat slats
- Exterior-grade screws (stainless steel or ceramic coated)
- Waterproof wood glue
- Appropriate protective finish
Basic Construction Steps:
- Cut Components: Cut four legs, two long aprons (front/back), two short aprons (sides), and several seat slats according to your design. For inspiration on bench designs, check out crafting profitable wooden benches.
- Assemble Leg Frames: Attach one short apron between two legs to form an end frame. Repeat for the other end. Use waterproof glue and secure with exterior screws. Consider using hand tool joinery for visible wood joints like mortise and tenon for superior strength.
- Connect End Frames: Attach the long aprons between the two assembled end frames. Ensure the structure is square.
- Add Seat Slats: Space the seat slats evenly across the top of the bench frame, leaving small gaps (1/8″ – 1/4″) for drainage. Secure with screws. Pre-drill all holes to prevent splitting.
- Finish: Apply your chosen protective finish.
Constructing a Durable Outdoor Table
An outdoor dining or coffee table transforms your patio into an entertaining hub.
Materials:
- 4×4 or 2×4 weather-resistant lumber for legs and frame
- 2×6 or 5/4 deck boards for tabletop
- Exterior-grade screws, bolts, and washers
- Waterproof wood glue
- Appropriate protective finish
Basic Construction Steps:
- Build Leg Assemblies: Create sturdy leg assemblies. For a farmhouse-style table, you might build two A-frame trestles. For a more traditional table, attach two aprons to each pair of legs.
- Assemble Table Base: Connect the leg assemblies with long stretchers or aprons to form the main base structure. Ensure all connections are strong and square. This is where advanced joinery techniques are invaluable.
- Construct Tabletop: Lay out your chosen tabletop lumber. Use pocket holes or biscuits to join boards if creating a solid top. Alternatively, leave small gaps between individual boards for drainage. Fasten the tabletop to the base from underneath using Z-clips or expansion fasteners to allow for wood movement.
- Sand and Finish: Thoroughly sand all surfaces, paying attention to edges and corners. Apply your protective finish.
Building Weather-Resistant Planters for Your Backyard Oasis
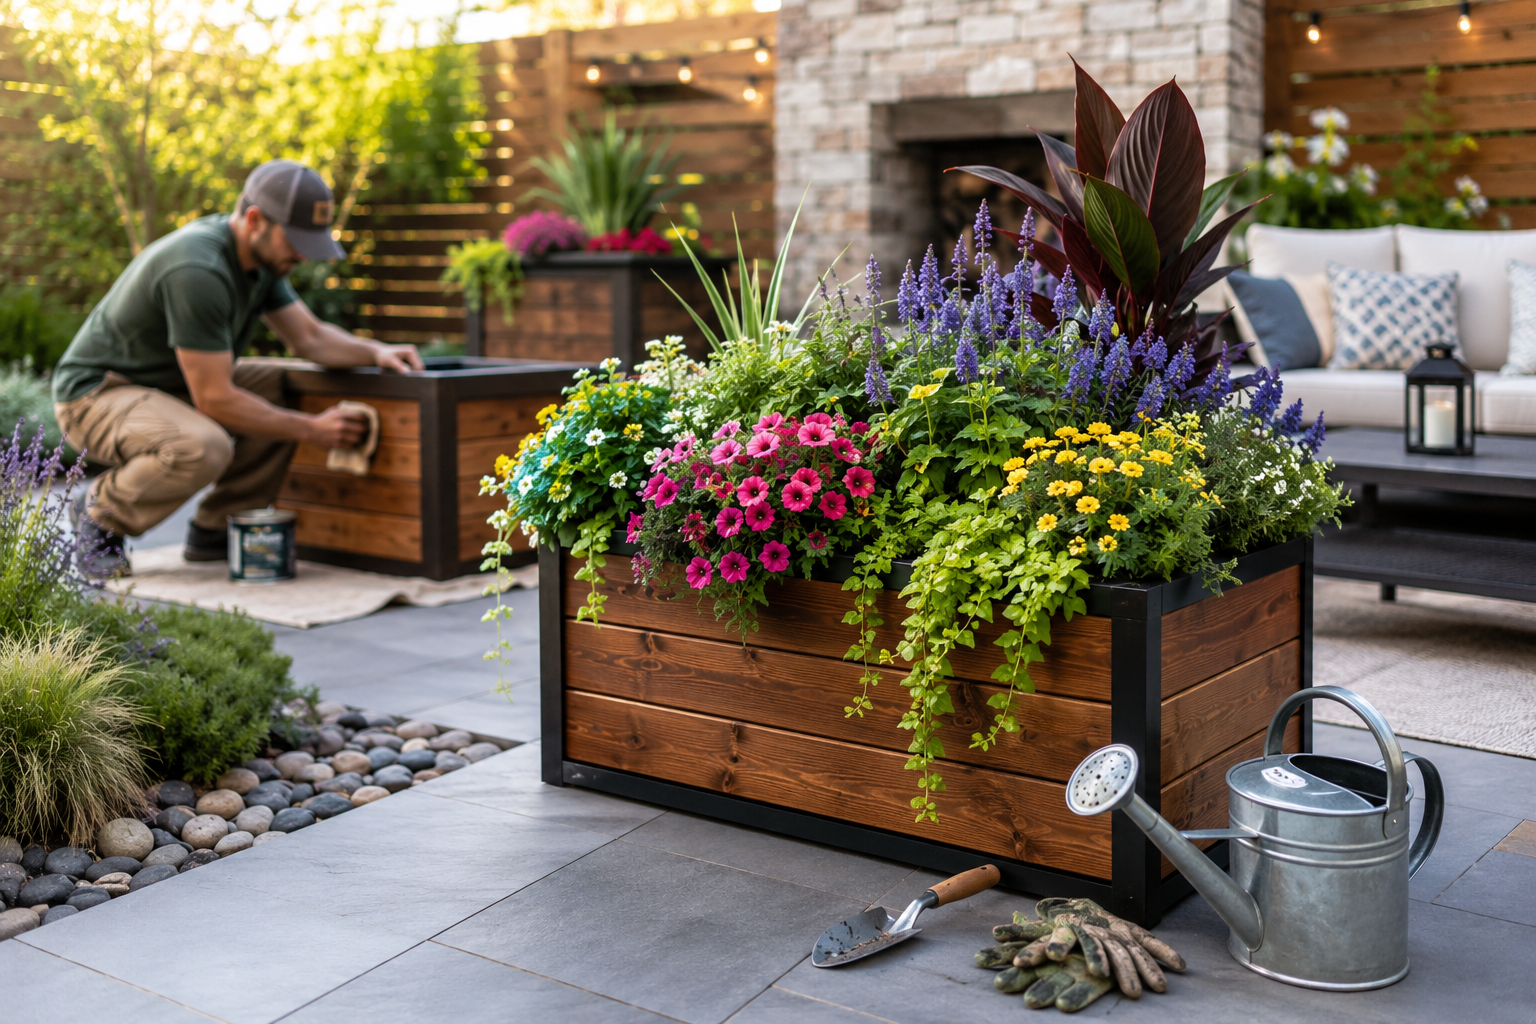
Planters add greenery and color, creating a vibrant atmosphere. Building them yourself ensures they are robust and can complement your other DIY outdoor furniture.
Key Considerations for Planter Design
- Drainage, Drainage, Drainage! This is paramount. Without adequate drainage, soil becomes waterlogged, harming plants and accelerating wood rot. Include drainage holes and consider a false bottom.
- Size and Volume: Match the planter size to the mature size of the plants you intend to grow. Larger planters offer better insulation for roots and retain moisture longer.
- Lining: While not strictly necessary for treated or naturally rot-resistant wood, lining the interior with heavy-duty landscape fabric or plastic sheeting (with drainage holes) can further extend the wood’s life and help retain soil.
- Ease of Movement: Consider adding casters to larger planters if you plan to move them frequently.
Simple Rectangular Planter Box
This classic design is versatile and straightforward to build.
Materials (for a 24″ L x 12″ W x 12″ H planter):
- 1×6 or 1×8 weather-resistant lumber (e.g., cedar, treated pine) for sides and bottom
- 2×2 weather-resistant lumber for corner supports (optional, but adds strength)
- Exterior-grade screws
- Waterproof wood glue
- Appropriate protective finish
Basic Construction Steps:
- Cut Lumber: Cut two long side pieces, two short end pieces, and several bottom slats to your desired dimensions.
- Assemble Sides: Attach the long side pieces to the short end pieces using screws and glue to form a rectangular box. Ensure edges are flush and corners are square. For added strength, you can attach 2×2 corner supports on the inside before attaching the side panels.
- Add Bottom: Space the bottom slats evenly across the base of the box, leaving 1/4″ – 1/2″ gaps between them for drainage. Secure with screws. You can also drill multiple large drainage holes (1/2″ to 1″ diameter) directly into a solid bottom piece.
- Feet (Optional): Attach small blocks of wood to the bottom corners of the planter to lift it off the ground, further improving drainage and airflow, and preventing direct contact with moisture.
- Finish: Apply your chosen protective finish to all exterior and interior surfaces (especially the inside bottom).
Tiered Planter Box for Vertical Gardening
For a more ambitious project that maximizes space, consider a tiered planter.
Materials:
- 1×6 or 1×8 weather-resistant lumber for boxes
- 2×4 weather-resistant lumber for structural supports
- Exterior-grade screws
- Waterproof wood glue
- Appropriate protective finish
Basic Construction Steps:
- Build Individual Boxes: Construct several rectangular planter boxes of varying or identical sizes using the method described above. Ensure each has excellent drainage.
- Design Tiered Structure: Decide on the arrangement of your boxes (e.g., pyramid, cascading).
- Build Support Frame: Construct a sturdy frame using 2×4 lumber that will support the individual planter boxes at their desired heights. This frame should be robust and designed for outdoor exposure.
- Attach Boxes to Frame: Securely fasten each planter box to the support frame using screws, ensuring they are level and stable.
- Finish: Apply a comprehensive protective finish to the entire structure.

Finishing and Maintenance for Lasting Beauty
Even with the best materials and construction, proper finishing and ongoing maintenance are vital for your DIY outdoor furniture to truly become weather-resistant benches, tables, and planters for your backyard oasis.
The Finishing Touches
- Sanding: Before applying any finish, thoroughly sand all surfaces. Start with a coarser grit (80-100) to remove imperfections, then move to finer grits (120-180) for a smooth finish. For outdoor pieces, overly smooth surfaces aren’t always necessary, but removing splinters and rough patches is key.
- Cleaning: After sanding, wipe down all surfaces with a tack cloth or damp rag to remove dust. Ensure the wood is completely dry before applying any finish.
- Application: Apply your chosen finish according to the manufacturer’s instructions. This typically involves multiple thin coats, with light sanding between coats for stained or varnished surfaces. Pay extra attention to end grains, as they absorb moisture more readily.
- Curing Time: Allow adequate curing time for the finish before exposing the furniture to the elements or placing plants in planters.
Ongoing Maintenance Strategies
- Regular Cleaning: Periodically clean your outdoor furniture with mild soap and water to remove dirt, pollen, and mildew. A soft brush can help with stubborn grime. Avoid harsh chemical cleaners that can degrade the finish.
- Inspecting for Damage: Annually inspect your benches, tables, and planters for any signs of wear, such as cracking, peeling finish, loose joints, or insect activity. Early detection allows for minor repairs before they become major issues.
- Reapplying Finish: Reapply sealants, stains, or paints as recommended by the product manufacturer, or when you notice the finish starting to wear (e.g., water no longer beads on the surface). This is the single most important step for long-term protection. For detailed guidance on enhancing wood aesthetics, explore weathered wood finishing techniques.
- Winter Storage (Optional): If possible, storing smaller items like planters or even folding benches in a garage or shed during harsh winter months can significantly extend their life. If not, consider investing in breathable furniture covers.
- Addressing Mildew: If mildew appears, clean the affected area with a solution of diluted bleach (1 part bleach to 4 parts water) or a commercial mildew remover, then rinse thoroughly.
By consistently maintaining your DIY outdoor furniture, you ensure that your handcrafted pieces remain beautiful and functional, truly serving as weather-resistant benches, tables, and planters for your backyard oasis for many years to come.

Conclusion
Embarking on the journey of DIY Outdoor Furniture: Building Weather-Resistant Benches, Tables, and Planters for Your Backyard Oasis is a rewarding endeavor that offers both creative satisfaction and tangible benefits. By meticulously selecting weather-resistant materials like cedar, redwood, treated pine, or durable composites, and employing sound construction techniques, you lay the groundwork for furniture that stands the test of time and elements. Understanding the importance of proper drainage, robust joinery, and consistent protective finishes is not merely about craftsmanship; it’s about investing in the longevity and beauty of your outdoor living spaces.
The projects outlined—from sturdy benches to functional tables and vibrant planters—provide a framework for transforming your backyard into a personalized sanctuary. Remember, the true beauty of DIY lies in the ability to customize every detail to your specific needs and aesthetic preferences. With regular maintenance and a keen eye for protection, your handcrafted pieces will not only withstand the changing seasons of 2026 but will continue to enhance your home for years to come. Start planning your next project today and cultivate the outdoor oasis you’ve always envisioned.
SEO Meta Title: Build Weather-Resistant DIY Outdoor Furniture in 2026
SEO Meta Description: Craft durable DIY outdoor furniture: benches, tables, and planters. Learn material selection, building tips, and weather-proofing for your backyard oasis in 2026.