
The difference between a mass-produced dining table and one that feels “built-in” often comes down to thoughtful design choices regarding proportions, structural elements, and a deep understanding of how wood behaves. Crafting a dining table that not only serves its function but also seamlessly integrates into your home’s aesthetic requires more than just basic woodworking skills; it demands an appreciation for subtle details that elevate a simple piece of furniture to a custom-fit centerpiece. This article provides a practical framework for designing and building a dining table that feels truly bespoke, focusing on how to build a dining table that feels built-in: sizes, aprons, and stretcher choices, ensuring both lasting beauty and durability.
Key Takeaways
- Custom Proportions are Crucial: Standard dimensions are a starting point, but true built-in feel comes from tailoring length, width, and height to your specific room and seating needs, considering human scale and traffic flow.
- Aprons Define Style and Structure: The apron’s depth, profile, and placement significantly impact aesthetics, perceived bulk, and legroom. It’s a critical structural component that also dictates the table’s visual weight.
- Stretcher Choices Enhance Stability: Stretchers, whether central, H-shaped, or perimeter-based, are essential for preventing leg splay and enhancing overall table rigidity, particularly for larger or heavier tabletops.
- Wood Movement is Non-Negotiable: Designing for wood movement is paramount for longevity. Utilize joinery that allows for expansion and contraction of the tabletop across its width to prevent cracking or warping.
- Joinery Dictates Durability: Employ strong, appropriate joinery methods like mortise and tenon, through tenons, or specialized hardware to ensure the table’s legs, aprons, and stretchers withstand daily use for generations.
How to Build a Dining Table That Feels Built-In: Sizes and Proportions
Achieving a built-in feel for your dining table begins with meticulous planning of its size and overall proportions. This isn’t just about fitting it into a room; it’s about creating a harmonious relationship with the surrounding space, ensuring comfortable seating, and facilitating easy movement.
Determining the Right Size
Standard dining table sizes offer a general guideline, but a custom table should deviate to fit your specific needs. Here’s how to approach it:
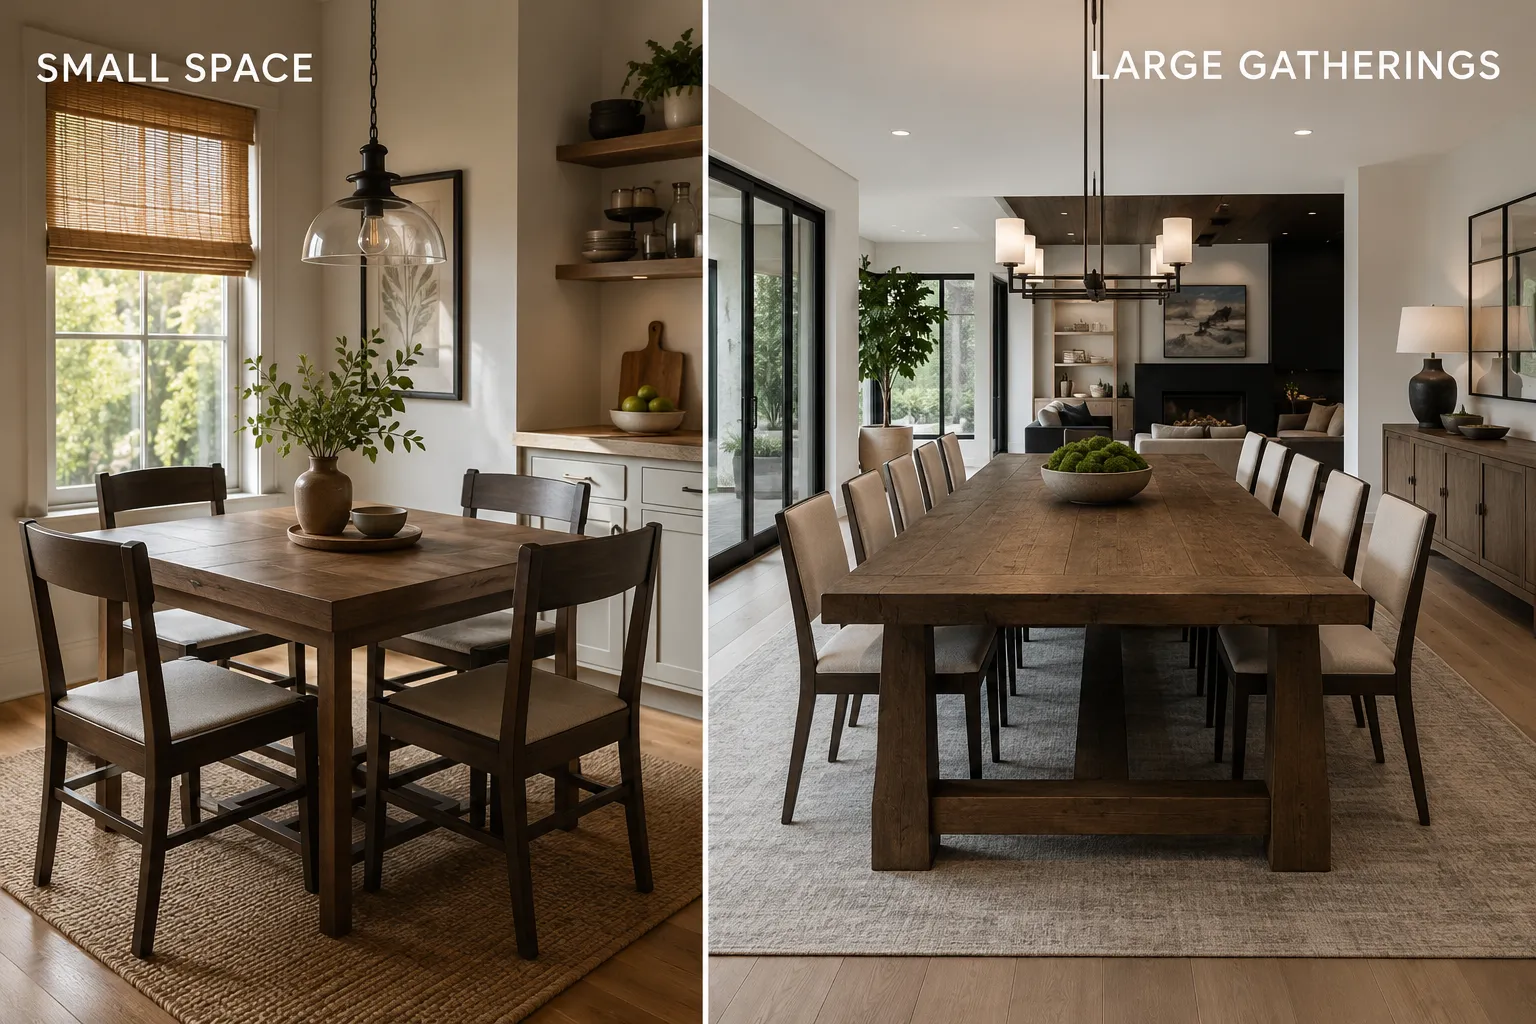
- Room Dimensions and Traffic Flow: Measure your dining area carefully. Allow at least 36-42 inches (91-107 cm) of clearance around the table from walls or other furniture to permit easy chair pull-out and circulation. For heavy traffic areas, consider adding more.
- Seating Capacity:
- Per Person: Each diner typically requires 24-26 inches (61-66 cm) of table edge length.
- Rectangular Tables:
- 4 people: 48-60 inches (122-152 cm) long, 36-40 inches (91-102 cm) wide.
- 6 people: 60-72 inches (152-183 cm) long, 36-42 inches (91-107 cm) wide.
- 8 people: 72-96 inches (183-244 cm) long, 40-44 inches (102-112 cm) wide.
- 10-12 people: 96-120 inches (244-305 cm) long, 42-48 inches (107-122 cm) wide.
- Round Tables:
- 2-4 people: 36-48 inches (91-122 cm) diameter.
- 4-6 people: 48-60 inches (122-152 cm) diameter.
- 6-8 people: 60-72 inches (152-183 cm) diameter.
- Table Height: The standard dining table height is 29-30 inches (74-76 cm). This allows for comfortable seating with most standard dining chairs, which typically have a seat height of 17-19 inches (43-48 cm). Ensure there’s enough clearance (usually 6-8 inches or 15-20 cm) between the chair armrests and the underside of the apron (if present). For an even more custom fit, measure your preferred chairs and adjust accordingly.
Top Thickness and Edge Profile
The tabletop itself significantly influences the built-in aesthetic.
- Thickness: A tabletop that feels substantial often has a thickness of 1.25 to 1.75 inches (3.2-4.5 cm) or even thicker for a very robust look. Thinner tops can look flimsy. A thicker top contributes to the perception of quality and longevity.
- Edge Profile: The edge profile can soften or sharpen the table’s appearance.
- Chamfered or Beveled: Creates a lighter, more modern look.
- Round-over: Softer, more traditional, and user-friendly.
- Straight with slight break: Clean and contemporary.
- Live Edge: For a rustic, natural aesthetic, particularly if you’re exploring options like building a modern live edge coffee table with epoxy river.
Wood Movement Considerations
A critical aspect of building a durable wooden table is accounting for wood movement. Wood expands and contracts across its grain in response to changes in humidity. Failing to accommodate this will lead to cracks, warps, and joint failures.
- Breadboard Ends: A traditional way to manage wood movement across a wide panel while keeping the ends flat.
- Tabletop Fasteners: Use specialized fasteners, such as Z-clips, figure-8 fasteners, or cleats, that allow the tabletop to float on the apron and stretchers while remaining securely attached. Never rigidly screw a tabletop directly to the frame across its entire width.
- Panel Glue-Ups: When gluing boards together for the tabletop, alternate the grain direction (end-grain pattern) to help balance internal stresses and minimize warping. For more details on this, refer to The Essential Guide to Wood Glue-Ups.
Aprons: Defining Style, Structure, and Legroom
The apron, also known as the skirt, is the frame connecting the table legs directly beneath the tabletop. Its design is fundamental to both the structural integrity and the aesthetic of a dining table. When considering how to build a dining table that feels built-in: sizes, aprons, and stretcher choices, the apron is a central element.
Apron Dimensions and Placement
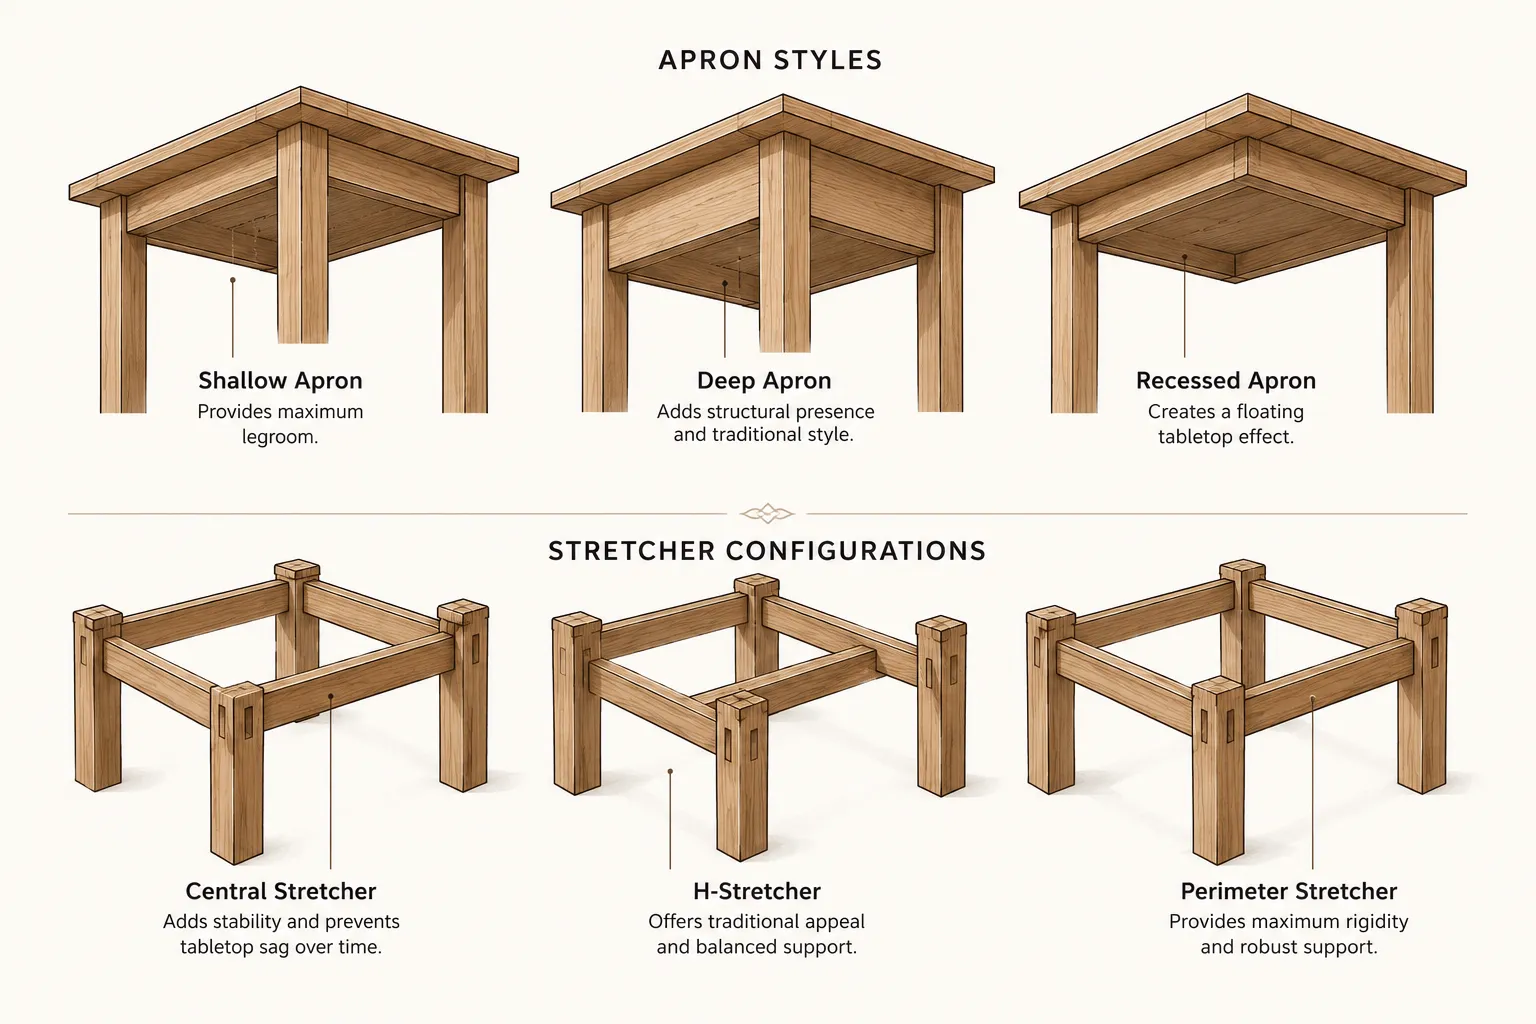
- Depth (Width): The depth of the apron typically ranges from 3 to 6 inches (7.5-15 cm).
- Shallow Apron (3-4 inches): Maximizes legroom, creating a lighter, more open feel. Ideal for modern designs or if you use chairs with armrests.
- Deep Apron (5-6 inches): Provides a more substantial, traditional, or rustic look. Increases structural rigidity but reduces legroom, so careful planning is needed.
- Thickness: Apron stock is usually 3/4 to 1 inch (1.9-2.5 cm) thick, depending on the overall table size and required rigidity. Thicker stock naturally leads to stronger joints.
- Recess from Edge: The apron is typically set back 1 to 2 inches (2.5-5 cm) from the edge of the tabletop. This allows hands to comfortably rest on the table edge without hitting the apron and creates a visual “shadow line” that makes the tabletop appear thinner or float.
- Legroom Clearance: Ensure the bottom edge of the apron is at least 26 inches (66 cm) from the floor to provide adequate legroom for most adults. This is a critical measurement for user comfort.
Apron Joinery
Strong joinery is essential for the apron-to-leg connection, as this forms the primary structural support for the tabletop.
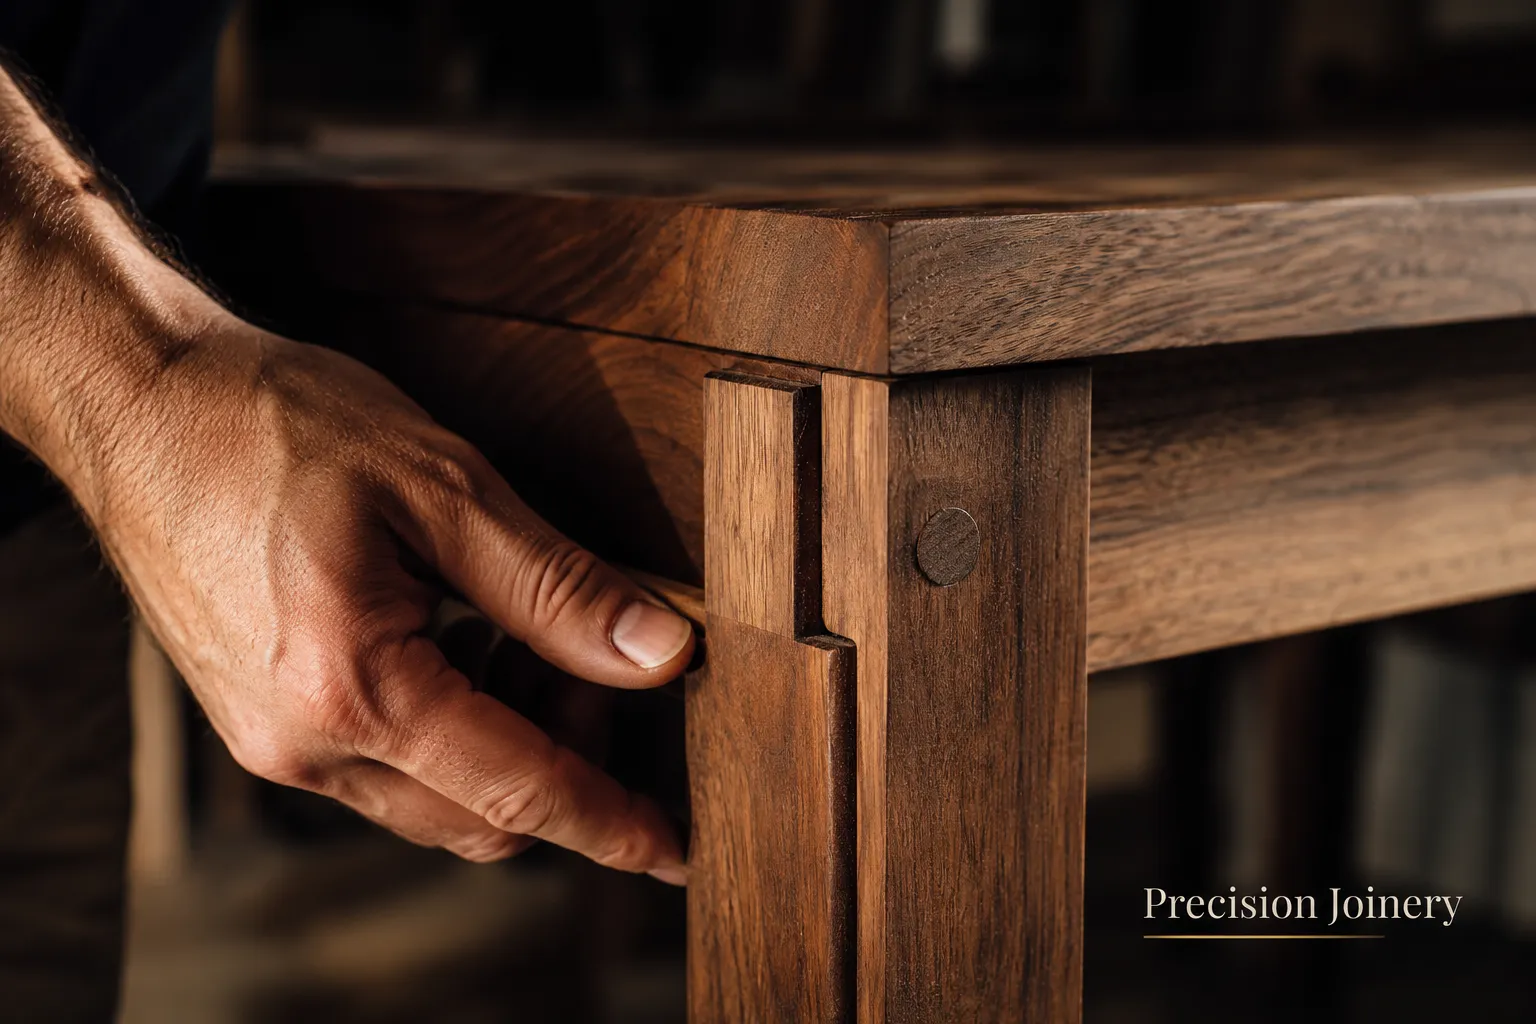
- Mortise and Tenon Joints: This is the gold standard for table construction, offering exceptional strength and durability. A tenon on the end of each apron fits into a mortise (a rectangular hole) cut into the table leg. This joint withstands racking forces well. For those new to this, a Beginner’s Guide to Hand Tool Joinery: Mastering Mortise and Tenon can be invaluable.
- Through Tenons: For a more traditional or visually interesting detail, a through tenon passes completely through the leg and can be wedged or pinned.
- Dominos or Dowels: While not as strong as traditional mortise and tenons, these can be effective for smaller tables or in conjunction with other reinforcement, especially when using a Domino joiner for furniture and cabinet making.
- Heavy-Duty Hardware: Metal brackets or specialized connectors can be used, particularly for knock-down designs, but may not offer the same “built-in” aesthetic as traditional joinery.
Apron Profiles and Aesthetics
The profile of the apron can subtly change the table’s character.
- Straight Apron: The most common and versatile, offering clean lines.
- Tapered Apron: Tapering the apron (making it narrower at the bottom or towards the ends) can lighten the visual mass of the table.
- Curved or Shaped Apron: For more elaborate, traditional, or art deco styles, the apron can be curved or have decorative cut-outs.
Stretcher Choices: Enhancing Stability and Design
While aprons provide significant structural integrity, stretchers offer additional stability, especially for larger tables or those subjected to heavy use. They connect the legs below the apron, resisting racking forces (sideways movement) and preventing the legs from splaying outwards over time. Understanding their role is key when considering how to build a dining table that feels built-in: sizes, aprons, and stretcher choices.
Types of Stretchers and Their Applications
- Perimeter Stretchers: These run around the entire perimeter of the table, connecting all four legs, often just above the floor or at chair rail height.
- Pros: Maximum stability, very robust, traditional look.
- Cons: Can impede leg movement for diners, especially if placed too high.
- Best For: Large, heavy tables, rustic designs, or designs where stability is prioritized over legroom at the very base.
- H-Stretchers: Two stretchers run between opposite legs, connected by a central stretcher.
- Pros: Excellent stability, allows for more legroom than a full perimeter stretcher, classic look.
- Cons: Still restricts some foot movement.
- Best For: Many traditional and transitional dining table designs, offering a good balance of stability and comfort.
- X-Stretchers: Two stretchers crossing diagonally between opposite legs.
- Pros: Strong and visually distinctive, often used in trestle or farmhouse-style tables.
- Cons: Restricts leg and foot movement significantly.
- Best For: Tables where the aesthetic of the stretcher is a primary design feature and maximum legroom under the table is not the highest priority.
- Central Stretcher (Trestle Tables): In trestle designs, a single, often substantial stretcher connects the two main trestle bases or leg assemblies.
- Pros: Unobstructed legroom along the sides, strong design, allows for comfortable end seating.
- Cons: Can be difficult to move if the stretcher is integrated into fixed bases.
- Best For: Long tables where maximum flexibility in seating along the sides is desired.
Stretcher Dimensions and Placement
- Height: Stretchers are typically placed lower on the legs, usually 6-12 inches (15-30 cm) from the floor. This provides maximum stability without interfering with leg movement too much at seated height. For trestle tables, the central stretcher will be higher, integrated into the trestle structure.
- Thickness and Width: Similar to aprons, stretchers generally range from 3/4 to 1 inch (1.9-2.5 cm) thick and 2-4 inches (5-10 cm) wide, depending on the scale and desired visual weight of the table.
Stretcher Joinery
Just like with aprons, robust joinery is paramount for stretchers.
- Mortise and Tenon: Again, the preferred method for its strength and longevity, creating a solid connection between the stretcher and the legs.
- Through Tenons (Wedged): Adds a decorative element while ensuring an incredibly strong mechanical lock.
- Drawboring: A technique where the peg hole in the tenon is slightly offset from the peg hole in the mortise. When a peg is driven through, it “draws” the joint tighter, creating an incredibly strong connection.
- Dovetail Joints (for angled stretchers): While less common for straight stretchers, half-dovetail or through-dovetail joints can be used for angled stretcher components, offering unique strength. For those interested in advanced joinery, explore Mastering Dowel Joinery for Furniture.
Design Integration
The choice of stretchers can heavily influence the overall aesthetic. A minimal design might forgo lower stretchers entirely if the apron and leg connections are strong enough, creating a lighter, more modern look. Conversely, chunky, exposed stretchers can contribute to a farmhouse or craftsman aesthetic.
For a built-in feel, ensure the stretcher design complements the apron and legs. If you’re building a substantial table for a large family, consider the principles in The Ultimate Guide to Designing and Building a Custom Dining Table.
Wood Species and Finishing
The choice of wood species and finish completes the “built-in” look, allowing the table to harmonize with existing decor or stand out as a central feature.
- Hardwoods: Oak, maple, walnut, cherry, and ash are popular choices for dining tables due to their durability, stability, and attractive grain patterns. Each has unique characteristics that contribute to the table’s personality. For a comprehensive overview, see Understanding Wood Species.
- Softwoods: While less durable for a primary dining surface, certain softwoods like Douglas fir or reclaimed pine can be used for rustic tables, especially if heavily finished.
- Finishes: The finish protects the wood and enhances its appearance.
- Oil-Based Finishes: Penetrate the wood, offering a natural look and feel (e.g., Danish oil, tung oil). Easy to repair but less resistant to heat and water.
- Polyurethane/Varnish: Forms a durable, protective film on the surface, highly resistant to spills and scratches. Can be high-gloss or satin.
- Lacquers: Fast-drying and durable, often used in professional settings for a smooth, hard finish.
- Specialty Finishes: Milk paint or chalk paint can create unique, distressed, or vintage looks, as discussed in Introduction to Milk Paint and Chalk Paint Finishes.
- Stains: Can alter the wood’s color without obscuring the grain. Always test stains on scrap wood of the same species.
Matching the wood species and finish to your existing flooring, cabinetry, or other furniture can significantly contribute to the built-in feel. A lighter wood in a smaller room can make the space feel more open, while a darker, richer wood can anchor a larger dining area.
Conclusion
Building a dining table that truly feels built-in is an art that blends precise measurements, intelligent design, and a deep respect for the materials. By carefully considering sizes and proportions to fit your specific space, designing aprons that balance aesthetic appeal with structural integrity and adequate legroom, and selecting appropriate stretchers for enhanced stability and visual harmony, you can craft a piece that transcends mere furniture. Remember to always account for wood movement and employ robust joinery techniques to ensure your creation stands the test of time. The result will be a dining table that not only serves its purpose but also acts as an enduring, custom-made centerpiece in your home for generations to come.
Actionable Next Steps:
- Measure Your Space: Accurately map out your dining area, including existing furniture and traffic paths.
- Sketch Designs: Create several design iterations, playing with different sizes, apron depths, and stretcher types.
- Choose Wood & Finish: Select a wood species and finish that complements your home’s existing aesthetic and stands up to daily use.
- Practice Joinery: If new to advanced joinery, practice on scrap pieces before committing to your project wood.
- Build with Precision: Take your time, measure twice, and cut once. The precision in your build will directly impact the “built-in” quality.