


Fewer than one percent of woodworkers actively incorporate pyrography, or wood burning, into their projects, yet this ancient art form offers an unparalleled method for adding intricate designs, lettering, and personalized touches. For the discerning artisan, mastering the basics of pyrography means elevating woodworking creations from merely functional pieces to unique works of art, imbued with a distinctive narrative and aesthetic appeal. This guide serves as an Introduction to Pyrography for Woodworkers: Adding Detailed Artwork and Personalization to Your Projects, providing the foundational knowledge to embark on this rewarding craft in 2026.
Key Takeaways
- Pyrography is the art of decorating wood with burn marks using a heated metal tip, offering immense potential for personalization.
- Understanding the different types of pyrography tools, particularly solid-point burners versus wire-nib burners, is crucial for selecting the right equipment.
- Preparing your wood surface properly, including sanding and transferring designs, is essential for clean, professional results.
- Mastering basic techniques like line work, shading, and texture, along with proper safety practices, forms the core of successful pyrography.
- Finishing and sealing your pyrography projects protects the artwork and enhances its longevity and appearance.
Understanding Pyrography: The Art of Wood Burning
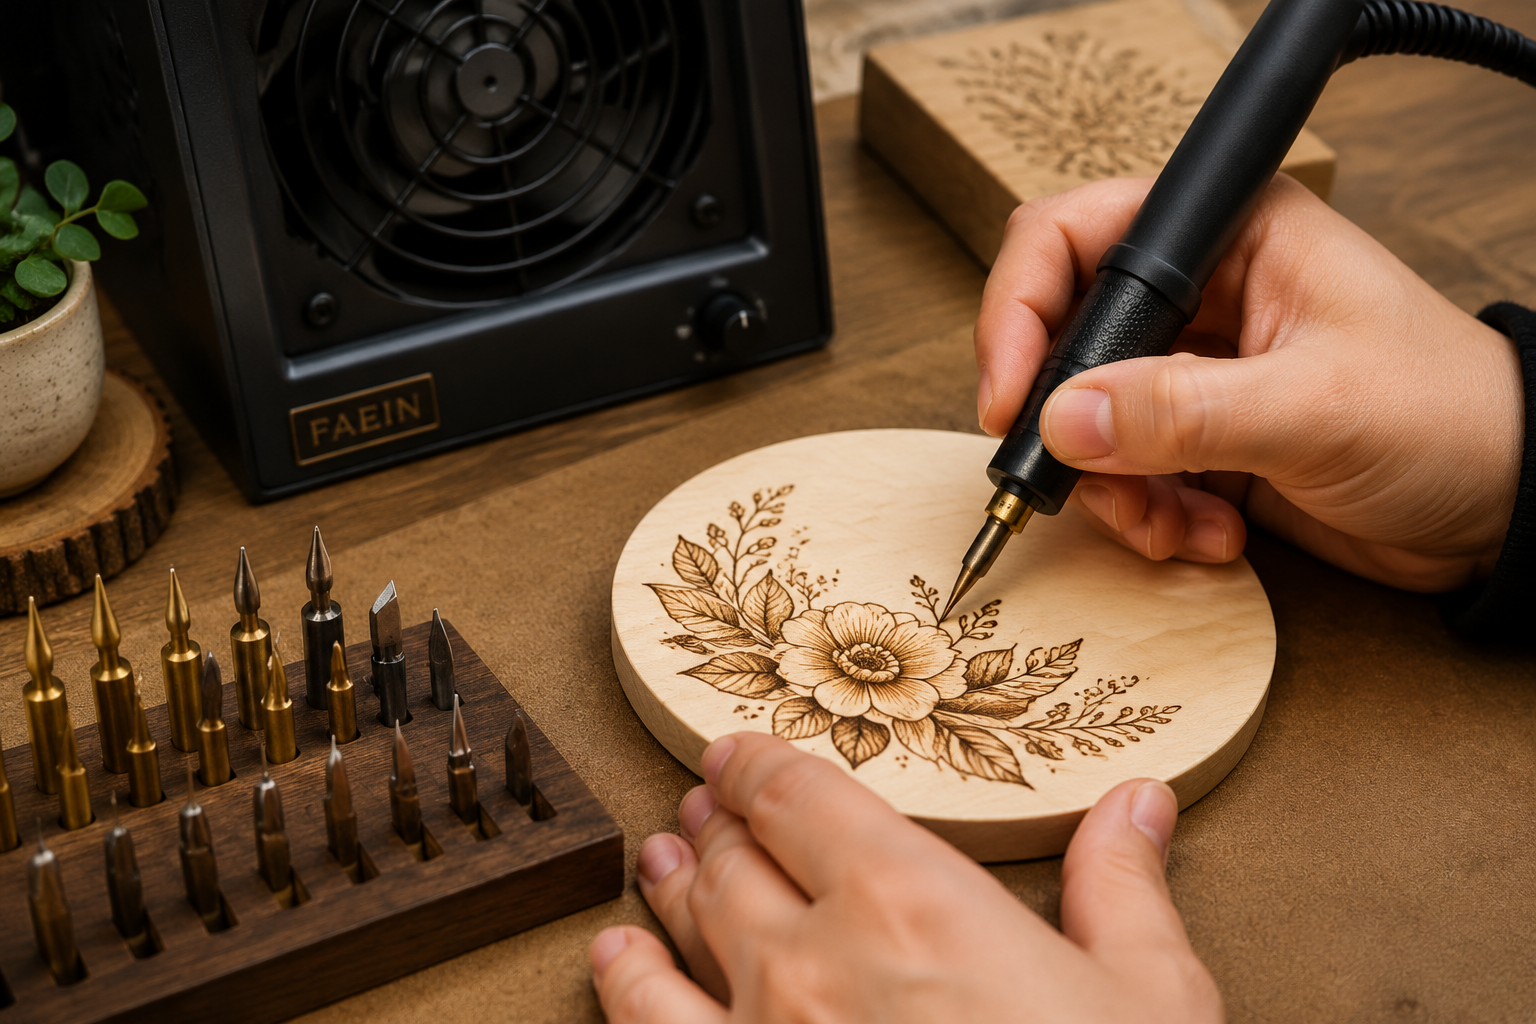
Pyrography, derived from the Greek words “pyr” (fire) and “graphos” (writing), literally means “writing with fire.” It is the art of decorating wood or other materials with burn marks resulting from the controlled application of a heated object. For woodworkers, this technique opens a vast realm of creative possibilities, allowing for the addition of names, dates, intricate patterns, detailed illustrations, and even realistic portraits directly onto their wooden creations. The beauty of pyrography lies in its ability to permanently etch design into wood, creating a tactile and visually rich texture that paint or stain cannot replicate.

The historical roots of pyrography stretch back centuries, with various cultures utilizing heated tools to decorate wood and gourds. Modern pyrography tools, however, offer precise temperature control and a wide array of interchangeable tips, making the art more accessible and versatile than ever before. This precision allows woodworkers to seamlessly integrate pyrographic elements into their existing projects, whether it’s a custom cutting board, a decorative box, a piece of furniture, or even wooden toys. The contrasting tones achieved through varying burn depths and pressures create stunning visual depth and interest, transforming ordinary wood into extraordinary pieces.
Types of Pyrography Tools for Woodworkers
Choosing the right tool is the first step in your Introduction to Pyrography for Woodworkers: Adding Detailed Artwork and Personalization to Your Projects. There are primarily two types of pyrography tools available, each with its own advantages:
Solid-Point Burners (Craft Burners):
- Description: These are typically pen-style tools with a fixed or screw-in tip that heats up internally. They are generally less expensive and widely available.
- Pros: Good for beginners, excellent for consistent lines and solid areas of color, often come with a few basic tips.
- Cons: Slower heat recovery, can struggle with fine details, temperature control is often limited to “on/off” or a few preset levels.
- Best For: Simple designs, bold lettering, borders, and general crafting projects.
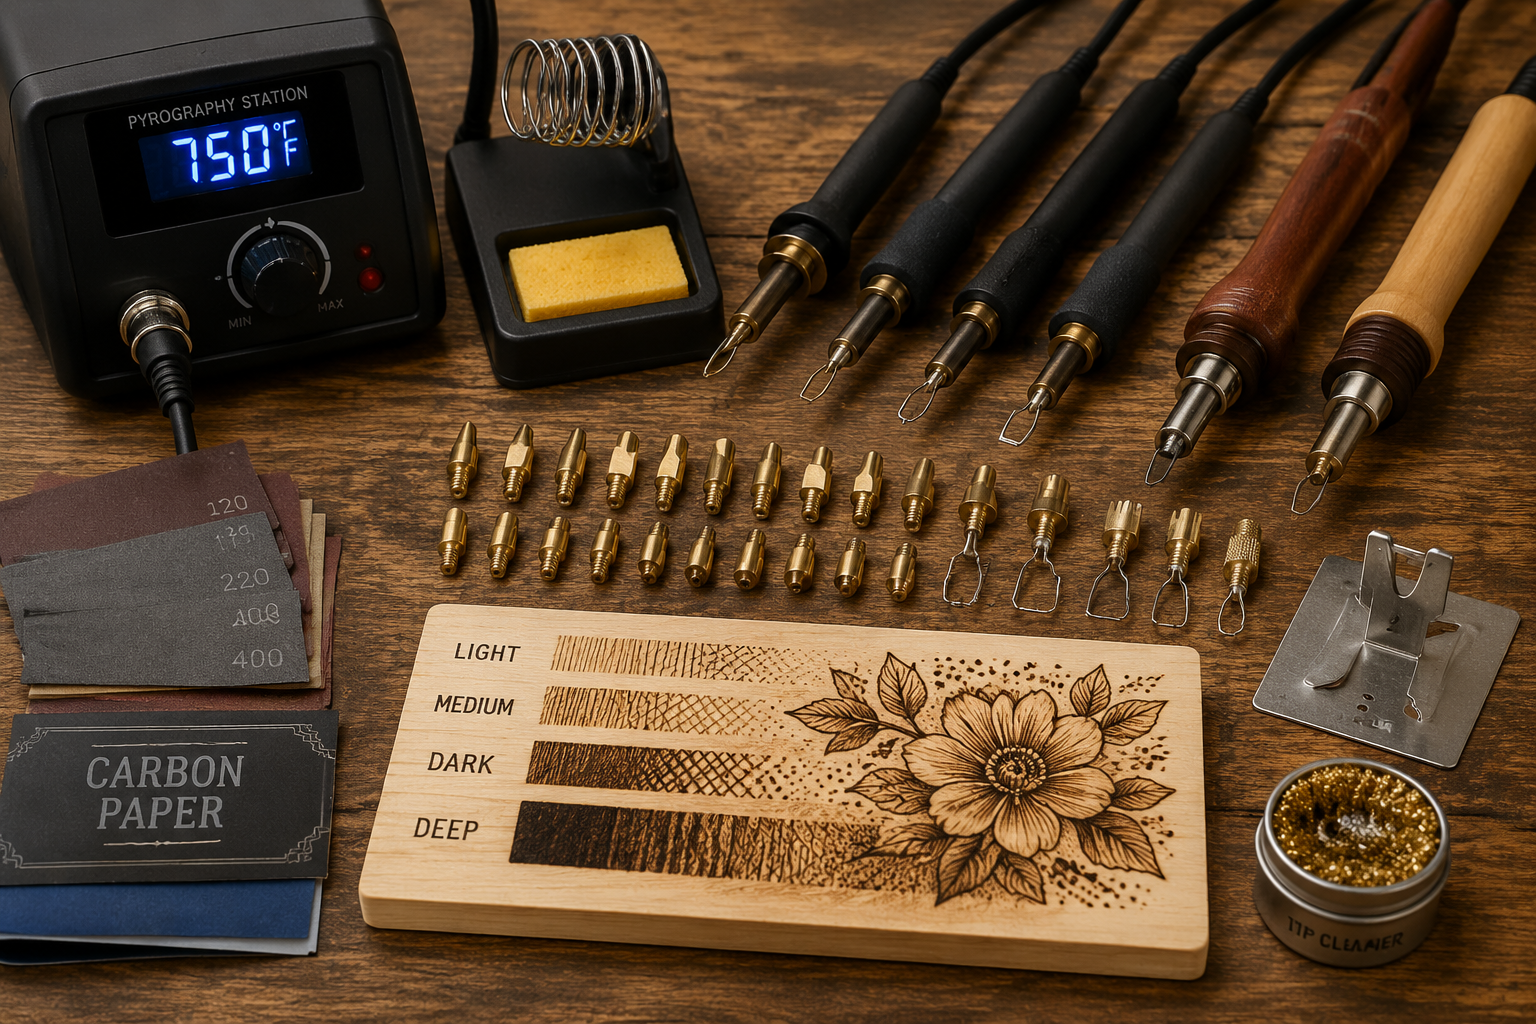
Wire-Nib Burners (Professional Burners):
- Description: These systems consist of a power supply with variable temperature control and a handpiece that holds interchangeable wire nibs. The nibs heat up very quickly and maintain a consistent temperature.
- Pros: Rapid heat recovery, excellent for fine details, delicate shading, and realistic textures. Offer precise temperature control for a wide range of burn depths. A vast selection of specialized nibs is available.
- Cons: More expensive initial investment.
- Best For: Detailed artwork, portraits, intricate patterns, and advanced shading techniques.
While solid-point burners are a good starting point, serious woodworkers looking to integrate detailed artwork will eventually find wire-nib burners to be a worthwhile investment due to their superior control and versatility.
Essential Supplies and Preparing Your Wood for Pyrography
Beyond the burning tool itself, a few other supplies are crucial for a successful pyrography experience. Properly preparing your wood is just as important as the burning process, as it directly impacts the quality and appearance of your finished artwork.
Necessary Supplies
To begin your pyrography journey, gather the following:
- Pyrography Tool: As discussed, either a solid-point or wire-nib burner.
- Interchangeable Tips/Nibs: A variety of tips allows for different effects:
- Universal/Shading Tip: For general burning and broader strokes.
- Detail/Writing Tip: For fine lines, lettering, and intricate details.
- Rounded/Stippling Tip: For creating dots and textured effects.
- Calligraphy Tip: For elegant script.
- Pliers/Heat-Resistant Gloves: For safely changing hot tips on wire-nib burners.
- Pencil and Eraser: For sketching designs and correcting mistakes.
- Carbon Paper or Graphite Paper: For transferring designs accurately.
- Sandpaper: Various grits (120, 180, 220, 320) for wood preparation and smoothing.
- Ventilation Mask/Fan: Essential for safety to avoid inhaling smoke and fumes.
- Heat-Resistant Surface: A ceramic tile or metal tray to rest the hot tool.
- Scrap Wood: For practicing techniques before working on your final project.
- Protective Finish: Polyurethane, wax, or oil to seal the finished piece.
Selecting the Right Wood
The type of wood you choose significantly impacts your pyrography results. Different woods burn differently due to their grain, density, and sap content.
Recommended Woods for Pyrography:
- Basswood: Soft, fine, even grain. Excellent for beginners and detailed work. Burns easily and consistently.
- Birch: Smooth, pale, and dense. Offers good contrast for designs.
- Maple: Hard and dense, requiring higher heat and more patience. Provides crisp lines and excellent detail once mastered.
- Poplar: Soft, even grain. Good for practice and projects where a very light burn is desired.
- Pine: Readily available and inexpensive. The prominent grain can make detailed work challenging, as soft grain burns faster than hard grain.
- Plywood (Baltic Birch): Look for furniture-grade plywood with a smooth, void-free surface.
Woods to Avoid (or Use with Caution):
- Resinous Woods (e.g., Cedar, Fir, some Pines): Can release sticky sap and strong fumes when burned, potentially gumming up tips.
- Treated Wood: Contains chemicals that release toxic fumes when burned. Never burn treated wood.
- Particleboard/MDF: Often contain glues and binders that produce toxic fumes.
Preparing the Wood Surface
Proper preparation ensures a smooth, even burning surface and helps prevent smudging.
- Sanding: Start with a medium-grit sandpaper (e.g., 120-150 grit) to remove any major imperfections. Progress to finer grits (180, 220, or even 320) until the surface is exceptionally smooth. The smoother the wood, the easier it is to achieve consistent lines and shading.
- Tip: For highly detailed work, consider sanding to 400-600 grit.
- Cleaning: After sanding, thoroughly wipe the wood with a clean, lint-free cloth to remove all dust. Any dust left on the surface can get burned into your design, creating imperfections.
- Design Transfer:
- Freehand Sketching: For simple designs or if you’re confident in your drawing skills, lightly sketch your design directly onto the wood with a pencil. Use a light hand, as deep pencil marks can be difficult to erase or burn over cleanly.
- Carbon/Graphite Paper: This is the most common method for transferring detailed designs. Print or draw your design on paper. Place the carbon paper face down on your wood, then place your design on top. Trace over the lines of your design with a pen or stylus. The carbon paper will transfer a light outline onto the wood.
- Digital Projection: For complex designs or portraits, you can project an image onto your wood and lightly trace the outlines.
- Important: Once your design is transferred, lightly erase any excess graphite or pencil lines that you don’t intend to burn, as they can sometimes set into the wood with the heat.
Basic Pyrography Techniques and Safety
With your tools ready and wood prepared, it’s time to learn the fundamental techniques and prioritize safety. An Introduction to Pyrography for Woodworkers: Adding Detailed Artwork and Personalization to Your Projects would be incomplete without a strong emphasis on these crucial aspects.
Pyrography Safety Guidelines
Safety should be your top priority when working with hot tools and smoke.
- Ventilation: Always work in a well-ventilated area. Use an exhaust fan or work near an open window. Consider a personal respirator mask (N95 or higher) to protect against smoke and particulate inhalation.
- Gloves: Wear heat-resistant gloves when changing hot tips on wire-nib burners to prevent burns.
- Tool Rest: Always place your hot tool on a dedicated heat-resistant stand or ceramic tile when not actively burning. Never lay it directly on your workbench or project.
- Flammable Materials: Keep flammable materials away from your work area.
- Breaks: Take regular breaks to avoid eye strain and hand fatigue.
- Never Leave Unattended: Do not leave a heated pyrography tool unattended. Unplug it or turn it off when you step away.
- Test on Scrap Wood: Before working on your final piece, always test your tool’s temperature and various tips on a piece of scrap wood of the same type.
Mastering Basic Burning Techniques
Practice is key to developing control and achieving desired effects. Always start on scrap wood.
- Holding the Tool: Hold the pyrography pen like a regular pen or pencil. Comfort and control are paramount. Experiment with different grips to find what works best for various lines and shading.
- Temperature Control:
- Too Low: Will require more pressure and multiple passes, leading to inconsistent burns.
- Too High: Can scorch the wood quickly, creating dark, uncontrolled marks or deep grooves.
- Just Right: Allows the tool to glide smoothly, creating consistent lines with minimal pressure.
- Wire-nib burners: Start at a medium setting and adjust as needed. Different woods and techniques require different temperatures.
- Solid-point burners: These typically operate at a single temperature; adjust your speed and pressure accordingly.
- Line Work:
- Fine Lines: Use a detail or writing tip with a light touch and steady speed. A slightly higher temperature can help create crisp lines without excessive pressure.
- Thick Lines: Use a wider tip, or make multiple passes with a detail tip. Slower speed and more pressure will create darker, thicker lines.
- Consistency: Aim for consistent pressure and speed to maintain uniform line thickness and darkness.
- Shading: This technique adds depth and dimension.
- Feathering: Lightly drag the flat edge of a shading tip across the wood, lifting it gradually to create a soft, faded effect.
- Stippling: Use a rounded tip to create a series of dots. Vary the pressure and density of dots to create different shades. This can be very effective for textures.
- Circular Motion: Lightly move a shading tip in small, overlapping circles to create smooth, even tones.
- Pressure Variation: Varying the pressure you apply will create darker or lighter shades. Less pressure for lighter burns, more pressure for darker burns.
- Speed Variation: Moving the tool faster will result in lighter burns; moving it slower will create darker burns.
- Texture: Use different tips and techniques to mimic various textures:
- Hair/Fur: Use fine lines and feathering.
- Wood Grain: Emphasize existing grain or create new patterns with a sharp tip.
- Stone: Use irregular stippling and shading.
- Internal Link Opportunity: For those interested in adding texture and detail through carving, explore “Introduction to Wood Carving for Beginners: Tools, Techniques, and Simple Projects to Get Started” at https://woodcraftwiz.com/introduction-to-wood-carving-for-beginners-tools-techniques-and-simple-projects-to-get-started/.
Remember that pyrography is a subtractive art – you can always burn darker, but you cannot un-burn. Start with lighter burns and gradually build up to your desired darkness. This approach minimizes mistakes and allows for greater control.

Finishing and Protecting Your Pyrography Projects
Once your pyrography artwork is complete, the final step is to finish and protect it. This not only enhances the appearance of your designs but also safeguards them against moisture, dirt, and wear, ensuring their longevity. This section is a vital part of an Introduction to Pyrography for Woodworkers: Adding Detailed Artwork and Personalization to Your Projects.
Cleaning and Post-Burn Preparation
Before applying any finish, a few steps are necessary:
- Gentle Erasing: Carefully erase any remaining pencil or graphite lines that were not covered by your burning. Use a soft eraser to avoid smudging the burn marks.
- Light Sanding (Optional, with caution): If you have any very light smudges or areas where the wood feels slightly raised from the burning, you can very gently sand with extremely fine-grit sandpaper (400-600 grit). Do this with extreme care, moving in the direction of the grain, and avoid sanding directly over deeply burned areas, as this can lighten them. This step is often skipped if the initial preparation was thorough.
- Dust Removal: Wipe down the entire piece again with a clean, lint-free cloth or use compressed air to remove any dust or eraser residue.
Choosing the Right Finish
The type of finish depends on the project’s intended use and desired aesthetic. It’s important to select finishes that will not significantly obscure or lighten your pyrographic artwork.
Here are common finishing options:
- Polyurethane (Oil-Based or Water-Based):
- Pros: Very durable, offers excellent protection against moisture and wear. Available in various sheens (matte, satin, gloss). Water-based polyurethanes dry faster and have less odor.
- Cons: Can sometimes slightly yellow over time (oil-based). Can appear thick if too many coats are applied.
- Application: Apply thin, even coats with a brush or sprayer. Lightly sand between coats with 320-400 grit sandpaper for a smoother finish.
- Internal Link Opportunity: For guidance on application techniques, refer to our article on “Applying Polyurethane in High Humidity: Tips and Techniques” at https://woodcraftwiz.com/applying-polyurethane-in-high-humidity-tips-and-techniques/.
- Clear Lacquer:
- Pros: Dries very quickly, provides a hard, clear finish. Easy to spray for an even coat.
- Cons: Less durable than polyurethane for heavy-use items. Can be brittle.
- Application: Best applied with multiple thin spray coats.
- Wax (Paste Wax, Butcher Block Oil/Wax):
- Pros: Creates a natural, soft luster. Easy to apply and reapply. Food-safe options available for cutting boards or serving trays.
- Cons: Offers less protection against moisture and wear compared to polyurethane or lacquer. Requires more frequent reapplication.
- Application: Apply with a soft cloth, let it penetrate, then buff to a shine.
- Oil Finishes (Tung Oil, Linseed Oil, Danish Oil):
- Pros: Penetrates the wood, enhancing the natural grain and providing a warm, hand-rubbed look. Doesn’t create a film on the surface, which some prefer for pyrography as it maintains the tactile feel.
- Cons: Less durable than film-forming finishes. Requires multiple coats and longer drying times.
- Application: Apply with a cloth, let it soak in, wipe off excess, and repeat coats.
- Shellac:
- Pros: Natural, non-toxic, and dries quickly. Can be used as a sealer before other finishes or as a finish itself for decorative items.
- Cons: Not very water-resistant. Can be damaged by alcohol.
- Application: Apply thin coats with a brush or pad.
Considerations when Choosing a Finish:
- Project Use: For cutting boards or items in contact with food, opt for food-safe finishes like mineral oil, butcher block oil, or certain waxes. For outdoor items, select marine-grade polyurethane or spar urethane for UV and moisture protection.
- Aesthetic: Do you want a high-gloss shine, a soft satin, or a natural, matte look?
- Protection Level: How much protection does the item need? A decorative wall hanging requires less protection than a frequently handled box or a table.
- Impact on Burn Marks: Most clear finishes will slightly darken the wood and intensify the burn marks, making them appear richer. Always test your chosen finish on a scrap piece of wood with some pyrography to see its effect before applying it to your final project.
Application Tips
- Work in a Clean Environment: Dust is the enemy of a good finish.
- Thin Coats: Always apply multiple thin coats rather than one thick coat. This ensures better adhesion, durability, and a smoother finish.
- Follow Manufacturer Instructions: Adhere to the drying times and reapplication guidelines provided by the finish manufacturer.
- Full Coverage: Ensure complete and even coverage, especially on all exposed surfaces, to provide uniform protection.
By carefully selecting and applying the right finish, you can protect your pyrographic artwork for years to come, truly bringing your personalized woodworking projects to life. For further exploration of finishing techniques for various wood types, including reclaimed wood, consider articles like “Sustainable Finishes for Reclaimed Wood: Low VOC Recipes and Application Tutorials” at https://woodcraftwiz.com/sustainable-finishes-for-reclaimed-wood-low-voc-recipes-and-application-tutorials/.
Conclusion
Pyrography offers woodworkers a unique and captivating avenue to infuse their projects with unparalleled artistic detail and personalization. From the initial selection of the right wood burning tool to the meticulous preparation of the wood surface, and from mastering foundational burning techniques to applying the perfect protective finish, each step contributes to transforming a simple wooden object into a cherished heirloom or a striking piece of art.
As you embark on this creative journey, remember that patience and practice are your most valuable tools. Start with simple designs, experiment with different tips and temperatures on scrap wood, and gradually challenge yourself with more intricate patterns and shading. The ability to etch your vision into wood with fire is a powerful skill that will undoubtedly elevate your woodworking craft in 2026 and beyond. Embrace the subtle textures, the rich contrasts, and the undeniable charm that pyrography brings, and watch your projects tell their own unique stories.
Actionable Next Steps:
- Invest in a Starter Kit: Purchase a basic solid-point pyrography tool or a beginner wire-nib set to get started.
- Gather Scrap Wood: Collect various types of wood scraps (basswood, birch, pine) for practice.
- Practice Basic Strokes: Dedicate time to practicing lines, curves, and simple shading techniques on scrap pieces.
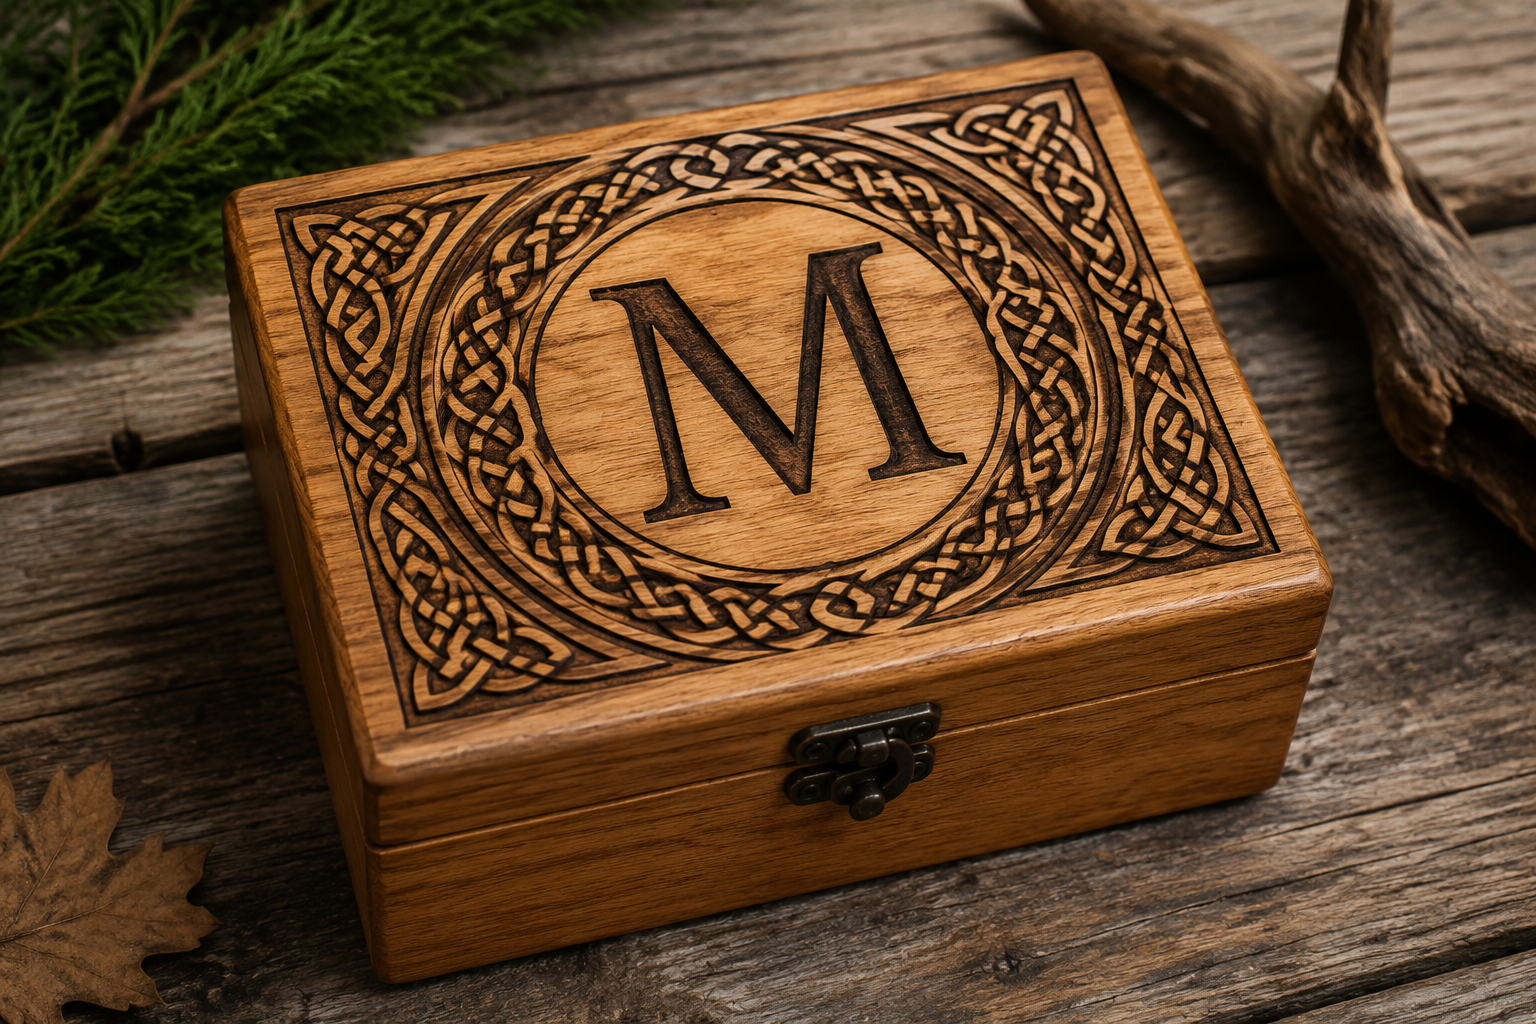
- Try a Simple Project: Begin with a small project like a personalized coaster, a key chain, or a simple design on a wooden box.
- Prioritize Safety: Always ensure proper ventilation and follow all safety guidelines.
- Explore Design Resources: Look for free pyrography patterns online or in books to inspire your next project.
Remember, every master wood burner began with an Introduction to Pyrography for Woodworkers: Adding Detailed Artwork and Personalization to Your Projects. Your journey into this beautiful art form starts now.
SEO Meta Title: Pyrography for Woodworkers: Add Art & Personalization SEO Meta Description: Learn pyrography basics in 2026. This guide for woodworkers covers tools, techniques, and finishing to add detailed artwork and personalization to projects.
