

Global food production contributes significantly to greenhouse gas emissions, with transportation accounting for a substantial portion of produce’s carbon footprint (UNEP, 2021). Imagine the environmental and personal benefits of harvesting fresh, organic herbs and vegetables just steps from your kitchen, regardless of outdoor climate or living space. Crafting Custom Wooden Planters for Indoor Edible Gardens: Aesthetic Designs for Homegrown Produce offers a powerful solution, transforming ordinary interiors into vibrant, productive oases. This approach not only provides a sustainable source of fresh food but also enhances home aesthetics with natural, handcrafted elements. Beyond the practicalities of cultivation, these bespoke wooden planters become integral design features, reflecting personal style while fostering a deeper connection to the food we consume.
Key Takeaways
- Custom wooden planters enhance indoor edible gardens by combining functionality with personalized aesthetics.
- Selecting the right wood and employing proper construction techniques are crucial for durability and moisture resistance.
- Effective drainage and appropriate waterproofing are essential for the health of indoor plants and the longevity of the planter.
- Design considerations should balance plant needs, home decor, and space availability to create a harmonious environment.
- Thoughtful finishing techniques and ongoing maintenance ensure the planter remains a beautiful and productive element for years.
The Foundation: Selecting Materials and Planning Your Planter Design
The success of Crafting Custom Wooden Planters for Indoor Edible Gardens: Aesthetic Designs for Homegrown Produce begins with thoughtful material selection and meticulous design planning. Unlike outdoor planters, indoor versions require heightened attention to moisture resistance, aesthetic integration, and ergonomics to ensure both plant health and home harmony.

Choosing the Right Wood for Longevity and Aesthetics
For indoor applications, several wood species offer a balance of durability, workability, and visual appeal. Moisture resistance is paramount to prevent warping, rot, and mold growth.
- Cedar: Naturally resistant to rot and insects due to its oils. It has a beautiful aroma and a warm, inviting color. However, it can be relatively soft.
- Redwood: Similar to cedar in rot resistance, redwood is also dimensionally stable and visually striking. It is often more expensive.
- Cypress: Known for its resistance to decay and insects, cypress is a durable option that weathers well and has an attractive grain.
- Teak: While expensive, teak is exceptionally durable and highly water-resistant, making it a premium choice. Its rich color deepens with age.
- Treated Pine (for internal structure, if covered): If the wood will not be in direct contact with soil and moisture, and will be lined, treated pine could be used for structural integrity, though typically less preferred for aesthetic surfaces in indoor planters due to its appearance and chemical treatment concerns. When sourcing reclaimed and salvaged wood, verify its origin and treatment to ensure it’s safe for edible plants indoors.
Beyond species, consider the grade of wood. Clear grades have fewer knots and provide a cleaner, more modern look, while knotty grades can offer a rustic charm. The thickness of the wood will also impact structural integrity and overall aesthetic. Aim for lumber that is at least 3/4 inch thick for most designs.
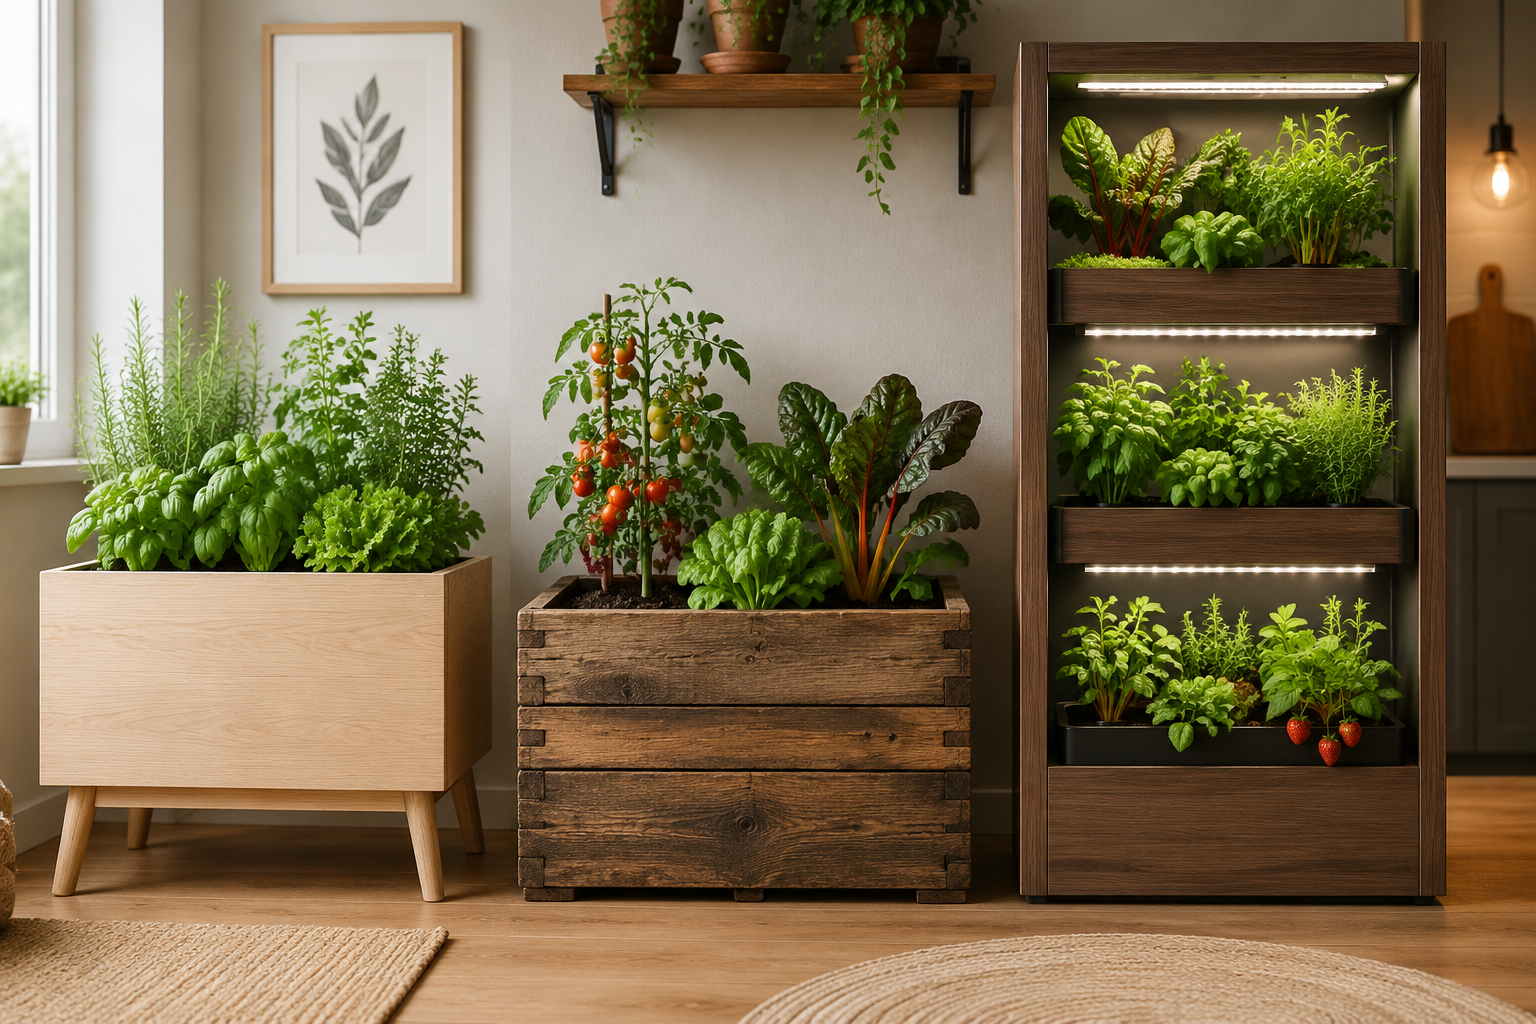
Essential Design Elements for Indoor Planters
When designing your custom wooden planter, several key elements must be considered to support plant growth and integrate seamlessly into your living space.
Size and Shape
The dimensions of your planter should accommodate the mature size of the edible plants you intend to grow. Root vegetables like carrots or radishes need deeper planters (10-12 inches), while herbs like basil or mint can thrive in shallower containers (6-8 inches). Consider the available space in your home – a narrow windowsill, a sunny corner, or a dedicated plant stand.
- Window Box Style: Ideal for herbs and smaller greens, fitting snugly on a windowsill.
- Tiered or Vertical Designs: Maximize space in smaller apartments, allowing for multiple plant varieties.
- Freestanding Boxes: Can become a focal point in a room, suitable for larger plants or a variety of crops.
- Modular Units: Offer flexibility, allowing you to rearrange or expand your garden as needed. For inspiration on creating adaptive pieces, explore modular furniture design for woodworkers.
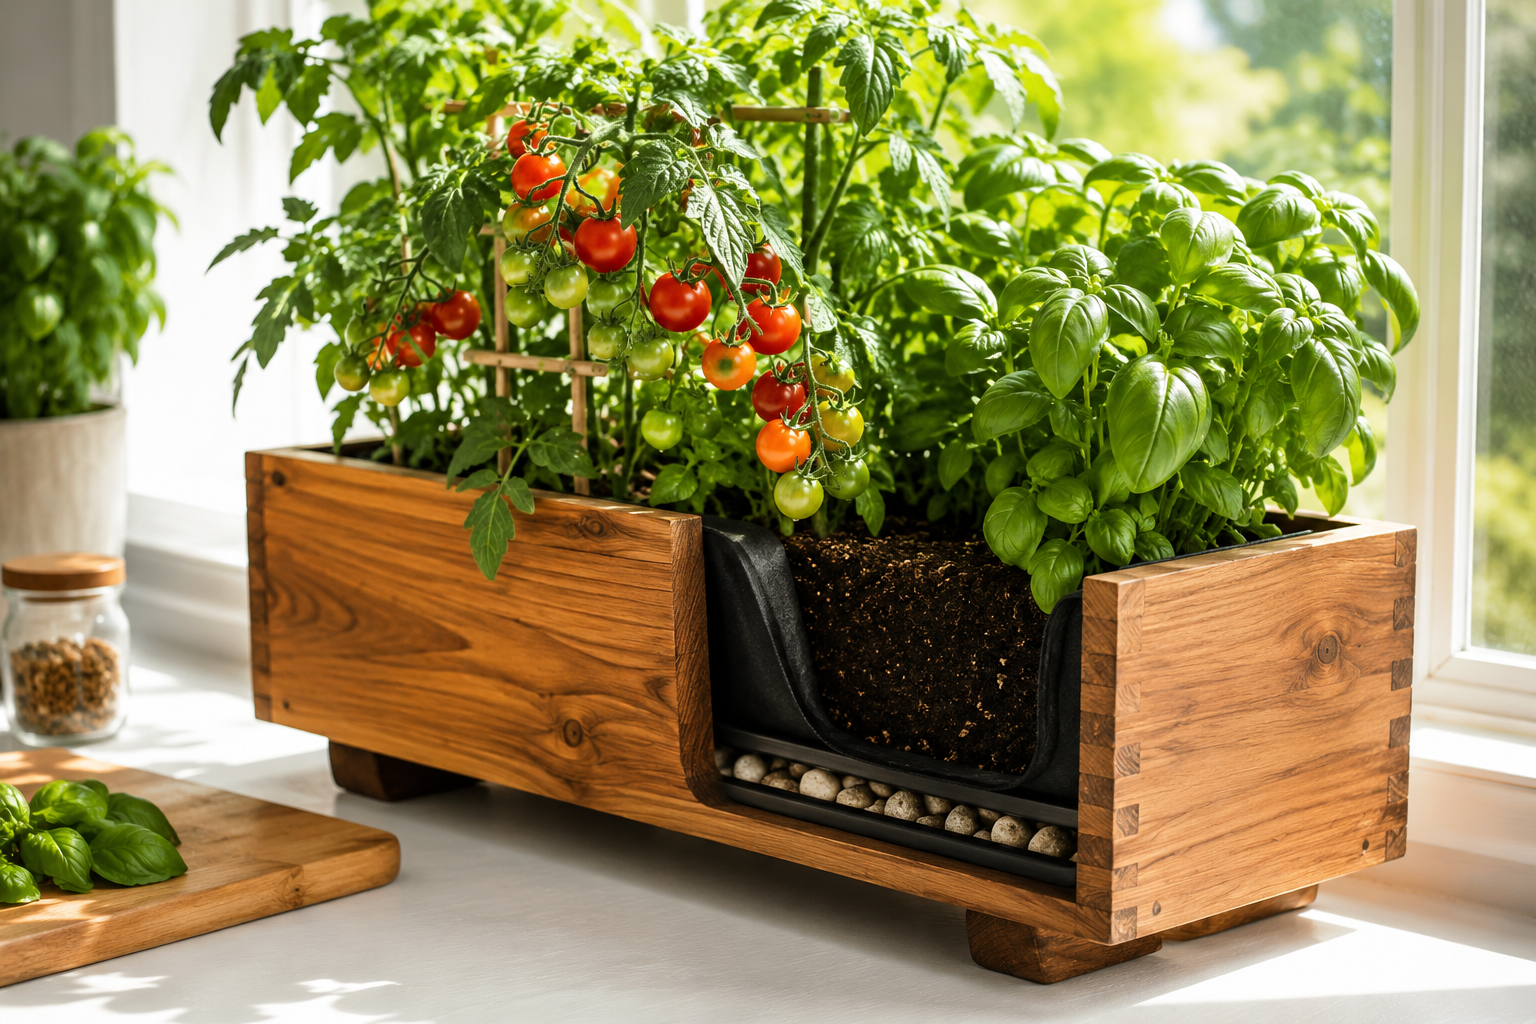
Drainage and Waterproofing
Proper drainage is non-negotiable for indoor planters. Stagnant water leads to root rot, a common killer of container plants.
- Drainage Holes: Drill several holes (at least 1/2 inch diameter) in the bottom of the planter.
- Drip Trays: A matching, waterproof drip tray is essential to catch excess water and protect your floors and furniture. This can be integrated into the design or be a separate, removable component.
- Lining: To protect the wood from direct contact with moist soil, consider lining the interior of the planter.
- Pond Liner/Heavy-Duty Plastic Sheeting: A durable and effective barrier. Ensure it is food-safe if it will come into direct contact with soil.
- Fabric Grow Bags: Can be placed inside wooden planters, offering excellent drainage and aeration.
- Bituminous Paint/Rubberized Coating: Apply to the interior surfaces for a waterproof seal. Ensure these are certified food-safe and non-toxic once cured.
- Elevated Bottom: Incorporating small feet or a recessed base can improve air circulation and prevent moisture buildup underneath the planter.
Aesthetic Integration
The design should complement your home decor.
- Modern Minimalist: Clean lines, simple shapes, light-colored woods, or painted finishes.
- Rustic Farmhouse: Reclaimed wood, distressed finishes, visible joinery.
- Bohemian: Natural, untreated wood, organic shapes, perhaps with carved details. Discover more about introduction to wood carving for beginners for unique decorative touches.
- Industrial: Combine wood with metal accents, such as iron legs or corner braces.
<code class="language-json">{
  "key_materials": {
    "Wood Types": ["Cedar", "Redwood", "Cypress", "Teak"],
    "Liner Options": ["Pond Liner", "Heavy-duty Plastic Sheeting", "Fabric Grow Bags", "Food-safe Bituminous Paint"]
  },
  "design_considerations": {
    "Plant Needs": "Depth (6-12 inches depending on plant type)",
    "Home Aesthetics": "Match existing decor (Modern, Rustic, Bohemian, Industrial)",
    "Space Constraints": "Window box, tiered, freestanding, modular"
  }
}
</code>
{width=”1536″ height=”1024″}
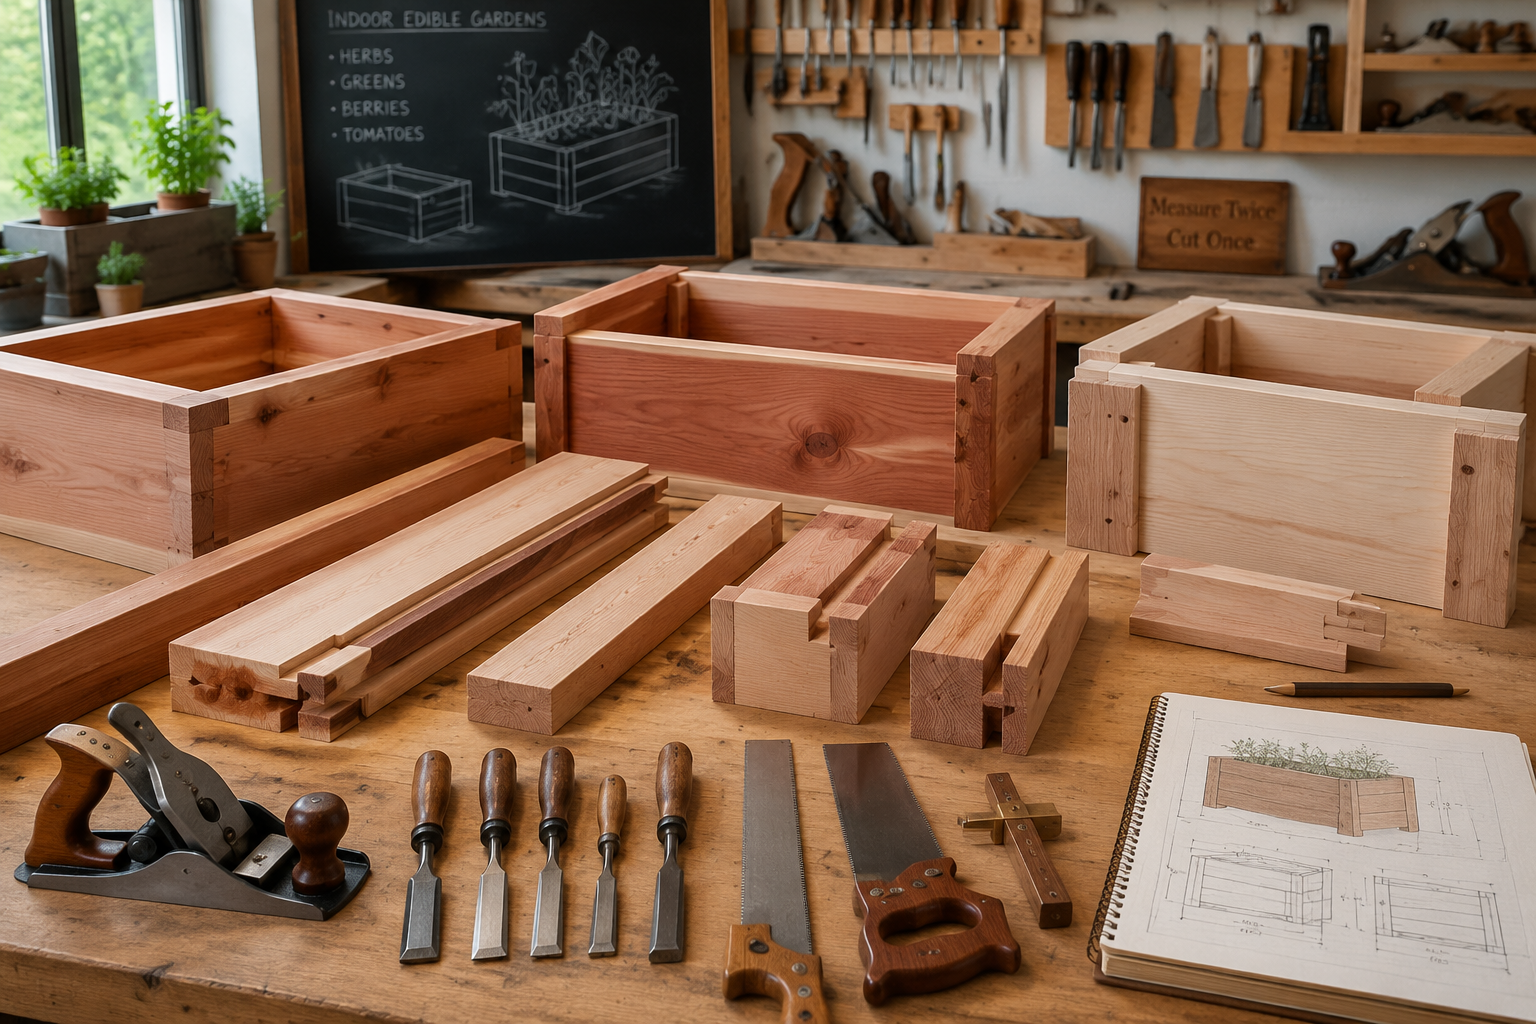
Construction Techniques for Custom Wooden Planters for Indoor Edible Gardens
Once the design and materials are chosen, the focus shifts to robust construction. The joinery and assembly methods employed will directly influence the planter’s durability, especially given the constant exposure to moisture and soil.
Precision Joinery for Structural Integrity
For planters, strong, moisture-resistant joints are crucial. While simple butt joints with screws can suffice for some applications, more advanced joinery will provide superior longevity and a refined aesthetic.
- Dado and Rabbet Joints: These are excellent for constructing the sides and bottom of a rectangular planter. A dado involves cutting a groove across the grain, while a rabbet is a cut along the edge or end of a board. They provide increased gluing surface area and mechanical strength.
- Box Joints/Finger Joints: Ideal for the corners of rectangular planters, these interlocking joints offer significant strength and a decorative element. Mastering dovetail joints with hand tools or using a router table can create highly durable and visually appealing corner joints.
- Mortise and Tenon Joints: While more complex, these joints offer exceptional strength and are suitable for larger, more substantial planters or for attaching legs and frames.
- Biscuit or Domino Joints: These reinforcement methods can be used with butt joints to add strength and alignment, making assembly easier and the final product more robust. For general guidance, review beginner’s guide to essential woodworking joints.
When assembling, use waterproof wood glue (e.g., Titebond III) in conjunction with mechanical fasteners like stainless steel screws or corrosion-resistant nails. Pre-drilling pilot holes is essential to prevent wood splitting.
Step-by-Step Assembly Guide
- Cut Components to Size: Precisely cut all side panels, bottom panel, and any support pieces according to your design. Ensure all cuts are square and accurate. A good power tool mastery for building console tables applies to many woodworking projects.
- Cut Joinery: Create your chosen joinery (dadoes, rabbets, box joints) on the respective pieces using a table saw, router, or hand tools.
- Dry Fit: Assemble the planter without glue to ensure all joints fit snugly. Make any necessary adjustments now.
- Apply Finish to Interior (Pre-Assembly, if applicable): If using a waterproof coating or sealant on the inside of the wood, it can be easier to apply it to individual panels before final assembly, ensuring full coverage.
- Glue and Assemble Sides: Apply waterproof wood glue to all mating surfaces of your chosen joints. Assemble the side panels, clamping them securely. Wipe away any excess glue immediately. Allow ample drying time.
- Attach Bottom: Once the side frame is solid, attach the bottom panel. Again, use waterproof glue and fasteners. Ensure proper drainage holes are drilled if not done already.
- Add Feet/Drip Tray Supports: If your design includes feet or integrated drip tray supports, attach them now.
- Internal Liner Installation: If using a plastic or fabric liner, fit it snugly inside the assembled planter. Staple the top edge of the liner to the inside rim of the planter, ensuring it doesn’t interfere with the aesthetic but provides full coverage for the soil.
- Exterior Finishing: Sand the exterior surfaces smooth. Apply your chosen exterior finish.
“A well-constructed wooden planter for indoor edible gardens is a testament to mindful craftsmanship, marrying aesthetic appeal with the practical demands of nurturing life.”
Tool Checklist for Planter Construction
- Measuring and Marking: Tape measure, ruler, square, pencil.
- Cutting: Circular saw, miter saw, table saw (for precision cuts and joinery), jigsaw (for curves).
- Shaping/Joinery: Router with appropriate bits (for dadoes, rabbets, decorative edges), chisels (for fine-tuning joinery or decorative elements). Learn more about the essential guide to router bits.
- Drilling: Drill/driver with drill bits (for pilot holes and drainage holes).
- Fastening: Clamps, screws (stainless steel), nails (corrosion-resistant), hammer/nail gun.
- Safety Gear: Safety glasses, hearing protection, dust mask.
This methodical approach ensures that your custom wooden planter will not only look stunning but also withstand the rigors of indoor gardening for years to come.
{width=”1536″ height=”1024″}
Finishing and Maintenance for Aesthetic and Durable Indoor Planters
The final stages of Crafting Custom Wooden Planters for Indoor Edible Gardens: Aesthetic Designs for Homegrown Produce involve finishing the wood and establishing a routine for maintenance. These steps are crucial for protecting the wood from moisture, enhancing its natural beauty, and ensuring the planter remains a functional and attractive part of your home decor for many seasons.

Finishing Techniques for Moisture Resistance and Aesthetics
Choosing the right finish is vital for protecting indoor wooden planters. The finish must resist moisture without harming the plants or emitting harmful VOCs indoors.
- Interior Protection:
- Food-Safe Sealants: For direct contact with soil, use non-toxic, food-safe sealants or paints. These might include certain epoxies or specific waterproofing compounds designed for garden beds.
- Pond Liner or Plastic Sheeting: As mentioned earlier, physically lining the interior is often the most effective and safest method. Ensure the liner is neatly trimmed and secured.
- Exterior Protection:
- Marine-Grade Varnish or Spar Urethane: These finishes offer excellent water resistance and UV protection, making them ideal for areas exposed to sunlight (like windowsills). They create a durable, protective layer.
- Polyurethane: A common and effective choice for wood protection. Opt for water-based polyurethane for lower VOCs and easier cleanup. Consider spray vs brush polyurethane for different application preferences, and ensure it’s fully cured before introducing plants.
- Natural Oils (e.g., Tung Oil, Linseed Oil): These penetrate the wood, enhancing its natural grain and providing a degree of water resistance. They require more frequent reapplication but offer a beautiful, natural look. For a detailed comparison, see Danish oil vs linseed: The Ultimate Wood Finishing Guide.
- Paint: For a pop of color or to match specific decor, exterior-grade, low-VOC paint can be used. Ensure it’s suitable for wood and provides good moisture barrier.
Application Tips:
- Sanding: Thoroughly sand all exterior surfaces, progressively moving from coarser (120-grit) to finer (220-grit) sandpaper for a smooth finish.
- Cleaning: Wipe down the wood with a tack cloth or damp rag to remove all dust before applying any finish.
- Even Coats: Apply finishes in thin, even coats, following the manufacturer’s instructions for drying times and recoating. Lightly sand between coats for optimal adhesion and smoothness.
- Curing: Allow ample time for the finish to fully cure (not just dry) before adding soil and plants. This ensures maximum protection and minimizes off-gassing.
Integrating Lighting and Watering Systems
To truly optimize your indoor edible garden, consider integrating smart solutions:
- Grow Lights: If natural light is insufficient, consider installing LED grow lights. These can be mounted above the planters or integrated into vertical garden designs. Many modern designs allow for discrete incorporation, enhancing both functionality and aesthetic. For general smart home integration, our guide on DIY smart home integration with custom woodwork offers broader inspiration.
- Self-Watering Systems: While traditional watering is common, self-watering inserts or wicking systems can provide consistent moisture and reduce daily maintenance. These typically involve a water reservoir and a wicking mechanism that draws water up to the soil.
- Water Level Indicators: For integrated self-watering systems, a simple visible water level indicator can be a practical addition.
Long-Term Maintenance for Your Wooden Planters
Regular maintenance ensures the longevity and continued beauty of your custom wooden planters.
- Regular Cleaning: Wipe down the exterior of the planter with a damp cloth to remove dust and soil splashes.
- Inspect for Moisture: Periodically check the wood for any signs of moisture damage, swelling, or mold, especially near the soil line or drainage areas. Address issues promptly.
- Reapply Finish: Depending on the type of finish and exposure, plan to reapply a protective coat every 1-3 years. Natural oils may require more frequent reapplication than varnishes or paints.
- Drainage Check: Ensure drainage holes remain clear of debris.
- Seasonal Rotation: If possible, rotate planters to ensure even light exposure for all sides of the plants.
By focusing on durable construction, appropriate finishing, and diligent maintenance, your handcrafted wooden planters will provide a beautiful and productive home for your indoor edible garden for many years to come, truly embodying the essence of Crafting Custom Wooden Planters for Indoor Edible Gardens: Aesthetic Designs for Homegrown Produce.
{width=”1536″ height=”1024″}
Conclusion
Crafting Custom Wooden Planters for Indoor Edible Gardens: Aesthetic Designs for Homegrown Produce offers a rewarding synthesis of woodworking, gardening, and home decor. It allows individuals to cultivate fresh, organic produce year-round while simultaneously enhancing their living spaces with unique, handcrafted elements. By carefully selecting moisture-resistant woods, employing robust joinery techniques, prioritizing effective drainage and waterproofing, and applying suitable finishes, these planters become durable, functional, and visually stunning additions to any home. The journey from raw lumber to a thriving indoor garden fosters a deeper appreciation for craftsmanship and sustainable living.
The integration of thoughtful design, from minimalist to rustic, ensures that each planter is not merely a container but an integral part of the home’s aesthetic. As we move into 2026, the demand for sustainable practices and personalized home environments continues to grow, making custom indoor edible gardens a particularly relevant and valuable endeavor.
Actionable Next Steps:
- Define Your Needs: Identify the types of edible plants you want to grow and the available space in your home. This will guide your planter’s size and design.
- Select Your Wood: Research and choose a wood species that aligns with your aesthetic preferences and provides the necessary moisture resistance for indoor use.
- Sketch Your Design: Create a detailed plan, including dimensions, joinery types, and drainage solutions. Consider integrating smart features like grow lights or self-watering elements.
- Gather Your Tools and Materials: Ensure you have all necessary woodworking tools, fasteners, glues, and finishing products before starting construction.
- Build and Finish with Care: Follow proper construction techniques, paying close attention to precision joinery, waterproofing the interior, and applying a durable exterior finish.
- Plant and Enjoy: Once cured, add your soil and plants, and begin enjoying the fresh produce from your beautifully crafted indoor garden. Regularly maintain your planter to ensure its longevity.
References
United Nations Environment Programme (UNEP). (2021). Food Systems Emissions. Retrieved from https://www.unep.org/explore-topics/food-systems/what-we-do/food-systems-emissions
About the Author
This article was written by a team of expert woodworkers and SEO content strategists at WoodcraftWiz, dedicated to providing comprehensive, authoritative guides for woodworking enthusiasts. Our goal is to empower readers with the knowledge and skills to create beautiful, functional, and sustainable projects for their homes and workshops.
