
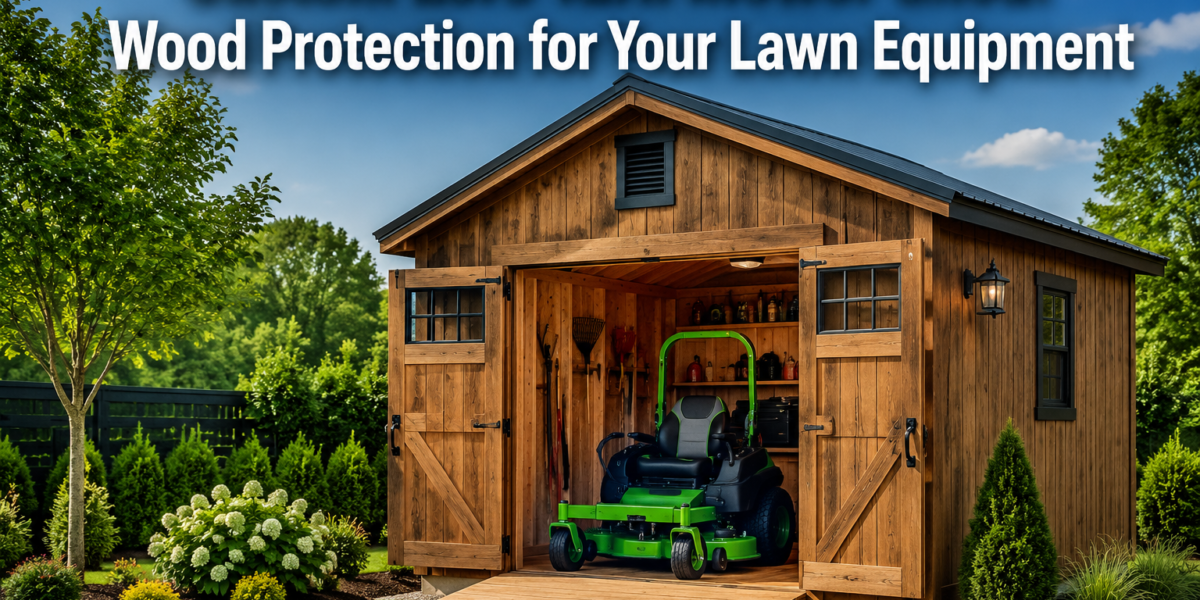
The average zero-turn mower represents a significant investment, often ranging from $3,000 to over $10,000. Leaving such valuable equipment exposed to the elements or crammed into a generic, ill-fitting structure can drastically reduce its lifespan and performance. The purpose-built solution of Building a Custom Zero Turn Mower Storage Shed: Protecting Your Lawn Equipment with Wood offers superior protection, enhanced security, and convenient access, all while adding a cohesive, attractive element to your property. This approach ensures your mower remains in peak condition, ready for years of reliable service, and safeguards your financial investment against rust, sun damage, and theft.
Key Takeaways
- Tailored Protection: A custom wooden shed provides precise dimensions and features to perfectly accommodate your zero-turn mower, offering optimal protection from weather and pests.
- Enhanced Durability: Wood, when properly treated and maintained, creates a robust and long-lasting structure capable of withstanding various environmental conditions.
- Improved Security: Integrating strong doors, secure latches, and potentially an alarm system into your custom shed significantly deters theft and unauthorized access.
- Aesthetic Integration: Designing a shed with wood allows for architectural flexibility, ensuring the structure complements your existing home and landscaping.
- Increased Functionality: Beyond just storage, a custom shed can incorporate shelving, workbenches, and easy-access ramps, optimizing your lawn care routine.
Planning Your Custom Zero Turn Mower Shed: Design and Site Selection
The foundation of any successful construction project, particularly when Building a Custom Zero Turn Mower Storage Shed: Protecting Your Lawn Equipment with Wood, lies in meticulous planning. Before a single board is cut, careful consideration must be given to design, site selection, and local regulations. These initial steps determine the shed’s functionality, durability, and compliance.
Assessing Your Mower’s Needs and Dimensions
The primary purpose of this shed is to house your zero-turn mower. Therefore, its dimensions are paramount. Measure your mower thoroughly, including its length, width, and height (with the roll-over protection structure, or ROPS, if applicable, in both raised and lowered positions). Add generous clearance, at least 12-18 inches around all sides, to allow for comfortable maneuvering, maintenance, and storage of fuel cans or other accessories.
Consider the following critical measurements:
- Overall Length: From front bumper to rear tire.
- Overall Width: At the widest point, usually the rear tires or deck edge.
- Overall Height: To the top of the steering levers or ROPS (both up and down).
- Door Clearance: Ensure the door opening is wider than your mower’s widest point and taller than its highest point. A double-door design is often ideal for zero-turn mowers.
Beyond the mower itself, think about what other equipment you might store. Weed trimmers, leaf blowers, gardening tools, or even a small workbench might necessitate additional space. Planning for future needs now can prevent the need for another storage solution later.
Site Selection and Permitting Considerations
Choosing the right location for your shed is as important as its design. The site will affect drainage, accessibility, and visibility.
Factors for site selection:
- Accessibility: Choose a spot that allows for easy access with your mower from where you typically use it. Avoid steep inclines or narrow pathways.
- Drainage: The site should be relatively flat and well-drained. Building on a low spot can lead to moisture issues and damage to the shed’s foundation and contents. Consider a slight grade away from the shed.
- Sunlight Exposure: While some sunlight can help keep the shed dry, excessive direct sun can accelerate wood degradation. Partial shade can be beneficial.
- Proximity to Utilities: If you plan to add lighting or power outlets, consider the proximity to your home’s electrical supply.
- Aesthetics: The shed should complement your property, not detract from it. Consider its visual impact from your home and neighboring properties.
Local building codes and homeowners’ association (HOA) rules are critical. Before you start digging, check with your local municipality for required permits. Many areas have regulations regarding:
- Shed Size Limits: Maximum footprint or height.
- Setback Requirements: How far the shed must be from property lines or other structures.
- Foundation Requirements: Specific types of foundations might be mandated.
- Material Specifications: While wood is generally accepted, some aesthetic guidelines might apply.
Ignoring permits can lead to fines, forced modifications, or even demolition. It is always better to clarify these requirements upfront.
Essential Design Elements for Durability and Functionality
When designing your custom zero-turn mower shed, certain elements contribute significantly to its durability and functionality.
- Foundation: A robust foundation is critical. Options include a concrete slab, concrete piers with a wooden floor, or treated skids. A concrete slab offers the most stability and moisture barrier, especially for heavy equipment. For more on ensuring structural longevity, explore understanding wood movement.
- Framing: Use pressure-treated lumber for any components in contact with the ground or concrete. Standard lumber (2x4s or 2x6s) is suitable for walls and roof trusses.
- Roof Design: A gable or gambrel roof offers good water runoff and can provide extra loft storage. Ensure an adequate overhang to protect the siding.
- Ventilation: Proper ventilation is crucial to prevent moisture buildup, which can lead to mold, mildew, and rust on your equipment. Include vents near the roof peak and near the foundation.
- Doors: Large, wide double doors are ideal for zero-turn mowers. Ensure they are sturdy, well-braced, and open fully without obstruction. Consider a ramp for easy entry and exit.
- Security: Install heavy-duty hinges, a robust latch system, and a quality padlock. You might also consider motion-sensor lighting or even a simple alarm.
By thoroughly planning these aspects, you lay a strong groundwork for Building a Custom Zero Turn Mower Storage Shed: Protecting Your Lawn Equipment with Wood that is both functional and enduring.
Materials and Construction: Building Your Wooden Zero Turn Mower Shed
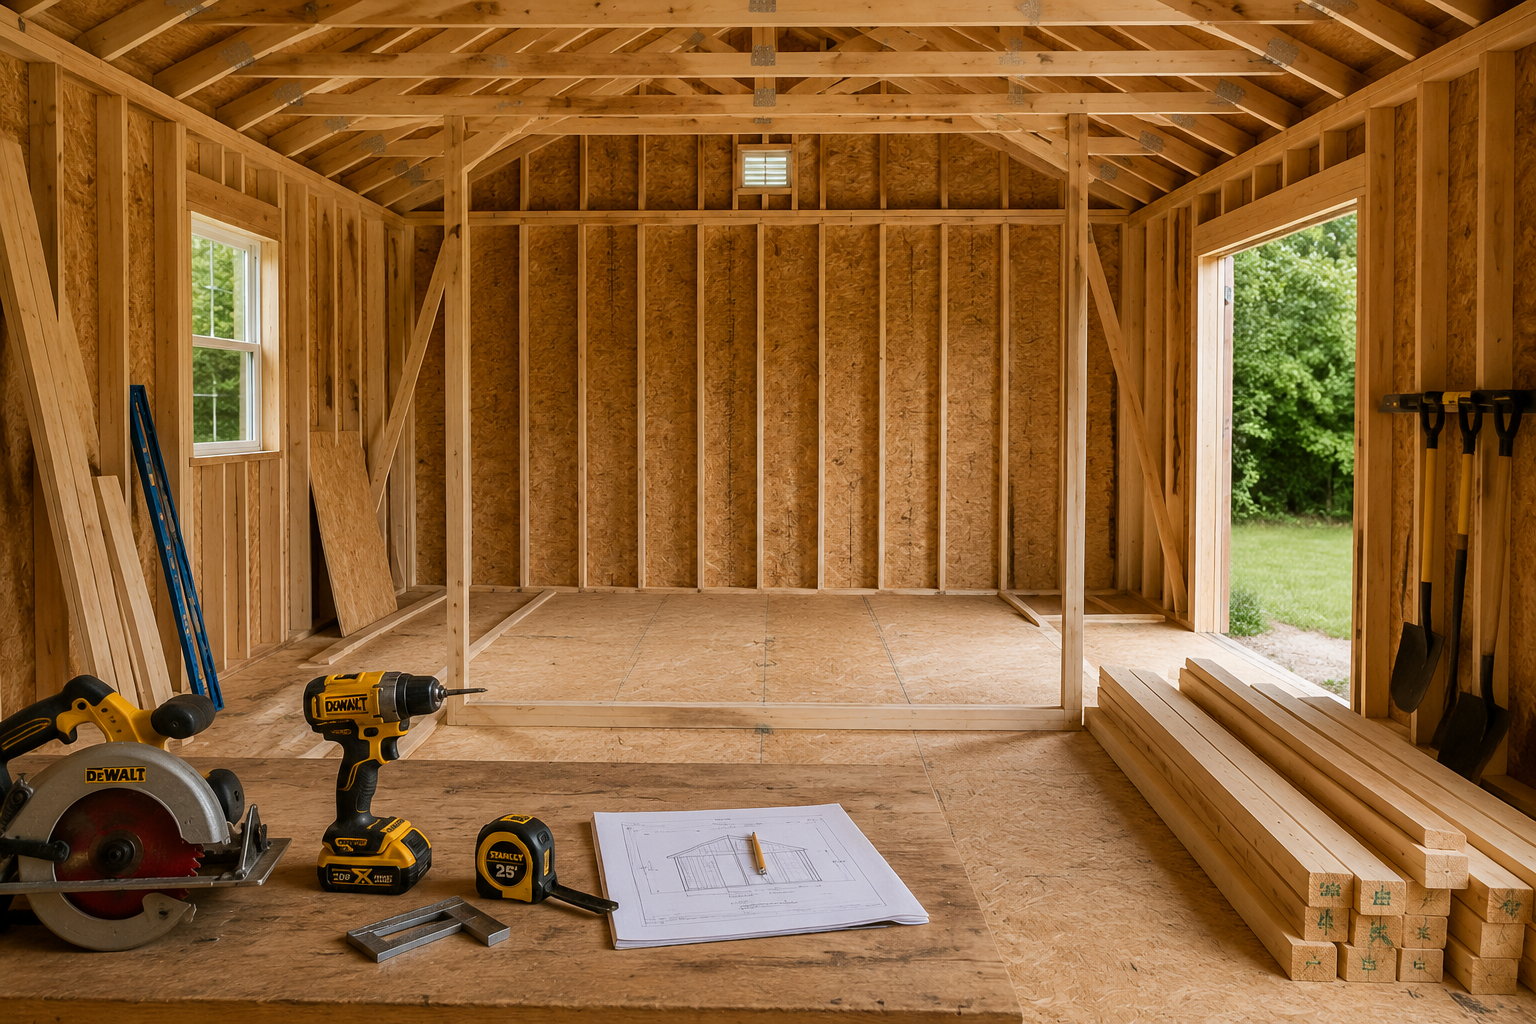
Once planning is complete, the next phase focuses on acquiring the right materials and executing the construction with precision. Building a Custom Zero Turn Mower Storage Shed: Protecting Your Lawn Equipment with Wood requires careful selection of lumber and adherence to sound construction practices to ensure longevity and structural integrity.
Selecting the Right Wood and Fasteners
The choice of wood greatly influences the shed’s durability, appearance, and cost.
Lumber Options:
- Pressure-Treated Lumber: Essential for any wood in direct contact with the ground or concrete, such as skids, floor joists, and bottom plates. It resists rot, decay, and insect infestation.
- Dimensional Lumber (SPF – Spruce-Pine-Fir): Common for wall studs, top plates, and roof rafters. It is readily available, relatively inexpensive, and strong enough for shed framing. For other woodworking projects, such as building sturdy wooden benches, dimensional lumber is also a popular choice.
- Plywood or OSB (Oriented Strand Board): Used for sheathing walls and roofing. Plywood typically offers better moisture resistance and strength. For roofing, consider exterior-grade plywood (CDX).
- Siding Materials:
- T1-11 Plywood Siding: A popular, economical choice that combines sheathing and siding into one material, offering a rustic look.
- Lap Siding (e.g., Cedar, Pine): Provides a more traditional, aesthetically pleasing finish. Requires more installation effort but offers excellent weather protection.
- HardiePlank (Fiber Cement Siding): Extremely durable, rot-resistant, and fire-resistant, but heavier and more challenging to work with than wood.
Fasteners and Hardware:
- Hot-Dipped Galvanized or Stainless Steel: Absolutely crucial for all exterior fasteners, especially those used with pressure-treated lumber. These resist corrosion, preventing unsightly rust stains and structural weakening.
- Deck Screws: Excellent for general framing and fastening.
- Nails: Common nails for framing, roofing nails for shingles.
- Heavy-Duty Hinges: For doors, choose galvanized or stainless steel hinges designed for outdoor use and heavy loads.
- Robust Latch/Lock System: Ensure security with a strong bolt, hasp, and padlock.
Step-by-Step Construction Overview
This section provides a general overview of the construction process. Always follow detailed plans and safety guidelines.
- Foundation:
- Prepare the site by leveling the ground and removing any organic material.
- Install your chosen foundation. For a concrete slab, pour and finish it according to specifications. For a wood floor, lay pressure-treated skids on a gravel base, then build a framed floor system with joists.
- Floor (if not a slab):
- Cover the floor joists with ¾-inch pressure-treated plywood, secured with galvanized screws.
- Wall Framing:
- Lay out the wall plates (bottom and top) on the floor.
- Cut studs to length and assemble wall sections (front, back, and sides) on the ground.
- Frame out door openings with headers and cripple studs.
- Raise each wall section and brace it temporarily.
- Fasten walls together at the corners and secure them to the floor frame.
- Roof Framing:
- Install ceiling joists if your design includes them.
- Build roof trusses or cut rafters according to your roof pitch.
- Install the rafters, ensuring proper spacing and secure fastening.
- Add fascia boards to the rafter ends.
- Sheathing and Siding:
- Attach plywood or OSB sheathing to the walls and roof frame, leaving appropriate gaps for expansion.
- Install the chosen siding material, ensuring proper overlap and weatherproofing.
- Apply roofing felt (tar paper) to the roof sheathing before installing shingles.
- Doors and Trim:
- Construct and install the double doors, ensuring they swing freely and latch securely.
- Install corner trim boards, door and window trim (if applicable), and fascia trim.
- Finishing Touches:
- Apply a suitable exterior wood primer and paint or stain to protect the wood from UV radiation and moisture.
- Install vents, a ramp, and any interior shelving or hooks.
Weather Protection and Maintenance for Your Wooden Shed
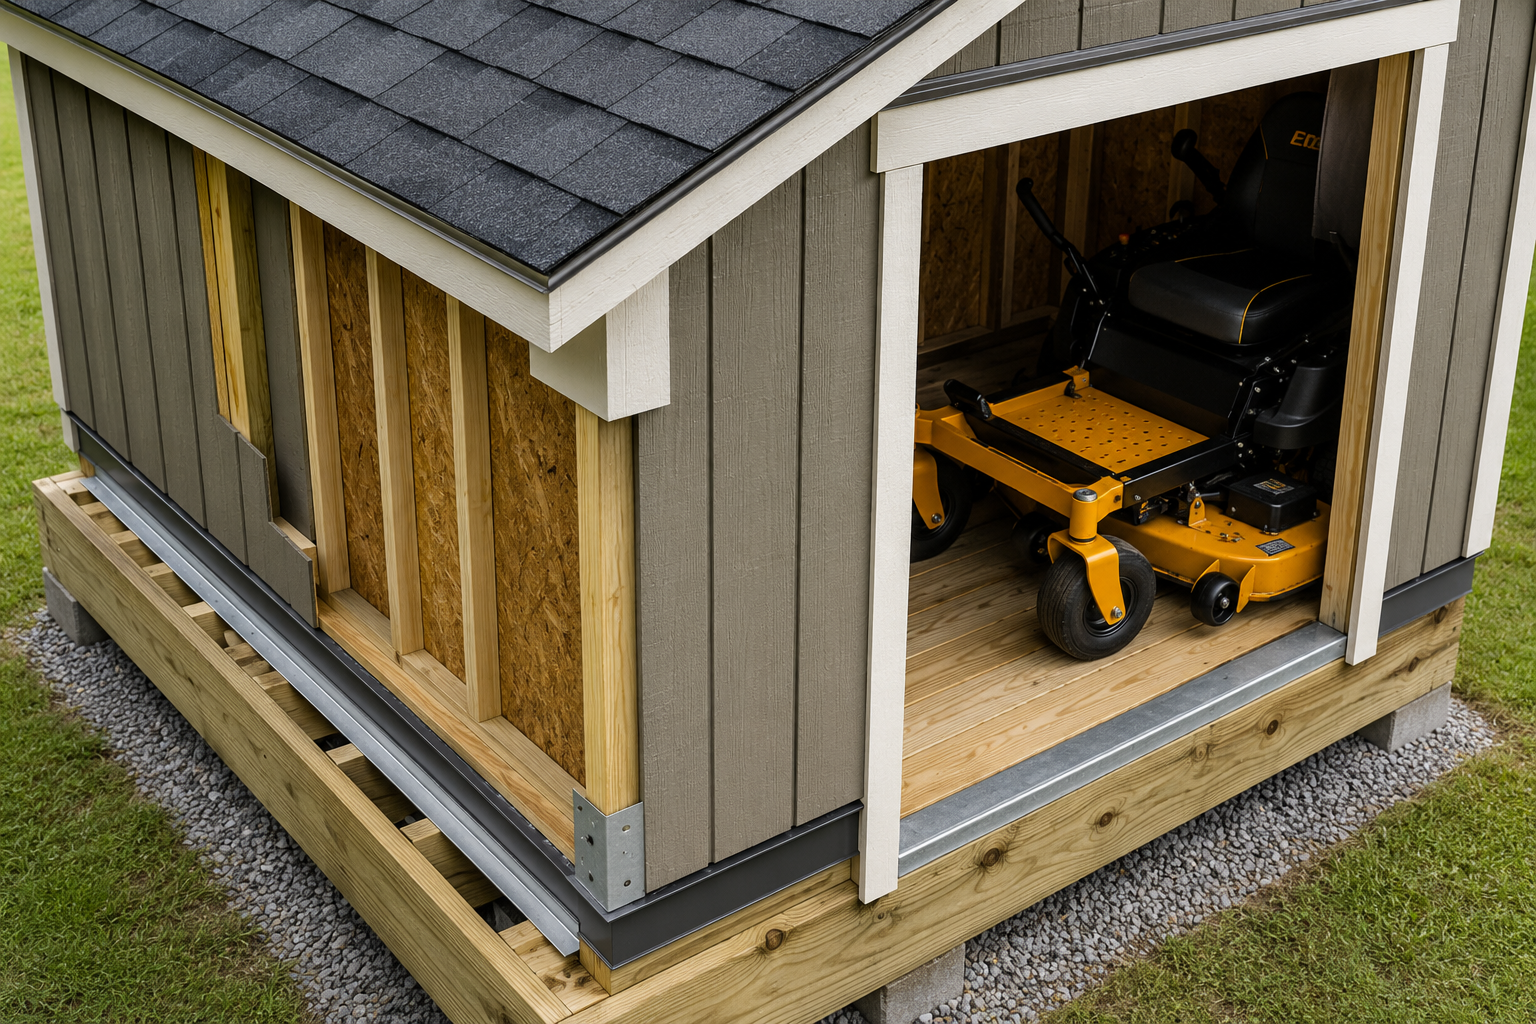
A wooden shed, while inherently strong and customizable, requires ongoing attention to withstand the elements and protect your valuable zero-turn mower. Effective weatherproofing and regular maintenance are paramount for Building a Custom Zero Turn Mower Storage Shed: Protecting Your Lawn Equipment with Wood to ensure it remains a reliable asset for years to come.
Sealing and Finishing Wood for Longevity
The raw wood used in your shed, even pressure-treated, needs further protection from moisture, UV rays, and biological threats.
- Exterior Paint or Stain:
- Paint: Provides the most comprehensive barrier against moisture and UV damage. Use a high-quality exterior primer followed by two coats of exterior latex or oil-based paint. Paint offers a wide range of color options to match your home or landscape.
- Stain: Penetrates the wood, offering protection while allowing the natural wood grain to show through. Semi-transparent and solid stains provide varying degrees of UV protection and color. Solid stains offer paint-like opacity with better penetration.
- Water Repellents: Even with paint or stain, applying a clear water repellent can add an extra layer of protection, particularly to vulnerable areas like door bottoms and trim.
- Caulking: Seal all gaps and seams where different materials meet, such as around windows, door frames, and corner trim, with exterior-grade caulk to prevent water intrusion.
- Roofing Materials: Install high-quality roofing shingles or metal roofing. Ensure proper underlayment (roofing felt) and flashing around any penetrations (vents, skylights) to prevent leaks. Proper shingle overhang at the eaves and rakes is crucial for directing water away from the walls.
Ensuring Proper Ventilation and Drainage
Moisture is the silent enemy of wooden structures and metal equipment. A well-ventilated and drained shed is essential.
- Ventilation Strategy:
- Ridge Vent and Soffit Vents: For gable roofs, a combination of continuous ridge vents and soffit vents creates a natural airflow, allowing hot, moist air to escape at the peak while drawing in cooler, drier air from below.
- Gable Vents: Simple louvered vents installed in the gable ends of the shed promote cross-ventilation.
- Consider a Solar-Powered Vent Fan: For warmer, humid climates, a small solar-powered exhaust fan can actively draw out hot, moist air, significantly improving interior conditions.
- Drainage Around the Foundation:
- Gutter System: Installing gutters and downspouts will channel rainwater away from the shed’s foundation, preventing erosion and moisture saturation. Direct downspouts to splash blocks or a drainage system that leads water well away from the structure.
- Grading: Ensure the ground around the shed slopes away from the foundation at least 6 inches over 10 feet to prevent water from pooling.
- Gravel Perimeter: A 6-12 inch wide gravel perimeter around the shed’s base can improve drainage and reduce splash-back onto the siding.
Regular Maintenance Schedule
Even the best-built and sealed shed requires routine maintenance to remain effective.
- Annual Inspection:
- Check for loose or damaged siding, trim, and roofing. Make repairs promptly.
- Inspect seals around doors and windows, re-caulking as needed.
- Look for signs of pest activity (e.g., termite tunnels, carpenter ant sawdust, rodent droppings).
- Examine the foundation for cracks or shifting.
- Cleaning:
- Wash the exterior siding annually with a mild detergent and soft brush to remove dirt, mold, and mildew.
- Clear gutters of leaves and debris, especially in fall.
- Sweep out the interior regularly to prevent dust and debris buildup.
- Repainting/Restaining:
- Depending on the product, exterior paint may need reapplication every 5-10 years, while stains may need it every 2-5 years. Watch for fading, peeling, or cracking as indicators.
- Door and Hinge Lubrication:
- Periodically lubricate door hinges and latches to ensure smooth operation and prevent rust.
By proactively addressing these weather protection and maintenance aspects, your custom wooden shed will effectively safeguard your zero-turn mower, providing peace of mind and extending the life of your lawn equipment. Remember that for other custom wood projects, like crafting custom wooden record player consoles, similar attention to material selection and finishing can ensure lasting beauty and function.
Optimizing Your Zero Turn Mower Shed for Security and Access
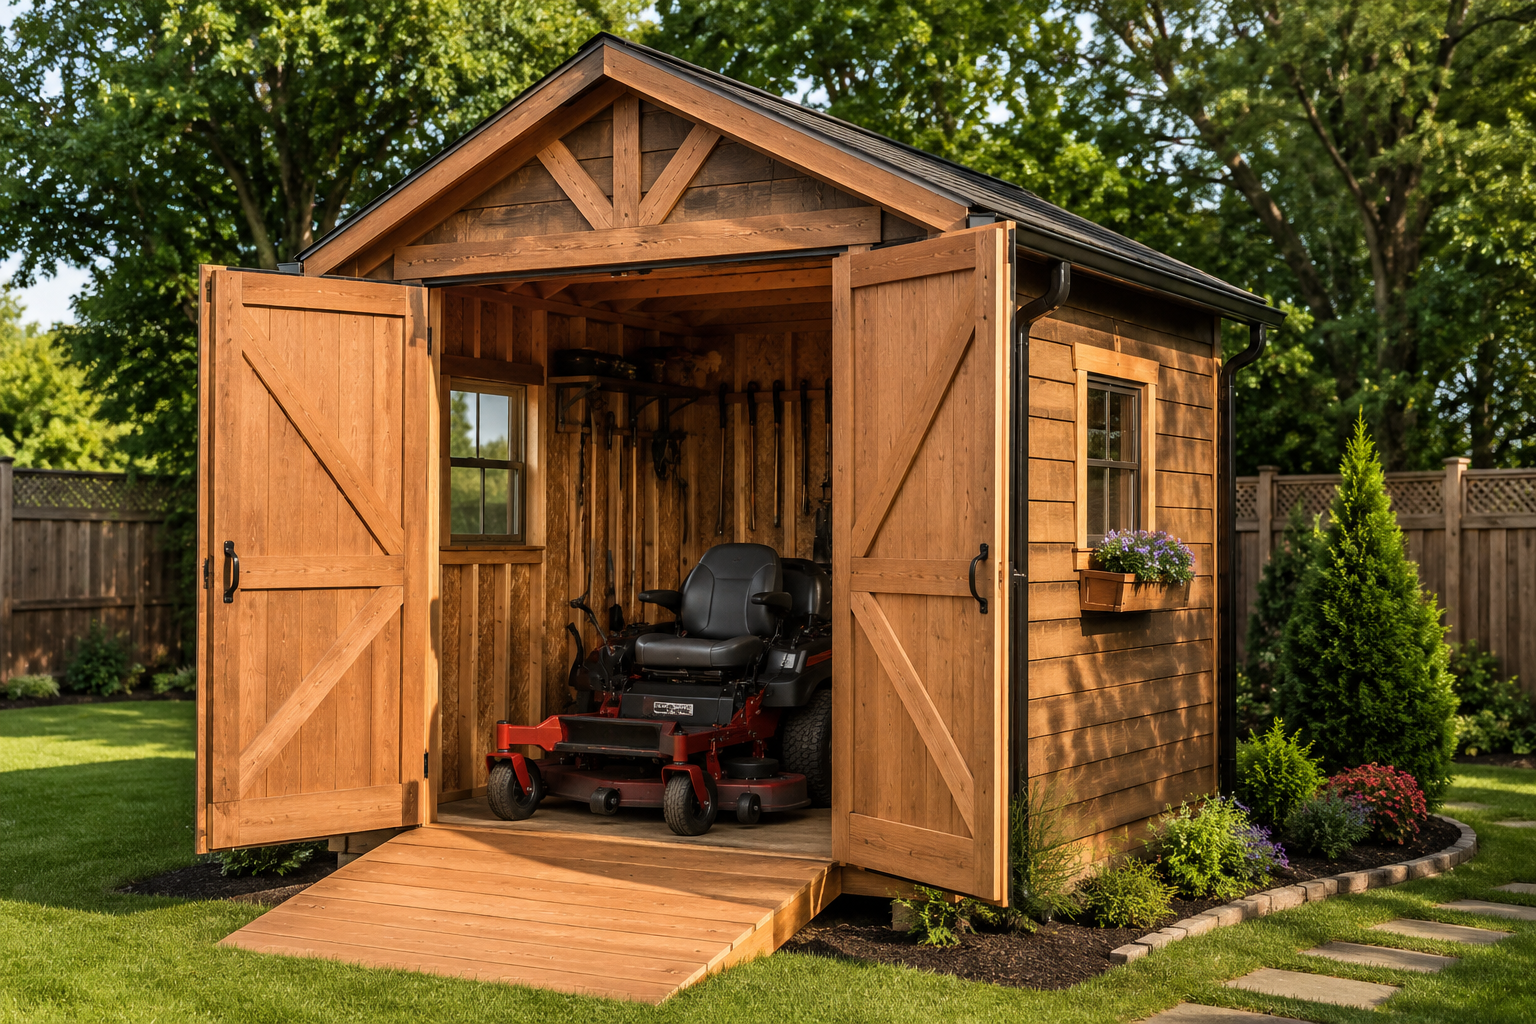
A custom shed not only protects your zero-turn mower from the elements but also from theft and ensures convenient operation. Building a Custom Zero Turn Mower Storage Shed: Protecting Your Lawn Equipment with Wood involves integrating security measures and designing for effortless access.
Implementing Robust Security Measures
Protecting your investment from theft is a crucial aspect of shed design.
- Heavy-Duty Doors and Frames:
- Construct doors from solid wood or exterior-grade plywood, reinforced with internal cross-bracing.
- The door frame should be equally robust, securely fastened to the wall framing.
- Consider a threshold plate to prevent leverage points for prying.
- Secure Hinges and Latches:
- Use tamper-proof hinges where pins cannot be easily removed when the door is closed. Bolt-through hinges with carriage bolts and washers on the inside offer superior security.
- Install a heavy-duty hasp and staple, or a barrel bolt that extends into the door frame or floor. Ensure all fasteners are carriage bolts or one-way screws to prevent removal from the outside.
- Quality Locking Mechanisms:
- Invest in a high-security padlock made from hardened steel with a shrouded shackle to resist bolt cutters.
- For added security, consider a deadbolt lock installed within one of the double doors, keyed alike to your home if desired.
- Windows (or lack thereof):
- Minimize or eliminate windows, especially those that could allow a view of the mower. If windows are desired, place them high on the wall or use security glass/polycarbonate. Consider adding interior bars or grates for extra protection.
- Lighting and Alarms:
- Exterior motion-sensor lighting around the shed can deter intruders.
- For high-value mowers, consider a simple battery-powered door alarm or integrate the shed into your home’s security system.
- Securing the Mower Itself:
- Inside the shed, you can install a ground anchor (a strong metal loop cemented into the floor) to chain and lock your mower for an additional layer of security.
Designing for Easy Mower Access and Maneuvering
Zero-turn mowers are large and heavy, so ease of entry, exit, and internal movement is paramount.
- Wide Double Doors: As previously mentioned, this is non-negotiable. The opening should be at least 6-12 inches wider than your mower’s widest point.
- Low Threshold and Durable Ramp:
- Minimize the height difference between the shed floor and the ground. A slight slope in the concrete slab or a sturdy wooden ramp is essential.
- Construct the ramp from pressure-treated lumber, ensuring it is wide enough for the mower’s wheels and has a gentle slope. Reinforce the ramp significantly to support the mower’s weight.
- The ramp should be securely attached to the shed or designed to be easily deployed and stored.
- Interior Clearance:
- Ensure there’s ample space around the mower once it’s inside. You should be able to walk around it comfortably for maintenance or to access tools.
- Avoid placing obstacles directly in the path of the mower’s entry or turning radius.
- Dedicated Storage for Accessories:
- Wall-mounted shelving, pegboards, and hooks can keep fuel cans, oil, filters, and other lawn care tools organized and off the floor, freeing up crucial maneuverability space. For creative storage ideas, see articles on building wooden spice racks for inspiration on efficient organization.
- Flooring Consideration:
- A smooth concrete slab or well-laid, sturdy wood floor (¾-inch pressure-treated plywood) provides the best surface for driving and maneuvering a heavy zero-turn mower. Avoid uneven surfaces or loose gravel inside the shed.
By thoughtfully incorporating these security and access features, your custom wooden zero-turn mower storage shed will not only protect your equipment but also enhance the efficiency and enjoyment of your lawn care routine.
Conclusion
Building a Custom Zero Turn Mower Storage Shed: Protecting Your Lawn Equipment with Wood is a significant, yet highly rewarding, undertaking. It provides an unparalleled level of protection against the elements, pests, and theft, directly extending the lifespan and ensuring the optimal performance of your valuable zero-turn mower. Beyond functionality, a thoughtfully designed wooden shed adds aesthetic value to your property, blending seamlessly with its surroundings. From the initial meticulous planning, including precise measurements and adherence to local codes, to the careful selection of durable wood and the implementation of robust construction techniques, every step contributes to a resilient and attractive structure.
Furthermore, integrating essential weatherproofing measures like proper sealing, ventilation, and drainage, coupled with a diligent maintenance schedule, safeguards your investment for decades. Finally, by incorporating robust security features and designing for effortless access and maneuvering, your custom shed transforms from a mere storage unit into an indispensable, purpose-built extension of your home and landscaping toolkit. This project ensures your lawn equipment is always protected, easily accessible, and ready to tackle the demands of your yard for many seasons to come.
Actionable Next Steps:
- Measure and Plan: Accurately measure your zero-turn mower and sketch out initial shed designs, considering clearances and additional storage needs.
- Check Local Regulations: Contact your local building department and HOA (if applicable) to understand permitting requirements, setback rules, and material guidelines.
- Source Materials: Create a detailed material list and begin sourcing high-quality, pressure-treated lumber, fasteners, and roofing materials.
- Foundation First: Start with a solid, level foundation, whether it’s a concrete slab or a robust wood-framed floor system on skids.
- Build with Precision: Follow your plans diligently during framing, sheathing, and roofing, paying close attention to weatherproofing details and secure joinery.
- Protect and Maintain: Finish the exterior with paint or stain, ensure ample ventilation, manage drainage effectively, and commit to an annual maintenance routine.
Meta Title: Build a Custom Zero Turn Mower Shed: Wood Protection for Equipment Meta Description: Learn how to build a custom zero-turn mower storage shed with wood. Protect your lawn equipment from weather and theft with our expert guide for 2026.