
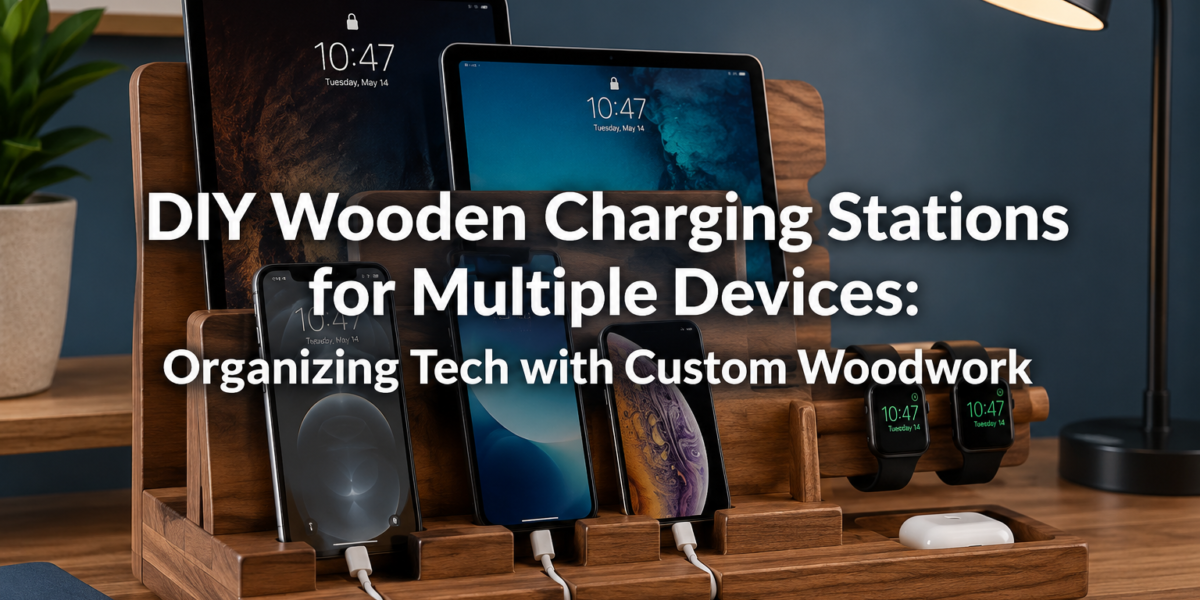
The average household in 2026 owns an estimated eight connected devices, from smartphones and tablets to smartwatches and earbuds, each demanding regular charging. This proliferation of electronics often leads to a chaotic tangle of cords, consuming valuable counter space and detracting from an otherwise organized environment. Enter the elegant solution: DIY Wooden Charging Stations for Multiple Devices: Organizing Tech with Custom Woodwork. Crafting your own wooden charging station offers a compelling blend of functionality and handcrafted aesthetics, transforming unsightly cable clutter into a sleek, integrated design element. This guide will walk you through the essential considerations, design principles, and practical steps to build a bespoke charging solution that perfectly complements your space and tech arsenal.
Key Takeaways
- Custom Design for Optimal Organization: DIY wooden charging stations allow for tailored slots and compartments to fit specific devices and conceal charging cables effectively.
- Aesthetic Integration: Woodwork brings natural beauty and warmth, elevating a functional item into a decorative piece that matches your home decor.
- Enhanced Functionality: Incorporate features like integrated power strips, ventilation, and accessory storage for a truly efficient charging hub.
- Skill Development: Building a charging station is an accessible project that allows woodworkers of all levels to refine their skills in joinery, finishing, and design.
- Sustainability: Utilizing reclaimed or responsibly sourced wood aligns with eco-friendly practices, adding value beyond just organization.
Planning and Design for Your DIY Wooden Charging Station
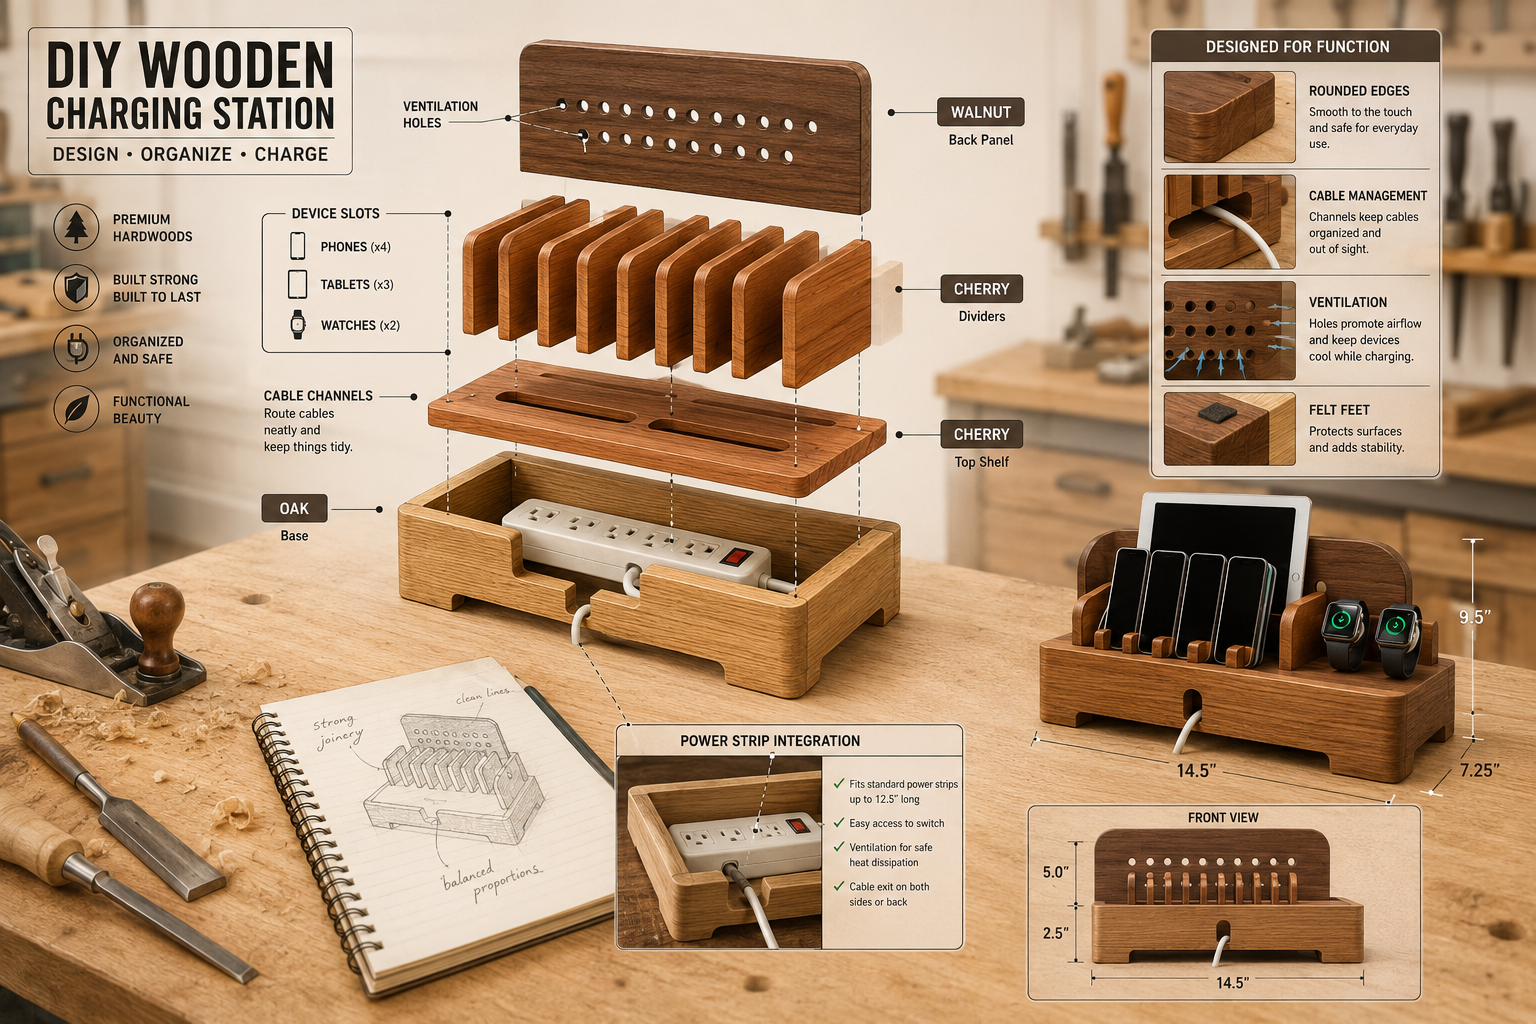
The success of any woodworking project begins with meticulous planning, and a custom charging station is no exception. Before making your first cut, consider the number and types of devices you need to charge, the available space, and your desired aesthetic. This foundational stage will dictate the overall dimensions, internal layout, and material choices for your DIY Wooden Charging Stations for Multiple Devices: Organizing Tech with Custom Woodwork.
Assessing Your Device Needs and Space
Start by gathering all the devices you intend to charge simultaneously. Measure their dimensions (length, width, thickness) and note their charging port locations. Think about:
- Smartphones: How many? Will they stand upright or lie flat?
- Tablets: Do you need a dedicated slot for a larger tablet?
- Smartwatches/Fitness Trackers: Often require unique magnetic chargers; plan for a small platform or cutout.
- Wireless Earbuds/Headphones: Consider small compartments or a hook.
- Other Devices: E-readers, portable power banks, etc.
Next, identify where the charging station will reside. Is it for a bedside table, an office desk, a kitchen counter, or a family charging hub in the living room? Measure the available footprint and height clearance. This will help determine the maximum size and shape of your station.
Conceptualizing the Layout and Cable Management
Effective cable management is the cornerstone of a functional charging station. Your design should prioritize concealing cords while allowing for easy device placement and removal.
Consider these layout strategies:
- Top-Loading Slots: Devices slide into vertical slots from the top, with cables routed through a false bottom or internal channel.
- Angled Stands: Devices rest at an angle, providing better screen visibility while charging.
- Drawer Integration: A pull-out drawer can house a power strip and store smaller accessories or cables.
- Hidden Compartment: A hinged top or side panel can reveal the internal power strip and cable routing.
For cable management, think about:
- Internal Channels: Route cables within the wood structure to a central power strip.
- False Bottom: Create a separate compartment underneath the main device area to house cables and a power strip.
- Ventilation: Ensure adequate airflow to prevent devices and power strips from overheating. Drill small holes or create vents in the design.
- Cord Organization: Use Velcro ties or clips within the hidden compartment to keep individual cables tidy.
Choosing Your Wood and Finishes
The type of wood you select significantly impacts the project’s aesthetics and durability.
| Wood Type | Characteristics | Ideal for |
|---|---|---|
| Pine | Soft, inexpensive, easy to work with, light color. | Beginners, painted finishes. |
| Poplar | Medium hardness, cost-effective, uniform grain, takes paint well. | Painted projects, durable core. |
| Oak | Hard, durable, prominent grain, classic look. | Robust stations, natural finishes. |
| Maple | Hard, dense, fine grain, light color, very durable. | Sleek, modern designs, heavy use. |
| Walnut | Dark, rich color, elegant grain, premium feel. | High-end projects, sophisticated aesthetics. |
For finishes, consider options that protect the wood and complement your home decor:
- Oil Finish: Penetrates the wood, enhancing its natural grain and providing a soft, natural look (e.g., tung oil, Danish oil).
- Polyurethane: Creates a durable, protective layer, available in various sheens (satin, semi-gloss, gloss).
- Stain: Changes the wood’s color while allowing the grain to show through. Always apply before a protective topcoat.
- Paint: Offers a wide range of colors for a modern, minimalist, or vibrant look.
Construction Techniques and Essential Tools
Building DIY Wooden Charging Stations for Multiple Devices: Organizing Tech with Custom Woodwork requires a combination of basic woodworking skills and specific techniques for creating slots and cable channels. Even beginners can achieve excellent results with the right tools and a systematic approach.

Basic Woodworking Tools
You don’t need a full workshop, but a few key tools will make the process much smoother:
- Measuring Tools: Tape measure, ruler, combination square.
- Marking Tools: Pencil, marking knife.
- Cutting Tools:
- Hand Saw or Circular Saw: For cutting larger pieces of wood.
- Jigsaw: Excellent for cutting curves or interior cutouts.
- Table Saw (optional): For precise rips and crosscuts, especially useful for creating uniform slots.
- Shaping Tools:
- Router: Indispensable for creating dadoes (grooves) for dividers, rounding edges, and making precise cable channels. A trim router is often sufficient for smaller projects.
- Chisels: For cleaning up corners and fine adjustments.
- Drilling Tools:
- Cordless Drill: For pilot holes and assembly.
- Forstner Bits or Spade Bits: For creating clean, flat-bottomed holes for power cord entry or ventilation.
- Clamping Tools: Bar clamps or F-clamps are crucial for holding pieces securely during glue-up.
- Sanding Supplies: Sandpaper in various grits (100, 150, 220), sanding block or orbital sander.
- Adhesives: Wood glue (e.g., Titebond III for strong, water-resistant bonds).
For those looking to expand their toolkit or improve precision, consider our guide on Power Tool Mastery for Decorative Wood Projects: Creating Professional Finishes on Cutting Boards, Serving Trays, and Wooden Clocks.
Step-by-Step Assembly Guide
While specific plans vary, the general assembly process for most wooden charging stations follows these steps:
- Cut Your Stock: Cut all wood pieces to the precise dimensions outlined in your plan (base, sides, dividers, top/false bottom, lid if applicable).
- Create Slots and Channels:
- Device Slots: Use a router with a straight bit to cut grooves into the false bottom or divider pieces for devices to sit in. Ensure the width accommodates your device thickness, plus a little extra for easy insertion.
- Cable Channels: Route channels on the underside of the false bottom or within the back panel to guide charging cables from the devices to the power strip compartment.
- Power Cord Entry/Exit: Drill a larger hole (e.g., 1-inch Forstner bit) in the back or side panel for the power strip’s main cord to exit.
- Dry Fit: Assemble all pieces without glue to ensure everything fits correctly. Make any necessary adjustments.
- Assembly and Glue-Up:
- Apply wood glue to all mating surfaces.
- Assemble the frame (base, sides, back).
- Insert dividers and the false bottom, ensuring they are square and flush.
- Use clamps to hold the pieces tightly together while the glue dries. Wipe off any excess glue squeeze-out immediately with a damp cloth.
- Sanding: Once the glue is fully cured, sand the entire station. Start with a coarser grit (100-120) to remove any imperfections or glue residue, then progressively move to finer grits (150, 220) for a smooth finish.
- Finishing: Apply your chosen stain or finish according to the manufacturer’s instructions. Often, this involves multiple thin coats with light sanding between coats.
- Hardware Installation: Install any hinges for lids, rubber feet for stability, or other hardware. Integrate your power strip into the hidden compartment, securing it with screws or adhesive if desired.
Customization and Advanced Features for Your Charging Station
Beyond basic organization, DIY Wooden Charging Stations for Multiple Devices: Organizing Tech with Custom Woodwork can be elevated with advanced features and customization, turning a simple utility item into a true showpiece. Embracing these elements not only enhances functionality but also allows for personal expression through your woodworking.
Integrating Smart Features and Enhanced Cable Management
Consider adding smart solutions to your station:
- Integrated Power Strip with USB Ports: Instead of a standard power strip, opt for one that includes multiple USB-A and USB-C ports, reducing the need for bulky wall adapters. Ensure the power strip is appropriately sized for the hidden compartment.
- Wireless Charging Pads: For devices with Qi wireless charging capabilities, you can embed a wireless charging coil directly into the top surface of the station. This requires routing out a shallow recess for the coil and ensuring adequate ventilation.
- Smart Cable Retractors: For a truly pristine look, you can integrate small, spring-loaded cable retractors that pull charging cables back into the compartment when not in use.
- Ventilation Solutions: If you plan to charge many devices simultaneously or embed wireless chargers, active ventilation (small, quiet USB-powered fans) can prevent heat buildup. Route small channels for airflow or drill a pattern of decorative ventilation holes.
Adding Aesthetic and Functional Details
The beauty of custom woodworking lies in the details. Think about how you can enhance the look and utility of your charging station:
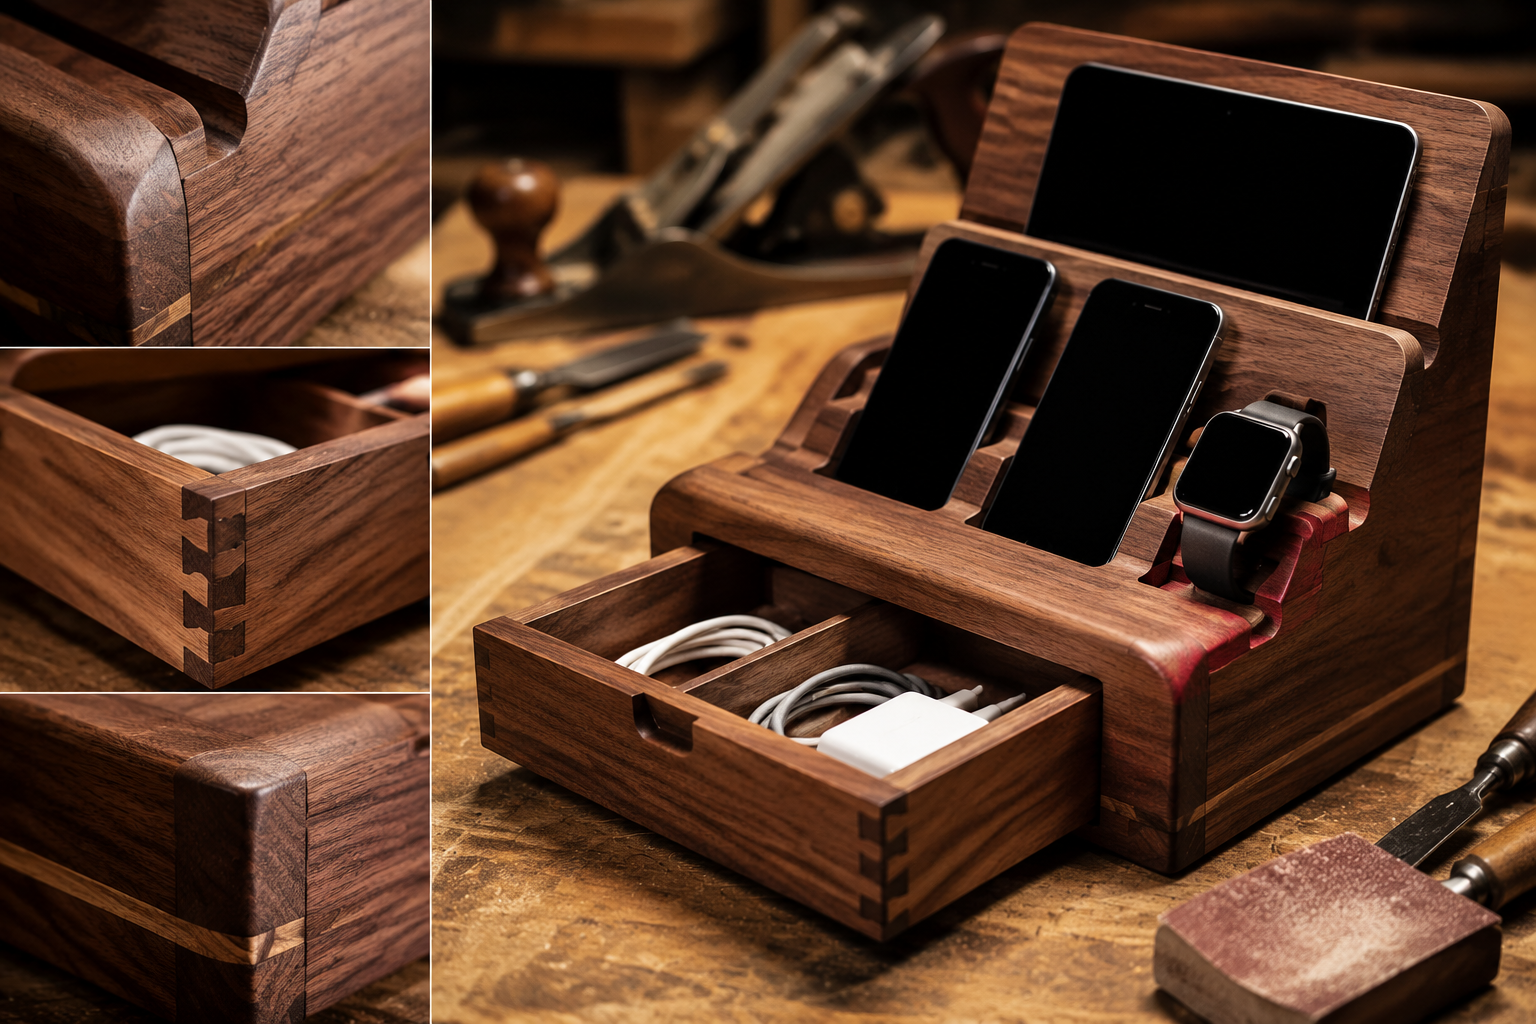
- Decorative Joinery: Instead of simple butt joints, incorporate more sophisticated joinery like dovetails or box joints for added strength and visual appeal. Our guide on Mastering Dovetail Joinery for Drawers: Hand and Router Methods for Cabinet Builders can be a valuable resource.
- Carved Accents: Hand-carved details or routed patterns can add a unique artistic touch. Explore Advanced Wood Carving Techniques for Decorative Furniture Accents: for inspiration.
- Hidden Compartments and Drawers: A small drawer can be incorporated for storing charging blocks, headphones, or other small accessories.
- Felt or Cork Liners: Add soft felt or cork pads to the bottom of device slots to protect screens and prevent scratching.
- Wood Species Combinations: Use contrasting wood species (e.g., dark walnut with light maple accents) to create visual interest and highlight different sections of the station.
- Custom Stands: Integrate a dedicated stand for a smartwatch or earbuds, often requiring precise routing or carving.
- Personalization: Laser engraving or wood burning can add initials, a family name, or a custom design, making your charging station truly one-of-a-kind. For ideas on personalization, see Customization Strategies for Mass-Producing Small Woodcraft:.
Safety Considerations
When working with electricity and wood, safety is paramount:
- Fire Safety: Always use UL-listed power strips and ensure proper ventilation to prevent overheating of devices and the power strip itself. Never overload the power strip.
- Cable Integrity: Avoid pinching or sharply bending cables, which can damage them over time. Design cable channels that offer gentle curves.
- Stable Base: Ensure the charging station has a wide, stable base to prevent tipping, especially if it will hold multiple heavy devices. Adding rubber feet can improve stability and prevent scratching surfaces.
- Safe Wiring: If you are integrating electrical components beyond a standard power strip, ensure all connections are secure and properly insulated. If unsure, consult an electrician.
By thoughtfully incorporating these advanced features and prioritizing safety, your DIY wooden charging station will not only organize your tech but also serve as a testament to your craftsmanship and design sensibilities.
Conclusion
Creating DIY Wooden Charging Stations for Multiple Devices: Organizing Tech with Custom Woodwork is a rewarding project that marries practical organization with the timeless appeal of handcrafted wood. In an increasingly connected world, where digital devices are central to our daily lives, a bespoke charging station offers a sophisticated solution to cable clutter, transforming a common household frustration into an elegant focal point. From the initial design phase, meticulously planning for device integration and cable management, to the careful selection of wood and the application of precise construction techniques, each step contributes to a functional and aesthetically pleasing outcome.
By embracing customization, you can infuse your charging station with unique features, whether it’s embedded wireless charging, decorative joinery, or personalized accents, truly making it your own. This project is not just about building a container for electronics; it’s about reclaiming space, enhancing decor, and refining your woodworking skills. As you complete your custom wooden charging station, you’ll gain a functional piece that streamlines your tech, a beautiful addition to your home, and the satisfaction of having crafted something truly valuable with your own hands.
Actionable Next Steps
- Assess Your Needs: Catalog all devices you wish to charge and measure their dimensions.
- Sketch a Design: Draft a rough sketch of your ideal charging station, including internal layout and cable routing.
- Gather Materials: Select your preferred wood and acquire necessary tools and hardware.
- Practice Cuts: If new to woodworking, practice cuts on scrap wood before working on your final pieces.
- Build and Finish: Follow a systematic approach for cutting, assembling, and finishing your station, prioritizing safety throughout the process.