
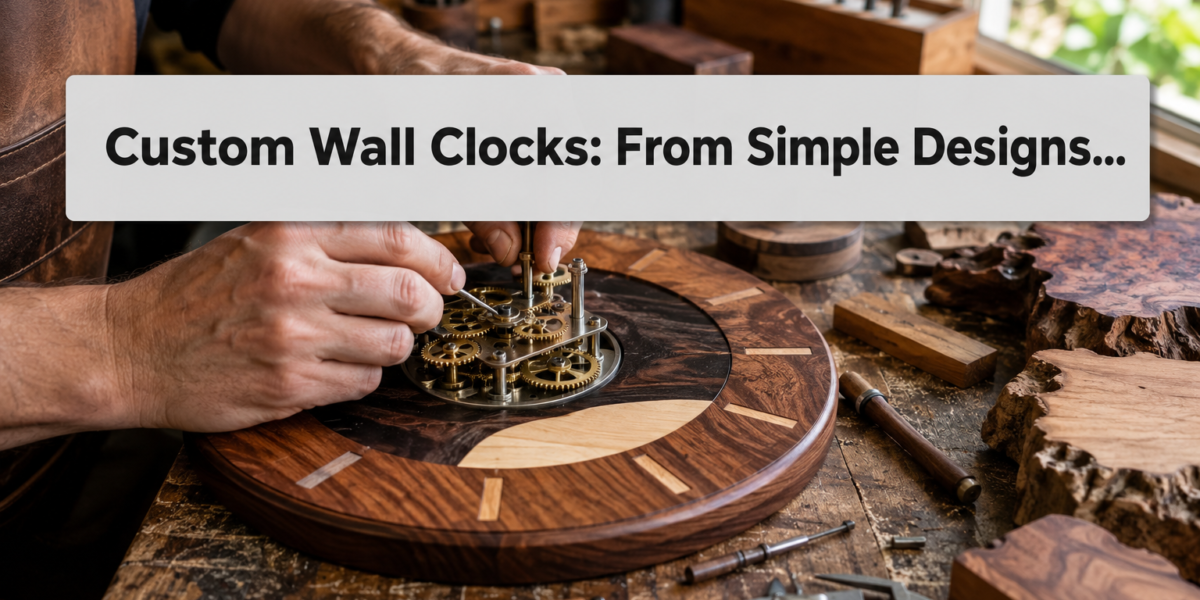
The average household in 2026 relies on digital devices for timekeeping, yet the demand for handcrafted, aesthetically significant wall clocks has paradoxically surged. This isn’t merely about telling time; it’s about making a statement, infusing personal style, and embracing the artistry of traditional craftsmanship. This comprehensive guide explores the fascinating world of Custom Wall Clocks: From Simple Designs to Statement Pieces Using Exotic Woods and Mechanical Movements, offering insights for both aspiring makers and discerning buyers.
Key Takeaways
- Custom wall clocks offer a unique blend of functionality and personalized aesthetic appeal, moving beyond mere timekeeping.
- Wood selection is crucial, with exotic woods like Wenge, Zebrawood, and Purpleheart providing distinctive grain patterns and colors for statement pieces.
- Understanding different mechanical movements, from basic quartz to intricate pendulum and chime mechanisms, is essential for both design and functionality.
- Designing a custom clock involves considering complexity, size, aesthetic integration, and the maker’s skill level.
- Proper finishing techniques are vital to protect the wood and enhance its natural beauty, ensuring the clock becomes a lasting heirloom.
The Foundation of Design: Selecting Wood for Custom Wall Clocks: From Simple Designs to Statement Pieces Using Exotic Woods and Mechanical Movements
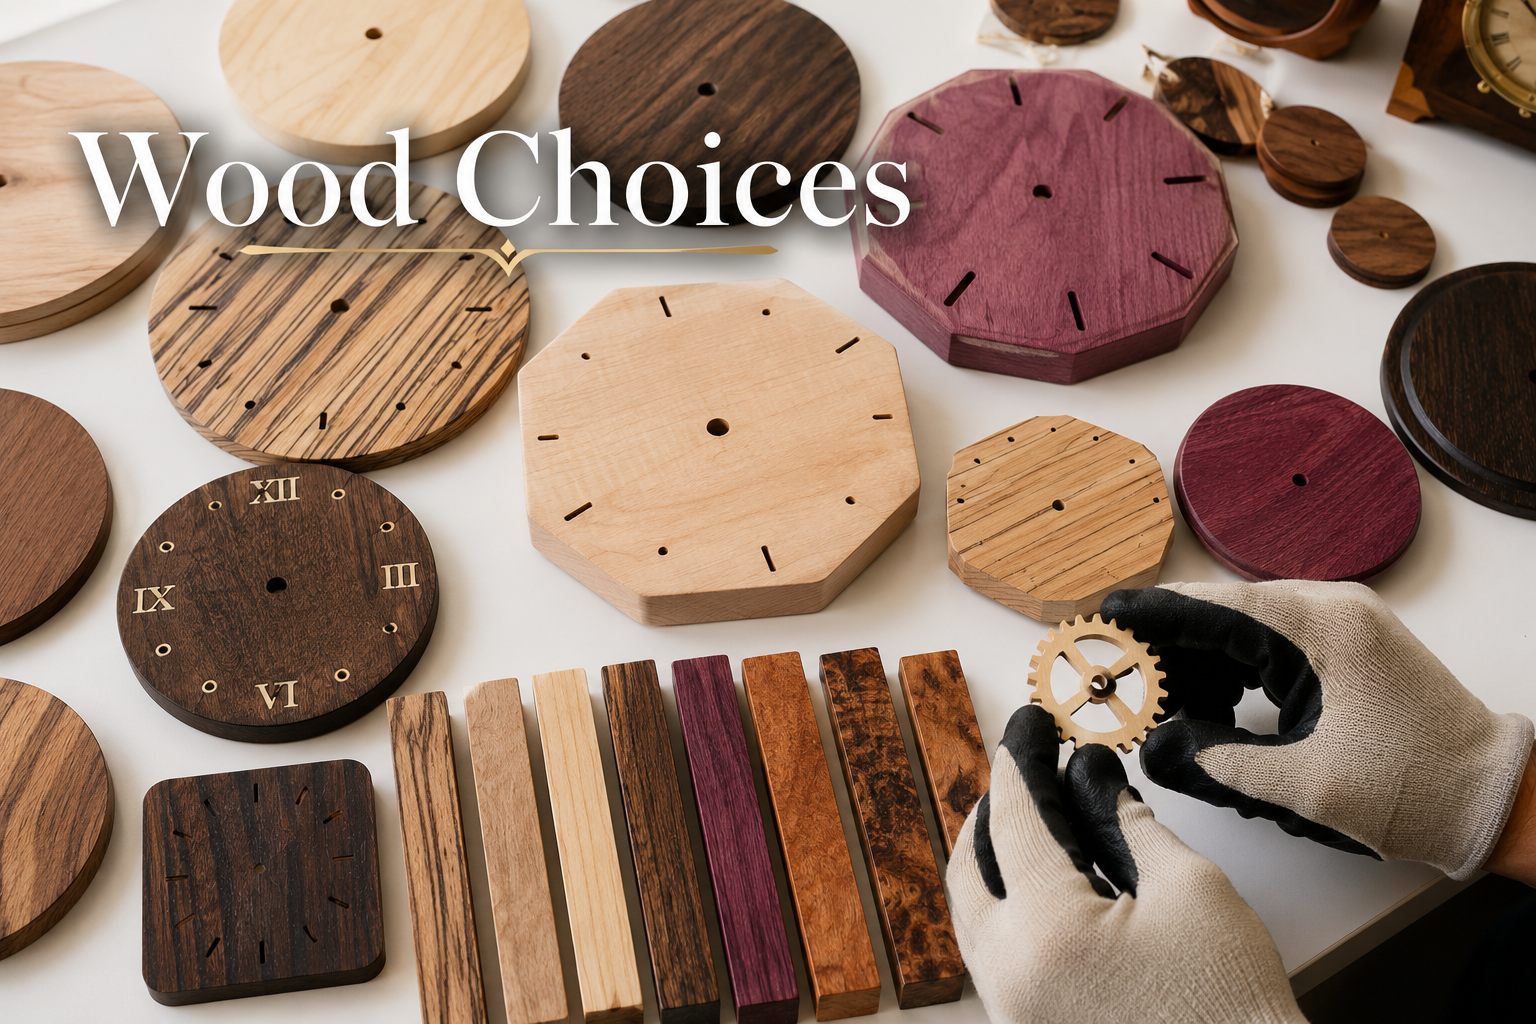
The journey of creating a custom wall clock begins with the heart of its aesthetic: the wood. The choice of material dictates not only the visual appeal but also the workability and durability of the finished piece. While common hardwoods like oak, maple, and cherry offer classic beauty and are excellent for beginners, venturing into exotic woods unlocks a realm of unique patterns, rich colors, and distinctive textures that can transform a simple design into a true statement piece.
Common Hardwoods for Beginners
For those new to woodworking or clock making, starting with readily available and forgiving hardwoods is advisable.
- Maple: Known for its light color and fine, even grain. It takes stain well and can be polished to a high sheen, offering a versatile canvas for various styles.
- Cherry: Displays a beautiful reddish-brown hue that deepens with age and exposure to light. Its smooth grain and moderate hardness make it easy to work with.
- Oak: A classic choice, both red and white oak possess distinctive open grain patterns. It’s durable and takes stains beautifully, lending itself well to traditional or rustic designs.
- Walnut: A rich, dark brown wood with an elegant grain. Walnut is prized for its natural beauty and requires minimal staining to achieve a sophisticated look.
Venturing into Exotic Woods for Statement Pieces
Exotic woods are sourced from various regions around the globe and offer unparalleled visual drama. Working with these woods often requires specialized tools and techniques due to their density, hardness, or unique grain structures, but the results are undeniably striking.
| Exotic Wood | Characteristics | Ideal Applications | Working Notes |
|---|---|---|---|
| Wenge | Very dark brown, almost black, with fine, close grain. | Modern, minimalist, high-contrast designs. | Extremely hard and brittle, dust can be an irritant. Requires sharp tools and good dust collection. |
| Zebrawood | Creamy yellow to light brown with striking dark stripes. | Bold, contemporary, or African-inspired pieces. | Can be challenging to work due to interlocked grain, prone to tear-out. Requires careful sanding and sharp blades. |
| Purpleheart | Vibrant purple hue, darkens to brownish-purple over time. | Eye-catching accents, artistic, geometric designs. | Very hard. Color can fade if exposed to excessive UV light; finishes with UV inhibitors help preserve color. |
| Padauk | Bright orange-red, darkens to a deep reddish-brown. | Warm, vibrant statement pieces. | Moderately hard. Releases a red sawdust that can stain other woods. Finishes well. |
| Bubinga | Pinkish-red to reddish-brown with figured grain. | Elegant, luxurious designs, often used in veneers. | Hard and dense, glues and finishes well. |
For advanced techniques in working with various wood types, including exotic varieties, consider exploring resources on mastering the router table to create precise cuts and profiles for your clock design.
The Heart of the Clock: Mechanical Movements and Their Integration
Beyond the wood, the movement mechanism is the soul of any clock. The choice between different types of movements significantly impacts the clock’s accuracy, maintenance requirements, and overall character. For custom wall clocks, makers often choose between quartz movements for simplicity and affordability, or more traditional mechanical movements for their intricate charm and heritage.
Understanding Clock Movements
- Quartz Movements: These are the most common and affordable. They are battery-powered, highly accurate, and require minimal maintenance. They are perfect for simple designs where the focus is on the aesthetic of the wood and face. They typically offer a continuous sweep (silent) or a stepping (ticking) second hand.
- Pendulum Quartz Movements: These offer the visual appeal of a swinging pendulum without the complexity of a full mechanical movement. They are still battery-operated and accurate but add a traditional touch.
- Mechanical Movements (Weight-Driven or Spring-Driven): These are the most complex and revered. They use gears, springs, and sometimes weights to power the clock. They require regular winding (daily or weekly, depending on the movement) and periodic servicing. Mechanical movements often feature chimes (Westminster, Whittington, etc.) and expose their intricate mechanisms, making them captivating statement pieces. They embody a connection to horological history and craftsmanship.
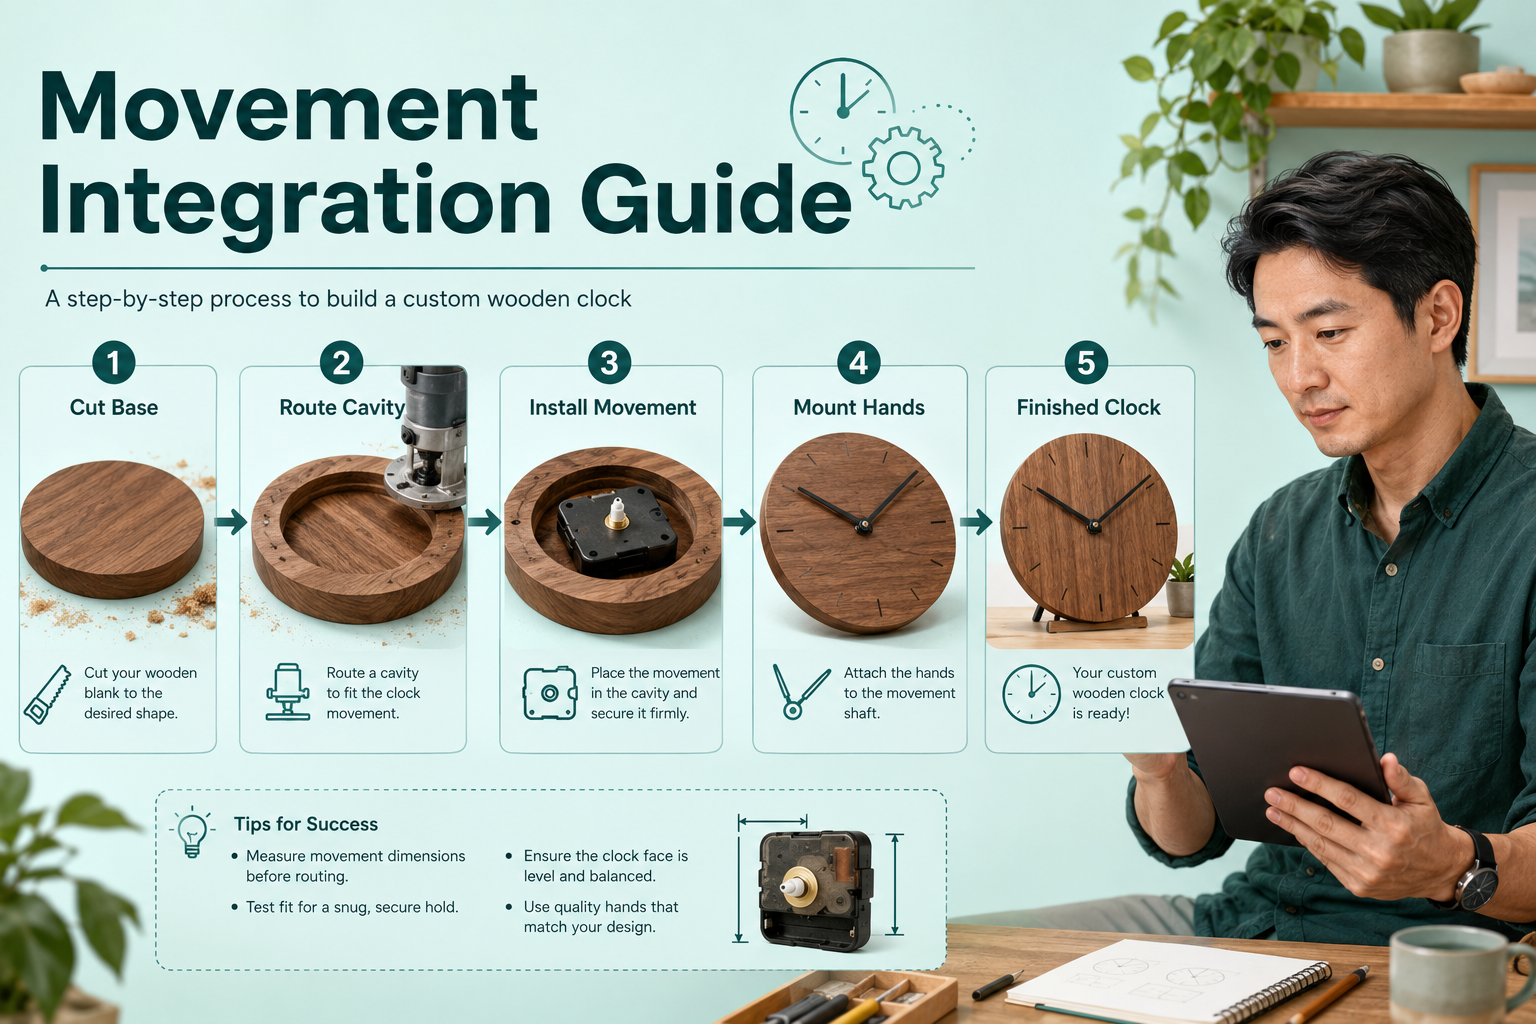
When designing a clock around a mechanical movement, it’s critical to accurately measure the movement’s dimensions, including the shaft length for the hands and the space required for any chimes or weights. Integrating these components into the wooden housing requires precision routing and drilling. For guidance on routing techniques that can help you create custom cavities for clock movements, refer to “Choosing and Using Router Tables: Maximizing Precision and Safety for” – https://woodcraftwiz.com/choosing-and-using-router-tables-maximizing-precision-and-safety-for-edge-profiling-and-joinery/.
Sourcing Quality Movements
High-quality movements can be purchased from specialized horology suppliers. For mechanical movements, consider brands known for their reliability and heritage. When selecting, pay attention to:
- Shaft Length: Must match the thickness of your clock face.
- Hand Style: Many movements come with standard hands, but custom hands can be sourced or made to complement your design.
- Chime Options: If opting for a chiming movement, ensure the sound is pleasing and the chime sequence is as desired.
- Mounting Type: How the movement attaches to the clock face or backplate.
Crafting the Design: From Simple to Intricate Masterpieces
The design phase is where your vision truly takes shape. Whether aiming for a minimalist aesthetic or an ornate, museum-quality piece, careful planning is essential.
Simple Designs: Embracing Minimalism and Geometric Forms
Simple custom wall clocks often highlight the natural beauty of the wood. Clean lines, geometric shapes, and a focus on grain patterns define this style.
- Circular or Square: The most common and easiest shapes to execute. A single, well-finished piece of exotic wood cut into a circle or square can be stunning.
- Floating Dial: Instead of a traditional bezel, the numbers or markers might be individually applied directly to the wall or a transparent backing, giving the appearance of “floating” time.
- Segmented Wood: For added visual interest without complex carving, combine different wood species in a segmented pattern. This can create a unique, mosaic-like face.
- Minimalist Markers: Instead of full numbers, use simple lines, dots, or even no markers, relying on the hands themselves to indicate the time against the wood’s texture.
Statement Pieces: Integrating Inlays, Carvings, and Mixed Materials
For those seeking to create a truly unique statement, integrating advanced woodworking techniques and materials elevates a clock to an art piece.
- Wood Inlays: Incorporate contrasting wood species to create intricate patterns or designs on the clock face. This requires precision cutting and fitting.
- Carvings: Hand or CNC carving can add sculptural elements, from decorative borders to intricate scenes or abstract textures.
- Mixed Materials: Combine wood with metal, resin, or even stone accents. For example, a live-edge wood clock with a resin inlay filling natural voids can be breathtaking.
- Exposed Mechanisms: Design the clock face or case to partially or fully expose the mechanical movement, turning its intricate gears into a focal point.
- Large Format: A grand custom wall clock, perhaps several feet in diameter, inherently becomes a statement piece, especially if crafted from a single, impressive slab of wood.
For creative ways to utilize various wood pieces and even scrap wood to incorporate into designs, explore turning shop scraps into design features.
Finishing and Assembly: Bringing Your Custom Wall Clocks to Life
The final stages of crafting your custom wall clock involve meticulous finishing and precise assembly. These steps protect the wood, enhance its beauty, and ensure the clock functions flawlessly for years to come.
Essential Finishing Techniques
The type of finish you choose depends on the wood, the desired aesthetic, and the level of protection required.
- Sanding: Begin with thorough sanding, progressing through various grits from coarse to very fine (e.g., 80, 120, 180, 220, 320, 400 grit) to achieve a silky-smooth surface. For exotic woods, finer grits might be necessary to bring out their natural luster.
- Stains: If desired, apply wood stain to alter the color of the wood. Always test stains on scrap pieces of the same wood before applying to the main project.
- Sealers: A sealer can be applied before the topcoat, especially on porous woods or if you want to prevent blotchiness from oil finishes.
- Topcoats:
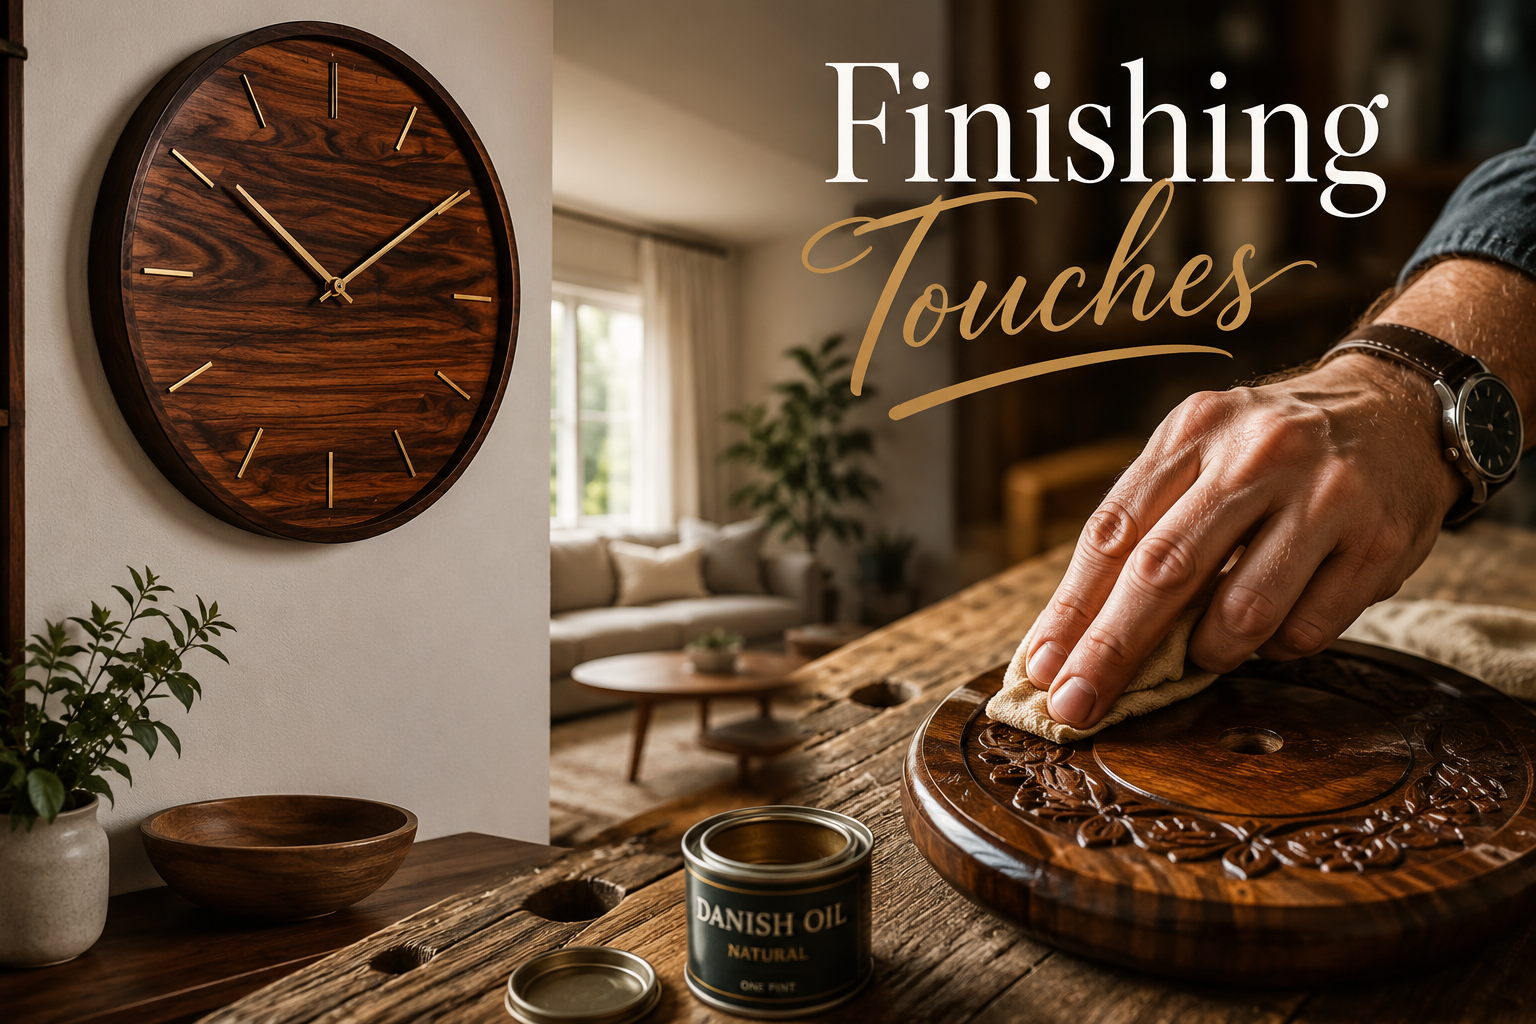
- Oil Finishes (e.g., Danish Oil, Tung Oil): Penetrate the wood, enhancing its natural color and grain, offering a warm, low-sheen finish. They provide good protection but may require reapplication over time. Our guide on Danish Oil vs. Linseed Oil provides an in-depth comparison.
- Polyurethane (Oil-Based or Water-Based): Forms a durable, protective layer on the surface. Available in various sheens (matte, satin, gloss). Water-based polyurethanes are clear and low-odor, while oil-based offer a slight amber tint. Learn more about aerosol polyurethane for easy application.
- Lacquers: Provide a hard, clear, fast-drying finish, often used for a high-gloss, sleek appearance.
- Waxes: Can be used alone for a soft, natural look or as a topcoat over other finishes for added protection and sheen.
Quote: “A well-executed finish doesn’t just protect the wood; it transforms it, bringing depth and character to the grain that no raw material can achieve alone.”
Final Assembly and Testing
Once the finish is cured, it’s time for the final assembly.
- Mounting the Movement: Securely attach the chosen clock movement to the back of the clock face. Ensure it is centered and stable.
- Attaching Hands: Carefully press the hour, minute, and second hands onto the movement shaft. Be gentle to avoid bending them. Ensure they are correctly aligned at the 12 o’clock position when the movement is set to 12.
- Adding Numbers/Markers: If using individual numbers or markers, attach them precisely to the clock face. Spacing and alignment are crucial for readability.
- Hanging Mechanism: Install a sturdy hanging mechanism on the back of the clock that can safely support its weight. Consider the wall type for installation.
- Testing: Insert batteries (for quartz) or wind the mechanism (for mechanical) and allow the clock to run for at least 24-48 hours. Monitor for accuracy and smooth operation of all components, including chimes if present.
Creating custom wall clocks is a rewarding endeavor that merges the art of woodworking with the precision of horology. From the initial wood selection to the final finish, each step contributes to a unique piece that tells more than just time, it tells a story.
Conclusion
Custom Wall Clocks: From Simple Designs to Statement Pieces Using Exotic Woods and Mechanical Movements offers an unparalleled opportunity to blend functional utility with artistic expression. Whether you are crafting a minimalist design from a common hardwood or an elaborate masterpiece featuring intricate inlays, exotic timbers, and complex mechanical chimes, the journey is deeply satisfying. The result is not just a time-telling device, but a focal point, a conversation starter, and a cherished heirloom that reflects personal taste and craftsmanship.
By understanding the properties of various woods, selecting the appropriate movement, and applying meticulous finishing techniques, woodworkers at all skill levels can create stunning custom clocks. These pieces elevate interiors, celebrate natural beauty, and stand as a testament to the enduring appeal of handcrafted quality in a rapidly digital world. Start your clock-making journey today and transform a simple concept into a timeless statement.