

In the competitive landscape of home aesthetics, the “quiet luxury” kitchen trend has emerged as a dominant force in 2026, emphasizing understated elegance, superior craftsmanship, and high-quality natural materials. For beginner woodworkers looking for profitable projects, there’s a unique opportunity to tap into this demand by building live-edge walnut cutting boards and charcuterie boards, finished to a premium standard. These pieces are not merely functional items; they are statement pieces, blending the organic beauty of nature with refined artisan skill, making them highly sought-after.
Key Takeaways
- Live-edge walnut boards align perfectly with the “quiet luxury” kitchen trend, offering both aesthetic appeal and practical utility.
- Selecting high-quality walnut slabs is crucial for achieving a premium look and ensuring durability.
- Proper flattening and sanding techniques are essential for a professional finish and comfortable use.
- Premium, food-safe finishes enhance the wood’s natural beauty while providing necessary protection and hygiene.
- These handcrafted boards represent a profitable venture for woodworkers, appealing to discerning customers.
Understanding the “Quiet Luxury” Trend and Walnut’s Appeal
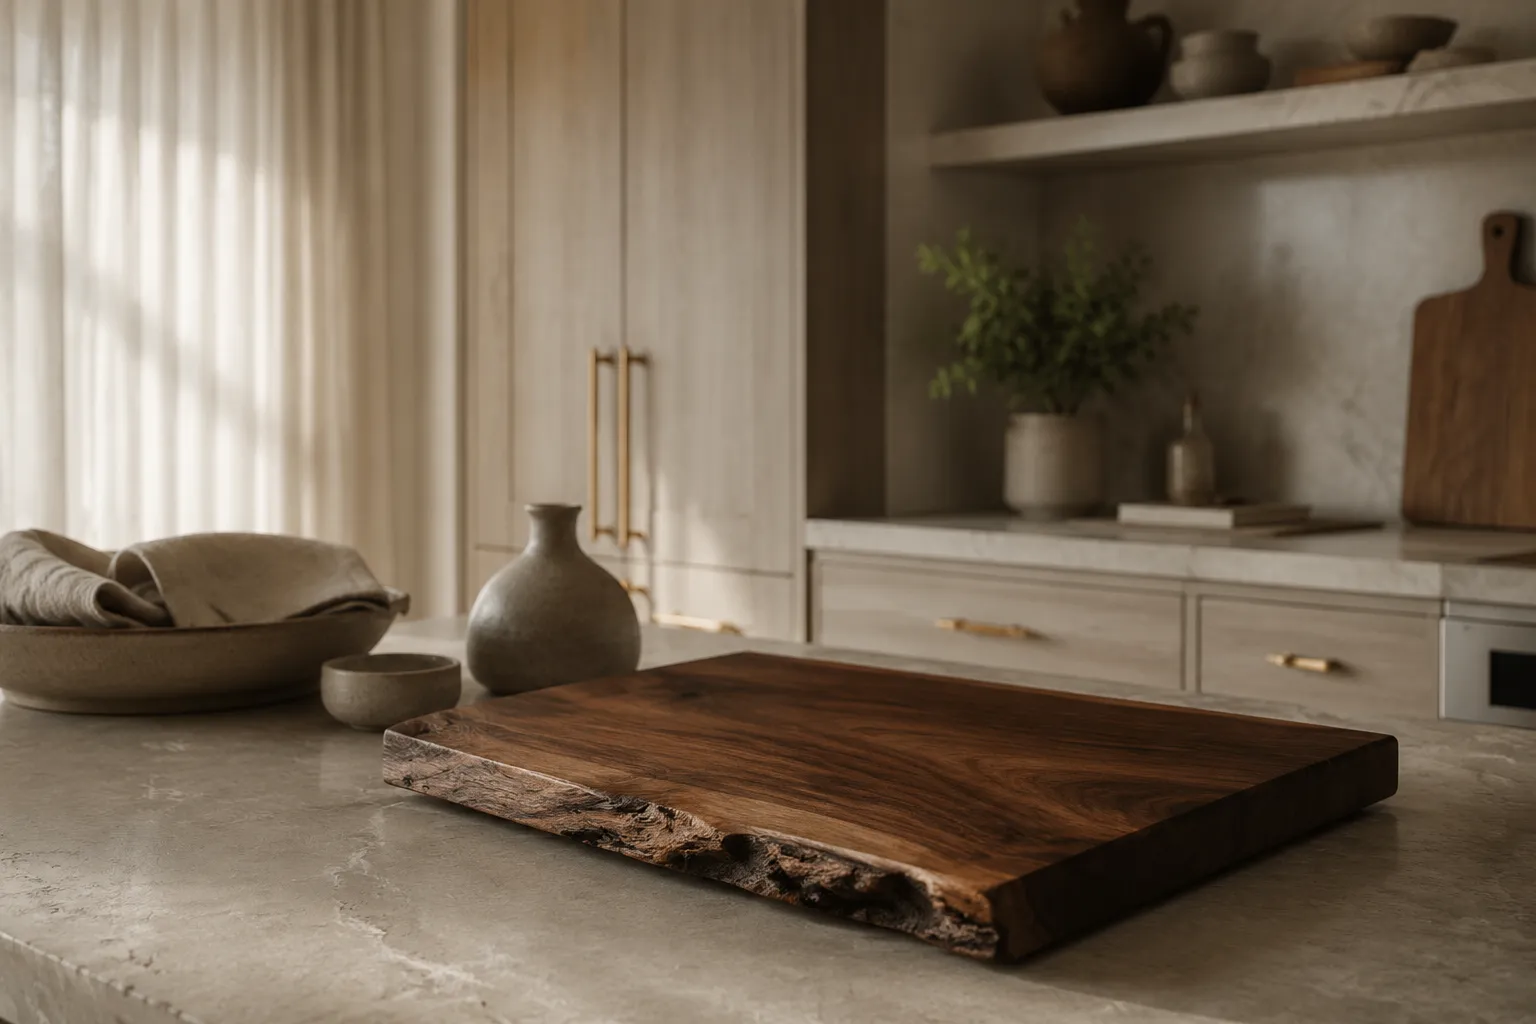
The “quiet luxury” kitchen trend is defined by its subtle sophistication. It eschews overt opulence in favor of timeless design, durable materials, and exceptional craftsmanship. Think natural stone, bespoke cabinetry, and high-quality wood accents, pieces that feel substantial and thoughtfully made. Mass-produced items are out; unique, artisan-crafted elements are in. This is where live-edge walnut boards shine.
Walnut, particularly black walnut, is a premier choice for this aesthetic. Its deep, rich chocolate-brown hues, often streaked with lighter sapwood, provide a natural elegance that complements minimalist and sophisticated interiors. The wood’s tight grain offers excellent durability and resistance to wear, making it ideal for kitchen use. Furthermore, its natural oils contribute to its longevity and beautiful sheen when properly finished.
The “live-edge” aspect amplifies its appeal, introducing an organic, untouched element into the clean lines of a modern kitchen. Each board is unique, a testament to the tree it came from, with its natural bark and contours preserved. This uniqueness is a hallmark of luxury, offering a story and character that manufactured goods cannot replicate. For those selecting premium wood for 2026 projects, walnut is an outstanding choice that guarantees both beauty and value.
Sourcing, Preparation, and Shaping: Building Live-Edge Walnut Cutting Boards and Charcuterie Boards
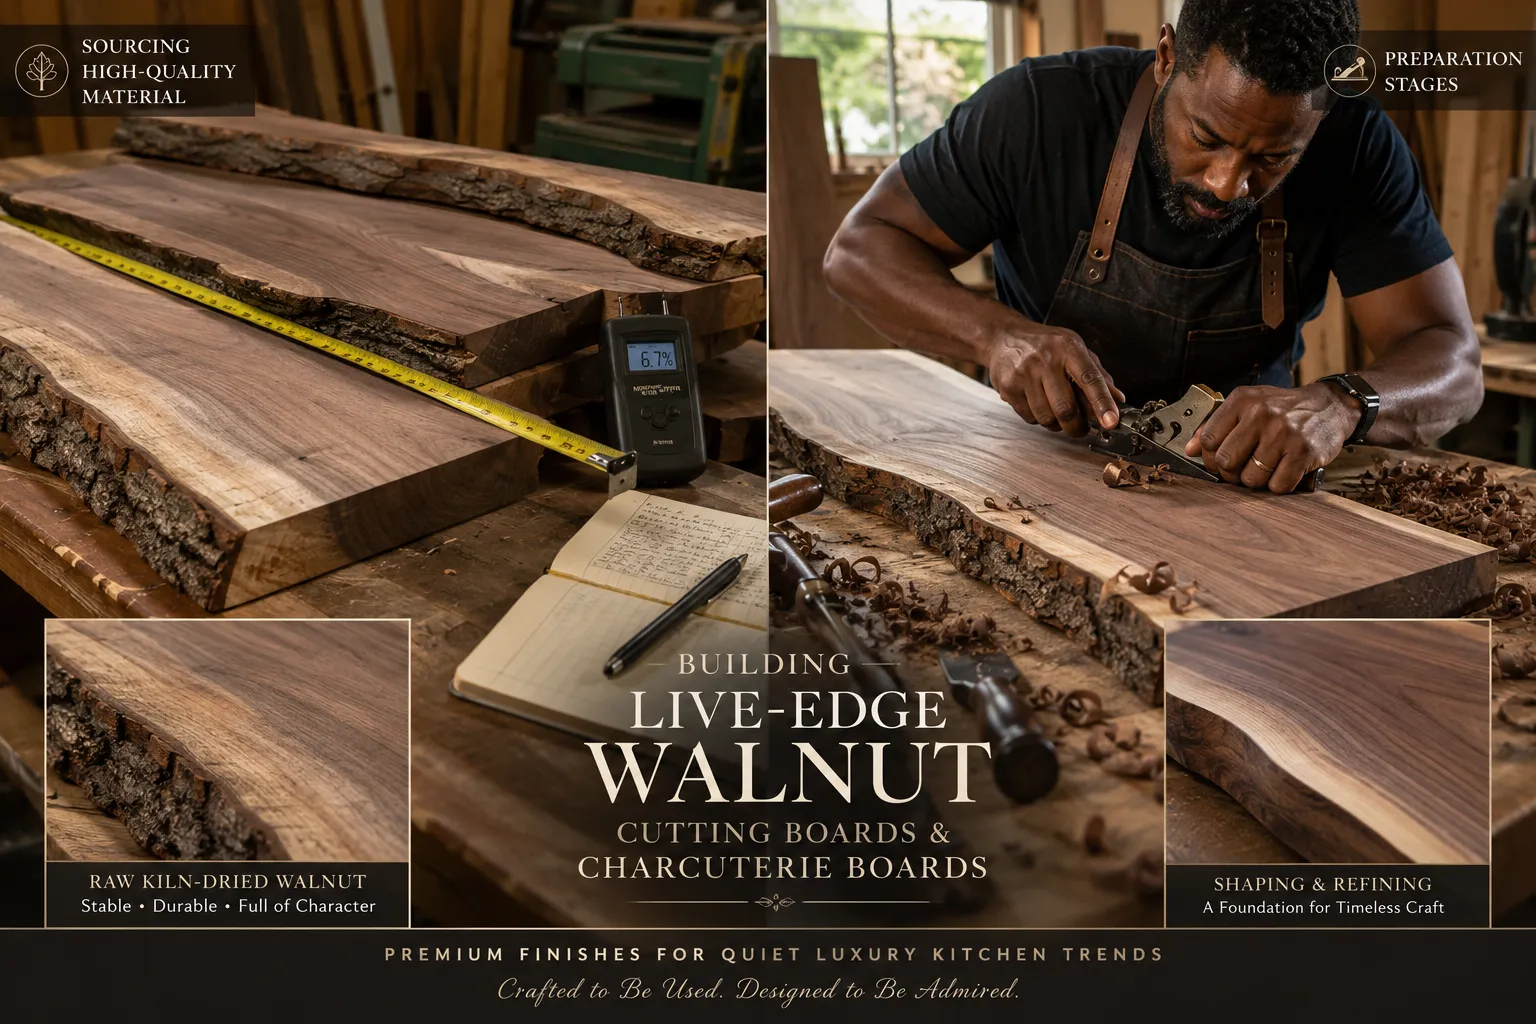
The journey of creating a stunning live-edge walnut board begins with sourcing the right material and meticulous preparation.
Sourcing High-Quality Walnut Slabs
When sourcing walnut, look for kiln-dried slabs to ensure stability and prevent future warping or cracking. Air-dried slabs can also work, but require a longer acclimation period in your workshop. Prioritize slabs with minimal checks (cracks) and knots that might compromise structural integrity or sanitation for food contact. The live edge itself should be relatively intact, allowing for gentle cleaning and preservation rather than extensive repair. Consider thickness; a good cutting board should be at least 1.5 inches thick to prevent warping and provide heft. For charcuterie boards, 1 inch can suffice for lighter handling.
Initial Preparation: Cleaning and Flattening
Once you have your slab, the first step is to clean the live edge. Use a stiff wire brush to remove any loose bark, dirt, or debris. You want to expose the solid, natural edge without damaging its unique contours.
Next, the slab needs to be flattened. Lumber, especially live-edge slabs, rarely comes perfectly flat. Uneven surfaces will not only be unstable but also difficult to finish properly. There are several methods for flattening:
- Router Sled: This is a common and effective method for small to medium-sized slabs. It involves building a simple jig that allows a router to pass over the slab, gradually removing material until both faces are parallel.
- Jointer and Planer: If you have access to a large jointer and planer, these machines can make quick work of flattening. However, the width of your slab will be limited by the capacity of your machines.
- Hand Planes: For those who appreciate traditional craftsmanship, hand planes can achieve a perfectly flat surface, though this requires significant skill and effort.
Whichever method you choose, aim for a consistent thickness and a perfectly flat surface on both sides. This foundational step is critical for the stability and aesthetic appeal of the finished board.
Shaping and Sanding for Perfection
After flattening, it’s time to refine the shape and prepare for finishing.
- Cut to Size: Determine the desired length and width of your board. Use a track saw or circular saw with a straight edge guide for precise, clean cuts on the ends.
- Edge Treatment (Non-Live Edges): For the edges without the live bark, consider a slight chamfer or round-over using a router. This softens the edges, making the board more comfortable to handle and less prone to chipping.
- Sanding Progression: This is perhaps the most critical step for achieving a premium finish. Start with a coarse grit sandpaper (e.g., 80 or 100 grit) to remove any tool marks and initial imperfections. Progress through increasingly finer grits (120, 150, 180, 220, 320, and even 400 or 600 grit for an ultra-smooth finish). The key is to thoroughly remove the scratches from the previous grit before moving to the next.
- Tip: After sanding with 220 grit, wipe the board with a damp cloth to raise the grain. Once dry, lightly sand with 320 or 400 grit again. This prevents the grain from raising later after the finish is applied, ensuring a silkier feel.
- Refining the Live Edge: Use a softer brush or a small carving tool to gently clean and smooth the live edge, removing any remaining loose material without removing its natural character. Lightly sand any sharp points with fine-grit sandpaper (e.g., 220 grit).
Proper sanding not only prepares the wood for finishing but also allows the natural beauty of the walnut grain to fully emerge, a key component in the “quiet luxury” aesthetic. For more insights into working with unique wood pieces, refer to our guide on live-edge wood projects from design to execution.
Premium Finishes for Durability and “Quiet Luxury”
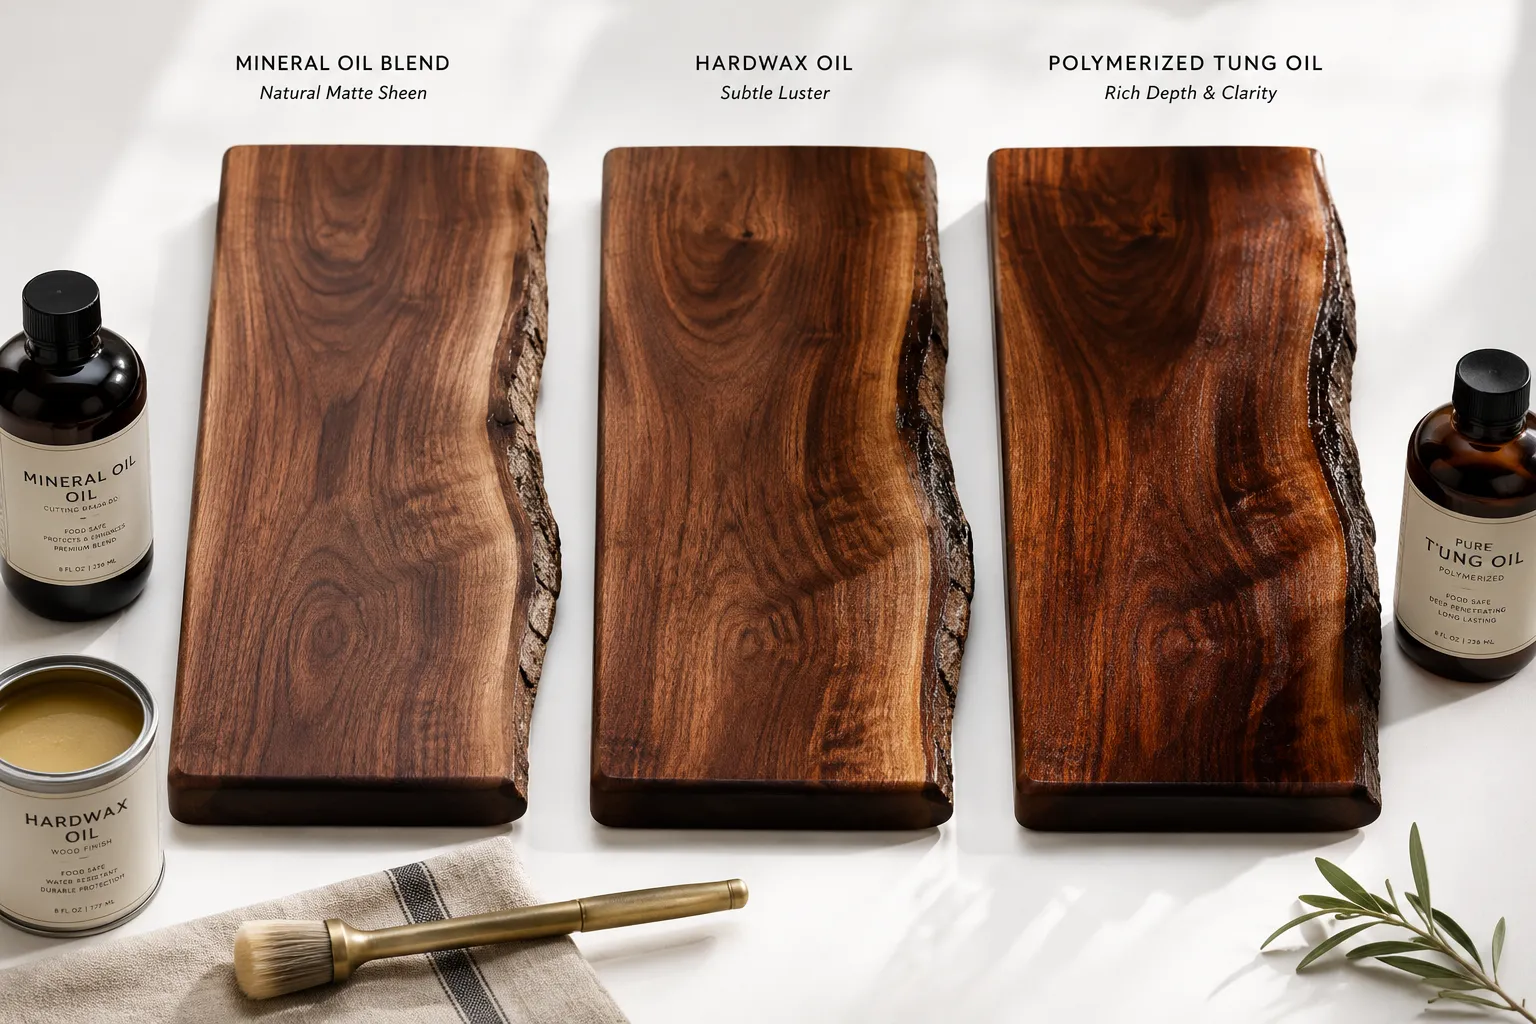
The finish is where your live-edge walnut board truly transforms into a premium, quiet luxury item. It enhances the wood’s natural color, protects it from moisture and bacteria, and provides a tactile experience that speaks of quality. It’s crucial to use food-safe finishes, especially for cutting and charcuterie boards.
Here are some top choices for premium, food-safe finishes:
1. Mineral Oil and Wax Blend
This is the most traditional and widely recommended finish for cutting boards due to its simplicity, ease of application, and food-safe nature.
- Mineral Oil: A non-toxic, non-drying oil that penetrates the wood fibers, bringing out the rich color and providing a degree of water resistance. Apply liberally, allow to soak in for several hours, then wipe off excess. Repeat this process multiple times for initial saturation.
- Food-Grade Wax (e.g., Beeswax, Carnauba Wax, or a blend): After the mineral oil has fully saturated the wood, a wax topcoat creates a protective barrier. Wax provides a more durable, silky-smooth feel and a subtle sheen. Apply a thin layer of wax, let it sit for 15-30 minutes, then buff vigorously with a clean, soft cloth.
- Benefits: Deeply enhances walnut’s natural color, easy to reapply and maintain, completely food-safe, offers a natural, matte to semi-gloss finish that aligns perfectly with quiet luxury.
2. Tung Oil or Linseed Oil (Polymerized/Food-Grade)
While pure tung oil and linseed oil are natural and food-safe, they cure to a harder finish than mineral oil, offering more robust protection. Always ensure you are using polymerized or “food-grade” versions, as some commercial products may contain additives that are not food-safe.
- Application: Apply thin coats, allowing each coat to fully cure (which can take 24-72 hours) before applying the next. Several coats are usually needed. Wipe off any excess after application to prevent a gummy surface.
- Benefits: Creates a durable, water-resistant finish that penetrates deeply and hardens within the wood. It provides a beautiful, natural satin finish that is highly protective.
- Caution: Rags soaked in tung or linseed oil can spontaneously combust. Always hang them to dry flat or dispose of them in a sealed, water-filled container.
3. Hardwax Oils (e.g., Osmo, Rubio Monocoat)
These are professional-grade finishes popular in fine woodworking. They are blends of natural oils and waxes that penetrate and harden, offering exceptional durability and a beautiful, natural look. Many are food-safe once cured.
- Application: Typically applied in one or two very thin coats, buffed into the wood. They cure quickly and provide excellent protection.
- Benefits: Highly durable, stain-resistant, natural matte or satin finish, enhances wood grain beautifully, easy to spot repair. These finishes provide a high-end feel that is perfectly suited for quiet luxury.
4. Food-Grade Epoxy Resin (for Charcuterie Boards, NOT Cutting Boards)
For charcuterie boards that won’t see direct knife use, a food-grade epoxy resin can create a striking, glass-like finish that fully encapsulates the wood. This is less suitable for cutting boards as knives will damage the resin.
- Application: Pour-on, self-leveling resin that cures to a hard, clear, durable surface. Requires careful mixing and application in a dust-free environment.
- Benefits: Exceptional durability, high-gloss finish, showcases the live edge and wood grain dramatically. Creates a truly unique, art-like piece.
- Caution: Ensure the epoxy is specifically labeled “food-grade” and follow all safety instructions.
For a deeper dive into general wood finishing techniques, consider exploring resources on budget-friendly wood finishing to understand the principles of various oil, wax, and shellac applications.
Applying the Finish and Final Touches
Regardless of the finish chosen, proper application is key to achieving that premium, quiet luxury look.
- Cleanliness: Ensure your board is absolutely dust-free before applying any finish. Use a tack cloth or compressed air.
- Even Coats: Apply finishes in thin, even coats. Multiple thin coats are always better than one thick coat.
- Curing Time: Allow adequate curing time between coats and before use. Rushing this step can lead to a sticky or uneven finish.
- Buffing: For oil/wax finishes, buffing with a clean, lint-free cloth after the final application will bring out a beautiful sheen and smooth feel.
Branding and Presentation
To fully embrace the “quiet luxury” ethos, consider subtle branding. A small, tastefully engraved logo or initial on the underside of the board adds a bespoke touch without detracting from the natural beauty of the wood. Presentation is also paramount:
- Packaging: Wrap your finished board in high-quality kraft paper, tied with natural twine, perhaps with a small, elegant hang tag detailing the wood type and finish used.
- Care Instructions: Include a small card with care instructions (e.g., hand wash only, re-oil periodically) to help customers maintain their investment.
These small details elevate your product from a simple wooden board to a premium, artisan-crafted item. Such thoughtful presentation enhances perceived value and is essential for marketing handmade woodcraft on social media and achieving profitable sales.
Conclusion
Building live-edge walnut cutting boards and charcuterie boards with premium finishes offers a compelling entry point for beginner woodworkers into the lucrative “quiet luxury” kitchen market in 2026. This niche values authenticity, superior materials, and exquisite craftsmanship, qualities inherent in these natural wood pieces. By meticulously selecting slabs, mastering flattening and sanding, and applying high-quality food-safe finishes, you can create functional art pieces that are both beautiful and highly desirable.
Start by practicing on smaller, less expensive wood pieces to hone your techniques before investing in prime walnut slabs. Experiment with different food-safe finishes to understand their characteristics and choose the one that best complements your aesthetic and target market. Remember, attention to detail at every stage, from sourcing to the final buff, will differentiate your product and position it squarely within the premium segment. Embrace the organic beauty of the live edge, let the rich walnut grain speak for itself, and craft pieces that embody quiet luxury. These projects are not just about woodworking; they’re about creating lasting impressions and building a reputation for quality.