
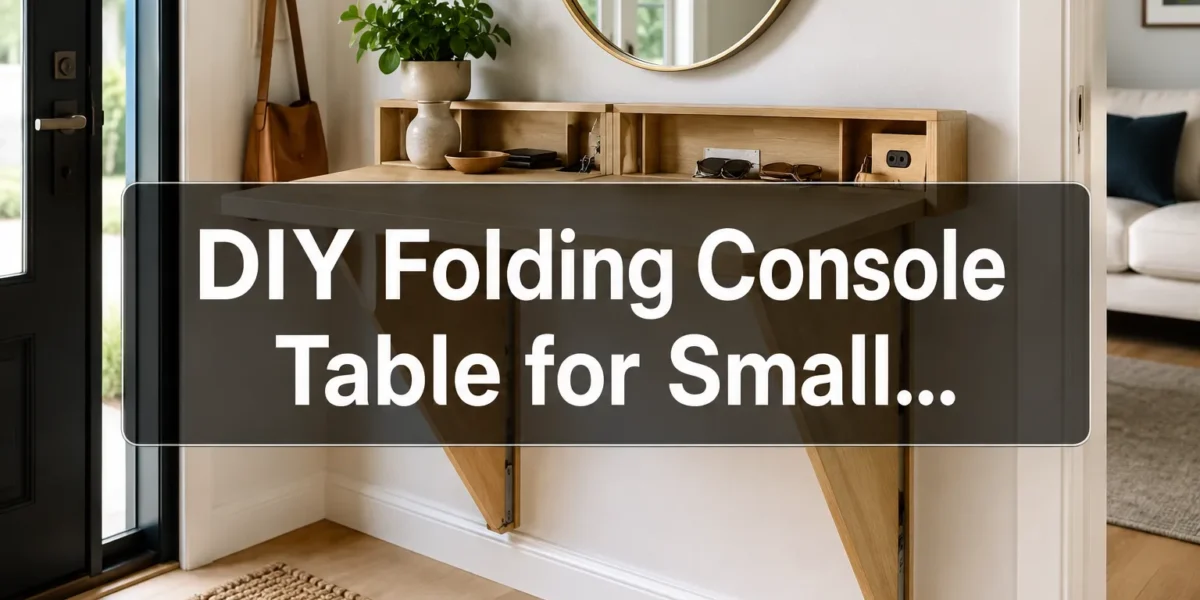
For homeowners navigating the spatial challenges of compact living, every square inch counts. In 2026, the demand for adaptable, multi-functional furniture is higher than ever, particularly for high-traffic zones like entryways. A strategically designed DIY folding console table for small entryways can transform an often-overlooked area into a practical, organized, and inviting space, complete with space-saving designs and clever hidden storage ideas. This article explores how to conceive, build, and integrate such a piece, ensuring both aesthetic appeal and optimal utility.
Key Takeaways
- DIY folding console tables optimize space in small entryways by offering a surface only when needed.
- Creative designs incorporate hidden storage for clutter, enhancing functionality without sacrificing aesthetics.
- Selecting the right materials and hardware is crucial for durability, stability, and ease of folding.
- Customization allows for perfect integration with existing decor and specific storage needs.
- Building your own offers significant cost savings and the satisfaction of a personalized, handcrafted solution.
Understanding the Need: Why a DIY Folding Console Table for Small Entryways?
Small entryways, by their very nature, present a design conundrum. They need to be functional, a place to drop keys, mail, and outerwear, yet remain uncluttered and navigable. A traditional console table, while elegant, often consumes too much valuable floor space, making the area feel cramped. This is where the ingenuity of a folding design shines.
A DIY Folding Console Table for Small Entryways: Space-Saving Designs and Hidden Storage Ideas offers an elegant solution. When folded, it can appear as a slim panel or a decorative wall accent, freeing up floor space for movement. When unfolded, it provides a stable surface for everyday essentials. This adaptability is particularly beneficial for apartments, townhouses, or any home where maximizing vertical and horizontal space is paramount. Beyond simply folding, integrating hidden storage elevates its utility, transforming a simple table into a multi-faceted organizational hub.
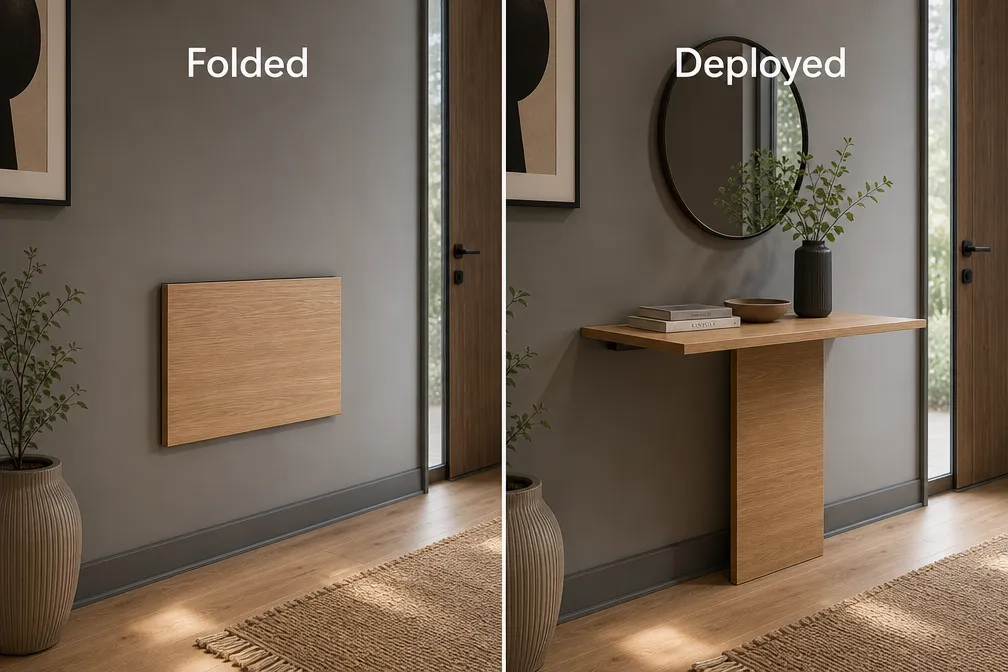
Benefits of a Folding Console Table
- Maximizes Floor Space: The primary advantage is the ability to reclaim floor space when the table is not in use. This is invaluable in narrow corridors or tight entry points, preventing bottlenecks.
- Reduces Visual Clutter: A streamlined design that folds away contributes to a cleaner, more minimalist aesthetic, making a small entryway feel larger and more open.
- Multi-functional: Can serve as a temporary workspace, a display shelf for decor, or a serving area for guests in a pinch, demonstrating its versatility. For other multi-functional furniture ideas, consider exploring how to build multi-functional entryway organizers.
- Customizable: DIY allows for precise dimensions, material choices, and aesthetic integration that pre-made furniture often cannot provide. You can ensure it perfectly complements your home’s existing style and color palette.
- Cost-Effective: Building your own can be significantly more affordable than purchasing a custom-designed or high-end space-saving console table.
Designing Your DIY Folding Console Table: Space-Saving Designs
The core of a successful DIY project lies in thoughtful design. For a DIY Folding Console Table for Small Entryways: Space-Saving Designs and Hidden Storage Ideas, this means balancing form, function, and the constraints of your specific space. Before cutting any wood, consider the table’s dimensions, how it will fold, and the types of hidden storage you wish to incorporate.
Key Design Considerations
Dimensions:
- Folded Depth: Aim for the slimmest profile possible, typically 1.5 to 4 inches, to minimize intrusion into the entryway.
- Unfolded Depth: This will depend on its intended use. For keys and mail, 8-12 inches might suffice. For a temporary workspace, 18-24 inches could be ideal.
- Width: Match the available wall space, ensuring it doesn’t obstruct doorways or other furniture.
- Height: Standard console table height is usually 28-32 inches, allowing for comfortable use. Consider if you want it to align with other furniture, like a nearby console table for narrow hallways.
Folding Mechanisms:
- Drop-Leaf: The table surface is hinged and drops down when not in use. It can be supported by folding brackets or a hinged leg.
- Wall-Mounted Flip-Down: The entire table top hinges from the wall, supported by folding brackets or a prop leg. This is a very clean, minimalist option.
- Accordion/Gateleg: More complex, but allows for a larger surface when extended, often used in DIY folding collapsible dining tables.
Materials:
- Wood: Plywood (birch, maple for paint/stain), MDF (for painting), or solid hardwoods (oak, maple, walnut for durability and aesthetics). Plywood is often preferred for its stability and cost-effectiveness.
- Hardware: Heavy-duty folding brackets, piano hinges (for seamless folds), magnetic catches, and sturdy drawer slides are essential for longevity and smooth operation. Consider the quality of materials, investing in good hardware will make a significant difference.
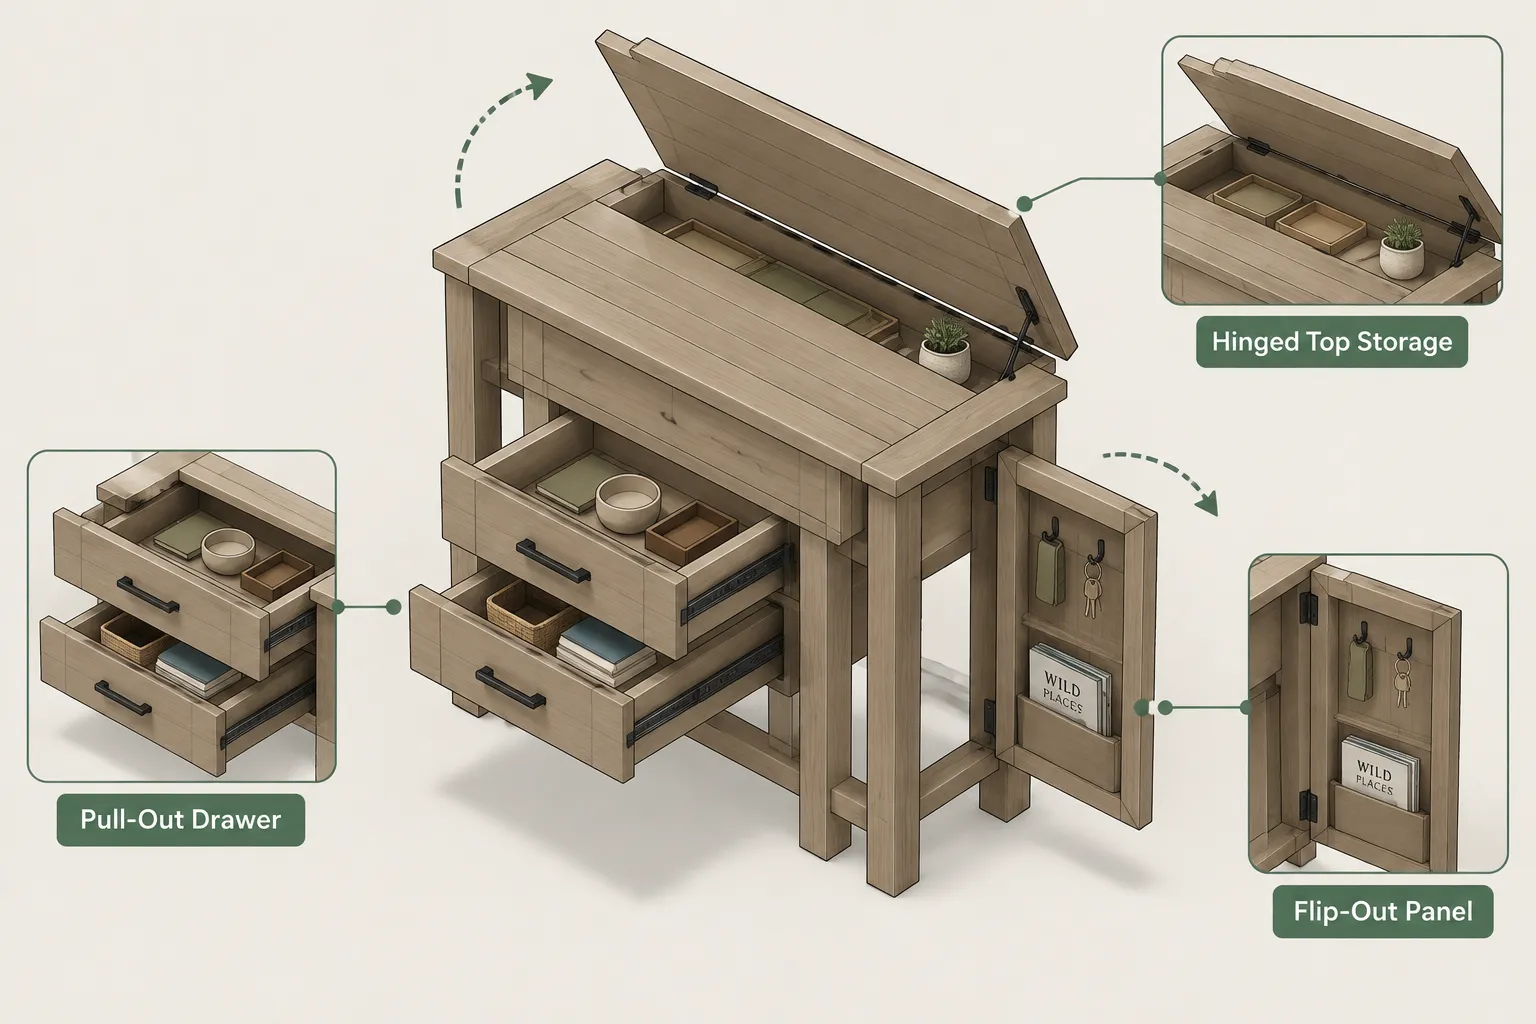
Integrating Hidden Storage Ideas
This is where your DIY console table truly shines as a space-saving marvel. Think beyond a simple flat surface.
- Shallow Drawers: Even a 2-3 inch deep drawer can perfectly house keys, pens, stamps, and small stationery. Consider a narrow, full-width drawer or a set of smaller drawers.
- Hinged Top Compartment: The entire top surface can be hinged to lift, revealing a shallow compartment underneath for storing mail, charging cables, or small electronics.
- Flip-Out Panels/Cubbyholes: Side panels could flip open to reveal narrow shelves or cubbyholes for wallets, sunglasses, or small decorative items.
- Magnetic Back Panel: If wall-mounted, a thin magnetic panel behind the main surface could hold magnetic key holders or small metal containers.
- Under-Table Baskets/Hooks: While not “hidden,” cleverly designed cutouts or hooks underneath the table can support small baskets for gloves or dog leashes, or provide hanging spots for bags.
- Secret Compartments: For valuables, a false bottom in a drawer or a pressure-release panel can offer discreet storage.
Table: Folding Mechanisms and Storage Potential
| Mechanism Type | Space-Saving Advantage | Hidden Storage Potential | Ideal Use Case |
|---|---|---|---|
| Drop-Leaf | Surface drops down, creating a narrow profile. | Can combine with drawers/hinged top in main body. | Minimalist surface, occasional use. |
| Wall-Mounted Flip | Entire unit folds flat against the wall. | Integrated shallow compartments behind the main panel. | Ultra-narrow entryways, high aesthetic value. |
| Accordion/Gateleg | Legs fold inward, allowing the top to collapse. | Often allows for deeper main body with drawers or shelves. | Larger temporary surfaces, more storage. |
When planning your design, visualize the table in both its open and closed states. How does it interact with the surrounding space? Will it impede traffic flow? Will the hidden storage be easily accessible? These questions will guide you toward an optimal solution.
Building Your DIY Folding Console Table: Step-by-Step Guide and Pro Tips
Once your design is finalized, the exciting part begins: construction. Building a DIY Folding Console Table for Small Entryways: Space-Saving Designs and Hidden Storage Ideas requires careful measurements, precise cuts, and methodical assembly.
Essential Tools and Materials
- Power Tools: Circular saw or table saw (for straight cuts), drill/driver, orbital sander. For more advanced joinery, a router could be useful, especially when considering a DIY router table build.
- Hand Tools: Tape measure, carpenter’s square, level, clamps, wood glue, chisels.
- Safety Gear: Safety glasses, hearing protection, dust mask.
- Materials: Wood of choice (plywood, hardwood), chosen hardware (hinges, folding brackets, drawer slides, magnetic catches), wood screws, sandpaper (various grits), wood filler, primer, paint/stain, clear coat.
Step-by-Step Construction Process
Measure and Cut Wood:
- Carefully measure and mark all components according to your design plans.
- Use your circular saw or table saw to make precise cuts. Accuracy here is paramount for a professional finish and proper folding.
- Cut pieces for the main table surface, supporting structure (if any), and all hidden storage components (drawer boxes, compartment lids, etc.).
Construct Hidden Storage Elements:
- Assemble drawer boxes using wood glue and small brad nails or screws. Ensure they are square.
- Create compartment lids or flip-out panels. Install any small hinges or magnetic catches for these components.
- For built-in storage, ensure the internal dimensions are suitable for their intended contents.
Assemble the Main Table Structure:
- If your design includes a fixed back panel or a primary frame, assemble these first. Use wood glue and screws for strong joints.
- Install drawer slides for any pull-out drawers. Ensure they operate smoothly before proceeding.
- Attach any internal dividers or shelves for compartments.
Install Folding Mechanism Hardware:
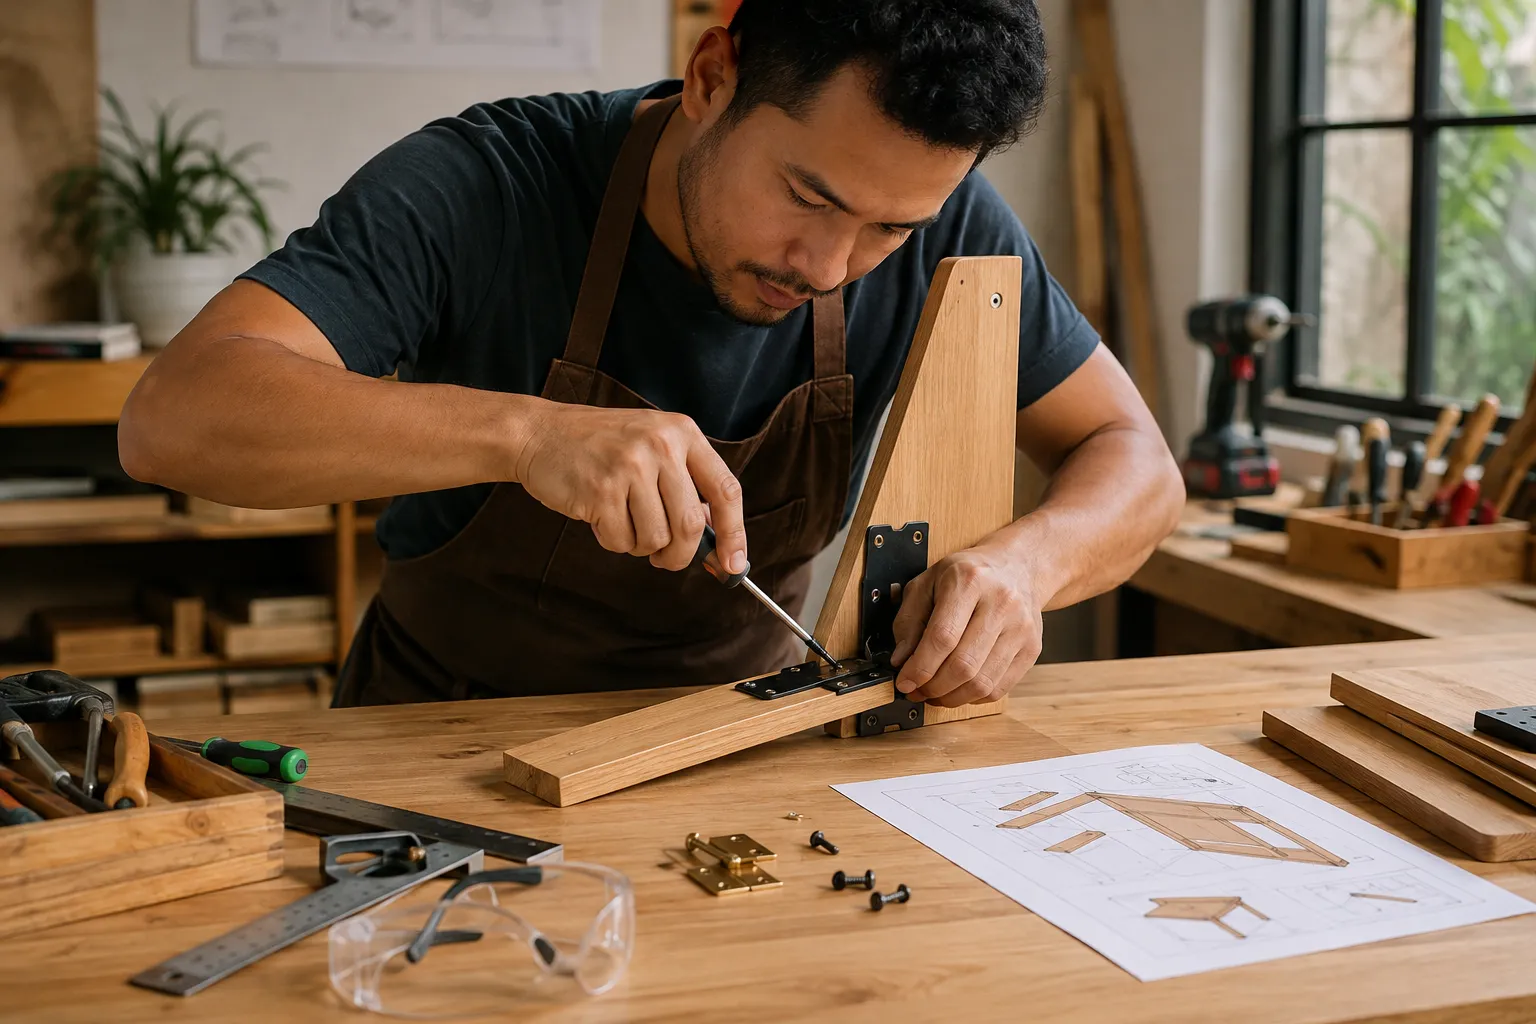
- Crucial Step: Attach the main folding hardware (e.g., piano hinge for a flip-down table, heavy-duty folding brackets) to the main table component and the wall-mounting cleat/support.
- Pre-drill all pilot holes to prevent wood splitting. Use a level to ensure the table will be perfectly horizontal when unfolded.
- Test the folding mechanism repeatedly to ensure it operates smoothly and securely. Ensure all hinges are aligned correctly.
Finishing:
- Sanding: Sand all wood surfaces thoroughly, starting with a coarser grit (100-120) and progressing to finer grits (180-220) for a smooth finish.
- Filling: Fill any screw holes or imperfections with wood filler, then sand smooth once dry.
- Priming/Staining: Apply a wood primer if painting, or a pre-stain conditioner if staining.
- Paint/Stain: Apply your chosen paint or stain in thin, even coats, following manufacturer instructions. For a durable surface, consider options like warm matte finishes for dining room tables or other protective coatings.
- Clear Coat: Finish with several coats of a durable clear coat (polyurethane, lacquer) to protect the surface from wear and moisture.
Pro Tips for Success
- Measure Thrice, Cut Once: This old adage is especially true for folding mechanisms where precision is vital.
- Use Quality Hardware: Don’t skimp on hinges, brackets, or drawer slides. Cheap hardware will lead to a flimsy, frustrating table.
- Test as You Go: Before final assembly, dry-fit components. Test the folding mechanism at each stage of installation to catch issues early.
- Secure Wall Mounting: For wall-mounted designs, ensure you mount into wall studs or use appropriate heavy-duty drywall anchors. Stability is paramount.
- Consider Cable Management: If you plan to charge devices, integrate small holes or channels for cables to maintain a clean look.
- Ergonomics: Think about how the table will be used. Will it be comfortable to stand at? Can items be accessed easily from storage? For more on creating comfortable furniture, consider creating ergonomic workshop furniture.
Building a DIY folding console table is a rewarding project that combines practical utility with creative design. With careful planning and execution, you can create a piece that perfectly suits your small entryway, making it both functional and beautiful in 2026.
Conclusion
A DIY folding console table with space-saving designs and hidden storage ideas is more than just a piece of furniture; it’s a testament to smart living and practical design for small entryways. In 2026, as urban spaces become more compact, the ability to customize functional items like this becomes an invaluable skill. By following a thoughtful design process, selecting appropriate materials and hardware, and executing the build with precision, you can create a highly efficient, aesthetically pleasing, and genuinely useful addition to your home. This project not only addresses the specific challenges of narrow entryways but also offers the immense satisfaction of a handcrafted solution tailored exactly to your needs. Embrace the opportunity to transform your small entryway into a hub of organization and style.
SEO Meta Title: DIY Folding Console Table for Small Entryways: Build Your Own SEO Meta Description: Maximize space in small entryways with a DIY folding console table. Discover creative designs, hidden storage ideas, and a step-by-step build guide for 2026.