
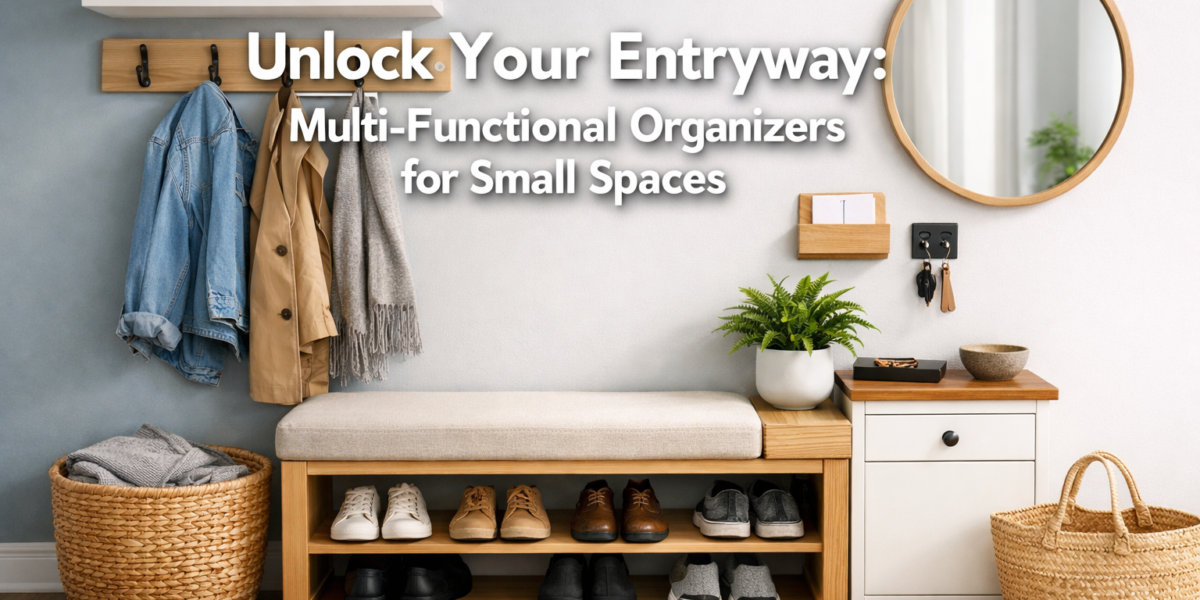

The average entryway, often the most overlooked space in a home, holds immense potential for functionality, especially in smaller dwellings. With space at a premium in 2026, homeowners and designers are increasingly turning to innovative solutions that maximize every square inch. The challenge isn’t merely about tidiness; it’s about transforming a high-traffic area into an efficient, aesthetically pleasing, and welcoming gateway. This article delves into Crafting Multi-Functional Entryway Organizers: Combining Storage, Seating, and Decor in Small Spaces, offering comprehensive guidance for designing and building practical yet stylish pieces that address these needs.
Key Takeaways

- Necessity of Multi-Functionality: Small entryways demand organizers that integrate storage, seating, and decorative elements to optimize limited space.
- Strategic Design Principles: Successful designs prioritize vertical space, modularity, and materials that balance durability with aesthetic appeal.
- DIY Potential: Crafting these organizers offers significant customization, cost savings, and the satisfaction of building a bespoke solution.
- Beyond Storage: Effective entryway organizers enhance the home’s overall decor, creating a cohesive and inviting first impression.
- Safety and Stability: Proper joinery, secure mounting, and appropriate material choices are crucial for the long-term integrity and safety of the organizer.
Understanding the Core Principles: Combining Storage, Seating, and Decor
The entryway serves as a crucial transition zone between the outside world and the sanctuary of your home. It’s where keys land, coats are hung, shoes are shed, and often, where guests form their first impression. For small spaces, a single-purpose item simply won’t suffice. This is why Crafting Multi-Functional Entryway Organizers: Combining Storage, Seating, and Decor in Small Spaces is not just a trend but a fundamental design approach.
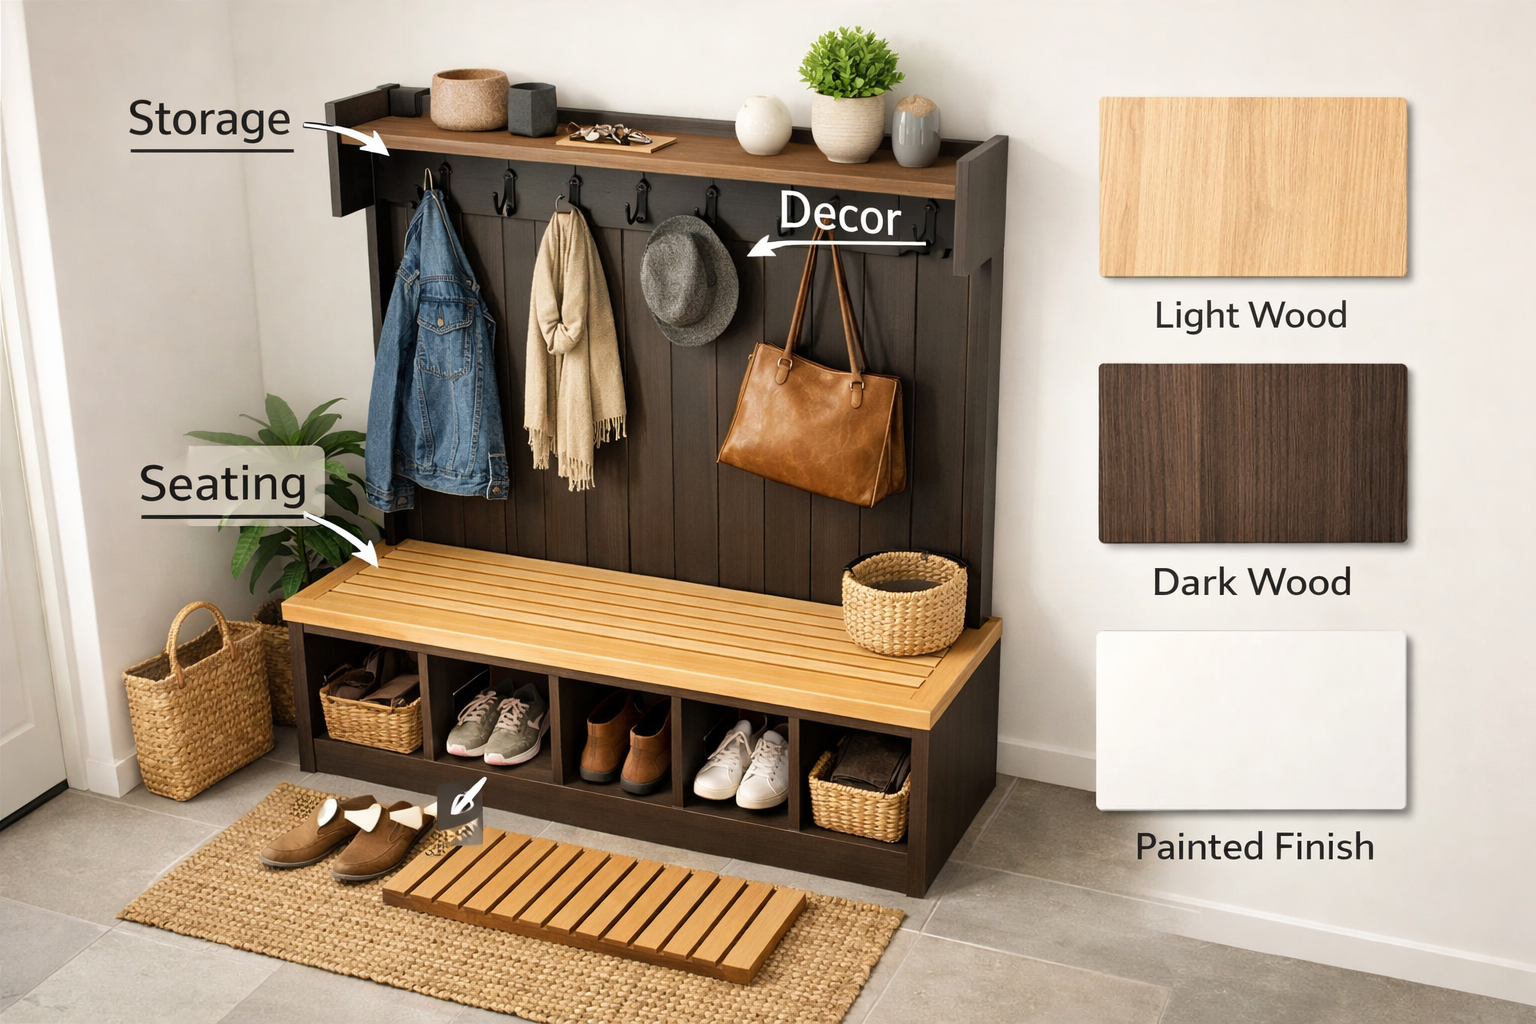
Let’s break down the essential components:
- Storage: This is the practical backbone. It includes solutions for coats, bags, shoes, keys, mail, and other daily essentials. Without adequate storage, clutter quickly overtakes the space, creating stress and disorganization. Effective storage can range from open shelving and cubbies to hidden compartments and drawers.
- Seating: A designated spot to sit down can dramatically improve the functionality of an entryway. It provides a convenient place to put on or take off shoes, set down groceries, or even wait for family members. This can be a built-in bench, a pull-out stool, or a compact ottoman integrated into the design.
- Decor: Beyond utility, the entryway offers an opportunity to express personal style and set the tone for the rest of the home. Decorative elements can include mirrors to check an outfit before heading out, small plants for a touch of greenery, artwork, or thoughtful lighting. The choice of materials, finishes, and hardware also contributes significantly to the overall aesthetic.
Maximizing Small Spaces: Verticality and Modularity
When space is limited, thinking vertically is paramount. Walls become prime real estate for shelving, hooks, and wall-mounted units. Modular designs allow for maximum flexibility, enabling you to combine various elements to suit specific needs and spatial constraints. For example, a base unit might incorporate shoe storage and seating, while upper sections feature coat hooks and shelves for smaller items. This approach ensures every available inch contributes to the organizer’s overall utility.
Consider these design elements:
- Wall-Mounted Solutions: Floating shelves, hook racks, and even entire units anchored to the wall free up floor space, making the area feel larger. For those interested in Wall-Mounted Coat Racks: Functional Art for Entryways with Hidden Hardware, there are many creative options available.
- Built-in vs. Freestanding: Built-in units offer a seamless, custom look that integrates flawlessly with the existing architecture. Freestanding units provide flexibility if you anticipate moving or reconfiguring the space.
- Open vs. Closed Storage: A mix often works best. Open cubbies for shoes allow for easy access, while closed drawers hide clutter and maintain a tidy appearance.
- Ergonomics: Ensure the seating height is comfortable, and hooks are within easy reach for all family members.
Designing Your Multi-Functional Entryway Organizer: A Practical Approach
The design phase is where functionality meets creativity. Before cutting any wood, a detailed plan is essential for Crafting Multi-Functional Entryway Organizers: Combining Storage, Seating, and Decor in Small Spaces. This section will guide you through crucial considerations, from material selection to integrating bespoke features.
Step-by-Step Design Process
Assess Your Needs:
- What needs to be stored? (e.g., 5 pairs of shoes, 3 coats, keys, mail, dog leash, umbrellas).
- Who will use it? (e.g., adults, children, multiple family members).
- What activities occur here? (e.g., putting on shoes, dropping bags, receiving mail).
- Measure your space: Accurately measure the width, height, and depth available. Consider door swings and traffic paths.
Sketching and Layout:
- Start with rough sketches. Don’t worry about perfection at this stage. Explore different configurations: benches with cubbies below, vertical panels with hooks and shelves, narrow console tables with hidden storage.
- Refine sketches into detailed drawings, including dimensions. Graph paper can be incredibly helpful here.
- Consider 3D modeling software if you’re comfortable, as it helps visualize the final product.
Material Selection: The choice of materials impacts durability, aesthetics, and cost.
- Plywood: An excellent choice for its stability, strength, and relatively low cost. Birch plywood offers a clean look, while standard construction plywood can be painted or covered. For structural components, 1/2 Plywood for Cabinets: Strength, Durability, and Design Considerations is a reliable option.
- Solid Wood: Offers superior durability and a rich, natural aesthetic. Hardwoods like oak, maple, or walnut are robust but more expensive. Pine is a budget-friendly option that takes stain well.
- MDF (Medium-Density Fiberboard): Ideal for painted finishes, MDF is smooth and stable, but not as strong as plywood or solid wood, and susceptible to moisture damage.
- Hardware: Quality hooks, drawer slides, and hinges are crucial for longevity.
| Material Type | Pros | Cons | Best Use |
|---|---|---|---|
| Plywood | Strong, stable, affordable, versatile | Edges require finishing | Structural elements, shelving, cabinet boxes |
| Solid Wood | Durable, beautiful grain, long-lasting | Expensive, can warp/move with humidity | Benches, decorative panels, visible surfaces |
| MDF | Smooth finish, stable, takes paint well | Less durable, heavy, susceptible to moisture | Painted cabinet doors, decorative accents |
Integrating Seating, Storage, and Decor Elements
- Bench with Storage: This is a classic multi-functional piece.
- Under-bench cubbies: Perfect for shoes, baskets, or open bins.
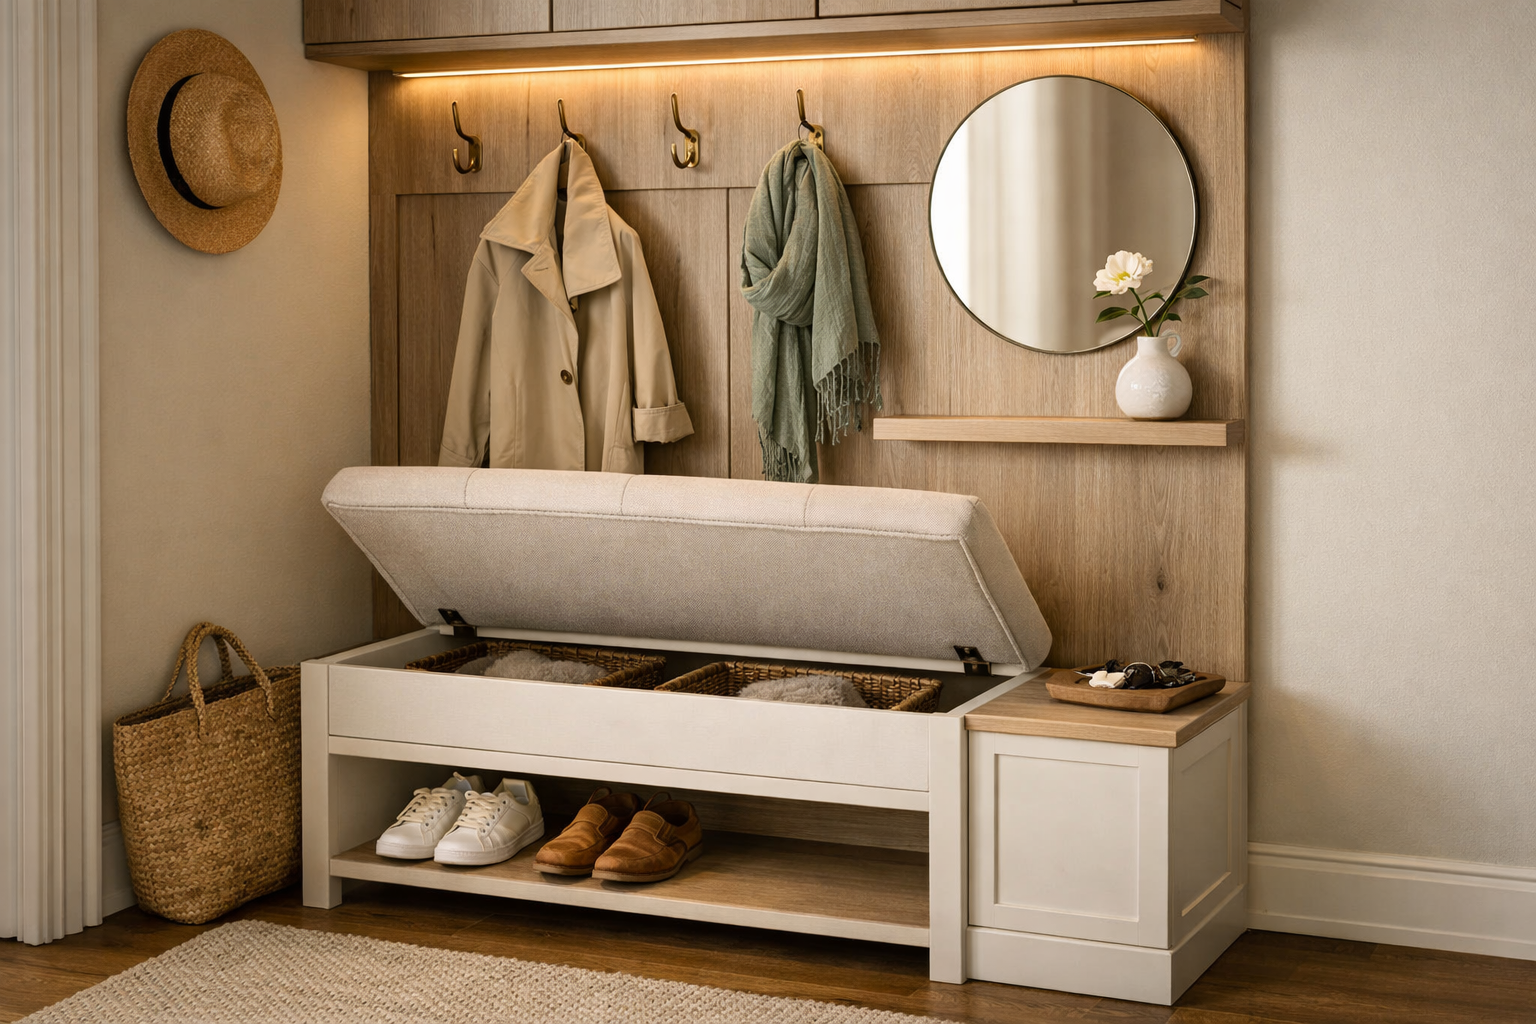
- Lift-top bench: Provides hidden storage for bulkier items like blankets, pet supplies, or off-season accessories.
- Pull-out drawers: Offer organized storage for smaller items.
- Vertical Panels & Wall Units:
- Coat Hooks: Integrate sturdy hooks at varying heights. Consider Wall-Mounted Coat Racks for sleek designs.
- Shelves: Add shallow shelves for keys, wallets, sunglasses, or small decorative items. A narrow shelf above the coat hooks is ideal.
- Mirrors: Incorporate a mirror directly into the panel or hang one above a narrow shelf. Not only decorative, but also functional for a last-minute check before leaving.
- Mail Slots/Key Holders: Small, integrated compartments keep daily essentials organized.
- Decorative Touches:
- Finishing: Stain, paint, or clear coat to match your home’s aesthetic. Danish Oil vs. Linseed: The Ultimate Wood Finishing Guide provides excellent insights.
- Lighting: Consider LED strip lighting under a shelf or a small wall sconce to brighten the area and highlight decor.
- Personalization: Add a small plant, a piece of artwork, or a family photo to make the space feel inviting and personal.
For those considering a broader approach to maximizing storage in their home, exploring methods for Building Modular Wood Storage Systems for Small Workshops can provide valuable transferable insights into modular design principles.
Crafting Your Entryway Organizer: Construction and Finishing
With a solid design in hand, the next phase involves the actual construction. Crafting Multi-Functional Entryway Organizers: Combining Storage, Seating, and Decor in Small Spaces requires careful attention to detail, precision, and appropriate woodworking techniques to ensure a durable and aesthetically pleasing result.
Essential Tools and Techniques
The tools required will depend on the complexity of your design, but here’s a general list:
- Measuring and Marking: Tape measure, ruler, square, pencil.
- Cutting: Circular saw or table saw for large panels, miter saw for accurate crosscuts, jigsaw for curves. A Beginner’s Guide to Essential Woodworking Jigs can help improve precision.
- Joining: Drill/driver, pocket hole jig, clamps, wood glue. For strength and longevity, consult The Ultimate Guide to Wood Glue.
- Sanding: Orbital sander, sanding blocks, various grit sandpaper.
- Finishing: Brushes, rollers, rags for applying stain, paint, or clear coat.
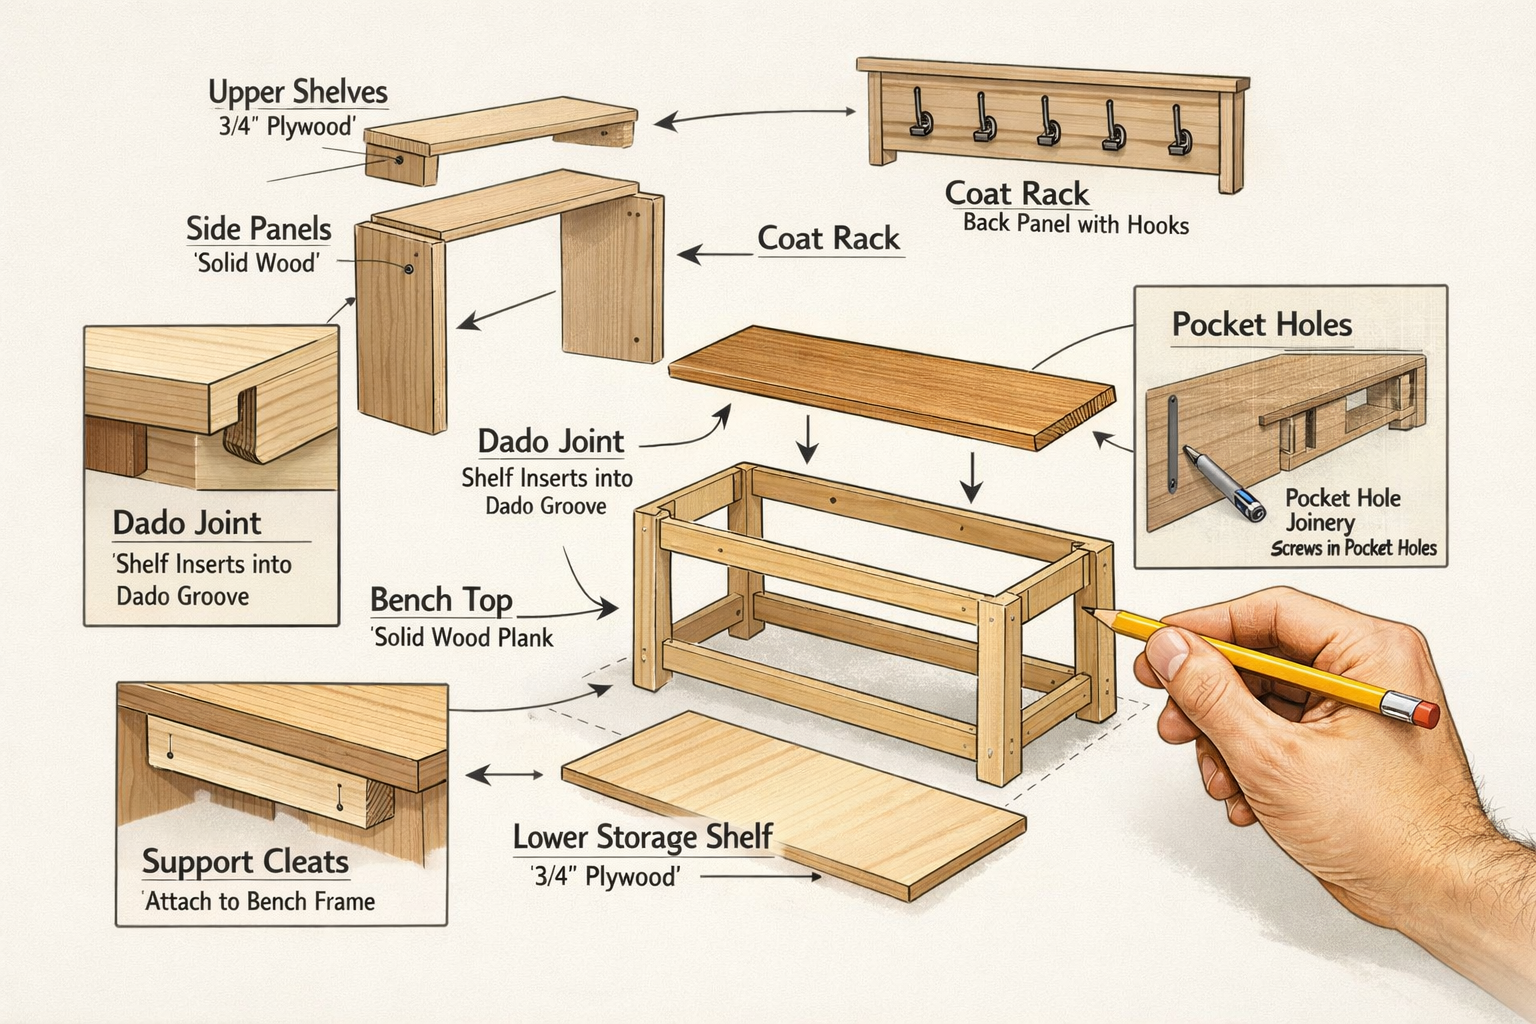
Construction Steps (General Outline)
- Cut Components: Measure and cut all wood pieces according to your detailed plan. Label each piece for easy assembly.
- Prepare for Joinery: Drill pocket holes, cut dados, or prepare tenons as per your chosen joinery methods. Dry-fit components to ensure everything aligns correctly.
- Assemble Base Unit: Typically, this involves the bench and any lower storage cubbies or drawers. Use wood glue and screws for strong joints.
- Add Vertical Elements: Attach side panels, back panels, and vertical dividers to the base. Ensure everything is square and plumb.
- Install Shelving and Hooks: Securely install shelves using cleats, shelf pins, or dado joints. Attach coat hooks, ensuring they are anchored into solid wood or reinforced areas.
- Add Finishing Touches: Install drawer slides and drawers if applicable. Secure the top of the bench. If the unit is wall-mounted, install appropriate mounting hardware. For a built-in look, trim pieces can be added around edges.
Finishing for Durability and Aesthetics
The finishing stage is where your organizer truly comes to life, enhancing its visual appeal and protecting it from daily wear and tear.
- Sanding: Start with a coarser grit (e.g., 80 or 100), then progressively move to finer grits (150, 220) until all surfaces are smooth. Pay extra attention to edges and areas that will be touched frequently.
- Cleaning: Thoroughly clean all sawdust from the piece. A tack cloth or vacuum with a brush attachment works well.
- Staining/Painting:
- Stain: Apply stain evenly following the grain. Wipe off excess according to product instructions. Test on scrap wood first.
- Paint: Apply a primer, especially if using MDF or pine. Apply several thin coats of paint, allowing adequate drying time between coats. Lightly sand between coats for a smoother finish.
- Protective Topcoat: This is crucial for durability, especially in a high-traffic area like an entryway.
- Polyurethane: Highly durable and available in various sheens. Apply multiple thin coats.
- Varnish: Offers excellent protection and can be more flexible than polyurethane.
- Oil Finish (e.g., Danish Oil): Penetrates the wood, offering a natural look and good protection, though often less robust than film-forming finishes. For options and applications, see Oil on Pine: Benefits, Tips, and Alternatives.
Installation and Anchoring
For safety, especially with benches or tall units, proper anchoring is vital.
- Locate Wall Studs: Use a stud finder to locate wall studs.
- Secure with Screws: Use long construction screws (at least 2.5-3 inches) to fasten the unit directly into the wall studs.
- Appropriate Anchors: If studs aren’t available, use heavy-duty toggle bolts or expanding anchors rated for the weight of your unit and its potential contents.
Decorating and Personalizing
Once constructed and finished, the final step is to personalize your multi-functional entryway organizer.
- Pillows/Cushions: Add a comfortable cushion or decorative pillows to the bench for an inviting touch.
- Baskets/Bins: Use attractive baskets or bins in cubbies to hide clutter like gloves, hats, or scarves.
- Mirrors: A well-placed mirror not only serves a practical purpose but also reflects light, making a small entryway feel larger.
- Art and Greenery: A small piece of art or a potted plant introduces color and life.
- Lighting: Consider a small task light or ambient lighting to highlight the area and make it more functional after dark.
- Seasonal Touches: Easily swap out decorative items to reflect seasons or holidays.
By following these steps, you can create a customized, durable, and beautiful entryway organizer that elevates your small space in 2026.
Conclusion
Crafting Multi-Functional Entryway Organizers: Combining Storage, Seating, and Decor in Small Spaces is an intelligent and rewarding endeavor for any homeowner looking to optimize their living environment. In an era where efficient space utilization is key, these bespoke solutions offer an unparalleled blend of practicality and aesthetic appeal. By carefully planning your design, selecting appropriate materials, employing sound woodworking techniques, and applying thoughtful finishing touches, you can transform a chaotic entryway into an organized, welcoming, and stylish gateway to your home. The satisfaction of building a piece that perfectly fits your needs and enhances your daily life is immense. Start by assessing your specific requirements, sketch out your vision, and then bring it to life with precision and creativity. The result will be a testament to intelligent design and skilled craftsmanship, serving your home for years to come.

