
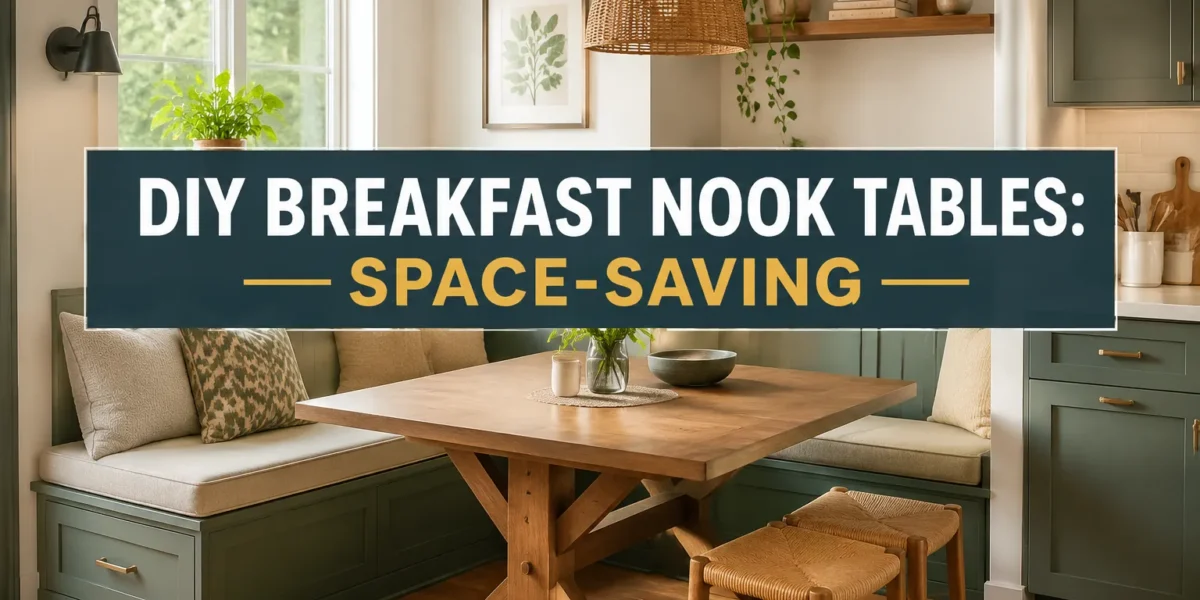
} The average American kitchen measures a mere 100 to 200 square feet, often making a full-sized dining set an impractical luxury. For those navigating the realities of compact living, crafting a custom solution like DIY Breakfast Nook Tables: Space-Saving Designs and Joinery for Cozy Kitchens presents an ideal opportunity. This approach not only optimizes square footage but also adds personalized charm and functionality, transforming an underutilized corner into a cherished gathering spot. This guide will walk woodworkers through building custom breakfast nook tables, focusing on space-saving designs and sturdy joinery techniques suitable for cozy kitchen areas, ensuring both aesthetic appeal and lasting durability.
Key Takeaways
- Space Optimization: Breakfast nooks are designed to maximize seating and dining space in compact kitchen areas, often integrating with existing architecture.
- Design Versatility: Customization allows for unique shapes (L-shape, U-shape, wall-mounted) and integrated features like storage benches to fit specific needs and aesthetics.
- Strong Joinery is Crucial: Durable joinery methods like mortise and tenon, pocket holes, and dadoes are essential for creating stable and long-lasting tables and benches.
- Material Selection: Choosing the right wood (hardwoods for durability, softwoods for ease of work) and finishes is key for both aesthetics and resilience in a kitchen environment.
- Planning and Precision: Careful measurement, detailed planning, and accurate execution are vital for a successful and safe DIY breakfast nook project.
Mastering Space-Saving Designs for DIY Breakfast Nook Tables
Designing a breakfast nook table that fits perfectly into a cozy kitchen requires thoughtful consideration of the available space and how it will be used. The goal is to create a functional dining area without impeding kitchen workflow or making the room feel cramped. This section explores various space-saving designs and their benefits for DIY Breakfast Nook Tables: Space-Saving Designs and Joinery for Cozy Kitchens.
The most effective designs leverage existing walls and corners, often incorporating built-in seating to maximize efficiency. By doing so, they eliminate the need for individual chairs that take up extra floor space when pulled out or pushed in.
Popular Space-Saving Breakfast Nook Configurations
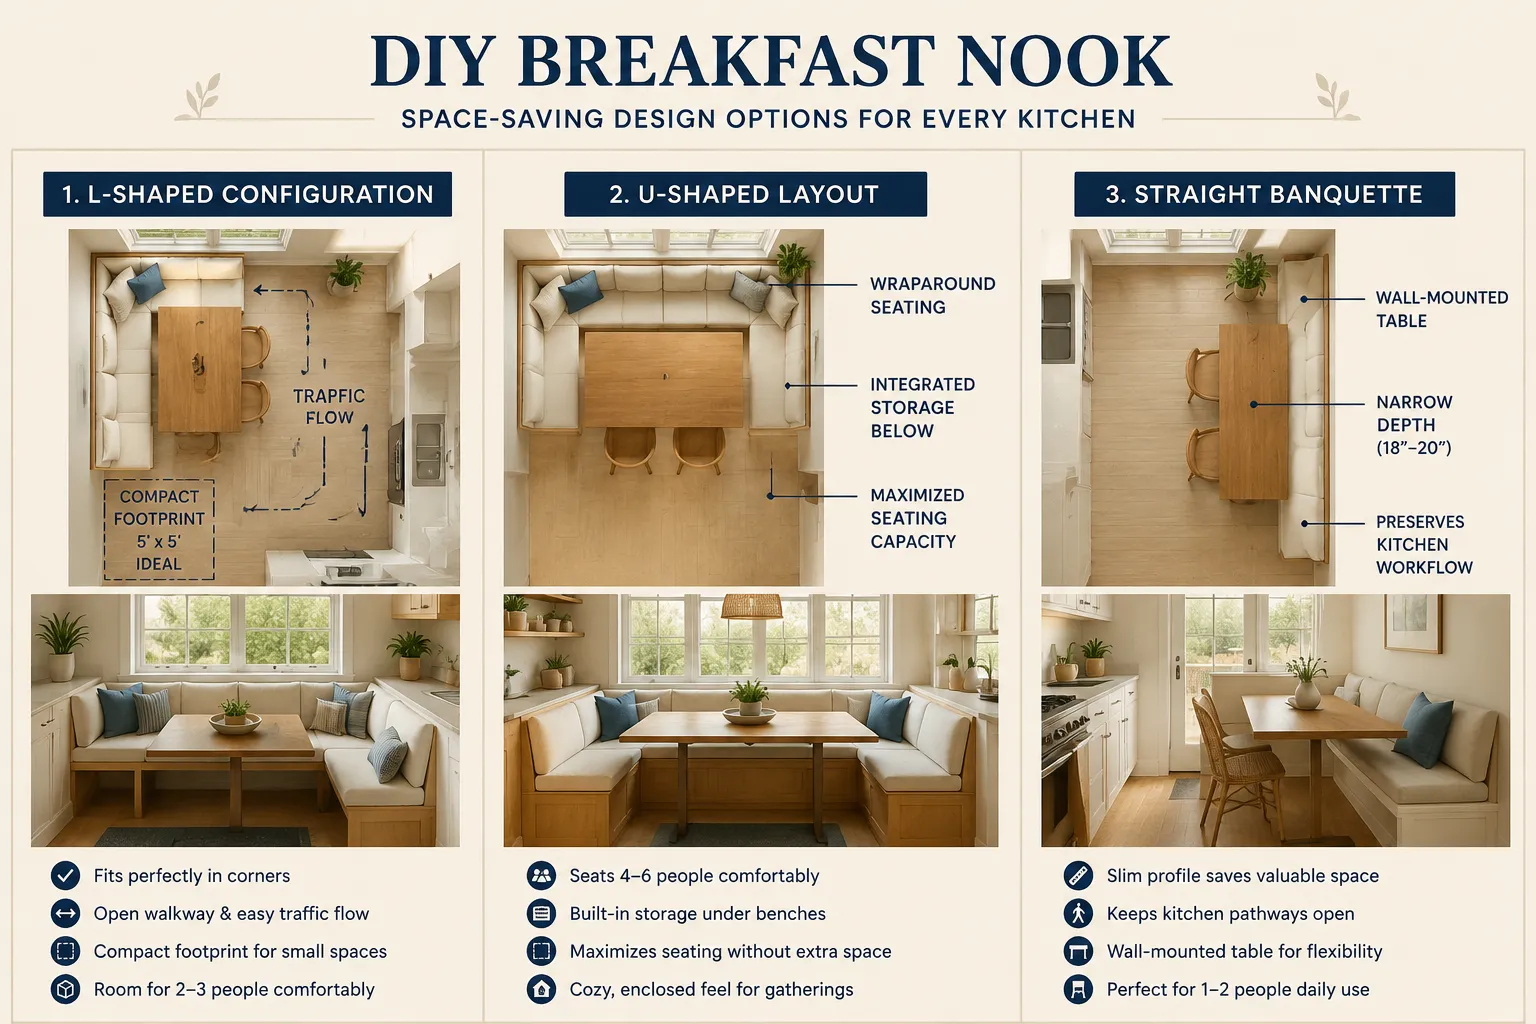
When planning your DIY breakfast nook, several configurations offer distinct advantages for tight spaces:
- L-Shaped Nooks:
- Description: Utilizes two adjoining walls to create an L-shaped bench, often with a matching L-shaped or rectangular table.
- Benefits: Excellent for corner optimization, providing continuous seating for multiple people and a defined dining zone.
- Considerations: Requires precise measurements of the corner and surrounding walls.
- U-Shaped Nooks:
- Description: Three benches forming a ‘U’ around a central table, typically against three walls or two walls and an open end.
- Benefits: Offers the maximum seating capacity in a compact area, creating a highly intimate dining experience.
- Considerations: Best suited for slightly larger nooks to ensure comfortable access and egress.
- Wall-Mounted Drop-Leaf Tables:
- Description: A tabletop attached to the wall with hinges, allowing it to be folded down when not in use. Some designs include a single leg that folds out for support.
- Benefits: Frees up significant floor space, ideal for very small kitchens or those with dynamic needs.
- Considerations: Requires robust wall anchoring and suitable hardware.
- Banquet Seating with Integrated Storage:
- Description: Benches with hinged tops or pull-out drawers that provide hidden storage.
- Benefits: Combines seating with valuable organizational space, perfect for linens, rarely used kitchen gadgets, or even kids’ toys.
- Considerations: Design must account for the weight of stored items and easy access.
- Pedestal Base Tables:
- Description: Instead of four individual legs, the table is supported by a single central column or base.
- Benefits: Eliminates leg obstructions, making it easier to slide in and out of bench seating and allowing for more flexible seating arrangements around the table perimeter. This is a common choice for round dining tables for small spaces.
- Considerations: Requires a very stable and well-constructed base to prevent wobbling.
Designing the Tabletop and Seating
The tabletop’s shape and size are critical for a space-saving nook. Rectangular or square tables are common for L-shaped and U-shaped nooks, fitting snugly against the benches. Round or oval tables can also work, especially with pedestal bases, as they soften the edges and improve flow in tight spaces. When choosing a size, ensure there’s at least 24 inches of width per diner and sufficient clearance between the table edge and the bench for comfortable sitting, typically 12-18 inches. Our guide on breakfast room tables: how to design cozy nook tables offers more insights into footprint and leg layout.
For seating, built-in benches are the hallmark of a breakfast nook. Standard bench height is usually 18 inches, allowing for a comfortable 30-inch table height. Bench depth can vary from 15 to 20 inches, depending on comfort preferences and available space. Adding custom cushions can significantly enhance comfort and aesthetics.
Essential Joinery Techniques for Sturdy Breakfast Nook Tables
The stability and longevity of your DIY breakfast nook table heavily depend on the joinery techniques employed. Unlike freestanding tables, nook tables often connect to benches and walls, requiring robust and secure joints. Choosing the right joinery not only ensures structural integrity but also contributes to the overall aesthetic quality of the piece. This section delves into essential joinery for DIY Breakfast Nook Tables: Space-Saving Designs and Joinery for Cozy Kitchens.
Core Joinery for Table and Bench Construction
For any table construction, understanding basic joinery is crucial. Our Beginners Guide To Dining Tables Standard Sizes Joinery Options And Wood Choices For Your First Build provides a great foundation. Here are some of the most effective joints for breakfast nooks:
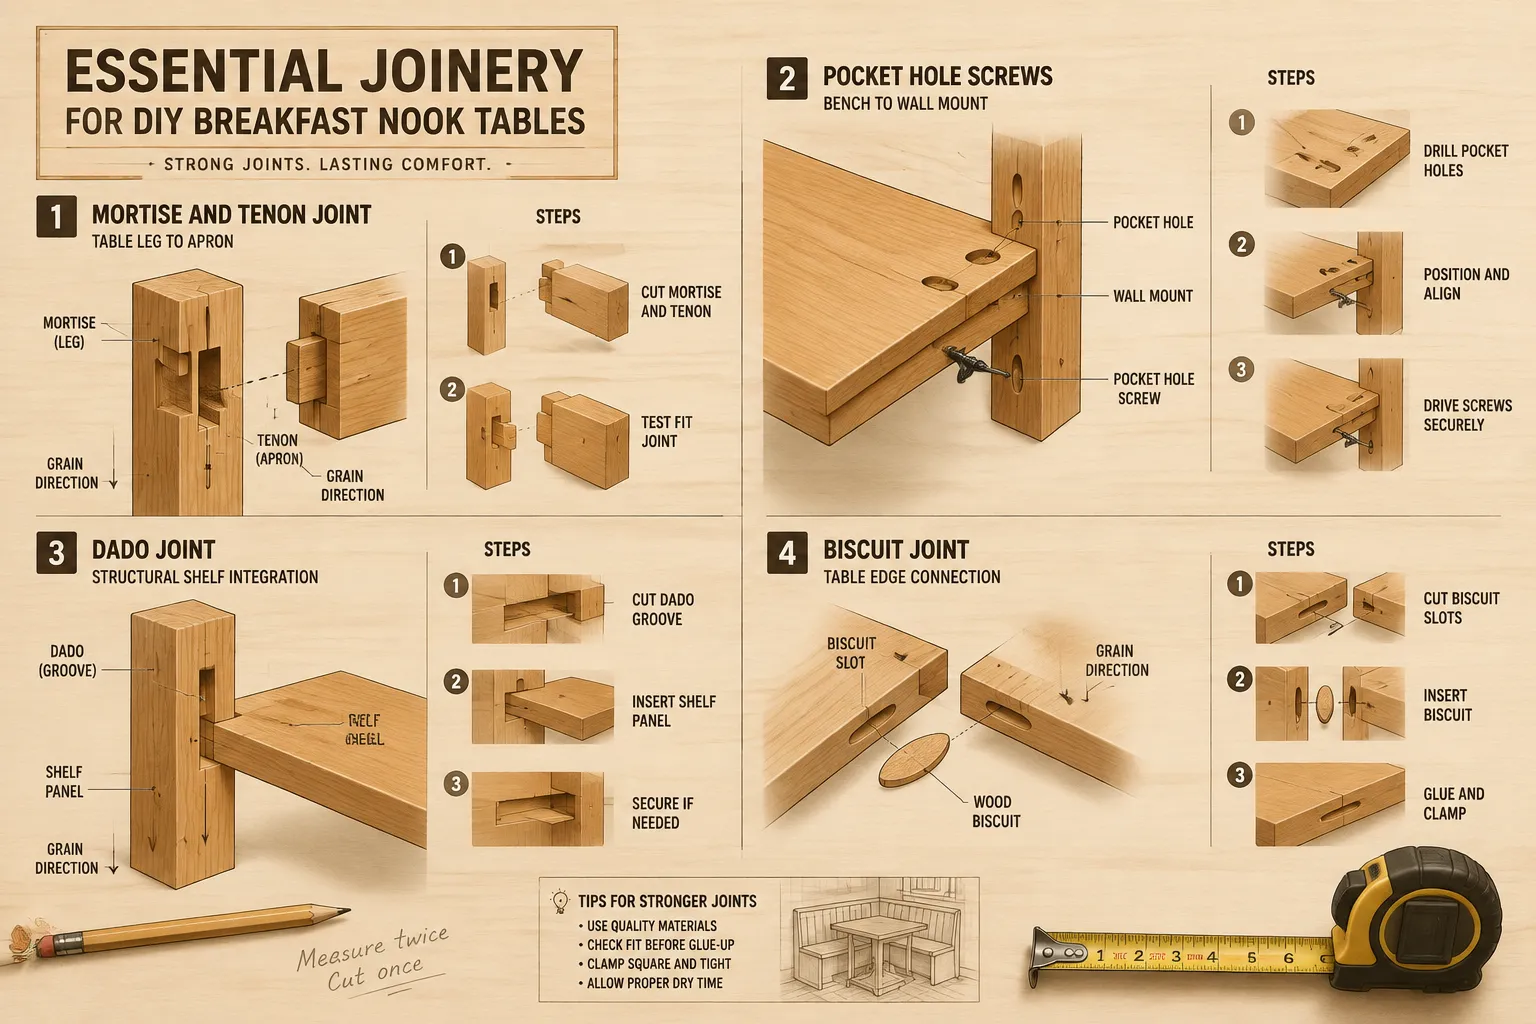
- Mortise and Tenon Joint:
- Description: A classic woodworking joint where a projecting tenon on one piece of wood fits snugly into a mortise (hole or slot) in another.
- Application: Ideal for connecting table legs to aprons, or bench rails to stiles. When properly executed, it offers exceptional strength and resistance to racking.
- Tools: Mortising machine, chisel, hand saw, or router.
- Benefits: Extremely strong, durable, and aesthetically pleasing.
- Pocket Hole Joinery:
- Description: Involves drilling an angled hole into one workpiece, through which a screw is driven into an adjoining workpiece.
- Application: Excellent for attaching tabletops to apron frames, joining carcass components for benches, or securing bench frames to wall cleats. It’s particularly useful for quickly creating strong, hidden joints.
- Tools: Kreg Jig (or similar pocket hole jig), drill, driver.
- Benefits: Fast, relatively easy for beginners, and creates very strong joints.
- Dado and Rabbet Joints:
- Description:
- Dado: A flat-bottomed groove cut across the grain of a board, into which another board fits.
- Rabbet: A cut made along the edge or end of a board, creating a step or L-shaped recess.
- Application: Dados are perfect for shelving in storage benches or for securely joining vertical and horizontal panels of the bench carcass. Rabbets can be used for back panels or drawer bottoms.
- Tools: Table saw with dado blade, router, or hand plane.
- Benefits: Provides excellent structural support, especially for load-bearing applications in benches.
- Description:
- Biscuit Joints (Plate Joinery):
- Description: Oval-shaped compressed wood biscuits are inserted into crescent-shaped slots cut into mating pieces, then glued. As the glue dries, the biscuit expands, creating a tight bond.
- Application: Useful for edge-to-edge glue-ups for wide tabletops or bench seats, and for aligning and strengthening panel joints.
- Tools: Biscuit joiner.
- Benefits: Good for alignment and adds strength to butt joints, relatively quick to execute.
- Dovetail Joints:
- Description: A series of interlocking pins and tails, known for its exceptional strength against pulling forces.
- Application: While more complex, dovetails are excellent for constructing storage drawers within benches, offering superior durability and a high-end look.
- Tools: Dovetail jig, router, or hand tools (chisel, dovetail saw).
- Benefits: Unparalleled strength and a beautiful, traditional aesthetic. For those interested in mastering hand-cut joinery, our guide on The Complete Guide To Hand Tool Joinery is invaluable.
Connecting Tables and Benches to Walls
For true space-saving designs, especially those integrating with kitchen architecture, secure wall attachment is paramount.
- Cleats: Wooden strips securely screwed into wall studs provide a robust ledge for benches or tabletops to rest upon. This distributes weight effectively and prevents tipping.
- Heavy-Duty Brackets: For floating or drop-leaf tables, strong metal brackets or custom-built wooden brackets must be anchored directly into wall studs.
- Through-Bolting: In some cases, benches or table frames can be directly bolted to wall studs for maximum rigidity, often countersunk and plugged for a clean finish.
Always use appropriate fasteners for your wall type (wood screws for studs, toggle bolts for drywall where studs aren’t available but less ideal for heavy loads).
Materials and Construction for Your DIY Breakfast Nook Tables
Building a DIY breakfast nook table involves selecting the right materials and following a systematic construction process to ensure a beautiful, functional, and durable outcome. From choosing the wood to applying the final finish, each step plays a crucial role in the table’s overall success.
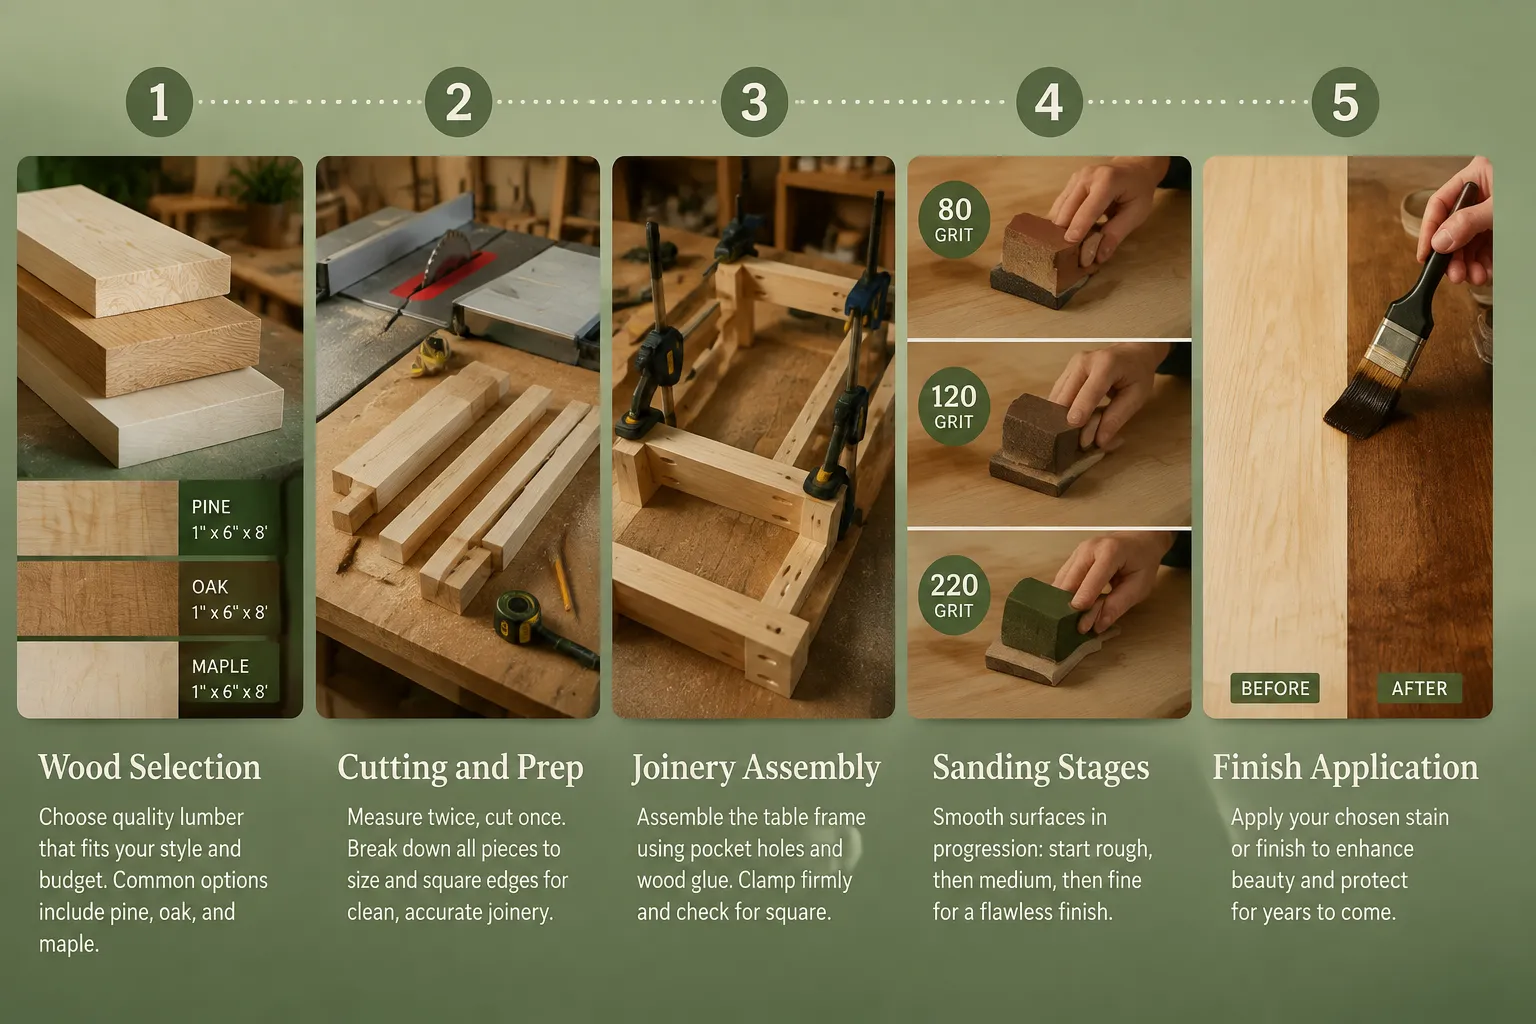
Selecting the Right Wood
The choice of wood impacts not only the aesthetic but also the durability and workability of your breakfast nook.
- Hardwoods (e.g., Oak, Maple, Cherry, Walnut):
- Pros: Extremely durable, resistant to dents and scratches, beautiful grain patterns, takes finishes well.
- Cons: More expensive, harder to work with hand tools, heavier.
- Best for: Table exposed to heavy use, tabletops, and structural components where longevity is paramount.
- Softwoods (e.g., Pine, Fir):
- Pros: More affordable, easier to cut and shape, lighter weight.
- Cons: Softer, more prone to dents and scratches, can sometimes show grain irregularities more easily.
- Best for: Bench frames (if covered with upholstery), internal structural components, or projects where a rustic, distressed look is desired.
- Plywood/MDF:
- Pros: Stable (less prone to warping), cost-effective, good for large flat panels, can be veneered.
- Cons: Edges need finishing, not as strong as solid wood for joinery unless specific techniques are used, MDF can be heavy and absorb moisture.
- Best for: Bench seat bases (especially for storage), cabinet boxes, or tabletops that will be covered with a laminate or veneer.
Consider the kitchen’s existing cabinetry and flooring when choosing wood species and stain colors to ensure a cohesive look.
Tools and Supplies
A successful build requires a well-equipped workshop.
Essential Tools:
- Measuring and Marking: Tape measure, carpenter’s square, marking knife, pencil.
- Cutting: Circular saw, miter saw, table saw (highly recommended for precision cuts), jigsaw for curves.
- Joining: Drill, pocket hole jig, biscuit joiner, router (for dados, rabbets, or decorative edges).
- Clamping: A variety of clamps (bar clamps, pipe clamps, F-clamps) are essential for secure glue-ups.
- Sanding: Orbital sander, sanding blocks, various grits of sandpaper (80-220).
- Safety Gear: Safety glasses, hearing protection, dust mask.
Supplies:
- Wood glue (PVA wood glue is standard).
- Wood screws (appropriate lengths for pocket holes and general assembly).
- Optional: Biscuits, dowels, or tenon stock depending on joinery.
- Wood filler/putty.
- Finishing materials: Stain, polyurethane, hardwax oil, or paint.
- Optional: Hinges for storage benches or drop-leaf tables.
- Optional: Cushions and upholstery materials for benches.
Construction Steps
While specific plans will vary, a typical DIY breakfast nook build follows these general steps:
- Design and Planning:
- Measure your space precisely.
- Sketch your design, including dimensions, seating capacity, and desired features (e.g., storage, wall attachment).
- Create a cut list for all wood components.
- Cut and Mill Lumber:
- Cut all wood pieces to the specified dimensions using a table saw or miter saw for accuracy.
- Plane or joint lumber if necessary to achieve flat and square stock.
- Construct Bench Frames:
- Assemble the internal framework of your benches using chosen joinery (e.g., pocket holes, mortise and tenon). Ensure frames are square and sturdy.
- If benches include storage, build the necessary compartments or drawer slides.
- Attach Bench Sides/Panels:
- Securely attach plywood panels or solid wood planks to the bench frames to form the outer structure. Use dadoes or rabbets for strong panel integration where applicable.
- Build Table Base/Legs:
- Construct the table’s support structure, whether it’s a pedestal base, traditional legs and aprons, or a wall-mounted system. Ensure all joints are strong and stable.
- Create Tabletop and Bench Seats:
- Assemble tabletop panels using edge-to-edge glue-ups (with biscuits or dowels for alignment).
- Cut bench seats to size, ensuring they fit precisely on the bench frames.
- Consider adding a slight overhang to the tabletop for comfort.
- Dry Fit and Assembly:
- Perform a dry fit of all major components to ensure everything aligns correctly before final gluing and fastening.
- Apply wood glue to joints, clamp securely, and reinforce with screws or other fasteners as needed.
- Wall Attachment (if applicable):
- Carefully mark and secure wall cleats or brackets to studs, then attach the bench or table firmly.
- Sanding and Finishing:
- Sand all surfaces thoroughly, starting with coarse grit (80-100) and progressing to finer grits (150-220) for a smooth finish.
- Apply your chosen finish (stain, paint, polyurethane, or hardwax oil). For kitchen surfaces, a durable, water-resistant finish is essential. Consider our guide to advanced wood finishing for outdoor poolside tables for inspiration on resilient finishes.
- Add Cushions/Hardware:
- Install hinges for storage bench lids.
- Add custom-made or purchased cushions to the benches for enhanced comfort and aesthetic appeal.
By meticulously following these steps and paying attention to detail, you can create a beautiful and highly functional DIY breakfast nook table that will serve your cozy kitchen for years to come.
Conclusion
Building DIY breakfast nook tables offers a rewarding solution for maximizing space and enhancing the charm of any cozy kitchen. By thoughtfully integrating space-saving designs, such as L-shaped or U-shaped configurations with built-in storage, and employing robust joinery techniques like mortise and tenon or pocket holes, woodworkers can craft a functional and durable dining area. The emphasis on precise planning, careful material selection, and strong construction ensures that these custom pieces are not only beautiful but also stand the test of time, becoming a beloved focal point for daily meals and gatherings in 2026 and beyond.
For those ready to embark on this project, begin by accurately measuring your kitchen space and sketching out your ideal design, paying close attention to clearances and potential storage. Invest in quality materials suitable for kitchen environments and familiarize yourself with the recommended joinery methods to ensure structural integrity. Don’t rush the process; precision in cutting and assembly will yield the best results. Finally, choose a durable finish that complements your kitchen’s aesthetic while protecting your handcrafted nook for years of enjoyment.
SEO Meta Title: DIY Breakfast Nook Tables: Space-Saving Designs for Cozy Kitchens SEO Meta Description: Build custom DIY breakfast nook tables for cozy kitchens in 2026. Explore space-saving designs & strong joinery for functional dining.