
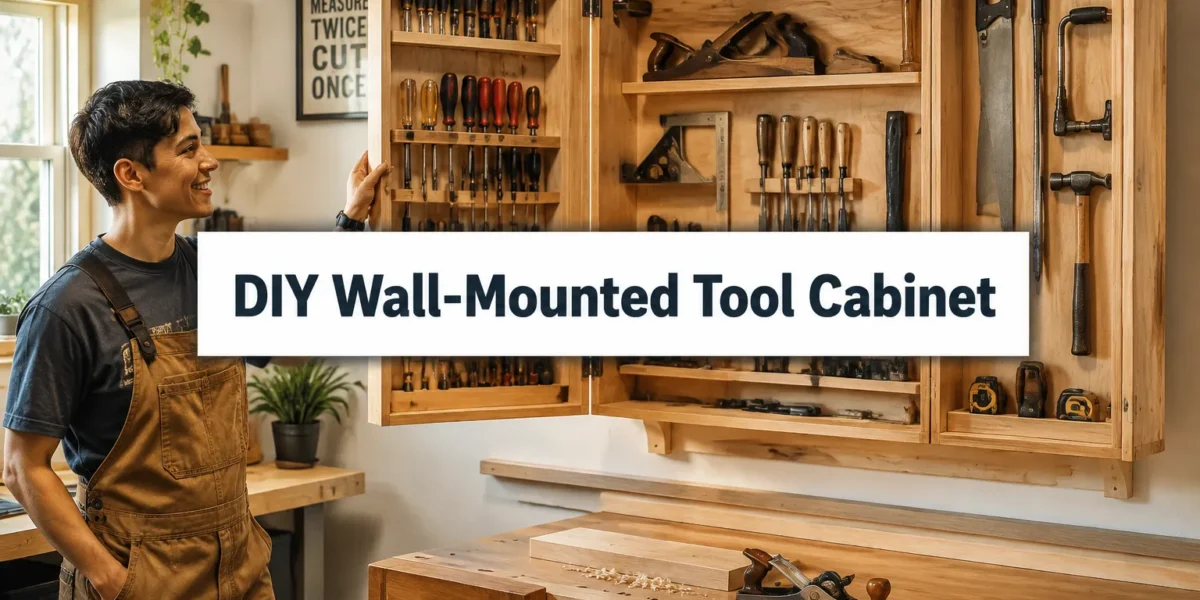
The average small workshop battles a persistent adversary: clutter. Tools accumulate, valuable bench space vanishes, and finding the right implement becomes a frustrating scavenger hunt. However, a strategic approach to vertical storage can transform this challenge into an opportunity for unparalleled organization and efficiency. This article details the process of Building a DIY Wall-Mounted Tool Cabinet with French Cleats: Maximize Small Workshop Storage, offering a robust, adaptable, and ultimately transformative solution for any maker operating within limited square footage. By harnessing the power of French cleats, you can create a highly customizable storage system that evolves with your tool collection, keeping every item accessible and your workspace pristine in 2026.
Key Takeaways
- French cleats offer a highly adaptable, strong, and reconfigurable wall-mounted storage system ideal for small workshops.
- A DIY wall-mounted tool cabinet significantly reduces clutter, frees up bench space, and improves workflow.
- Careful planning, precise cuts, and secure installation are crucial for building a durable and effective cabinet.
- Custom tool holders on French cleats allow for tailored storage of diverse tools, from hand tools to power tools.
- This project is an investment in workshop efficiency and organization, providing long-term benefits for any woodworker.
Why French Cleats are Essential for Building a DIY Wall-Mounted Tool Cabinet with French Cleats: Maximize Small Workshop Storage
French cleats represent a cornerstone of smart workshop organization, particularly when space is at a premium. Unlike traditional pegboards or fixed shelving, a French cleat system offers unparalleled flexibility and strength. It consists of two interlocking angled strips of wood, typically cut at a 45-degree bevel. One strip is securely fastened to the wall, with the bevel facing upwards. The other strip is attached to the back of a cabinet, a shelf, or a custom tool holder, with its bevel facing downwards. When these two bevels interlock, gravity pulls the attached item firmly against the wall, creating a secure and remarkably strong hold.
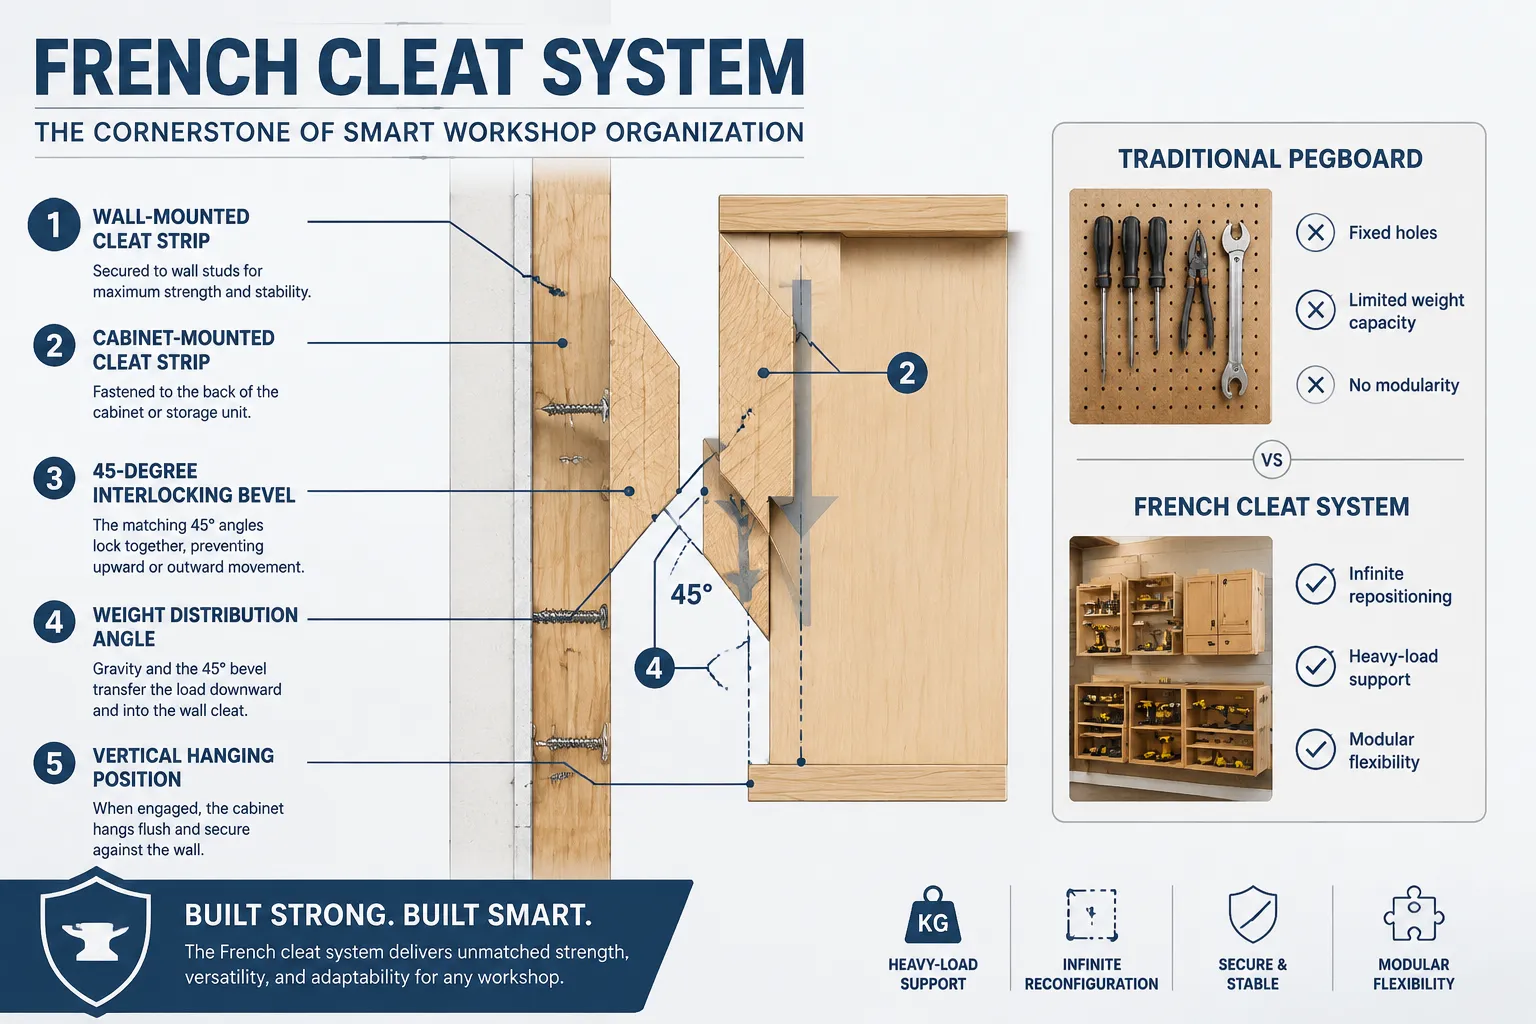
This ingenious design provides several distinct advantages for Building a DIY Wall-Mounted Tool Cabinet with French Cleats: Maximize Small Workshop Storage:
- Unrivaled Flexibility: The modular nature of French cleats means that any item with an attached cleat can be easily moved, rearranged, or completely removed from the wall in seconds. This allows you to adapt your storage layout as your tool collection grows or your workflow changes. No more drilling new holes or patching old ones.
- Exceptional Strength: Because the load is distributed along the entire length of the cleat and leverages gravity, French cleat systems can support significant weight. This makes them ideal for heavier hand tools, power tools, and fully loaded storage cabinets, far surpassing the weight limits of standard pegboard hooks.
- Customization Potential: The beauty of French cleats lies in their adaptability. You aren’t limited to off-the-shelf solutions. You can design and build custom holders for virtually any tool, ensuring a perfect fit and efficient use of space. From specific chisel racks to custom drill bit organizers, the possibilities are endless.
- Space Optimization: By leveraging vertical wall space, French cleat systems free up valuable horizontal surfaces like workbenches, making your small workshop feel larger and more functional. This vertical strategy is key to effective workshop organization for high volume small project production.
The application of French cleats to a wall-mounted tool cabinet takes these benefits to the next level. Instead of a single flat surface, you’re building a dedicated enclosure that can house multiple layers of storage, protecting tools from dust and workshop debris, and presenting a much cleaner aesthetic. The cabinet itself mounts to the wall via cleats, and its interior can also be lined with cleats, allowing for internal modularity.
Designing and Constructing Your Wall-Mounted Tool Cabinet
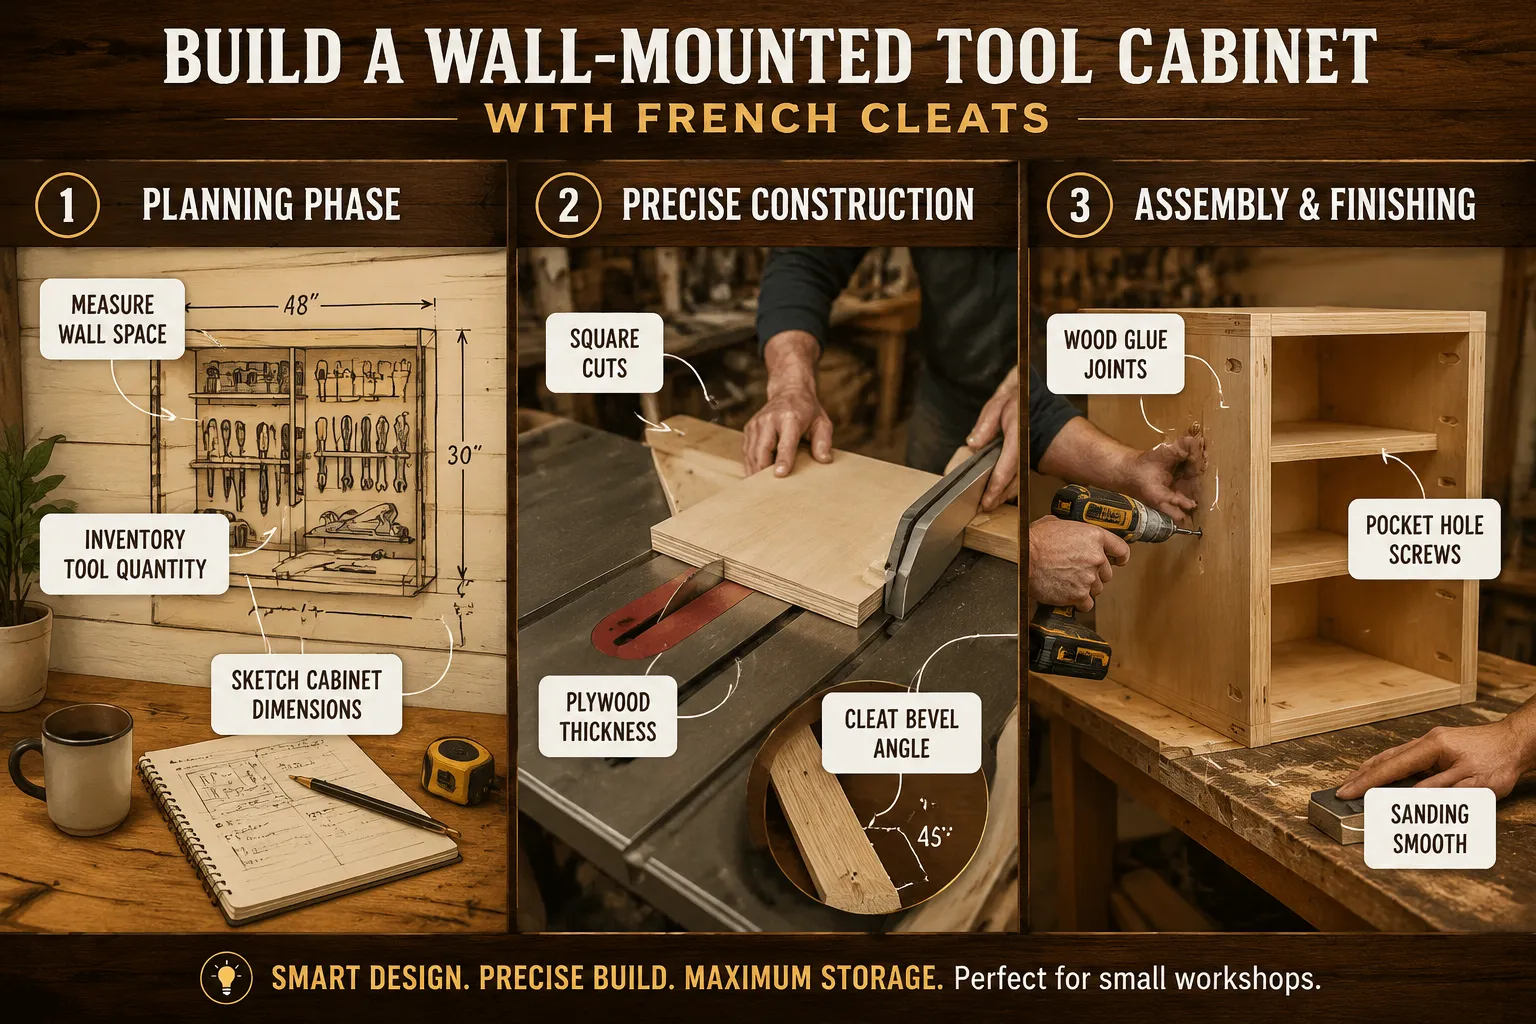
The success of your DIY wall-mounted tool cabinet hinges on thoughtful design and precise construction. Before cutting any wood, consider the types and quantity of tools you need to store, the available wall space, and your desired aesthetic. This planning phase is critical for maximizing storage in a small workshop.
Planning Your Cabinet Layout
Start by inventorying your tools. Group similar tools together (e.g., chisels, screwdrivers, wrenches). Measure your longest and bulkiest items to determine the minimum depth and height required for your cabinet sections. Sketch out a preliminary design, including:
- Overall Dimensions: Determine the ideal width, height, and depth based on your wall space and tool collection.
- Cabinet Structure: Will it be a single large cabinet, or a series of smaller, interconnected units? Consider adjustable shelves or internal dividers.
- Internal Cleat Placement: Plan where internal French cleat strips will be mounted to hang custom tool holders.
- Doors: Hinged doors are common, but sliding doors or even no doors might suit your needs.
A typical cabinet might be constructed from 3/4-inch plywood for the main carcass and 1/4-inch plywood for the back panel. For the French cleats themselves, 3/4-inch plywood or hardwood is recommended for strength.
Material List (Example)
| Component | Material Recommendation | Quantity (Adjustable) |
|---|---|---|
| Cabinet Carcass | 3/4″ Plywood (Baltic Birch) | 1-2 sheets (4×8 ft) |
| Back Panel | 1/4″ Plywood | 1 sheet (4×8 ft) |
| French Cleats (Wall) | 3/4″ Plywood or Hardwood | 1-2 boards (6-8 ft) |
| French Cleats (Internal) | 3/4″ Plywood or Hardwood | 1-2 boards (6-8 ft) |
| Door Panels | 3/4″ Plywood | 1 sheet (4×8 ft) |
| Hinges | Concealed or Overlay | 2-4 pairs |
| Cabinet Pulls/Knobs | Metal or Wood | 2-4 |
| Wood Glue | High-quality PVA | 1 bottle |
| Screws | 1 1/4″ to 2″ Wood Screws | ~100-200 |
| Finish | Polyurethane, Shellac, etc. | 1 quart |
Construction Steps for Building a DIY Wall-Mounted Tool Cabinet with French Cleats
- Cut Plywood Panels: Using a circular saw with a guide or a table saw, precisely cut all your plywood pieces according to your design plan. This includes side panels, top, bottom, shelves, back panel, and door panels. Accuracy here is crucial for a square cabinet.
- Cut French Cleats: Set your saw blade to 45 degrees. Cut several strips of 3/4-inch plywood or hardwood. Each strip will yield two cleat halves when cut down the middle. One half will form the wall cleat, and the other will be attached to the cabinet or tool holder. Aim for cleat widths of 3-4 inches before the 45-degree cut.
- Assemble the Cabinet Carcass: Join the side, top, and bottom panels. Use wood glue and screws for strong joints. Consider using dado joints or rabbet joints for added strength and a cleaner look. Ensure the cabinet is square during assembly.
- Install Internal French Cleats: Measure and cut lengths of your French cleat strips (bevel facing down) to fit inside the cabinet. Secure them horizontally to the side and/or back interior panels using glue and screws. These will be for hanging your custom internal tool holders.
- Attach Cabinet Back Panel: Square up the cabinet one last time, then attach the 1/4-inch plywood back panel using small brad nails or screws. This adds rigidity to the structure.
- Mount Wall Cleat to Cabinet: Securely attach a continuous length of your French cleat strip (bevel facing up) to the top back edge of your cabinet. This is the main cleat that will interlock with the wall cleat. Use plenty of glue and screws, ensuring it’s robust enough to bear the cabinet’s weight plus its contents.
- Build and Attach Doors: Assemble your door panels. Attach hinges to the doors and then mount the doors to the cabinet carcass. Ensure proper alignment and smooth operation. Add cabinet pulls or knobs.
- Apply Finish: Sand all surfaces smooth. Apply your chosen finish (e.g., polyurethane, shellac, paint) to protect the wood and enhance its appearance.
When selecting and using power tools for these steps, consider solutions like selecting the best Ryobi power tools for small workshop setup or Milwaukee power tools for woodworking: the essential setup for a small woodshop.
Installing and Customizing Your Wall-Mounted Tool Cabinet for Maximum Storage
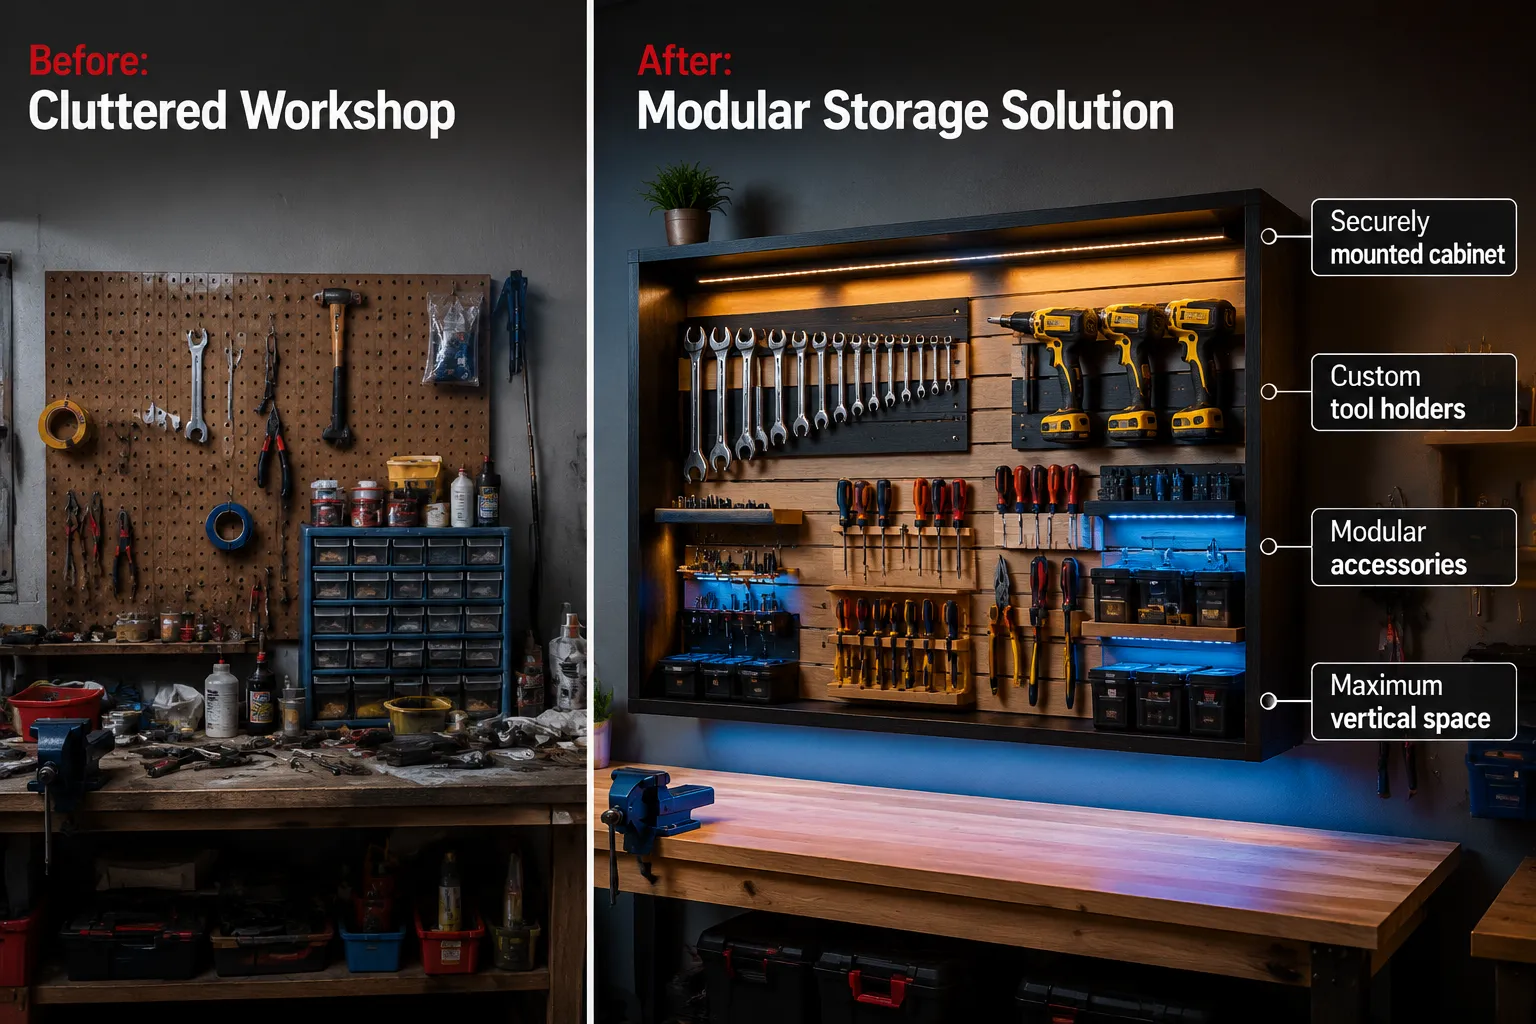
Once your cabinet is built and finished, the final steps involve securely mounting it to your workshop wall and populating it with custom tool holders. This is where the true power of Building a DIY Wall-Mounted Tool Cabinet with French Cleats: Maximize Small Workshop Storage shines through.
Secure Wall Mounting
Proper installation is paramount for safety and stability.
- Locate Wall Studs: Use a stud finder to locate the studs in your workshop wall where the cabinet will hang. Mark their positions precisely. French cleats must be securely screwed into studs.
- Install Wall Cleat: Cut a French cleat strip (bevel facing down) to the width of your cabinet. This is your wall cleat. Using a level, mark a perfectly horizontal line on the wall at the desired height for the top of your cabinet. Align the top edge of your wall cleat with this line, ensuring the cleat is level. Screw the wall cleat into every stud it crosses, using strong, long screws (e.g., 2.5-3 inch construction screws).
- Mount the Cabinet: With assistance, lift your cabinet and hook the cleat on its back onto the wall cleat. The cabinet should slide down and lock firmly into place. Double-check for levelness and stability. For extra security, you can often add a few screws through the bottom of the cabinet’s back panel directly into studs, ensuring the cabinet cannot accidentally lift off the cleat.
Creating Custom Tool Holders for Your French Cleat System
This is the most creative and impactful part of optimizing your small workshop storage. The internal French cleats you installed in your cabinet (and any external cleats on your workshop walls, as seen in a DIY clamp rack and tool holder wall) are now ready for action.
- Design for Specific Tools: Think about each tool or group of tools. How can it be stored most efficiently? Could it hang by its handle? Rest in a custom-shaped slot? Be held by magnets? Consider building custom magnetic tool holders and organizers for an even more flexible solution.
- Attach Cleat Strips to Holders: For each custom tool holder you build, attach a French cleat strip (bevel facing down) to its back. This strip should be slightly shorter than the holder itself to ensure a clean look and easy installation.
- Examples of Custom Holders:
- Chisel Rack: A simple block of wood with routed or drilled slots for each chisel, with a French cleat on the back.
- Screwdriver Organizer: A piece of plywood with holes drilled to fit screwdriver shafts, allowing them to hang vertically.
- Drill Bit Index: A small box or panel with labeled holes for different sized drill bits.
- Power Tool Shelf: A sturdy shelf with a French cleat, designed to hold a specific power tool like a drill or sander.
- Pliers/Wrench Holders: Cutouts or pegs on a panel to hang individual pliers or wrenches.
- Small Parts Bins: Small wooden bins or plastic containers mounted to a cleated panel for fasteners and hardware.
- Pencil and Marking Tool Holders: Dedicated spots for pencils, markers, and measuring tapes, perhaps resembling DIY wooden pencil holders and tool organizers.
Maintaining and Evolving Your System
The beauty of a French cleat system is its adaptability. As your tool collection changes, or your needs evolve, you can easily create new holders, rearrange existing ones, or even build additional cleat-mounted modules for your cabinet. Regularly assess your organization to ensure it continues to serve your workflow optimally. This ongoing optimization is a core principle of creating ergonomic workshop layouts.
Conclusion
Building a DIY Wall-Mounted Tool Cabinet with French Cleats: Maximize Small Workshop Storage is more than just a woodworking project; it’s an investment in your productivity, safety, and enjoyment of your craft. By meticulously designing, constructing, and installing this modular storage solution, you reclaim valuable floor and bench space, ensure every tool has its proper place, and streamline your workflow. The French cleat system provides the flexibility to adapt your storage as your needs change, making this a truly future-proof organizational strategy for any small workshop in 2026. Embrace the satisfaction of a clean, organized, and highly efficient workspace that empowers you to focus on what you do best: creating.
For those ready to take the next step, consider expanding your French cleat system to other areas of your workshop or building specialized tool carts for portability. The principles of vertical and modular storage are endlessly adaptable.