
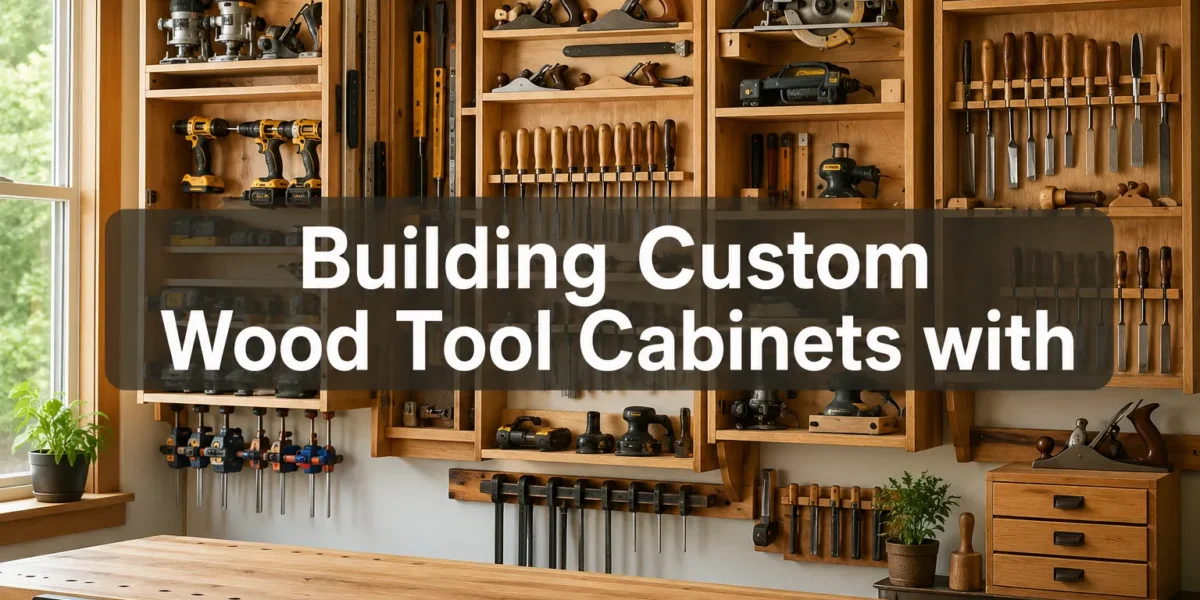
The incessant search for tools in a chaotic workshop can drain valuable time and stifle creativity. Imagine a system where every power tool and hand tool has a designated, easily accessible home, transforming your workspace into a beacon of efficiency. This is the promise of Building Custom Wood Tool Cabinets with French Cleats: Advanced Organization for Power Tools and Hand Tools, a transformative approach to workshop management that empowers woodworkers to maximize productivity and enjoy their craft more fully in 2026.
This article delves into the intricacies of designing and constructing bespoke wooden cabinets integrated with the highly versatile French cleat system. By leveraging this adaptable methodology, woodworkers can achieve unparalleled organization, ensuring that both bulky power tools and delicate hand tools are securely stored, readily available, and protected from damage. The emphasis is on customization, allowing each craftsman to tailor storage solutions precisely to their unique tool collection and workflow.
Key Takeaways
- Customization is Key: French cleat systems enable highly customized storage for any tool, from large power tools to small hand tools.
- Adaptability and Flexibility: Tool holders can be easily reconfigured, added, or removed as your tool collection evolves.
- Space Optimization: Vertical wall space is efficiently utilized, freeing up workbench surfaces.
- Enhanced Accessibility: Tools are visible and within easy reach, reducing search time and improving workflow.
- Protection for Tools: Dedicated custom holders protect tools from damage, maintaining their condition and extending their lifespan.
Understanding French Cleats for Advanced Tool Organization
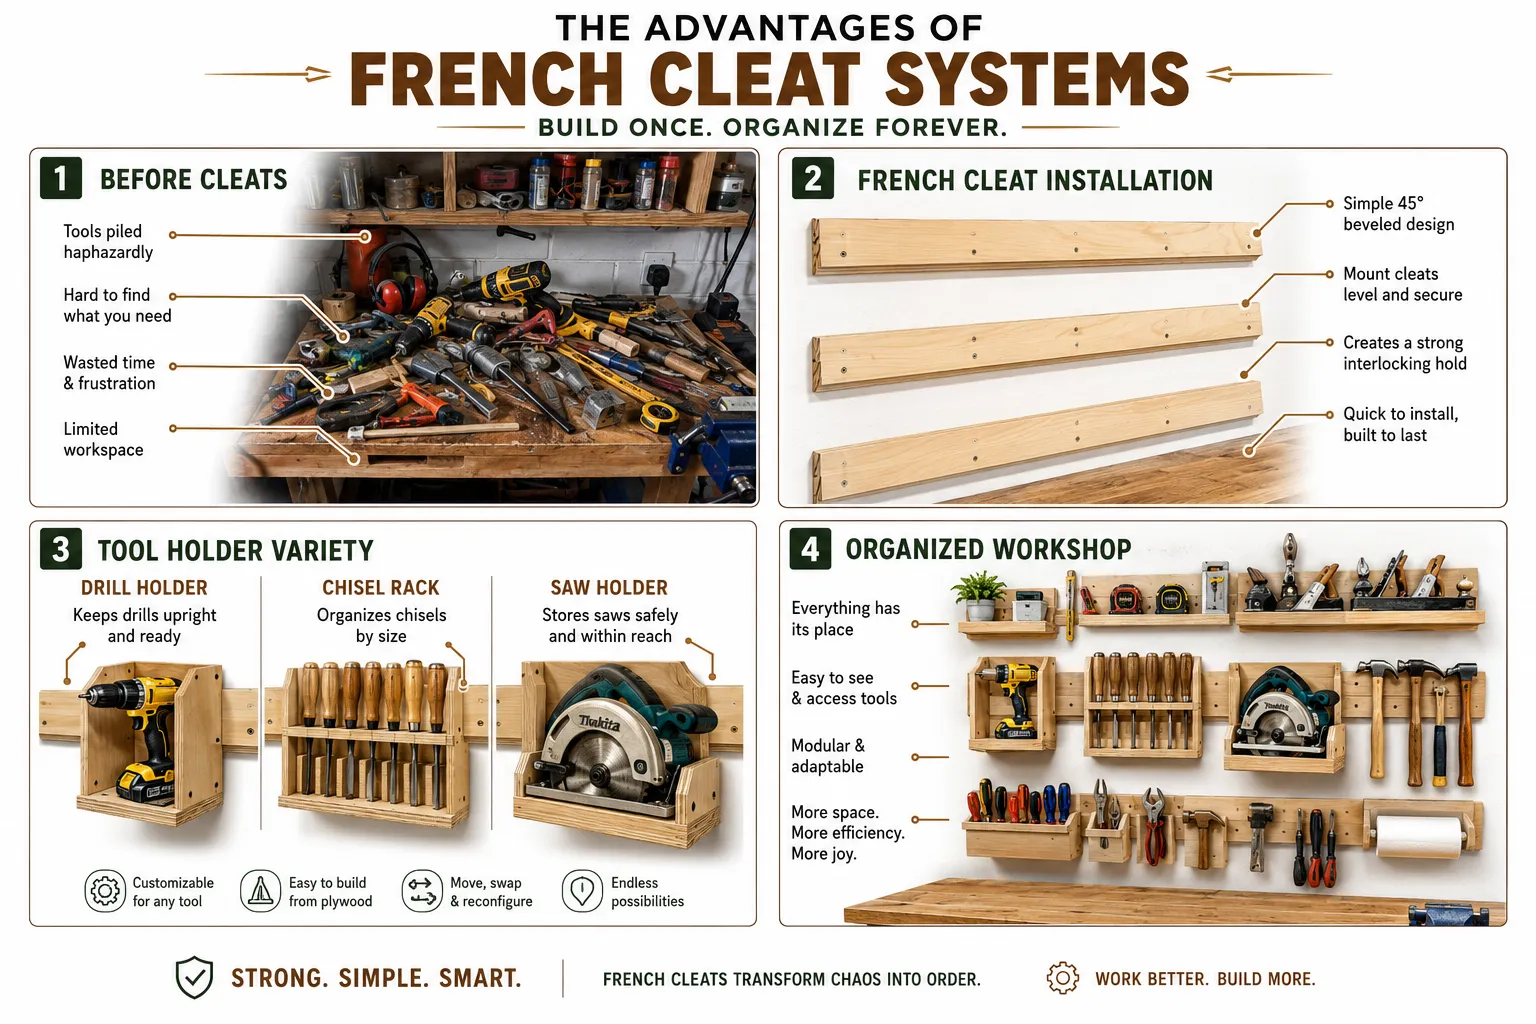
The French cleat system is a woodworking technique that provides a robust and highly adaptable method for hanging cabinets, shelves, and tool holders on a wall. It consists of two interlocking pieces of wood, each cut at a 45-degree angle. One piece, the “wall cleat,” is securely fastened to the wall, with its angled edge facing upwards and outwards. The other piece, the “cabinet cleat” or “holder cleat,” is attached to the back of a cabinet or tool holder, with its angled edge facing downwards and inwards, designed to perfectly interlock with the wall cleat. This creates a strong, gravity-fed connection that can support significant weight while allowing easy removal and rearrangement.
This system is particularly advantageous when Building Custom Wood Tool Cabinets with French Cleats: Advanced Organization for Power Tools and Hand Tools because it offers unmatched flexibility. As your tool collection grows or your workshop layout changes, you can simply slide tool holders along the wall cleat or lift them off and re-position them anywhere else on the system. This inherent adaptability makes it an ideal choice for a dynamic workshop environment.
Why French Cleats Excel for Tool Storage
Compared to traditional pegboards or fixed shelving, French cleats offer several superior benefits:
- Strength: The interlocking design distributes weight efficiently, making it incredibly strong. Large, heavy power tools can be safely stored.
- Versatility: Almost any custom jig, shelf, or holder can be designed to hang on a French cleat.
- Modularity: Storage units are independent, allowing for quick rearrangement without redrilling wall holes.
- Clean Appearance: When properly executed, a French cleat system provides a clean, professional aesthetic to the workshop, concealing fasteners and presenting a streamlined look.
- Protection: Custom tool holders made to fit specific tools keep them secure, preventing damage from impacts or falls.
For further exploration of efficient workshop design, consider reading about Smart Workshop Storage Solutions Maximizing Small Spaces With Modular Systems And Diy Organizers.
Essential Materials and Tools for French Cleat Systems
To embark on your French cleat journey, gather the following:
- Wood Stock: Plywood (minimum 3/4 inch thickness for cleats and cabinet carcasses, good quality like Baltic birch or cabinet-grade plywood is recommended) or clear lumber for cleats.
- Saw: Table saw with a capable blade for accurate 45-degree bevel cuts is crucial. A miter saw can also be used for shorter cleats.
- Fasteners: Wood screws (e.g., #8 or #10, appropriate length for wall studs and wood thickness) and wall anchors if not screwing into studs.
- Drill/Driver: For pre-drilling holes and driving screws.
- Measuring Tools: Tape measure, combination square, pencil, and a level.
- Safety Gear: Safety glasses, hearing protection, and dust mask.
When selecting wood for your project, consider options from Premium Wood Selection For 2026 Projects Walnut Cherry And Exotic Alternatives To Pine for durability and aesthetics.
Designing and Building Custom Wood Tool Cabinets with French Cleats
The real power of the French cleat system lies in its ability to integrate with custom-built cabinets and holders. When Building Custom Wood Tool Cabinets with French Cleats: Advanced Organization for Power Tools and Hand Tools, careful planning and precise execution are paramount.
Step 1: Planning and Design
Before cutting any wood, meticulously plan your layout.
- Tool Inventory: Catalogue all your power tools and hand tools. Consider their size, weight, frequency of use, and any accessories.
- Workspace Assessment: Measure your available wall space. Identify studs for secure mounting.
- Workflow Mapping: Think about how you use your tools. Group related tools together. Tools used most often should be at eye level and easily accessible.
- Cabinet Design: Decide on the types of cabinets you need. Some tools might require enclosed cabinets for dust protection (e.g., sandpaper, sensitive measuring tools), while others can be openly displayed on specialized holders.
- Enclosed Cabinets: These protect tools from dust and offer a cleaner look. Design them with internal shelving or drawers. A French cleat would be installed on the back panel of the cabinet.
- Open Holders/Racks: Custom-shaped holders for specific power tools (e.g., circular saw, router, drill) or hand tools (e.g., chisels, planes, screwdrivers). These directly attach to a French cleat.
- Sketching and Prototyping: Draw out your designs. Consider making cardboard prototypes for complex tool holders to ensure a snug fit.
Step 2: Constructing the French Cleat Wall System
This forms the backbone of your entire organization.
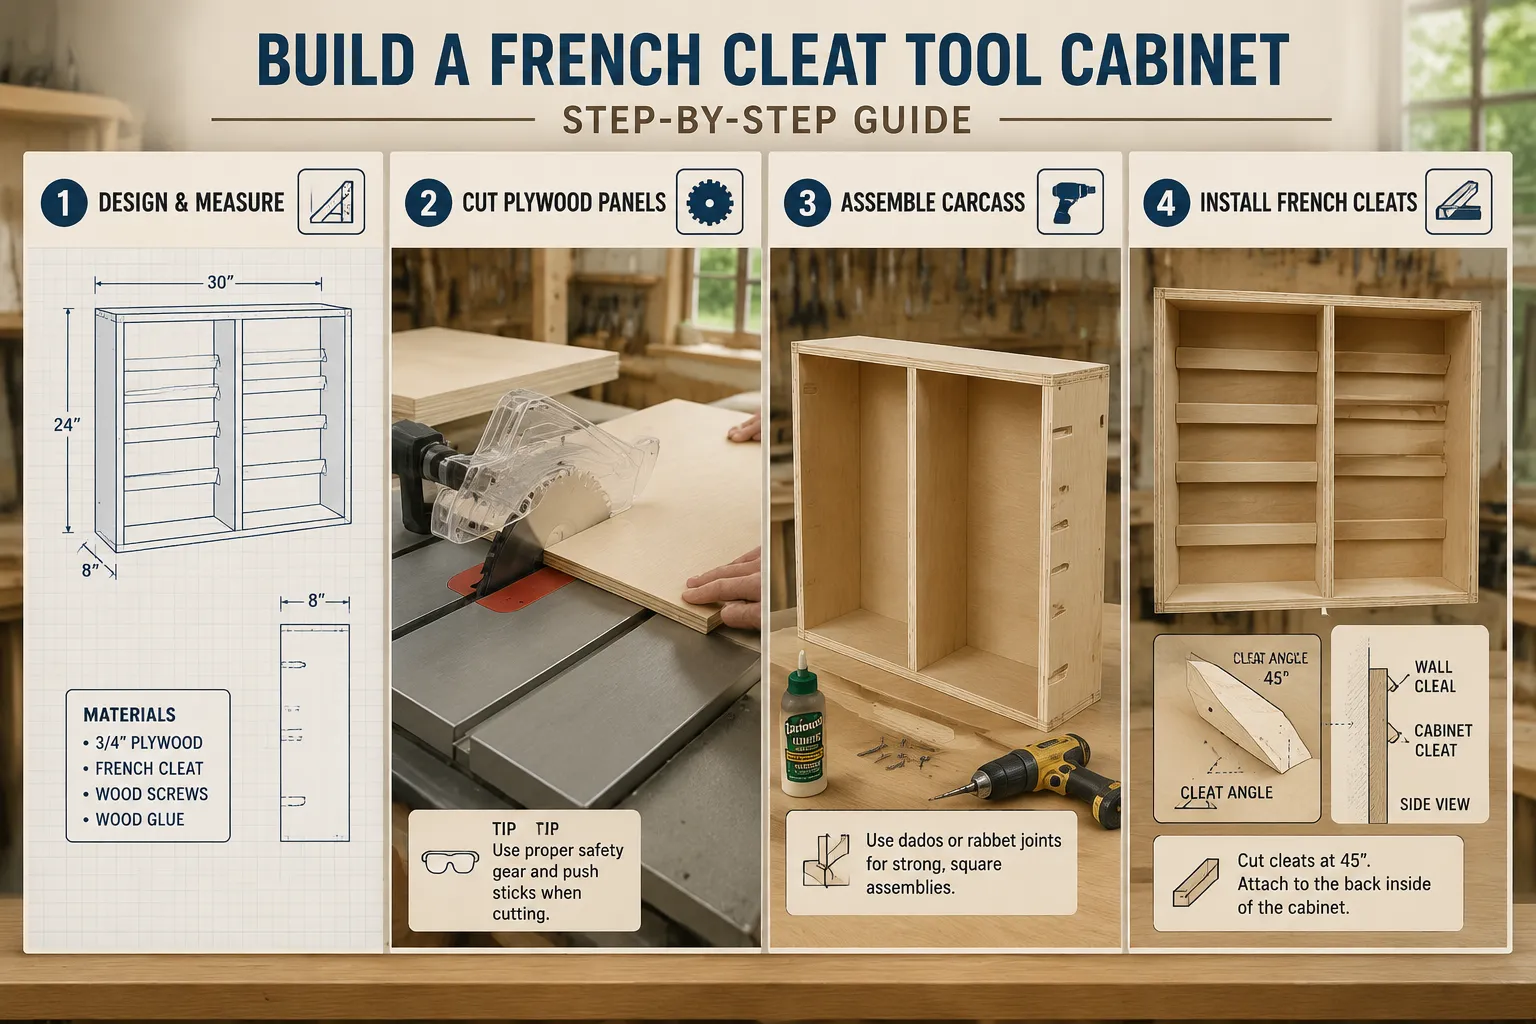
- Cut Wall Cleats: Using a table saw or miter saw, cut long strips of 3/4-inch plywood or solid lumber at a 45-degree angle. The width of these strips can vary, but 3-4 inches is common, resulting in two pieces of equal width after the bevel cut.
- Locate Wall Studs: Use a stud finder to mark the locations of wall studs. This is critical for securely mounting heavy tools.
- Install Wall Cleats: Attach the wall cleats to the studs using long wood screws. Ensure the angled edge faces upwards and outwards. Use a level to ensure each cleat is perfectly horizontal. Spacing between cleats depends on your cabinet and holder designs. A common approach is to run cleats continuously along the wall or at specific heights.
- Tip: If your wall is uneven, shims can be used behind the cleats to ensure they are flat and straight.
Step 3: Building Custom Tool Cabinets and Holders
This is where your design vision comes to life.
For Enclosed Cabinets:
- Cut Cabinet Components: Cut plywood panels for the cabinet sides, top, bottom, and back. For a standard cabinet, consider using hand tool joinery for visible wood joints dovetails mortise and tenon and box joints as design features in furniture and small projects for strength and aesthetic appeal.
- Assemble Carcass: Construct the cabinet box using dado joints, rabbet joints, or screws and glue for durability.
- Install Cabinet Cleat: Attach a French cleat (cut at a 45-degree angle, facing downwards and inwards) to the top back edge of the cabinet. This cleat will interlock with the wall cleat. For very wide or heavy cabinets, consider two parallel cleats on the back for added stability.
- Add Internal Storage: Install shelves, drawers, or custom dividers within the cabinet based on your design. For example, a cabinet for chisels might have a dedicated rack inside.
For Power Tool Holders:
- Trace and Cut: Place the power tool (e.g., a cordless drill, router, or jig saw) on a piece of plywood or lumber. Carefully trace its outline. Design the holder to cradle the tool securely without interfering with its moving parts or accessing controls.
- Cut Custom Shape: Use a jigsaw, bandsaw, or router to cut out the custom shape. Smooth edges with a sander.
- Add Retention: Design elements like small blocks, straps, or specific cutouts to ensure the tool doesn’t accidentally fall out. For example, a drill holder might have a contoured pocket and a small block at the base to prevent it from sliding down.
- Attach Holder Cleat: Secure a French cleat to the back of the custom holder, ensuring the angled edge faces downwards and inwards.
For Hand Tool Organizers:
- Design for Accessibility: Hand tool holders should prioritize easy access and clear visibility.
- Examples:
- Chisel Rack: A simple block of wood with routed slots or drilled holes to hold chisels.
- Screwdriver Rack: A piece of wood with various sized holes drilled at an angle.
- Pliers/Wrench Holder: A horizontal shelf with a lip or strategically placed dowels.
- Attach Holder Cleat: As with power tool holders, attach a French cleat to the back of each organizer.
When securing components, understanding different types of Mastering Woodworking Screws Your Ultimate Guide For 2026 can greatly enhance the strength and longevity of your project.
Advanced Strategies for French Cleat Organization
Beyond basic cabinets and holders, the French cleat system allows for incredibly sophisticated and adaptable solutions, truly elevating the concept of Building Custom Wood Tool Cabinets with French Cleats: Advanced Organization for Power Tools and Hand Tools.
Modular Tool Carts and Stations
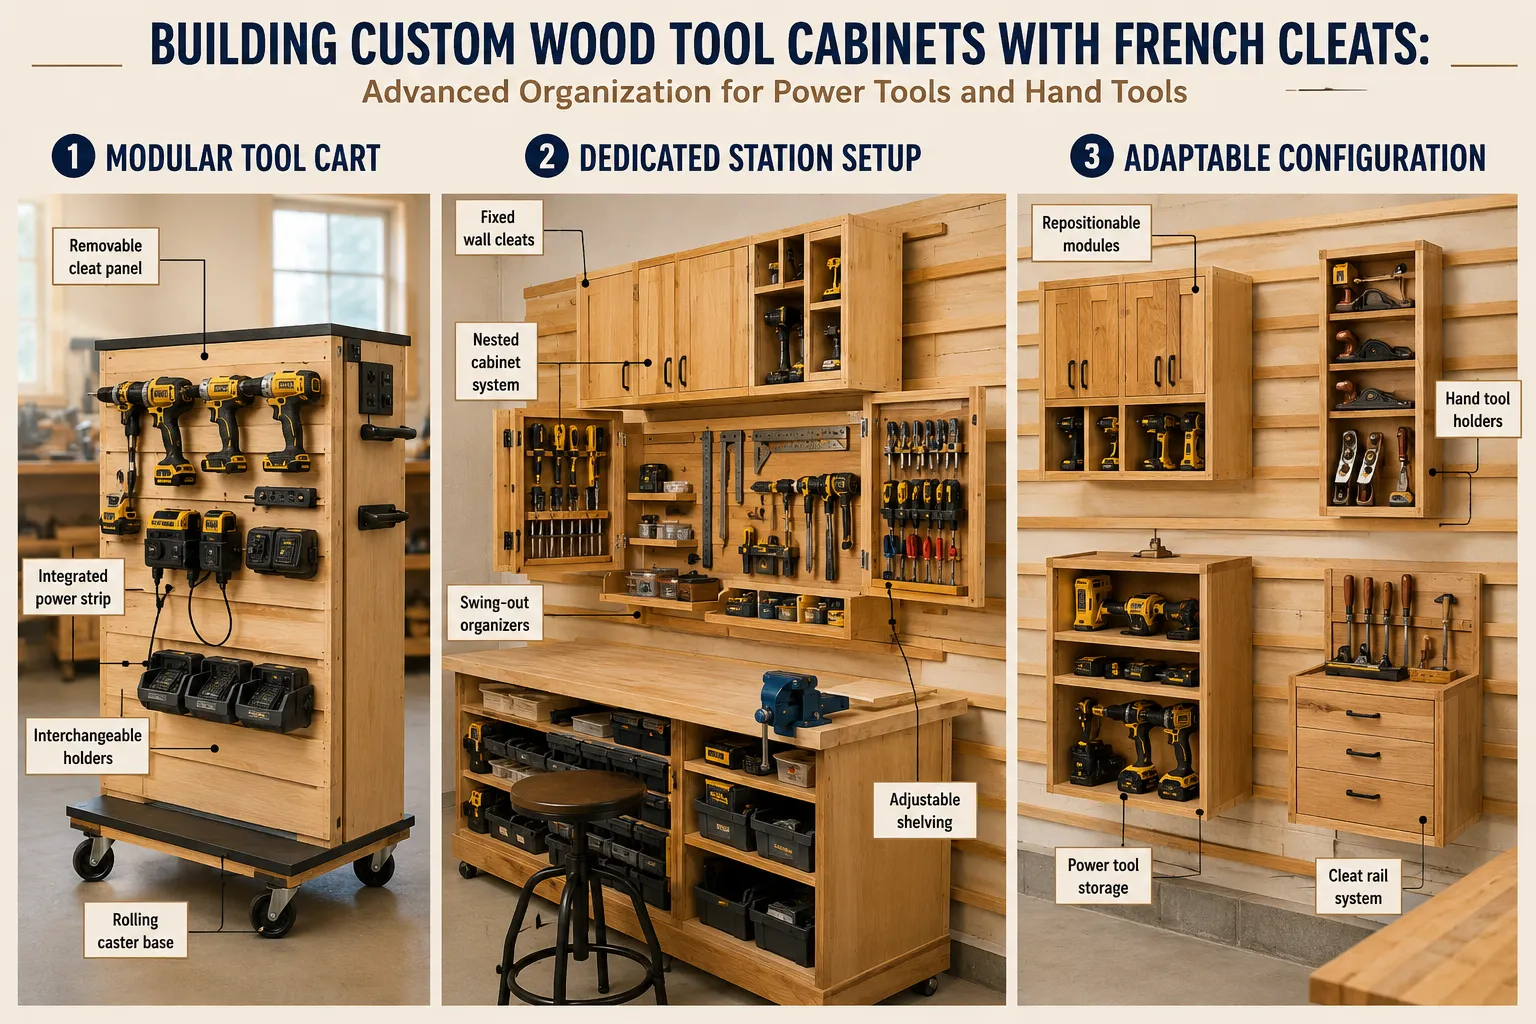
Consider building small, rolling tool carts or specialized workstations that are designed to attach to the French cleat system when not in use. For instance, a mobile sanding station with integrated dust collection could be designed to hang on the cleat wall, then rolled out for use. This maximizes floor space and keeps specialized tools organized.
- Benefits: Frees up floor space, allows for flexible arrangement, and keeps tools consolidated.
- Design Considerations: Ensure the cart is stable and designed for easy attachment and detachment.
Integrated Power and Dust Collection
When designing custom cabinets for power tools, consider integrating power strips or outlets directly into the cabinet. This reduces cord clutter and makes tool setup quicker. For tools that generate significant dust, such as sanders or routers, design holders that incorporate dust ports directly into the storage unit, ready to be connected to a central dust collection system.
- Internal Link: For those interested in optimizing workflow, explore Smart Workshop Integration Automating Dust Collection Lighting And Tool Control For Enhanced Efficiency And Safety.
Specialized Holders for Consumables and Jigs
Don’t limit your French cleat system to just tools. Create custom holders for:
- Drill Bit Sets: A simple block with drilled holes for various sized bits.
- Router Bit Organizers: A wall-mounted holder with labeled slots.
- Adhesives and Finishes: Small shelves or bins for bottles and cans.
- Sandpaper Storage: A cabinet with shallow drawers or vertical slots for different grits.
- Custom Jigs: Any shop-made jigs (e.g., dado jig, circle cutting jig) can have a French cleat attached for easy storage and retrieval. This aligns with the principles of 3 Profitable Scrap Wood Projects Under 1 Hour Ice Screw Tools Traps And Book Holders, showcasing how even small projects contribute to efficiency.
Finishing and Labeling
Once your custom tool cabinets and holders are built, apply a protective finish. A clear coat of polyurethane or a durable lacquer will protect the wood from dust, grime, and wear. Proper labeling is also essential for maintaining organization. Use clear, concise labels on cabinets, drawers, and individual tool holders to quickly identify contents. This significantly reduces the time spent searching for specific items.
Conclusion
Building Custom Wood Tool Cabinets with French Cleats: Advanced Organization for Power Tools and Hand Tools is more than just a storage project; it’s an investment in your woodworking efficiency, safety, and enjoyment. By embracing the modularity, strength, and adaptability of the French cleat system, you can transform a cluttered workspace into a highly organized, inspiring environment. The process, while requiring careful planning and execution, rewards you with a truly personalized solution that evolves with your needs in 2026 and beyond.
Start by assessing your current tool collection and available space. Design simple holders first, then gradually expand to more complex cabinets and specialized stations. With each custom piece you create, you’ll not only hone your woodworking skills but also build a workshop that reflects your dedication to craftsmanship and order. This advanced approach to tool organization will streamline your projects, protect your valuable equipment, and ultimately enhance your passion for woodworking.
References
- Fine Woodworking. (2018). Workshop Solutions: Tools & Storage. Taunton Press.
- Peters, T. (2020). The Workshop Book: A Craftsman’s Guide to Building a Quality Shop. Fox Chapel Publishing.