
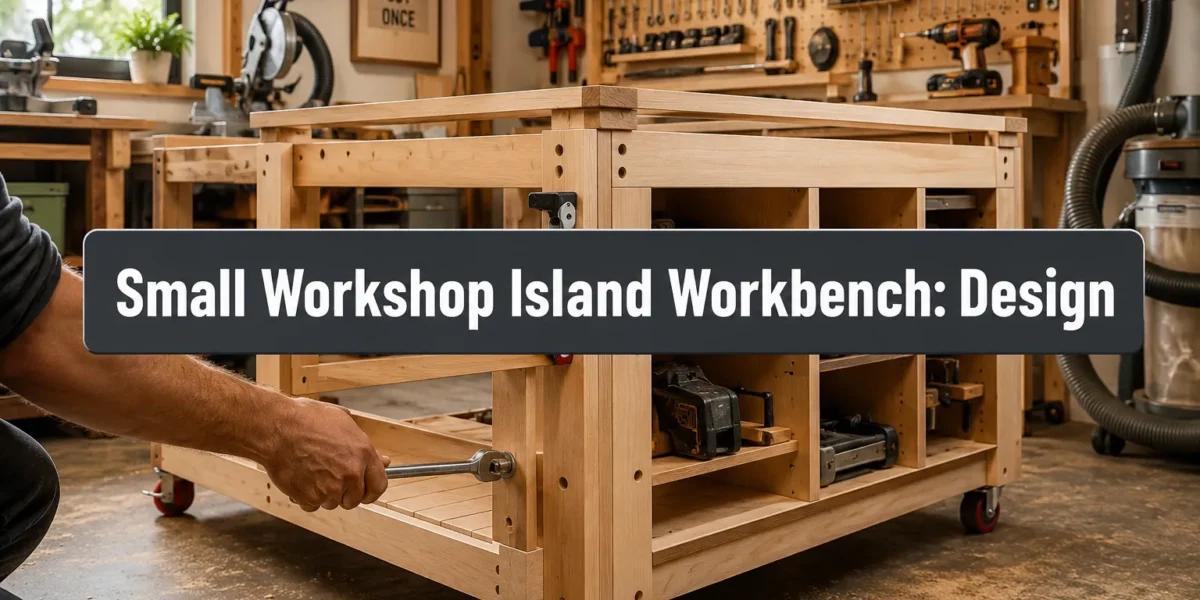
Woodworkers operating in compact spaces often face a significant challenge: how to achieve professional-grade results without compromising on essential tools or sacrificing precious floor area. The solution isn’t necessarily more space, but smarter space utilization. Enter the concept of a Small Workshop Island Workbench: Design and Build a Mobile Mechanic-Style Station for Woodworkers. Inspired by the robust, highly organized, and mobile carts found in automotive garages, this workbench brings unparalleled versatility and efficiency to the woodworking shop, transforming limitations into opportunities for streamlined production and enhanced creativity in 2026.
Key Takeaways
- A mobile island workbench maximizes functionality and organization in small woodworking shops.
- Integrating heavy-duty locking casters is crucial for easy repositioning and stability.
- Design should prioritize multi-functional storage, including drawers, shelves, and dedicated tool holders.
- Consider a robust work surface that can withstand clamping, pounding, and various woodworking tasks.
- The “mechanic-style” approach emphasizes durability, accessibility, and efficient workflow.
The Core Concept: Small Workshop Island Workbench: Design and Build a Mobile Mechanic-Style Station for Woodworkers
The idea behind a mechanic-style island workbench for woodworkers is simple yet transformative: create a central, highly functional, and movable workstation that brings the work to the tools, or the tools to the work, rather than the other way around. This contrasts with traditional fixed benches, which can restrict workflow in smaller areas. This mobile design allows woodworkers to reclaim floor space, adapt their layout for different projects, and keep essential tools and materials always within reach.
The “island” aspect means it can be accessed from all sides, offering maximum flexibility. The “mechanic-style” influence emphasizes rugged construction, integrated tool storage, and robust mobility. It’s not just a place to work; it’s a mobile command center for your woodworking endeavors. This type of bench is particularly beneficial for those with limited square footage, allowing for dynamic reconfigurations of the workspace. For insights on optimizing any workshop layout, consider reading our article on creating ergonomic workshop layouts.
Why Go Mobile and Mechanic-Style?
- Space Optimization: In a small shop, every square foot counts. A mobile bench can be moved out of the way, tucked into a corner, or positioned precisely where needed, freeing up floor space when not in active use.
- Enhanced Workflow: Instead of walking back and forth to different tool stations, you can roll your entire workstation closer to your material, the table saw, or your finishing area. This reduces fatigue and saves time.
- Integrated Storage: A well-designed mechanic-style bench features dedicated storage for frequently used hand tools, power tools, fasteners, and jigs. This keeps your workspace tidy and improves efficiency by minimizing searching.
- Versatility: The robust nature allows it to serve multiple functions, assembly table, outfeed support, glue-up station, or even a temporary finishing stand.
- Durability: Inspired by the demands of a mechanic’s garage, these benches are built to last, often using sturdy materials and joinery techniques that can withstand heavy use.
Designing Your Small Workshop Island Workbench: Key Features and Considerations
Successful execution of a Small Workshop Island Workbench: Design and Build a Mobile Mechanic-Style Station for Woodworkers hinges on thoughtful design. Before cutting the first board, consider the specific needs of your woodworking style, the dimensions of your space, and the types of tools and materials you use most frequently.
Work Surface
The heart of any workbench is its top. For a mechanic-style island bench, durability and versatility are paramount.
- Material: A thick slab of hardwood (maple, oak, birch plywood) is ideal for resilience. Consider a replaceable top layer, such as MDF or hardboard, if you anticipate heavy abuse from glue, paint, or aggressive sanding.
- Dimensions: Aim for a size that provides ample working room without overwhelming your shop. Common dimensions might range from 24×48 inches to 36×60 inches. Ensure you can comfortably reach all parts of the surface.
- Features:
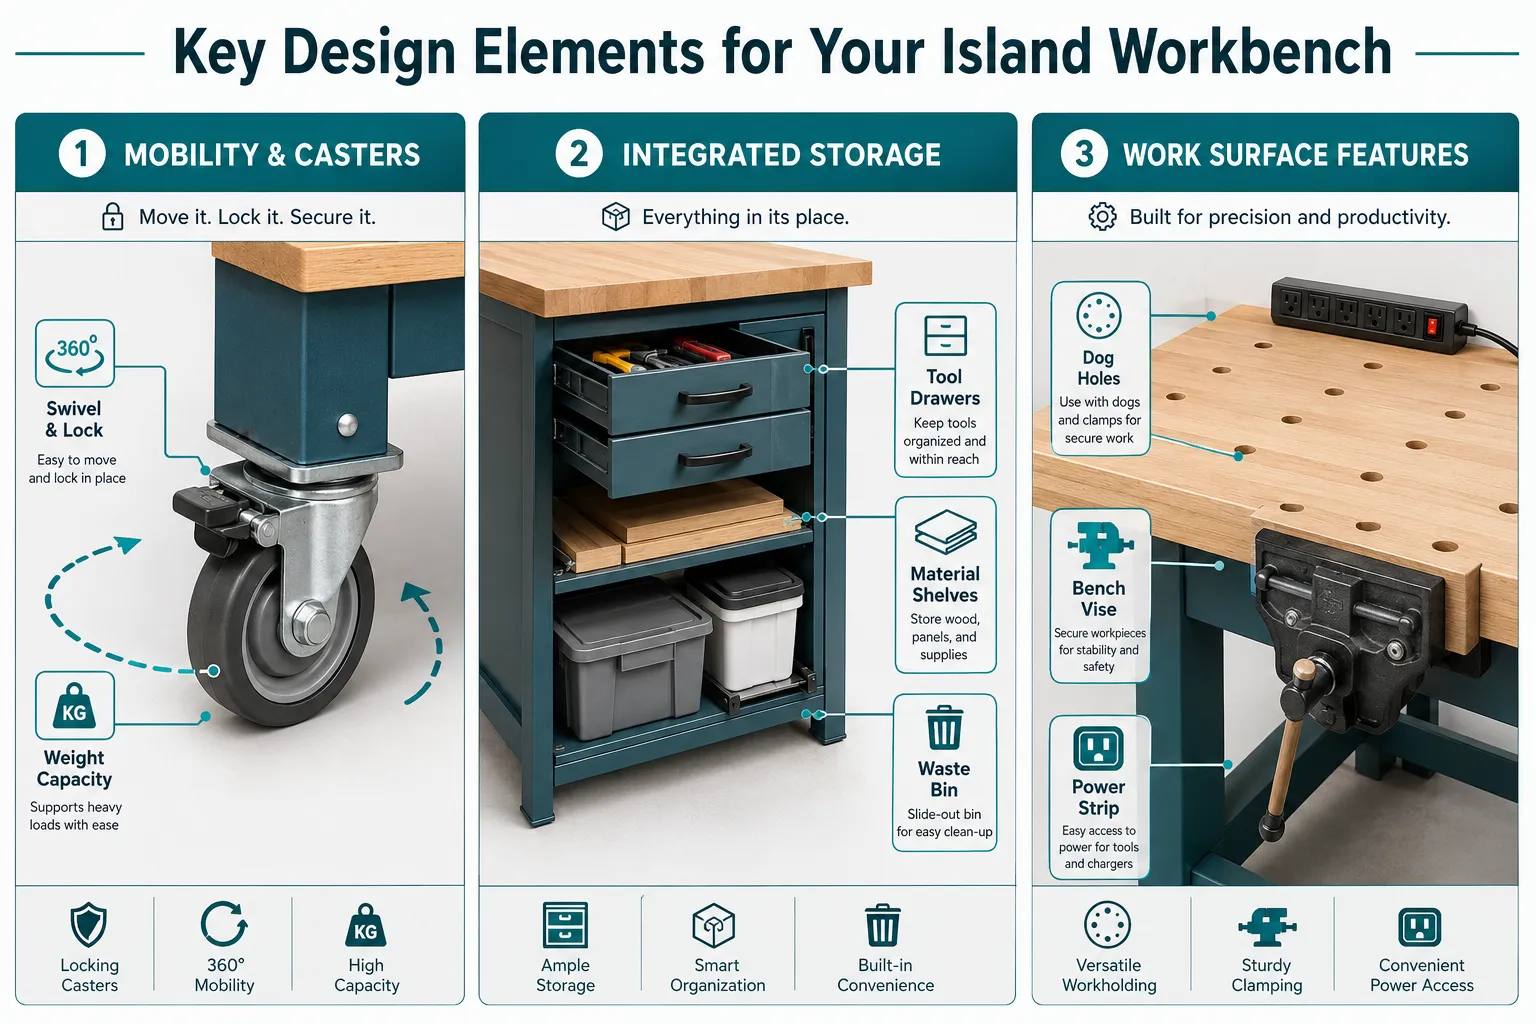
- Dog Holes: Essential for clamping workpieces with bench dogs and holdfasts. Space them consistently for maximum utility.
- Bench Vise: A sturdy woodworking vise is a non-negotiable feature. Mount it flush with the top or slightly below for maximum flexibility.
- Integrated Power Strip: Keep extension cords off the floor by mounting a power strip directly to the side of the bench.
- Router Table Insert: For advanced users, consider incorporating a lift-out section that houses a router, transforming part of the bench into a dedicated router table when needed. Learn more about building a DIY router table.
Mobility and Stability
The key differentiator for an island workbench is its ability to move, but also to remain rock-solid when needed.
- Casters: Invest in heavy-duty, industrial-grade locking casters.
- Type: Swivel casters (two with brakes, two without, or all four with brakes) provide excellent maneuverability. Total-lock casters lock both the wheel and the swivel, offering superior stability.
- Capacity: Ensure the casters can comfortably support the weight of the bench, all its contents, and any workpiece you might place on it. Overestimate rather than underestimate.
- Mounting: Secure casters with through-bolts and fender washers for maximum strength.
- Leveling Feet (Optional but Recommended): If your shop floor is uneven, or if you want absolute immobility for precision work, consider adding adjustable leveling feet that can be engaged when the casters are locked. This lifts the casters slightly off the ground, ensuring maximum stability.
Storage Solutions for Your Mobile Mechanic-Style Station
This is where the “mechanic-style” influence truly shines, turning clutter into organized efficiency.
- Drawers: Deep, full-extension drawers are ideal for storing hand tools, power tools, and project-specific hardware.
- Dividers: Implement custom dividers or foam inserts to keep tools organized and prevent them from shifting during movement.
- Weight Capacity: Ensure drawer slides are rated for the weight of your tools. Heavy-duty slides are a good investment.
- Shelving: Open shelves are practical for larger items, bins, or frequently accessed supplies.
- Adjustable Shelves: Allow for flexibility in storing items of different heights.
- Pull-out Shelves: Consider pull-out shelves or trays for easy access to items at the back.
- Dedicated Tool Holders:
- Pegboard/French Cleat Sides: Mount pegboard or a French cleat system on the sides of the bench for quick access to frequently used hand tools like squares, chisels, and clamps.
- Bin Storage: Integrate small bins for fasteners, sandpaper, or other consumables.
- Waste Bin/Dust Collection: Designate a space for a trash can or incorporate a dust collection port for easy cleanup. A portable dust collection system is invaluable in a small workshop; you can learn about building one here.
Ergonomics and Workflow
A well-designed workbench should enhance comfort and productivity.
- Height: Determine an ergonomic working height that suits you. A good rule of thumb is to stand with your arms at your sides, then bend your elbows to 90 degrees; the benchtop should be around the height of your knuckles.
- Clearances: Ensure enough clearance around the bench for movement, especially when tools are extended (e.g., miter saw on outfeed support). For more ideas on maximizing your workspace, see our article on building a compact and ergonomic workbench for small workshops.
Building Your Small Workshop Island Workbench: Construction Guide
Once your design is finalized, the building phase begins. Focus on sturdy construction and accurate joinery to ensure a durable and stable workbench.
Materials Selection
- Frame: Use dimensionally stable lumber like 2x4s or 2x6s for the main frame. Hardwoods are preferred for longevity, but construction-grade lumber can work if properly joined. Plywood (¾” or 1″) offers excellent stability for structural components.
- Top: As discussed, thick hardwood or multiple layers of plywood (laminated for thickness) are ideal.
- Panels: ¾” plywood or MDF for sides, back, and drawer boxes.
- Hardware: Heavy-duty casters, full-extension drawer slides, bolts, nuts, washers, screws, and wood glue.
Step-by-Step Construction Process
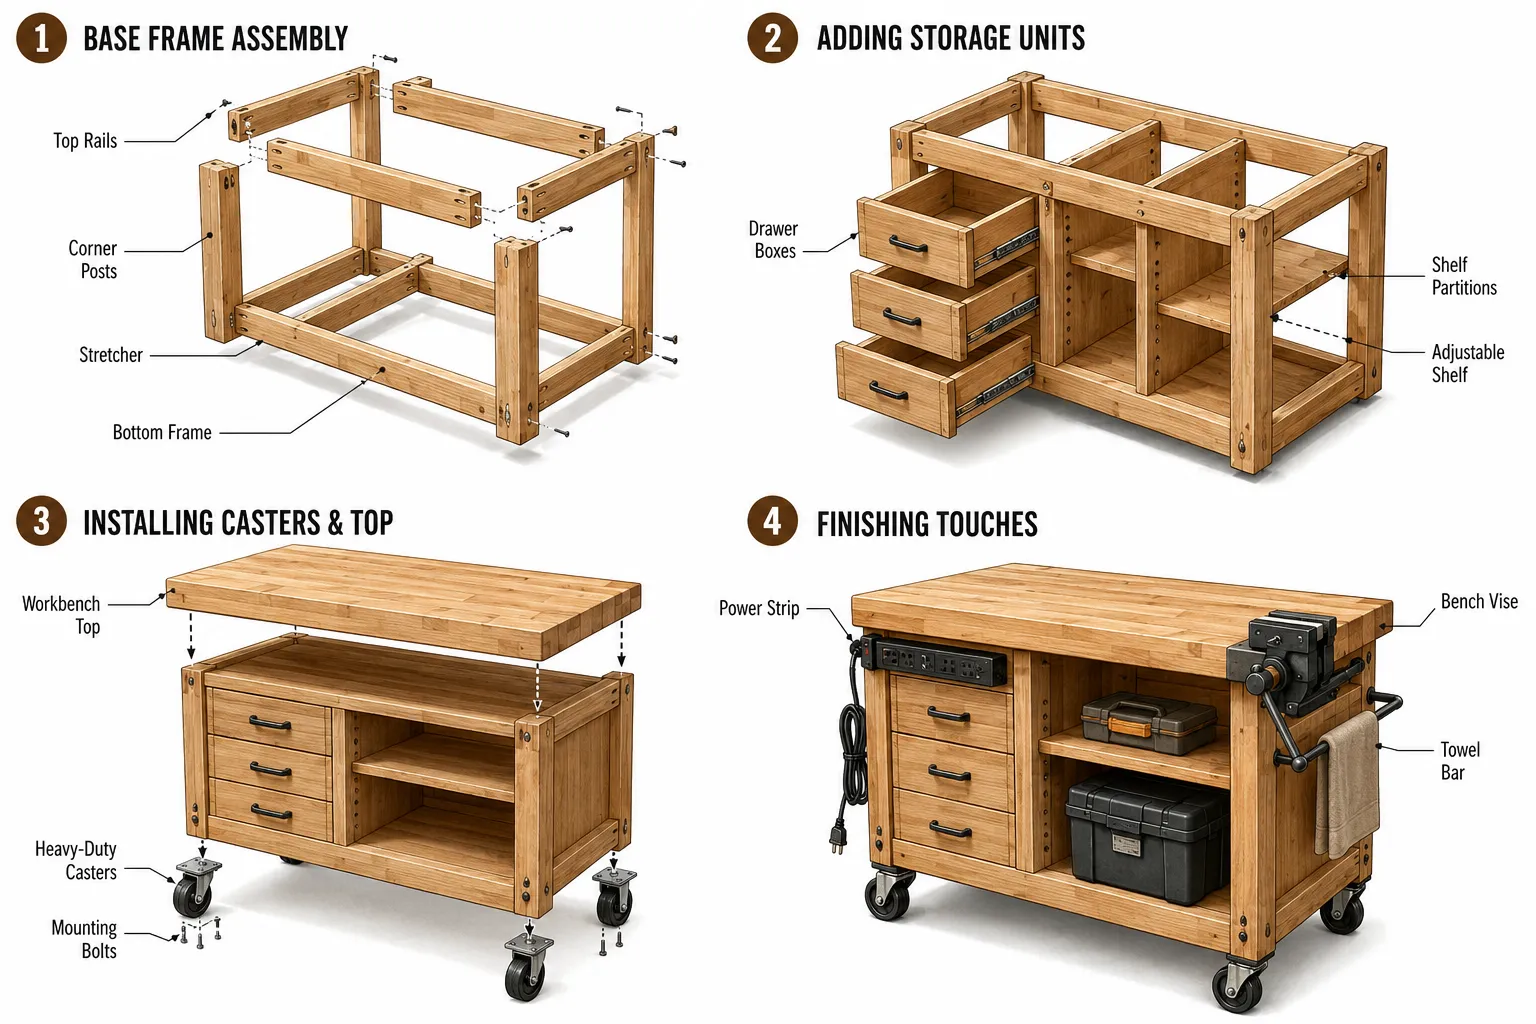
- Cut List and Material Preparation: Based on your design, create a precise cut list. Square and dimension all lumber and plywood. Pre-finish internal surfaces if desired before assembly.
- Base Frame Assembly:
- Construct the main rectangular frame for the base. Use robust joinery like mortise and tenon, lap joints, or pocket hole joinery for strength.
- Add cross-members for rigidity and to support the work surface and any internal shelving/drawer banks.
- Ensure the frame is square and flat.
- Caster Installation:
- Attach the heavy-duty casters to the bottom corners of the base frame using through-bolts, nuts, and large washers. Position them to provide maximum stability.
- Add Vertical Supports and Internal Structure:
- Install vertical corner posts and any internal partitions for your drawer banks or shelving units. Again, focus on strong, square connections.
- Build out the framework for any open shelving.
- Construct Drawer Boxes and Shelves:
- Build drawer boxes from ¾” plywood using dadoes, rabbets, or pocket screws for strong joints.
- Install drawer slides to the internal partitions and the drawer boxes, ensuring smooth operation.
- Cut and install shelves, securing them with cleats, dadoes, or shelf pins.
- Attach Side and Back Panels:
- Install plywood side and back panels to enclose the structure and add further rigidity. These can be glued and screwed, or routed into dadoes in the frame.
- If using pegboard or French cleats, attach these to the exterior sides.
- Mount the Work Surface:
- Carefully position your prepared workbench top onto the frame.
- Secure it from underneath using screws driven up into the top, allowing for seasonal wood movement if using solid hardwood.
- Install the bench vise, ensuring it is flush and securely bolted. Drill dog holes as needed.
- Final Details and Finishing:
- Add drawer pulls, power strips, and any other accessories.
- Sand all surfaces smooth.
- Apply a durable finish to protect the wood from moisture, stains, and wear. Polyurethane, spar varnish, or a tough oil-based finish are excellent choices for a workbench.
Consider the tools you’ll need for this build. While a circular saw and drill are essential, a table saw will greatly enhance precision and efficiency, especially for cutting plywood panels and dimensioning lumber. For more on tool choices, you might find our article on Ryobi vs Dewalt for beginner woodworkers helpful.
Customizing and Enhancing Your Mobile Workstation
A great Small Workshop Island Workbench: Design and Build a Mobile Mechanic-Style Station for Woodworkers isn’t just about the basic structure; it’s about tailoring it to your unique needs.
Specialized Tool Storage
- Router Bit Trays: Create custom trays that fit into drawers, with drilled holes to hold router bits upright and organized.
- Clamp Rack: Design an integrated clamp rack on one end of the bench, or a pull-out system.
- Power Tool Caddy: Build a dedicated compartment or pull-out shelf for frequently used power tools like an orbital sander or jigsaw, complete with charging stations if battery-powered.
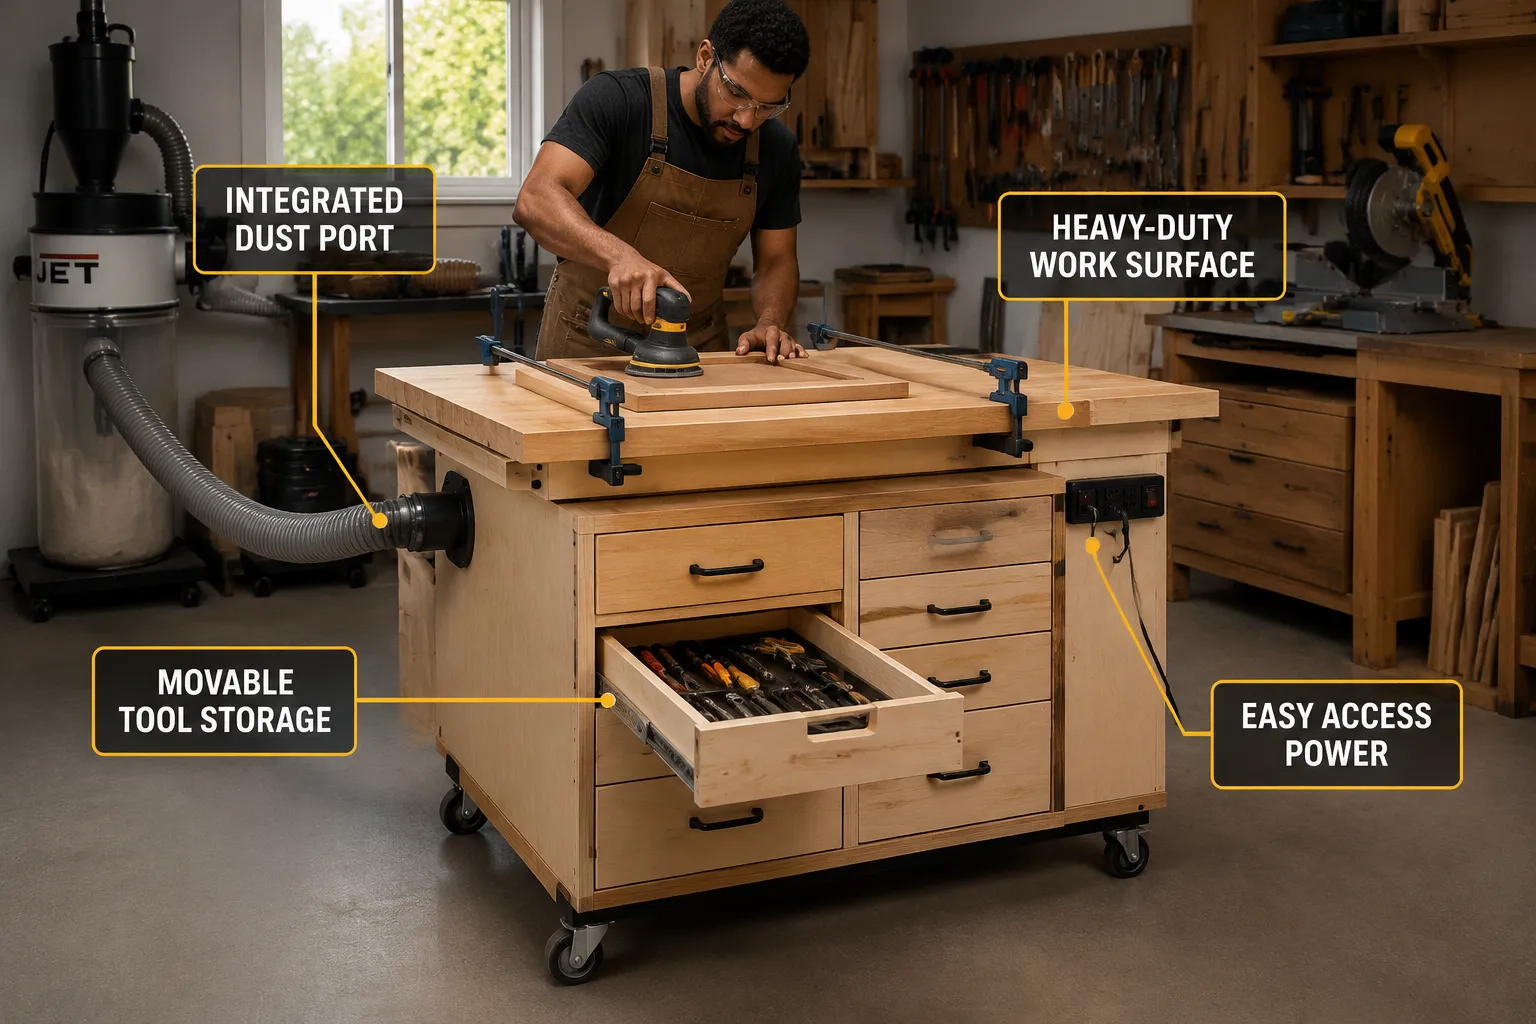
- Dust Collection Port: Install a blast gate and a short run of ductwork to connect to a shop vacuum or central dust collection system, making cleanup of the benchtop easier.
Auxiliary Features
- Folding Wing Extensions: If space allows, incorporate folding wings that can extend your work surface when needed and fold down to save space.
- Integrated Lighting: Mount a small LED strip light under the edge of the workbench top to illuminate the lower shelves or drawers.
- Outfeed Support: Design the height of your workbench to match your table saw, allowing it to double as an outfeed support, a common need in smaller shops.
- Magnetic Strips: Install magnetic strips on the sides or within drawers to hold metal tools like chisels, screwdrivers, or drill bits.
- Removable Bench Hook/Shooting Board: Create a removable bench hook or shooting board that can be quickly clamped or dropped into dog holes for precise hand tool work.
Durability and Maintenance
- Finish Protection: Regularly reapply a protective finish to your workbench top, especially if it sees heavy use.
- Caster Care: Periodically clean and lubricate your casters to ensure smooth movement. Check bolts for tightness.
- Impact Resistance: For extremely heavy-duty applications, consider adding metal banding or corner guards to the edges of the workbench top to protect against dings and dents.
Investing time in the design and build of a custom mobile island workbench is an investment in your woodworking efficiency and enjoyment. By combining the rugged utility of a mechanic’s station with the specialized needs of a woodworker, you create a workspace that works for you, no matter the size of your shop.
Conclusion
Designing and building a Small Workshop Island Workbench: Design and Build a Mobile Mechanic-Style Station for Woodworkers is a highly rewarding project for any woodworker seeking to optimize their shop. This versatile, mobile workstation offers a powerful solution to common space constraints, enhancing workflow, organization, and efficiency in 2026. By carefully considering the work surface, mobility, and integrated storage solutions, you can create a custom bench that not only meets your current needs but also adapts to future projects.
The process involves thoughtful planning, precise execution, and a focus on durability, echoing the robust nature of its mechanic-inspired brethren. Whether you are a hobbyist or a professional working in a compact area, this workbench will become the cornerstone of your operations, enabling you to tackle a wider range of projects with greater ease and enjoyment. Take the leap, embrace the mobility, and transform your small workshop into a highly productive hub.