
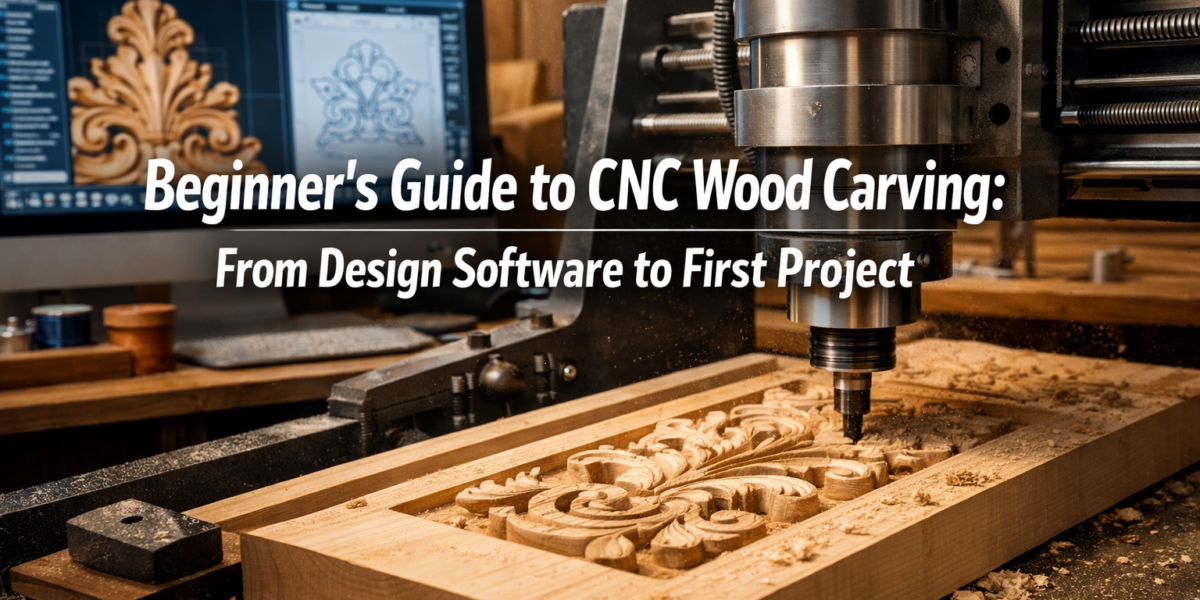

The average hobbyist woodworker spends over 100 hours annually on their craft, yet many find advanced techniques like intricate carvings daunting. In 2026, the barrier to creating highly detailed wooden pieces has significantly lowered, thanks to the accessibility of Computer Numerical Control (CNC) technology. This comprehensive Beginner’s Guide to CNC Wood Carving: From Design Software to First Project demystifies the entire process, making advanced techniques accessible to anyone with a passion for woodworking and a willingness to explore digital tools. From conceptualizing your design in software to holding your first beautifully carved wooden project, this guide provides a structured pathway into the exciting world of CNC.
Key Takeaways

- CNC wood carving merges digital precision with traditional craftsmanship, enabling intricate designs previously difficult by hand.
- Getting started involves understanding core software types: CAD for design, CAM for toolpath generation, and Controller software for machine operation.
- Selecting the right CNC machine involves balancing budget, workspace, and project scope; hobbyist routers are excellent for beginners.
- Safety protocols are paramount when operating CNC machinery; always prioritize personal protection and machine maintenance.
- Your first project should be simple, allowing for hands-on learning of the entire workflow without overwhelming complexity.
Unpacking the Fundamentals: Your Beginner’s Guide to CNC Wood Carving: From Design Software to First Project
CNC (Computer Numerical Control) wood carving fundamentally changes how woodworkers approach intricate designs and repetitive tasks. Instead of manual chisels and gouges, a computer controls a router or spindle, precisely moving it along X, Y, and Z axes to remove material. This precision opens up a vast realm of possibilities, from detailed relief carvings to precise joinery and custom parts. For beginners, the journey starts with understanding the digital workflow that underpins this technology.
The process typically involves three main software categories:
- CAD (Computer-Aided Design) Software: This is where your creative vision takes shape. You design your project, whether it’s a 2D outline or a complex 3D model. Popular choices for wood carving range from free options to professional-grade suites.
- CAM (Computer-Aided Manufacturing) Software: Once your design is complete, CAM software translates it into toolpaths – the specific instructions that tell the CNC machine how to move. This includes selecting cutting tools, defining cutting depths, and optimizing the path for efficiency and quality.
- Controller Software: This software communicates directly with your CNC machine. It takes the G-code generated by the CAM software and sends commands to the machine’s motors, controlling its movements and spindle speed.
Choosing the right software suite often depends on your budget and desired complexity. Many entry-level CNC machines come bundled with basic software, offering an integrated solution. As you advance, you might explore more powerful standalone CAD and CAM programs.
Essential Components of a CNC Wood Carving Setup
To embark on your CNC wood carving journey, a few key pieces of equipment are necessary:
- CNC Router/Carver: This is the heart of your setup. For beginners, desktop or small-format hobbyist CNC routers are an excellent starting point. They are generally more affordable, easier to set up, and perfectly capable of producing impressive carvings. Our “Beginner’s Guide to CNC Routers for Small Woodshops: From Setup to First Project” offers more in-depth advice on machine selection.
- Computer: A desktop or laptop powerful enough to run your chosen CAD/CAM software and controller software reliably.
- Cutting Tools (End Mills/Bits): These are specialized bits designed for CNC machines. They come in various shapes and sizes (e.g., flat end mills, ball nose end mills, V-bits) each suited for different carving tasks, such as roughing out material, creating fine details, or engraving.
- Workholding: Methods to securely fasten your wood workpiece to the CNC machine’s bed. This is critical for accuracy and safety. Options include clamps, double-sided tape, or vacuum tables.
- Dust Collection: CNC machines generate a lot of wood dust and chips. An effective dust collection system is essential for maintaining a clean workshop and protecting your health.
- Safety Gear: Eye protection, ear protection, and appropriate clothing are non-negotiable.
Remember, starting small and gradually expanding your setup is a common and wise approach. Focus on mastering the basics before investing in more advanced or larger equipment.

Designing Your Vision: From Concept to G-Code
The most exciting part of CNC wood carving is bringing your designs to life. This section focuses on the workflow from idea to the machine-ready file.
Step 1: Conceptualizing Your Project
Start with a clear idea. For a Beginner’s Guide to CNC Wood Carving: From Design Software to First Project, consider something relatively simple but visually rewarding:
- Engraved Coasters: Simple text or geometric patterns. Check out our guide on “Engraved Wooden Coasters with Custom Designs: Laser and Hand Carving Techniques for Profitable Sales” for inspiration.
- Personalized Key Holder: A basic silhouette with carved names or initials.
- Small Relief Carving: A simple leaf, star, or abstract shape on a flat board.
- Decorative Signage: A name or short phrase for a desk or wall.
Sketching your idea on paper first can help refine your vision before moving to digital design.
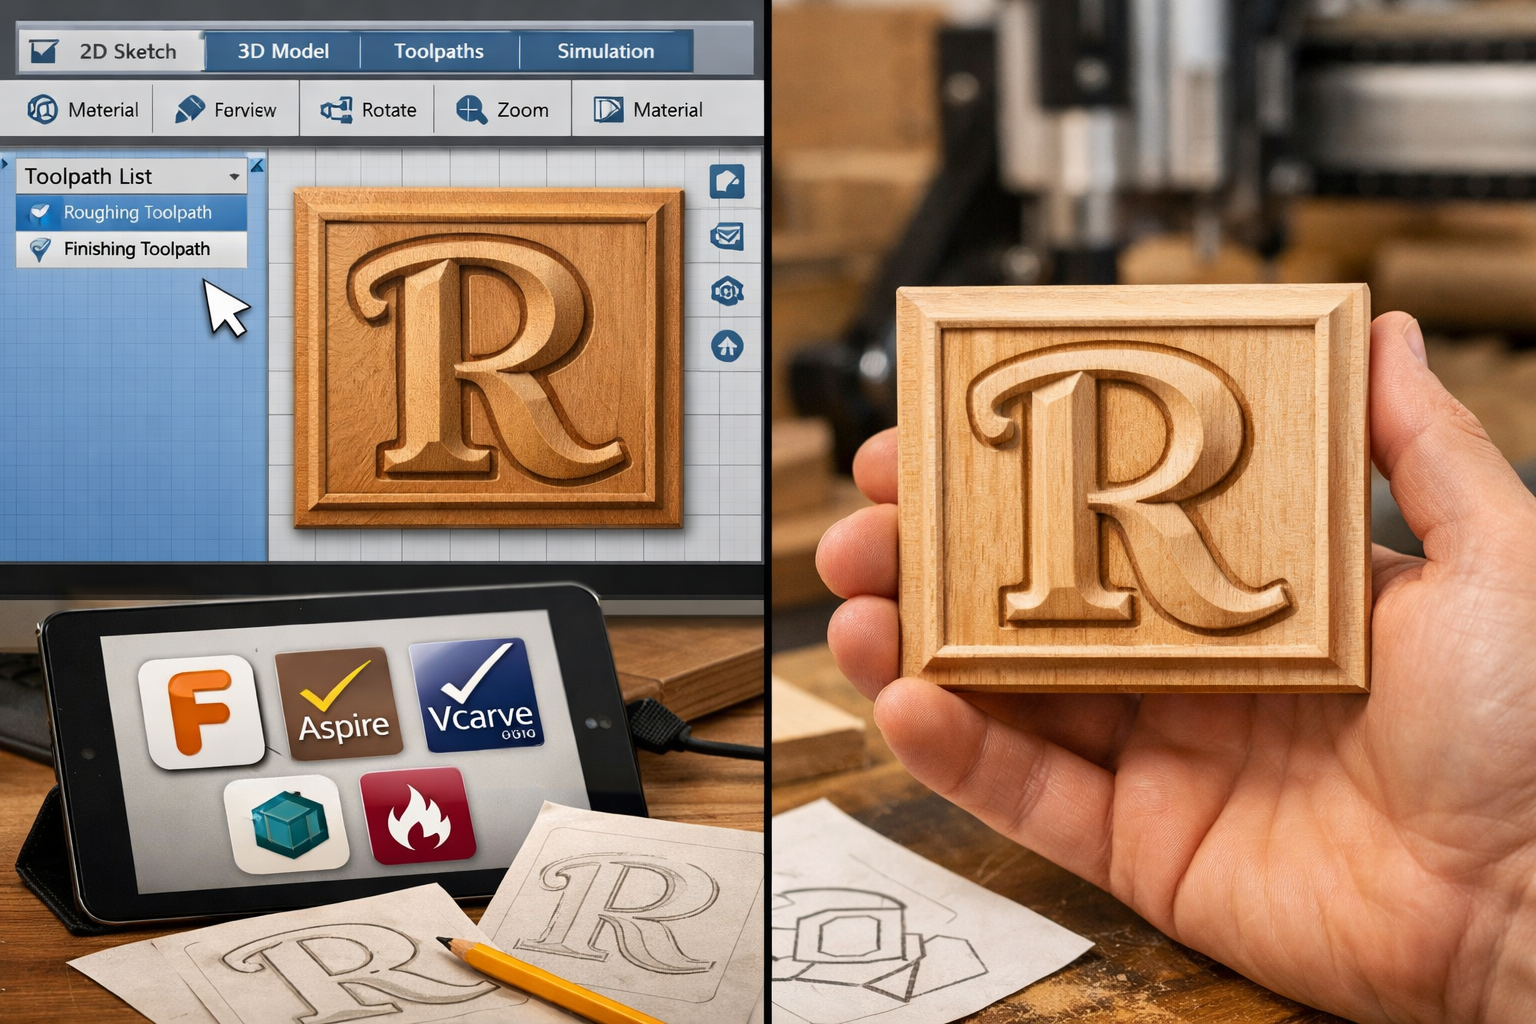
Step 2: CAD Software – Bringing Your Design to Life
Your sketch now needs to be translated into a digital format. This is where CAD software comes in.
- 2D Designs (Vector Graphics): For simple engravings or outlines, 2D CAD is sufficient. You’ll create vectors (lines, curves, text) that the CNC machine will follow.
- Software Examples: Inkscape (free), Adobe Illustrator, CorelDRAW. Many CAM programs also include basic 2D design tools.
- 3D Designs (Modeling): For relief carvings or full 3D objects, you’ll need 3D CAD software.
- Software Examples: Fusion 360 (free for hobbyists), Vectric Aspire (woodworking specific, paid), SketchUp (free/paid).
Key Considerations in CAD:
- Dimensions: Ensure your design dimensions match the actual size you want the carving to be.
- Complexity: As a beginner, keep designs relatively simple to avoid common pitfalls.
- File Format: Common output formats from CAD include DXF, SVG, STL (for 3D models), which are then imported into CAM software.
Step 3: CAM Software – Generating Toolpaths
Once your design is ready in CAD, the CAM software takes over. This is the bridge between your digital design and the physical carving.
- Import Design: Import your 2D vector or 3D model into the CAM software.
- Define Material: Specify the type of wood you’re using (e.g., pine, maple, oak) and its dimensions. This helps the software calculate optimal cutting parameters.
- Select Tools: Choose the appropriate end mills for your carving. For a simple project, you might use a flat end mill for roughing and a V-bit for detail or engraving. Our “The Essential Guide to Router Bits: Choosing the Right Profile, Material, and Technique for Every Woodworking Task” provides valuable insights.
- Create Toolpaths: This is the core of CAM. You’ll tell the software how you want the machine to cut.
- Pocketing: Removing material within a defined boundary.
- Profiling: Cutting along the inside or outside of a line (e.g., cutting out the shape of a coaster).
- V-Carving: Using a V-shaped bit to create carved text or intricate lines where depth varies with line width.
- 3D Carving: Generating toolpaths for complex 3D surfaces, often involving roughing passes with larger bits and finishing passes with smaller, ball-nose bits.
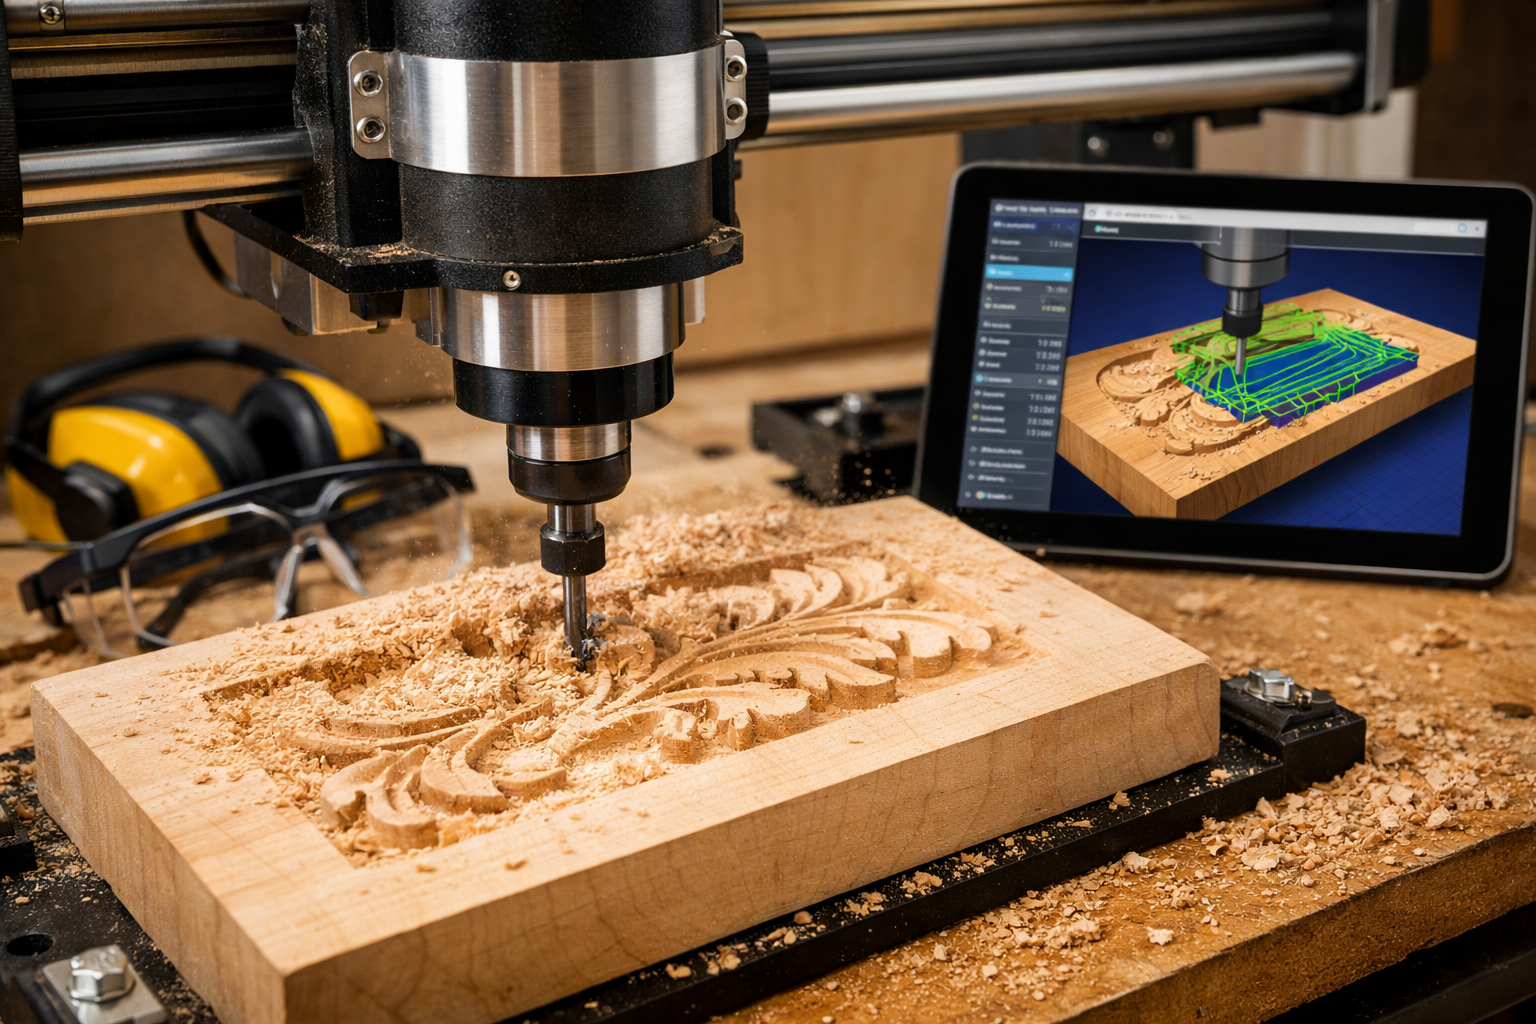
- Simulate Toolpaths: Crucially, virtually simulate the carving process. This allows you to catch errors, visualize the final product, and ensure all cuts are as intended before touching any wood.
- Generate G-Code: After simulation, the CAM software generates the G-code file (e.g., .nc, .gcode). This file contains all the instructions your CNC machine needs to perform the carving.
Many CNC machines for beginners come with integrated CAD/CAM software, simplifying this learning curve.

Common CAM Terminology for Beginners
| Term | Description |
|---|---|
| Feed Rate | How fast the cutting tool moves horizontally through the material. |
| Plunge Rate | How fast the cutting tool moves vertically into the material. |
| Spindle Speed | The rotational speed of the cutting tool (RPM). |
| Depth of Cut | How deep the tool cuts into the material in a single pass. |
| Stepover | The amount a tool overlaps its previous path when clearing an area. |
| Toolpath | The calculated path the cutting tool will follow. |
Getting these parameters right is crucial for cut quality and tool longevity. Start with conservative settings and gradually increase them as you gain experience.

Your First Project: Setup, Carve, and Finish
With your G-code ready, it’s time for the exciting step of bringing your digital design into the physical world. This is where the Beginner’s Guide to CNC Wood Carving: From Design Software to First Project truly comes alive.
Step 1: Machine Setup and Workpiece Preparation
- Safety First: Always wear safety glasses, ear protection, and avoid loose clothing or jewelry. Ensure proper ventilation or dust collection is active.
- Mount the Workpiece: Securely fasten your chosen wood to the CNC bed using clamps, double-sided tape, or a vacuum fixture. Ensure it’s perfectly flat and stable.
- Pro Tip: Use a “waste board” (a sacrificial piece of MDF or plywood) under your workpiece to protect your CNC bed from accidental cuts.
- Install the End Mill: Carefully insert the correct cutting tool (end mill) into the spindle collet, tightening it securely.
- Zero the Axes (Homing): This critical step tells the CNC machine where your workpiece is located.
- X and Y Zero: Position the cutting tool to the desired starting point on your workpiece (often a corner) and set this as the X and Y origin in your controller software.
- Z Zero: Bring the tip of the end mill down to just touch the top surface of your workpiece and set this as the Z origin. Many beginners use a “touch plate” for accurate Z-height setting.
Step 2: Running Your First CNC Program
- Load G-Code: Open your generated G-code file in your CNC controller software.
- Final Checks: Double-check your workholding, tool installation, and zeroing. Do a “dry run” with the spindle off, raised slightly above the workpiece, to observe the tool path and ensure it stays within the material boundaries.
- Start the Spindle: Turn on your CNC spindle to the recommended RPM.
- Initiate Carving: Start the G-code program. Stay attentive, observing the carving process for any unexpected behavior. Be ready to hit the “Stop” or “Emergency Stop” button if anything goes wrong.
Common First Project Woods:
- Pine: Soft, inexpensive, and easy to cut. Great for practicing.
- Poplar: A bit harder than pine, smooth texture, good for detail.
- Maple: Harder, denser, excellent for fine detail and durability, but requires more powerful machines and slower feed rates.
- MDF: Not technically wood, but machines very consistently and is excellent for practicing toolpaths without wasting valuable timber.
For sourcing wood, consider “Sourcing Reclaimed and Salvaged Wood: Quality Assessment, Restoration, and Safe Handling” or look for local lumberyards.
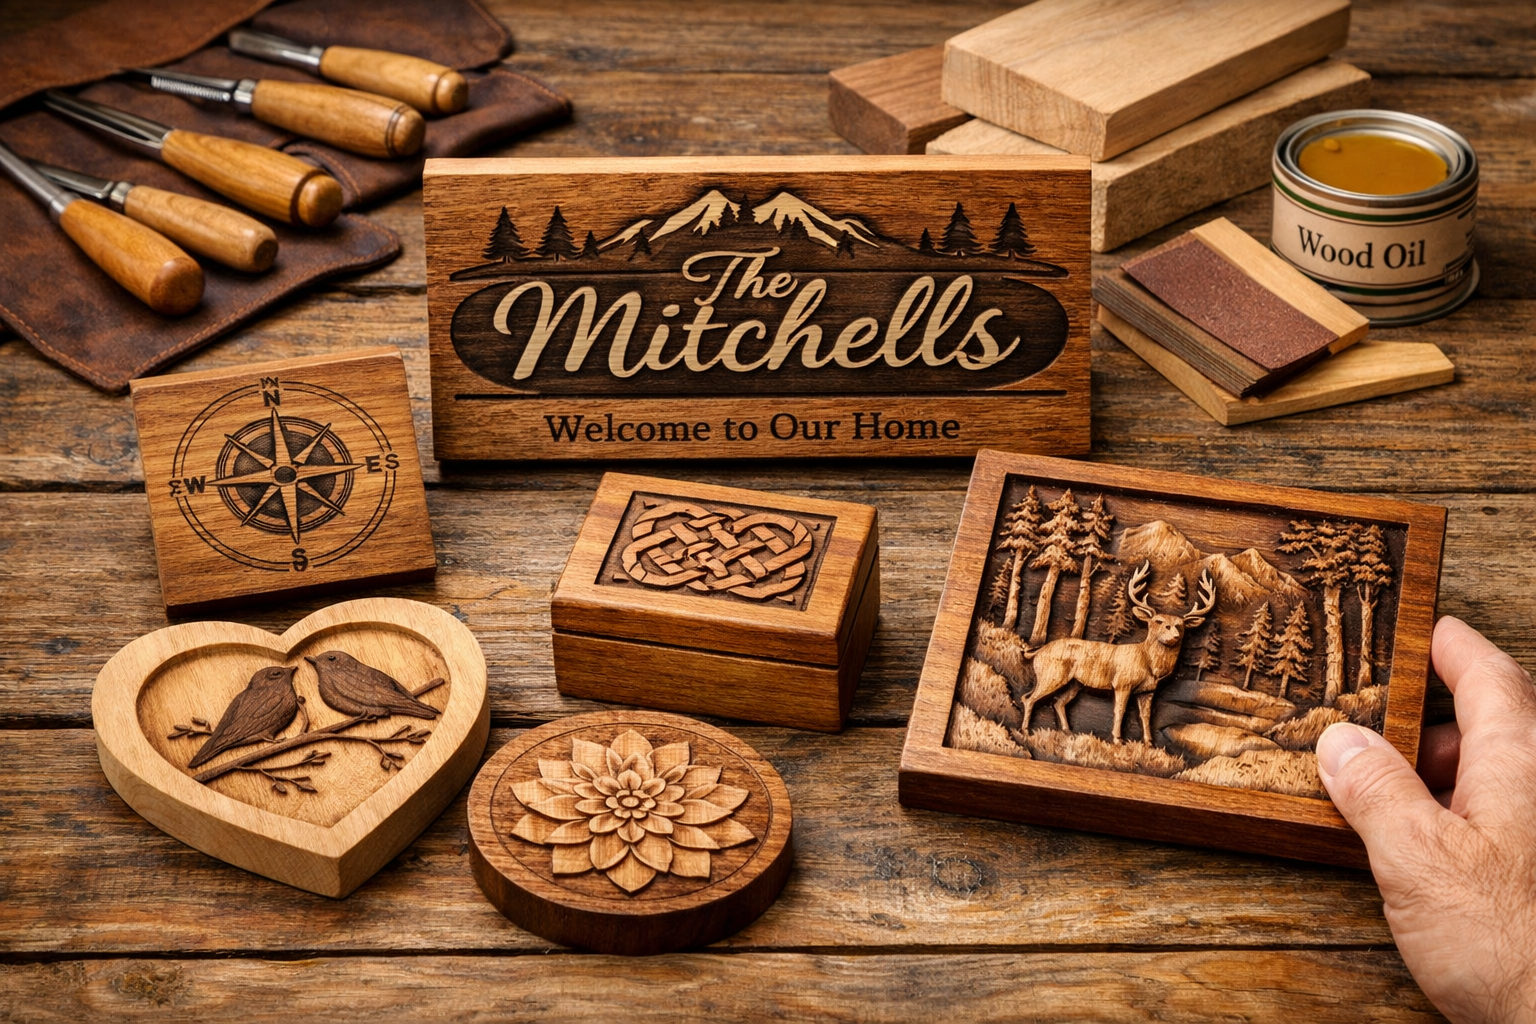
Step 3: Finishing Your Carving
Once the carving is complete and the machine stops, carefully remove your workpiece. The finishing process is crucial for bringing out the beauty of your CNC creation.
- Deburring/Sanding: Gently sand away any fuzz or small imperfections left by the carving process. Start with a medium grit (e.g., 120-150) and move to finer grits (e.g., 220-320) for a smooth finish. For delicate carvings, dental picks or small carving tools can help clean tight corners.
- Cleaning: Remove all dust and debris, ideally with compressed air or a tack cloth.
- Applying Finish: Choose a finish that complements your project and wood type.
- Oil Finishes (e.g., Mineral Oil, Tung Oil, Danish Oil): Penetrate the wood, enhance its natural grain, and provide a low-luster, natural feel. Easy to apply for beginners.
- Varnishes/Polyurethanes: Create a durable, protective layer on the surface, offering more shine and water resistance.
- Stains: Can alter the color of the wood before applying a protective topcoat. For advice on adhesives, our “The Ultimate Guide to Wood Glue: Choosing the Right Adhesive for Every Project, Joint, and Environmental Condition” might be helpful for multi-piece projects.
After finishing, step back and admire your first CNC carved project! This is just the beginning of what you can create. Don’t be discouraged by minor imperfections; each project is a learning opportunity.

Conclusion
Embarking on the journey of CNC wood carving in 2026 offers unparalleled opportunities for creativity and precision. This Beginner’s Guide to CNC Wood Carving: From Design Software to First Project has aimed to demystify the initial steps, from conceptualizing your design in CAD, translating it into machine instructions with CAM, to the triumphant moment of holding your first finished carving. While the technology may seem complex at first, a methodical approach, starting with simple projects, and a commitment to safety will quickly build your confidence and skills.
The world of CNC woodworking is vast, offering continuous learning and the satisfaction of transforming raw wood into intricate works of art or functional pieces. Don’t hesitate to experiment with different woods, cutting tools, and software features as you grow. The most important step is simply to start.
Actionable Next Steps:
- Research Entry-Level CNC Machines: Explore hobbyist-grade CNC routers that fit your budget and space.
- Download Free Software: Experiment with free CAD/CAM software options like Inkscape and the hobbyist version of Fusion 360 to get comfortable with the digital design environment.
- Plan a Simple Project: Design a basic engraved coaster or small relief carving for your very first attempt.
- Prioritize Safety Gear: Invest in good quality eye and ear protection before your machine arrives.
- Join Online Communities: Engage with other CNC enthusiasts to share knowledge, troubleshoot, and gain inspiration.
Happy carving!

SEO Meta Title: Beginner’s Guide to CNC Wood Carving: From Design to Project SEO Meta Description: Unlock CNC wood carving in 2026! This beginner’s guide covers design software, machine setup, and creating your first project with confidence.
