

The year is 2026.
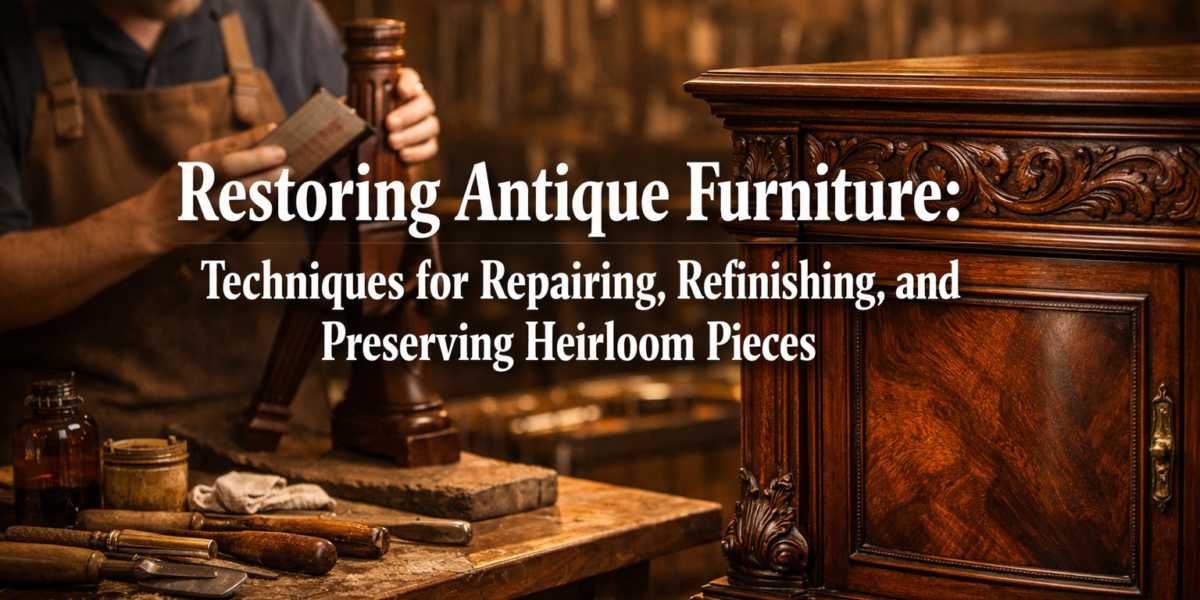
One might assume that the lifespan of a wooden chest or a carved chair ends with a cracked leg or a faded finish. Yet, the true secret to enduring craftsmanship lies not just in its initial creation but in the meticulous art of its revival. Far from being relegated to landfills, countless pieces of antique furniture possess an inherent value—both monetary and sentimental—that can be brought back to life through dedicated restoration. This article will delve into the essential techniques for Restoring Antique Furniture: Techniques for Repairing, Refinishing, and Preserving Heirloom Pieces, empowering you to transform forgotten relics into cherished family treasures for generations to come.

Key Takeaways
- Antique furniture restoration involves a delicate balance of repair, refinishing, and preservation, demanding patience and specific skills.
- Proper structural repair, including joinery and veneer work, is crucial for both functionality and maintaining historical integrity.
- Sympathetic refinishing techniques are vital to enhance beauty without devaluing the piece, often favoring traditional finishes.
- Long-term preservation strategies, like environmental control and regular maintenance, ensure an antique’s longevity.
- Understanding the furniture’s history and original construction methods guides appropriate restoration choices.
The Art of Repair: Addressing Structural Issues and Damage
The foundation of any successful antique furniture restoration lies in addressing its structural integrity. Over decades, or even centuries, joints can loosen, wood can split, and veneers can lift, compromising the piece’s stability and appearance. Tackling these issues requires a careful, methodical approach, prioritizing stability and historical accuracy.
Assessing Damage and Planning Repairs
Before any work begins, a thorough assessment is critical. Examine the piece from all angles, identifying:
- Loose Joints: Wobbly legs, arms, or rails.
- Cracks and Splits: In solid wood components.
- Missing or Damaged Veneer: Bubbling, chipping, or lost sections.
- Insect Damage: Small holes, sawdust trails (frass), or weakened areas.
- Missing Parts: Pulls, carvings, or sections of trim.
Documenting the existing condition with photographs helps track progress and ensures original placement during reassembly. For comprehensive insights into these initial steps, consider our guide on Restoring Antique Wooden Furniture: Techniques for Repairing.
Essential Repair Techniques
Once damage is identified, specific techniques can be applied:
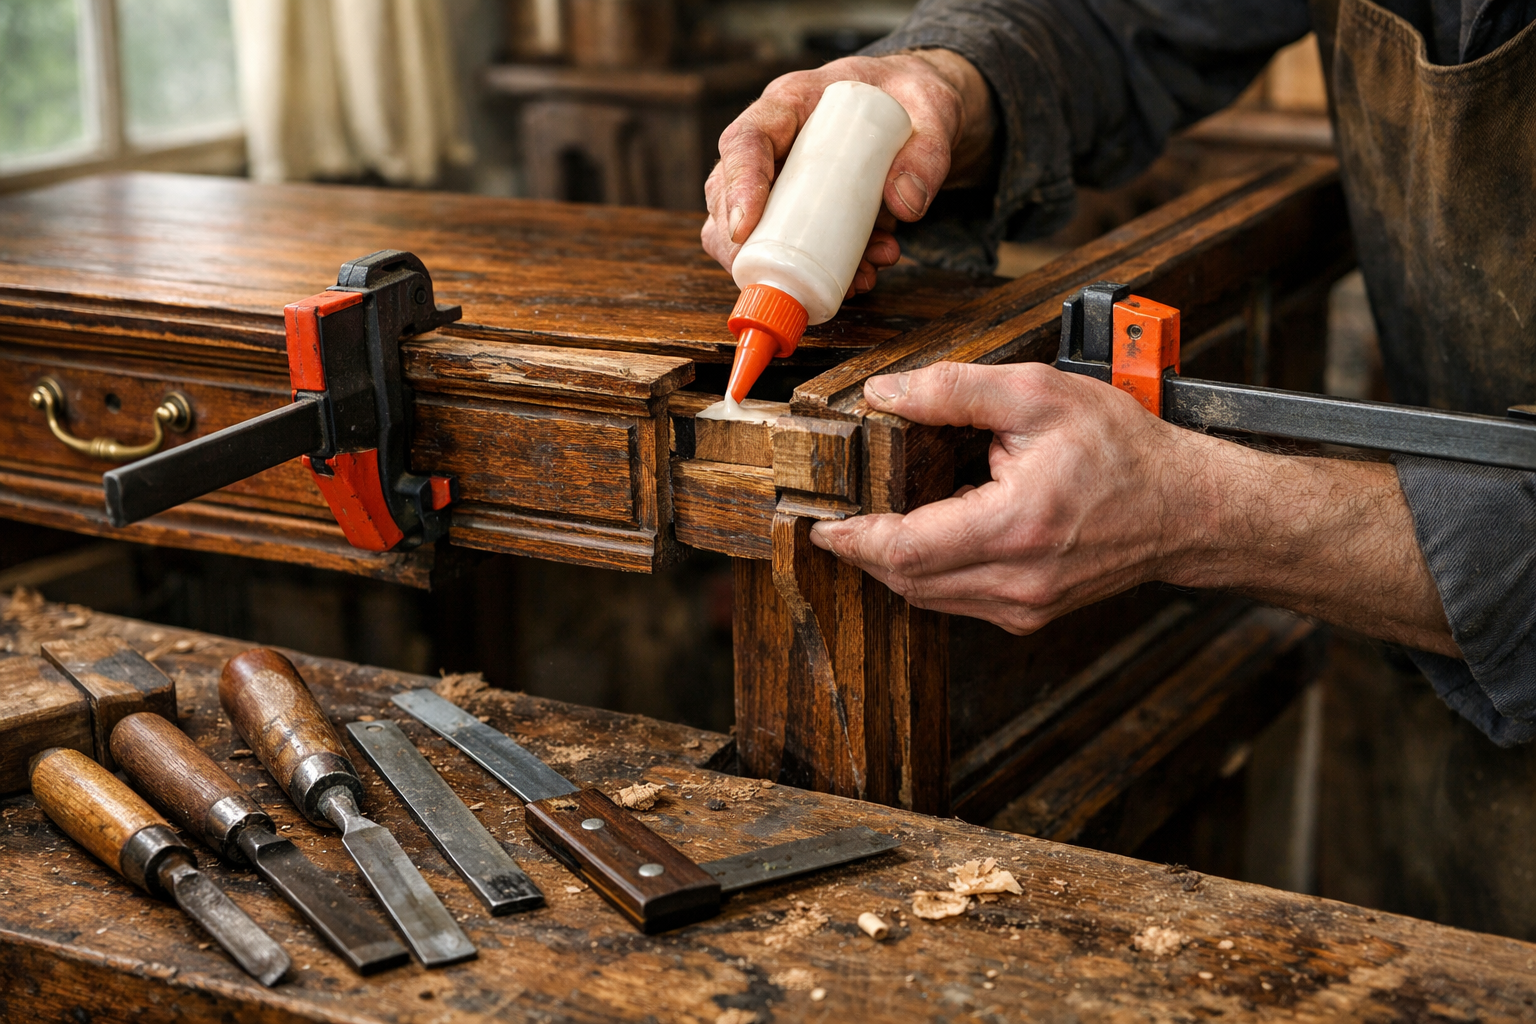
1. Re-gluing Loose Joints
This is one of the most common repairs.
- Disassembly: Carefully dismantle the loose joint. Mark each piece to ensure correct reassembly.
- Cleaning: Scrape away old, brittle glue from both surfaces. Alcohol or hot water can help soften old animal glue.
- Gluing: Apply a suitable wood glue (animal hide glue is often preferred for antiques as it’s reversible and traditional, or a high-quality PVA glue for modern strength) to both surfaces.
- Clamping: Reassemble the joint and clamp securely until the glue cures, ensuring squareness. Use cauls (protective wood blocks) to prevent clamp marks.
2. Repairing Cracks and Splits
Small cracks can often be stabilized, while larger splits may require more intervention.
- Cleaning: Remove any debris from the crack.
- Gluing: Inject thin wood glue into the crack using a syringe. Clamp the area until dry.
- Reinforcement (for larger cracks): For significant splits, consider adding splines or dowels internally for added strength, especially in load-bearing areas. Our article on Beginner’s Guide to Essential Woodworking Joints offers valuable context on joinery principles.
3. Veneer Repair
Veneer, a thin layer of decorative wood, is susceptible to damage.
- Reattaching Loose Veneer: For small bubbles or lifted sections, inject hide glue underneath and gently press down with a warm iron (with a protective cloth) to activate the glue and flatten the veneer.
- Patching Missing Veneer: Cut a new piece of veneer to precisely fit the missing section. Grain matching is crucial for a seamless repair. Glue it in place and sand lightly once dry.
- Tools for Precision: Specialized veneer saws and knives are essential for clean, accurate cuts.
4. Addressing Missing or Damaged Parts
- Replication: For missing carvings or turned components, skilled woodworkers can replicate these using period-appropriate tools and techniques. This might involve advanced wood carving techniques or lathe work.
- Hardware: Replace missing or broken hardware (hinges, pulls) with reproductions that match the original style and material.
Table 1: Common Antique Furniture Repair Materials
| Component | Preferred Adhesive | Notes |
|---|---|---|
| Joints | Hide Glue | Reversible, traditional, allows for future repairs. |
| Cracks | PVA Glue (thin) | Strong, good penetration. |
| Veneer | Hide Glue | Reactivated by heat, allows for repositioning. |
| Loose Inlay | Epoxy (slow-cure) | Strong bond, good for non-porous materials like metal or shell inlay. |
)
Sympathetic Refinishing: Enhancing Beauty While Preserving History
Refinishing is perhaps the most debated aspect of antique furniture restoration. While a fresh coat of modern polyurethane might seem appealing, it can drastically reduce an antique’s value and obliterate its historical character. The goal of sympathetic refinishing is to enhance the piece’s beauty and protection while retaining its original patina and respecting its age.
When to Refinish (and When Not To)
Not every antique needs a full refinish.
- Full Refinish: Consider a full refinish only if the original finish is severely damaged, flaking, or discolored to the point where it detracts significantly from the piece’s appearance and offers no protection.
- Conservation/Cleaning: For pieces with stable, original finishes, a thorough cleaning, touch-up, and re-waxing are often sufficient. This preserves the valuable “patina” – the mellowing and changes in the surface that occur naturally over time.
- Value Consideration: Consult with an antique appraiser if you’re unsure. Over-restoration can diminish value.
Traditional Refinishing Techniques
When refinishing is necessary, traditional methods are often preferred for their historical accuracy and aesthetic qualities. Our guide on antique wood finishing techniques offers a deeper dive into these methods.
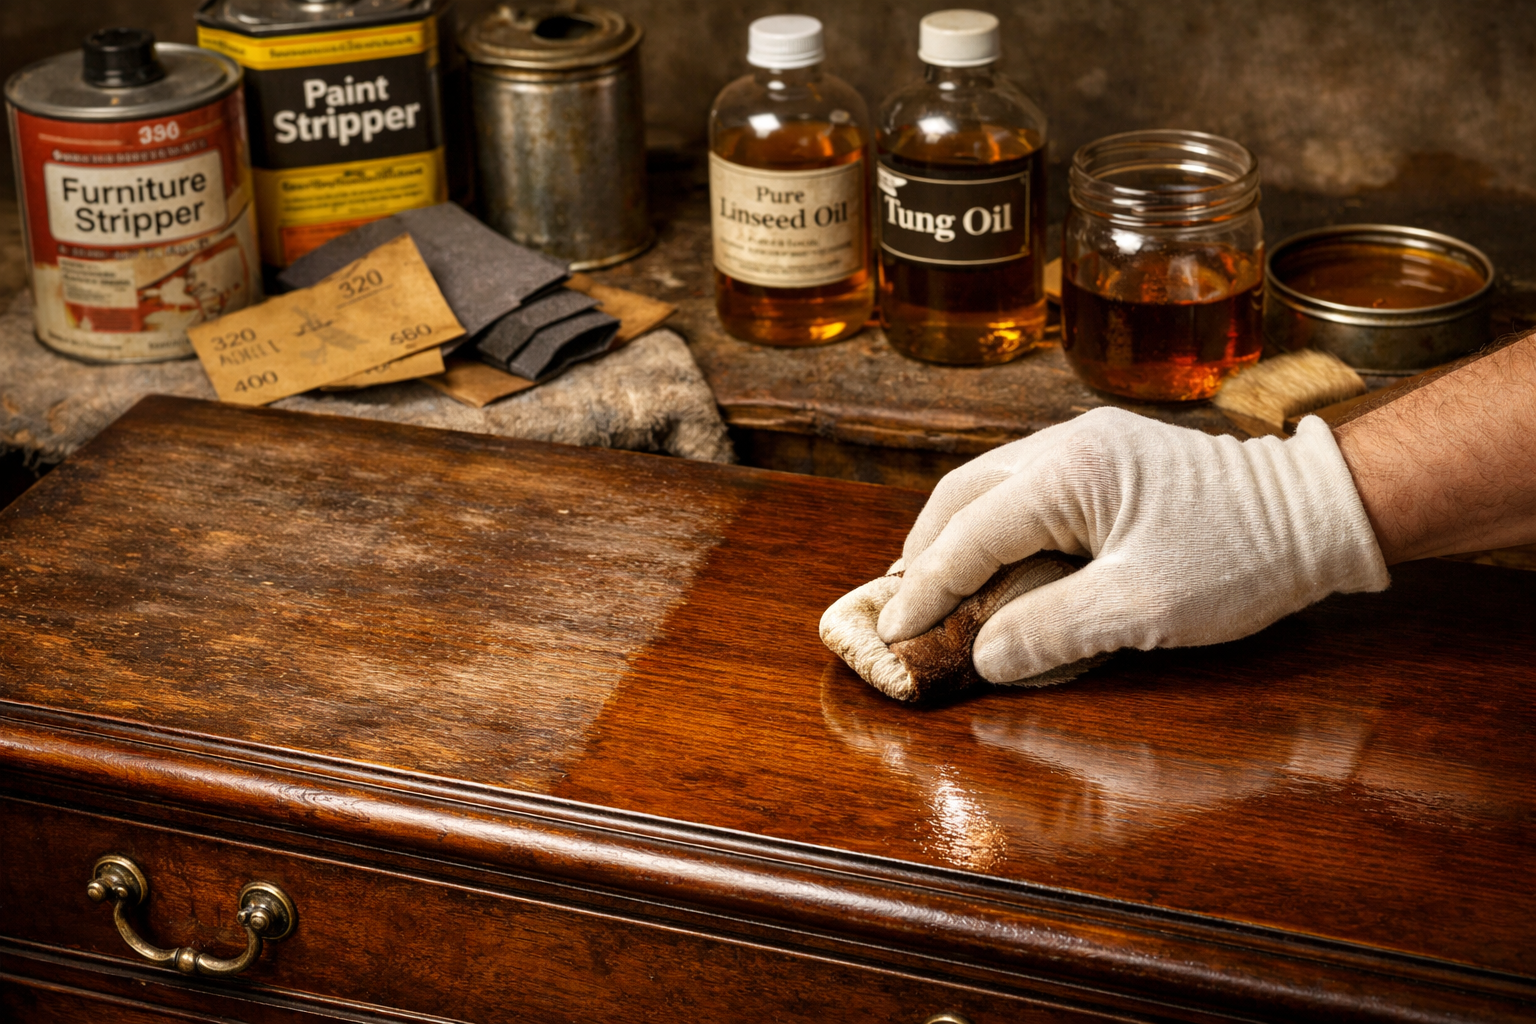
1. Stripping the Old Finish
- Chemical Strippers: Use mild, non-caustic chemical strippers that minimize damage to the wood. Always work in a well-ventilated area and wear protective gear.
- Mechanical Removal: For particularly stubborn finishes, gentle scraping with a cabinet scraper or fine sandpaper (starting with 150-grit, then progressing to 220-grit) can be used, but extreme care must be taken to avoid damaging the wood surface or altering its original shape.
- Neutralization: After stripping, neutralize the wood if a chemical stripper was used, often with mineral spirits or water, according to the product’s instructions.
2. Surface Preparation
- Sanding: Light sanding with fine-grit sandpaper (220-grit to 320-grit) helps smooth the surface. Avoid over-sanding, which can erase fine details, crisp edges, or carving details.
- Staining (Optional): If the original wood color needs adjustment or evening out, a period-appropriate stain can be applied. Test on an inconspicuous area first.
3. Applying New Finishes
- Shellac: A traditional finish, often dissolved in denatured alcohol. It’s easy to repair, offers good protection, and provides a beautiful, warm glow. French polishing is a specific technique for applying shellac that creates a high-gloss, deep finish.
- Oil Finishes: Linseed oil or tung oil penetrates the wood, enhancing its natural grain and providing a durable, matte to satin finish. Multiple thin coats are applied over days or weeks.
- Varnish: Traditional varnishes (e.g., spar varnish for durability) offer excellent protection. Modern polyurethane varnishes are durable but can appear less “authentic” on true antiques.
- Wax: Often used as a topcoat over oil or shellac, or directly on bare wood for a natural, low-sheen finish. Beeswax or carnauba wax are common choices.
Pull Quote: “The patina of an antique is its soul. A thoughtful restoration respects that soul, never stripping it away completely, but rather helping it shine anew.”
)
Preserving Heirloom Pieces: Long-Term Care and Maintenance
Once an antique piece has been repaired and refinished, the work isn’t over. Long-term preservation is paramount to ensure its stability and beauty for future generations. This involves understanding environmental factors and implementing a routine maintenance schedule.

Environmental Control: The Enemy of Wood
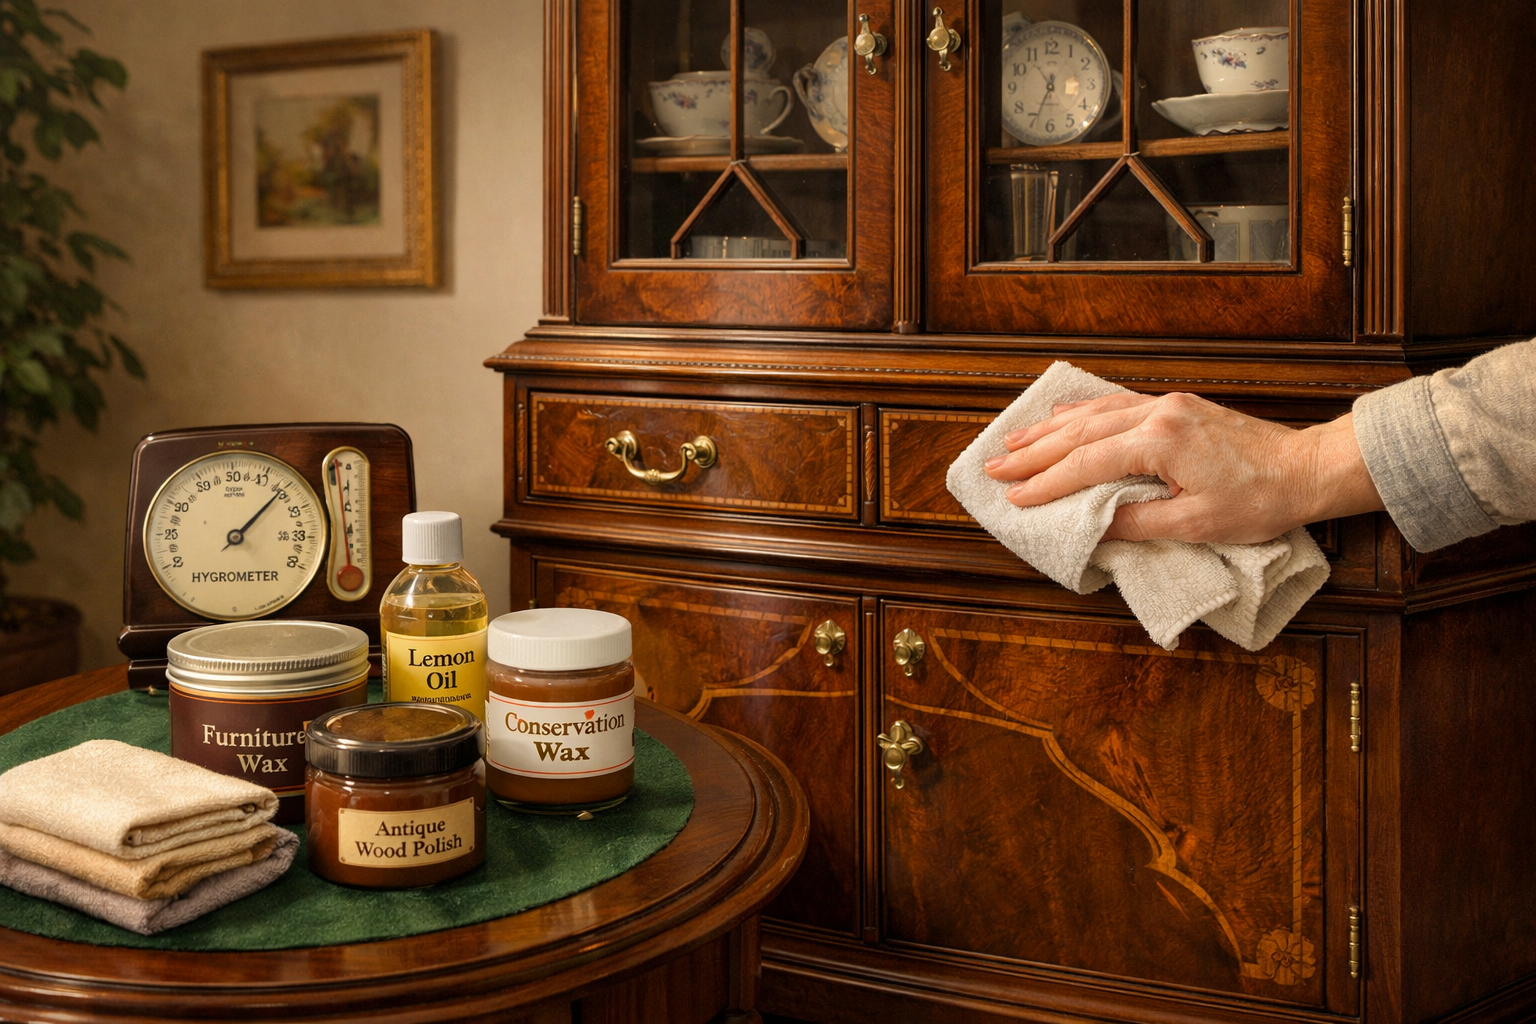
Wood is a hygroscopic material, meaning it absorbs and releases moisture from the air. Fluctuations in humidity and temperature are the primary causes of furniture damage.
- Humidity: Maintain a stable relative humidity between 40-55%. High humidity can lead to swelling, mold, and mildew, while low humidity can cause shrinkage, cracking, and joint failure.
- Temperature: Keep temperatures consistent, ideally between 68-72°F (20-22°C). Extreme temperature changes exacerbate humidity issues.
- Sunlight: Direct sunlight causes fading, drying, and can degrade finishes. Place antiques away from windows or use UV-filtering curtains.
- Heat Sources: Avoid placing furniture near radiators, fireplaces, or air vents, which can cause localized drying and damage.
Routine Maintenance for Longevity
A consistent maintenance schedule helps protect the finish and prevent future issues.
- Dusting: Regularly dust with a soft, clean, lint-free cloth. Avoid abrasive cloths or feather dusters that can scratch surfaces.
- Cleaning: For general cleaning, a slightly damp cloth followed immediately by a dry one is usually sufficient. Avoid harsh chemical cleaners, silicone-based polishes, or multi-surface sprays, as these can damage finishes over time.
- Waxing: Apply a high-quality paste wax (carnuba or beeswax blend) every 6-12 months, or as needed, to provide a protective barrier and enhance the finish. Apply sparingly with a soft cloth, let haze, then buff to a gentle sheen.
- Inspections: Periodically inspect joints, veneers, and hardware for any signs of loosening or wear. Early detection can prevent minor issues from becoming major problems.
- Careful Handling: When moving antique furniture, lift rather than drag. Always protect corners and delicate areas. Disassemble large pieces if necessary.
Storage Considerations
If an antique must be stored, these guidelines are critical:
- Climate-Controlled Environment: Never store antiques in attics, basements, or garages where humidity and temperature fluctuate wildly. A climate-controlled storage unit or a stable interior room is best.
- Protection: Cover pieces with breathable cotton sheets (never plastic, which traps moisture). Elevate furniture off the floor to protect against potential water damage.
- Pest Control: Ensure the storage area is free of pests like termites, woodworms, and rodents. Regular monitoring is essential. Our article on restoring vintage woodworking hand tools touches on combating rust, but pest control for wood is equally vital.
By implementing these techniques for Restoring Antique Furniture: Techniques for Repairing, Refinishing, and Preserving Heirloom Pieces, you not only extend the life of these beautiful objects but also honor the craftsmanship of their creators and the stories they carry. This dedication transforms a simple piece of furniture into a tangible link to the past, capable of enriching homes for countless years to come.
)
Conclusion
Restoring Antique Furniture: Techniques for Repairing, Refinishing, and Preserving Heirloom Pieces is a rewarding endeavor that requires patience, skill, and a deep respect for history. From meticulously repairing structural damage and revitalizing worn veneers to applying sympathetic finishes and establishing rigorous preservation protocols, each step contributes to the enduring legacy of an heirloom piece.
By understanding the unique needs of antique wood and finishes, one can prevent further deterioration, enhance its aesthetic appeal, and ensure its survival for future generations. This isn’t merely about fixing old furniture; it’s about safeguarding cultural heritage, one cherished piece at a time. Embrace the challenge, learn the techniques, and discover the profound satisfaction of breathing new life into the silent storytellers of our past.
Actionable Next Steps:
- Assess Your Piece: Carefully examine your antique furniture to determine the extent and type of damage.
- Research Its History: Identify the wood type, construction methods, and likely original finish to guide your restoration choices.
- Gather Supplies: Acquire the right glues, strippers, sandpaper, and finishing materials appropriate for your antique.
- Practice Techniques: If new to restoration, practice on scrap wood or less valuable pieces before tackling your heirloom.
- Maintain and Monitor: Once restored, establish a routine for cleaning, waxing, and environmental control to ensure its long-term preservation.
