
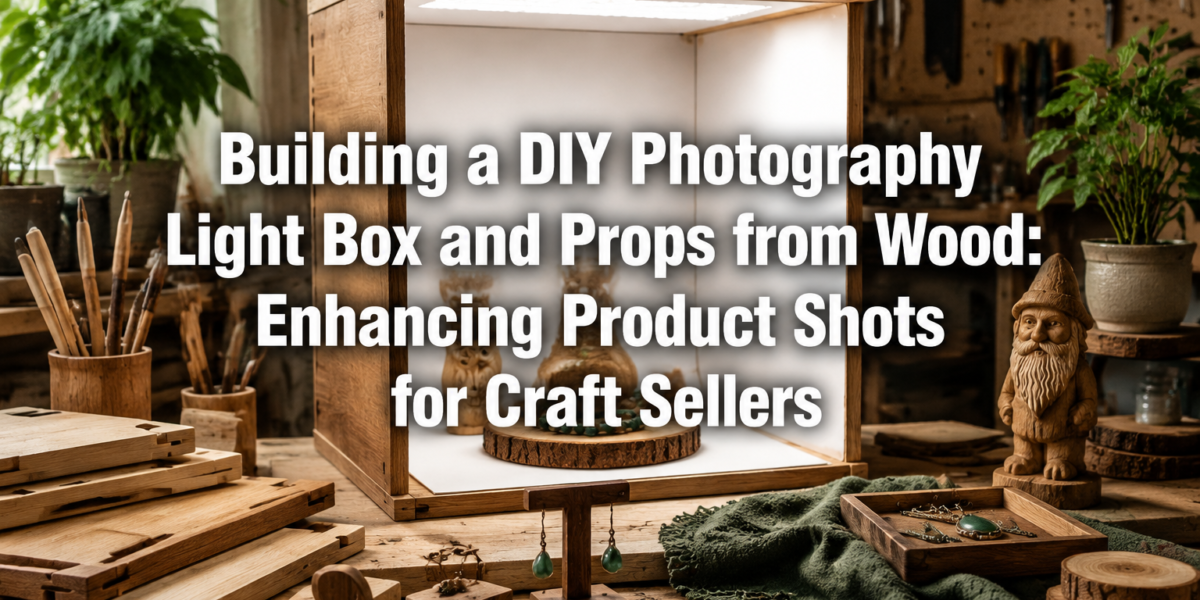

The difference between a casual browse and a confident purchase often hinges on a single factor: the product photograph. Research indicates that 90% of online shoppers consider photo quality to be the most influential factor in an online buying decision (MDG Advertising, 2017). For craft sellers and small businesses, the challenge of capturing professional-grade product images without a significant investment in studio equipment can seem daunting. However, Building a DIY Photography Light Box and Props from Wood: Enhancing Product Shots for Craft Sellers offers an accessible, cost-effective, and highly customizable solution. This guide empowers woodworkers to construct essential tools that transform their product photography, ensuring their handmade creations shine online.
Key Takeaways
- A DIY wooden light box provides consistent, soft lighting crucial for professional product photography.
- Custom wooden props add authentic character and elevate the aesthetic of craft items.
- Woodworking skills translate directly into creating bespoke photography tools tailored to specific products.
- Strategic use of light and wooden elements can significantly boost product appeal and sales for online craft sellers.
- This project is a sustainable and cost-effective alternative to commercial photography equipment.
The Foundation: Why a DIY Wooden Light Box is Essential for Craft Sellers
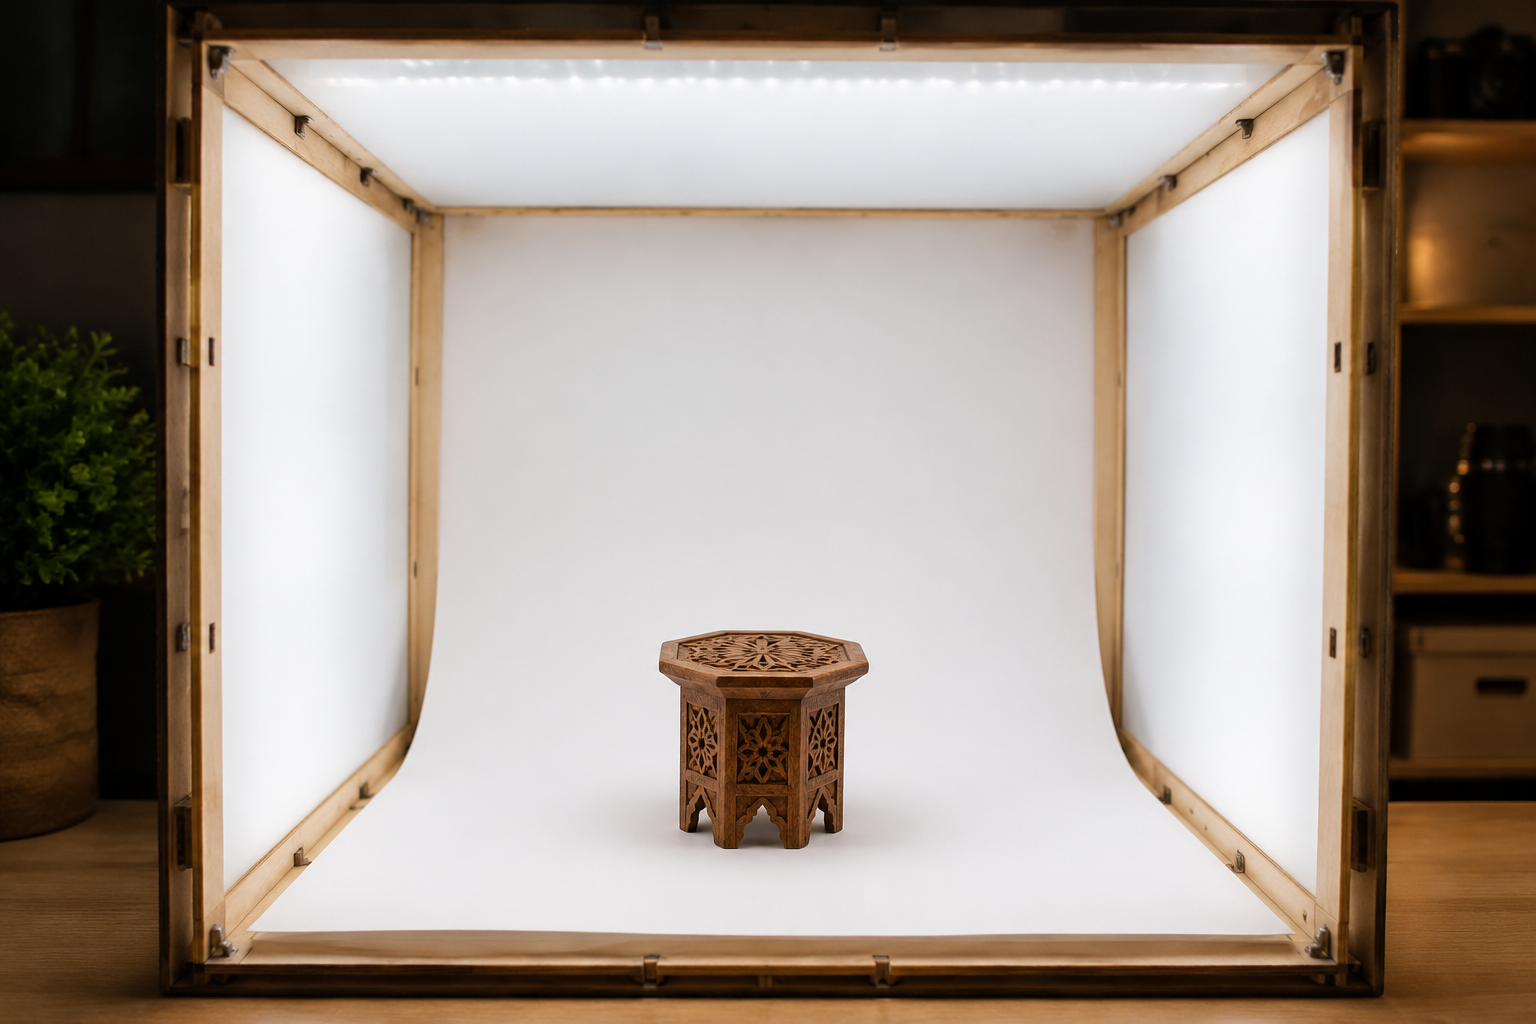
For anyone selling physical products online, whether it’s handmade jewelry, artisanal soaps, or unique wooden crafts, high-quality images are non-negotiable. Poor lighting, harsh shadows, or distracting backgrounds can undermine the perceived value of even the most exquisite item. A photography light box, often called a light tent or photo studio box, addresses these issues by providing a controlled environment with soft, diffused, and even lighting.

While many commercial light boxes are available, Building a DIY Photography Light Box and Props from Wood: Enhancing Product Shots for Craft Sellers using wood offers several distinct advantages. Wood provides a sturdy, durable structure that can be customized in size and features, far surpassing the flimsy nature of many collapsible fabric alternatives. Moreover, working with wood allows for the integration of unique design elements and greater stability for heavier products.
Understanding the Principles of Product Photography Lighting
Effective product photography hinges on understanding light. The goal is to illuminate the product evenly, minimize harsh shadows, and reveal texture and detail.
- Diffused Light: This softens harsh light sources, eliminating sharp shadows and hot spots. A light box achieves this by bouncing light off its interior walls and passing it through translucent material.
- Even Illumination: Consistent lighting across the entire product ensures all features are visible and colors are accurately represented.
- Neutral Background: A plain, often white or gray, background ensures the product remains the focal point without distractions.
- Controlled Environment: A light box shields the product from ambient light variations, providing repeatable results.
By constructing a wooden light box, craft sellers gain complete control over these elements, significantly improving the quality and consistency of their product imagery. This control leads to more professional listings and increased buyer confidence.
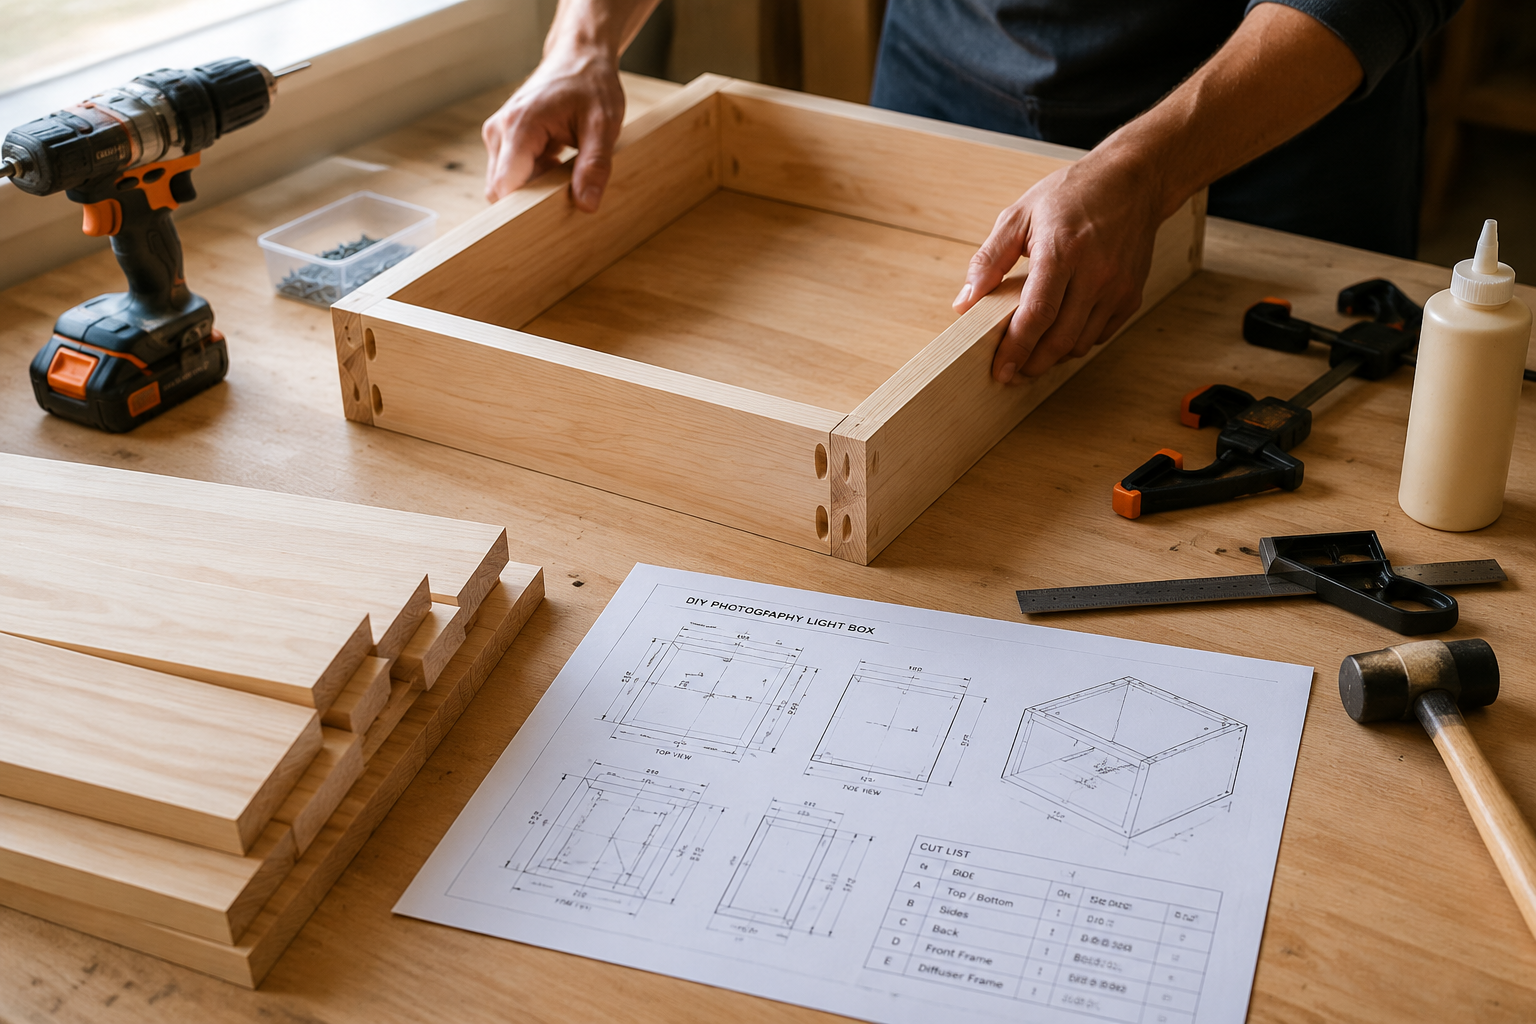
Materials and Tools for Building Your Wooden Light Box
The beauty of a DIY project is the ability to choose materials that suit your budget and aesthetic preferences. For the light box, common woodworking materials and tools are sufficient.
Recommended Materials:
- Plywood or MDF: 1/4″ or 1/2″ thick sheets are ideal for the main structure. MDF offers a smoother finish, while plywood is often lighter.
- Wood Glue: Strong adhesive for joining panels.
- Screws or Brad Nails: For reinforcing joints.
- White Paint or Contact Paper: To line the interior for maximum light reflection. Matte finish is preferred to avoid glare.
- Translucent White Fabric or Diffusion Material: For the top and side light panels (e.g., white ripstop nylon, tracing paper, white sheer curtain fabric).
- Light Sources: LED strip lights, daylight-balanced fluorescent bulbs, or small LED panels.
- Seamless Background Paper or Fabric: White, black, or neutral gray are excellent starting points.
- Optional: Small hinges, latches, or magnets for easy assembly/disassembly.
Essential Woodworking Tools:
- Circular Saw or Table Saw: For accurate cuts of large panels.
- Miter Saw (Optional): For precise angle cuts if desired.
- Drill: For pilot holes and driving screws.
- Clamps: To hold pieces while glue dries.
- Measuring Tape, Ruler, Pencil: For accurate layout.
- Sandpaper or Orbital Sander: For smoothing edges.
- Safety Gear: Eye protection, ear protection, dust mask.
When selecting wood, consider sustainability options like sourcing reclaimed and salvaged wood to add character to your build while being environmentally conscious.
Step-by-Step Construction Guide for a Basic Wooden Light Box
For Building a DIY Photography Light Box and Props from Wood: Enhancing Product Shots for Craft Sellers, a simple five-sided box (bottom, back, two sides, and a top) with an open front is a great starting point.
Design and Cut Panels:
- Determine the desired size based on the products you sell. A common size is 24″x24″x24″ for small to medium crafts.
- Cut five panels: one bottom, one back, two sides, and one top.
- For the top and side panels, cut large openings (e.g., 18″x18″ for a 24″ box) to be covered with diffusion material. Leave a frame of a few inches around the edges for structural integrity.
Assemble the Frame:
- Using wood glue and screws/brad nails, attach the side panels to the bottom panel. Ensure they are square.
- Attach the back panel to the assembly.
- Finally, attach the top panel.
Reinforce and Finish:
- Add corner blocks or additional bracing if necessary for stability, especially for larger boxes.
- Sand all exterior and interior edges to remove splinters and create a smooth finish.
- Paint the interior of the box with matte white paint or apply white contact paper for maximum light reflection. This is crucial for even illumination.
Install Diffusion Panels:
- Cut your translucent white fabric or diffusion material to size, slightly larger than the openings you cut in the top and side panels.
- Secure the diffusion material over the openings using wood glue, staples, or small tacks. Ensure it’s taut and free of wrinkles.
Add Lighting:
- Mount LED strip lights or small fixtures along the interior edges of the top and side panels, aiming inwards. Consider having separate switches or dimmers for each light source for greater control.
- Ensure the lights are positioned so they are hidden from the camera’s view but illuminate the interior evenly.
With your light box built, you’ve established a professional studio environment. For more advanced woodworking projects, consider exploring beginner’s guide to CNC routers for small woodshops to create even more intricate designs for your light box or props.
Crafting Bespoke Wooden Props to Elevate Your Product Photography
A light box provides excellent lighting, but the right props tell a story. For craft sellers, especially those working with natural materials, custom wooden props can add authenticity, context, and a touch of professional styling. These props integrate seamlessly with the “Building a DIY Photography Light Box and Props from Wood: Enhancing Product Shots for Craft Sellers” philosophy, allowing you to showcase your products in a cohesive, aesthetically pleasing manner.
The Power of Props in Product Storytelling
Props are more than just decorative elements; they are storytelling tools. They can:
- Provide Scale: A small wooden ruler or a miniature stool next to a product helps customers visualize its actual size.
- Add Context: A piece of rustic wood beneath a handmade candle suggests natural ingredients and craftsmanship.
- Enhance Brand Aesthetic: If your brand leans into minimalist Scandinavian design, clean, geometric wooden blocks can reinforce that image.
- Create Visual Interest: Varying heights, textures, and shapes within the frame can make a static product photo more dynamic.
- Evoke Emotion: A small, distressed wooden sign with a comforting word can add warmth to a photograph.
By thoughtfully selecting or crafting props, you connect with your audience on a deeper level, making your products more desirable.
Designing and Building Simple Wooden Props
The key to effective props is simplicity and relevance. Avoid props that compete with your product. Instead, aim for elements that complement and highlight it.

Ideas for Wooden Props:
- Geometric Blocks/Cubes: Cut from various wood types (pine, oak, walnut) in different sizes. These are versatile for creating elevation, leading lines, or framing.
- Miniature Pedestals/Risers: Small, elevated platforms to give products height and importance.
- Textured Boards: Sanded, planed, or even lightly distressed wood panels can serve as natural, tactile backdrops or surfaces.
- Natural Elements: Thin slices of branches (wood cookies), polished pebbles, or small, dried flowers can introduce organic textures.
- Tiny Ladders or Shelves: For displaying multiple small items or creating layers.
- Wooden Trays or Bowls: To hold collections of products or add a touch of rustic charm. You can even adapt techniques from wooden fruit bowls: lathe-turned and segmented builds for kitchen statement pieces for smaller, more delicate prop bowls.
Construction Tips:
- Wood Selection: Use scrap wood from other projects or small pieces purchased specifically for props. Different wood species offer varying grains and colors.
- Finishing: Keep finishes natural or use clear sealants to allow the wood’s inherent beauty to shine. Avoid glossy finishes that can cause reflections. Lightly sanding and oiling can enhance the wood’s texture.
- Simplicity: Often, a simple block of wood with a clean cut is more effective than an overly ornate prop.
- Variety: Create a collection of props in different sizes, shapes, and wood types to offer versatility during your photo shoots.
- Safety: Ensure all props are stable and won’t tip over, especially when supporting delicate products.
Consider techniques from power tool mastery for decorative wood projects to add refined details or smooth finishes to your wooden props, ensuring they look professional.
Integrating Wooden Props with Your Light Box Setup
Once your light box is ready and your wooden props are crafted, the next step is integrating them into your product photography workflow.
- Background First: Start with a seamless background (white, black, or a specific colored paper/fabric) that extends from the back, curves gently to the bottom, and avoids a harsh crease.
- Product Placement: Place your main product within the light box.
- Prop Positioning: Experiment with different prop arrangements.
- Rule of Thirds: Position props to guide the viewer’s eye towards the product.
- Varying Heights: Use risers or blocks to elevate elements and add depth.
- Texture Contrast: Pair smooth products with textured wood, or vice versa, to create visual interest.
- Negative Space: Don’t overcrowd the frame. Allow for breathing room around the product and props.
- Camera Angle: Adjust your camera angle to capture the best view of the product and its accompanying props. Shoot from directly above, eye-level, or a slight angle to find what works best.
- Review and Refine: Take test shots. Check for unwanted shadows, reflections, or props distracting from the product. Adjust lighting, prop placement, and camera settings as needed.
Remember, the goal is to make the product the hero, with the props serving as supporting characters that enhance its appeal and narrative.
Maximizing Your DIY Studio: Tips for Professional Product Shots
Building a DIY Photography Light Box and Props from Wood: Enhancing Product Shots for Craft Sellers is just the beginning. To truly unlock the potential of your custom studio, understanding basic photography techniques and workflow is crucial. Even with a smartphone camera, these tips can dramatically improve your results.
Camera Settings for Optimal Product Photography
While a professional DSLR or mirrorless camera offers the most control, modern smartphones are incredibly capable. Here’s what to focus on:
- Lighting is Key: Your light box already provides excellent, diffused light. Use natural daylight if possible, by positioning the light box near a window, or rely on your installed LED lights. Avoid mixing different color temperatures of light (e.g., warm incandescent with cool LED).
- White Balance: Ensure your camera’s white balance is set correctly (e.g., “Daylight” or “Auto”) so colors appear accurate. Inconsistent white balance can make products look off-color.
- Focus: Always tap to focus on your product, ensuring it’s sharp and clear. For smartphone users, avoid using digital zoom, which degrades image quality. Instead, move the phone closer.
- Exposure: Adjust exposure to ensure the product is well-lit without being overexposed (blown-out whites) or underexposed (dark shadows). Most smartphone camera apps allow you to tap on the subject to set exposure.
- Composition:
- Rule of Thirds: Mentally divide your image into a 3×3 grid. Place your product along the lines or at their intersections for a balanced shot.
- Symmetry & Asymmetry: Play with symmetrical arrangements for formal products or asymmetrical for more dynamic shots.
- Negative Space: Embrace empty space around your product to make it stand out.
- Depth of Field (Bokeh): If your camera or phone allows, a shallow depth of field can blur the background and foreground props, making your product pop. This feature is often labeled “Portrait Mode” on smartphones.
Post-Processing: The Final Touch
Even the best photographs benefit from a touch of post-processing. Free and paid tools are available, including Adobe Lightroom (desktop/mobile), Snapseed (mobile), GIMP (desktop), or even your phone’s built-in editing features.
Key Editing Steps:
- Crop and Straighten: Crop out any distracting elements and straighten horizons.
- Exposure and Contrast: Make minor adjustments to brightness and contrast to ensure the image is vibrant and clear.
- White Balance Correction: Fine-tune the white balance if colors still look off.
- Color Saturation: Enhance colors slightly without making them look unnatural.
- Sharpening: Add a touch of sharpening to make details crisp. Be careful not to over-sharpen, which can introduce noise.
- Spot Removal: Remove any dust, lint, or minor imperfections from your product or background.
Consistency in your editing style helps create a cohesive brand image across all your product listings.
Maintaining Your DIY Photography Studio
A well-maintained studio ensures consistent results and longevity for your investment.
- Keep it Clean: Dust is the enemy of product photography. Regularly wipe down the interior of your light box and your wooden props. Keep a lint roller handy for products.
- Store Props Safely: Organize your wooden props in a way that prevents damage or warping. Consider smart workshop storage solutions to keep your photography tools and props tidy.
- Check Lighting: Ensure all light sources are working correctly and that diffusion material is free from tears or stains.
- Experiment: Don’t be afraid to try new angles, prop combinations, or lighting variations. The more you experiment, the better you’ll understand what works for your products.
By continuously refining your techniques and maintaining your DIY studio, you’ll produce professional product photographs that attract attention and drive sales for your craft business.

Conclusion
Mastering product photography is an indispensable skill for any craft seller navigating the competitive online marketplace. Building a DIY Photography Light Box and Props from Wood: Enhancing Product Shots for Craft Sellers offers a robust, cost-effective, and highly customizable pathway to achieving professional-grade visuals. By constructing your own wooden light box, you gain unparalleled control over lighting, a critical element for showcasing your handcrafted items with clarity and appeal. Coupled with bespoke wooden props, tailored to your brand’s aesthetic, you can tell a compelling story, add context, and elevate the perceived value of your products.
This project not only leverages your woodworking skills but also provides a sustainable solution that outlasts many commercial alternatives. The effort invested in this DIY studio will yield significant returns in improved product presentation, increased customer engagement, and ultimately, higher sales. Take the actionable step of planning your light box dimensions today, gather your materials, and begin the build. Your craft deserves to be seen in its best light.
