
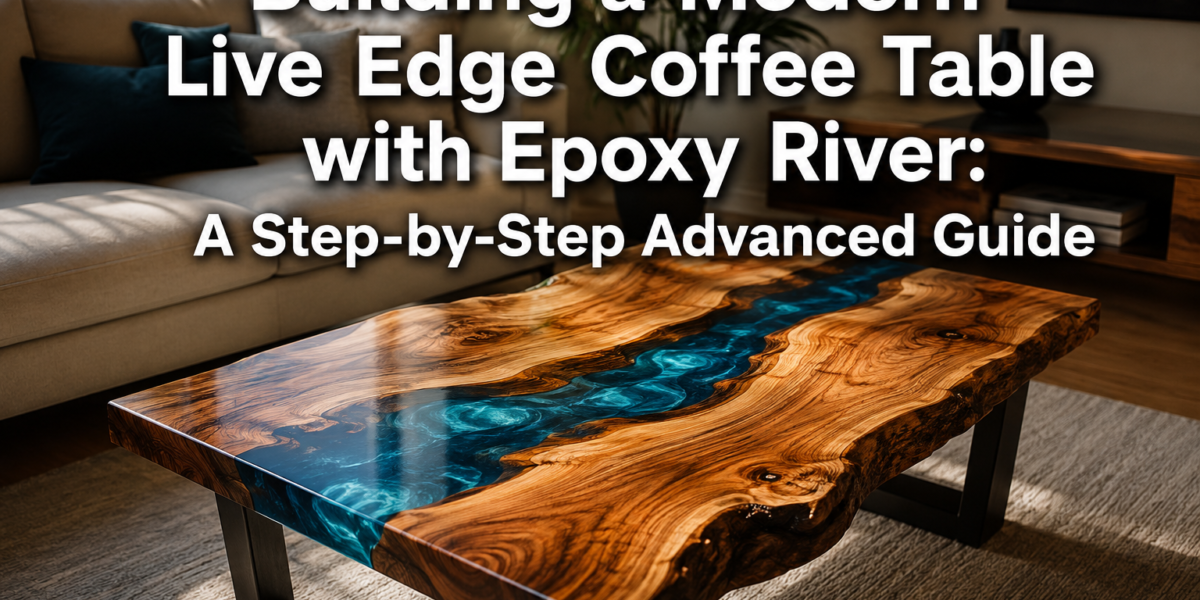

The average homeowner spends nearly $3,000 on furniture annually, yet few possess a truly unique, handcrafted centerpiece that reflects their personal aesthetic and skill. This guide offers a masterclass in Building a Modern Live Edge Coffee Table with Epoxy River: A Step-by-Step Advanced Guide, transforming raw natural beauty into a functional work of art that can become the focal point of any contemporary living space or command a premium price in the burgeoning market for bespoke furniture in 2026. This project moves beyond basic woodworking, delving into advanced techniques for slab preparation, precise epoxy application, and professional finishing, ensuring a durable and visually stunning result.
Key Takeaways
- Selecting and preparing the live edge slab is crucial for the success and longevity of your epoxy river coffee table.
- Building a robust containment dam is essential for preventing epoxy leaks and ensuring a clean river pour.
- Mastering epoxy mixing and pouring techniques, including bubble removal and layering, is key to achieving a flawless, clear resin river.
- Thorough sanding and professional finishing enhance both the aesthetic appeal and durability of the finished table.
- This advanced project requires patience, precision, and adherence to safety protocols for optimal results.
Selecting and Preparing Your Live Edge Slab for the Epoxy River
The foundation of any exceptional live edge epoxy river table is the wood itself. Choosing the right slab and preparing it meticulously sets the stage for a successful project when Building a Modern Live Edge Coffee Table with Epoxy River: A Step-by-Step Advanced Guide.

Choosing the Ideal Live Edge Slab
When selecting your live edge slab, consider both species and character. Hardwoods like Black Walnut, Maple, Oak, and Cherry are popular choices due to their beautiful grain patterns, durability, and often contrasting sapwood/heartwood lines. Walnut, in particular, offers a rich dark hue that beautifully complements a vibrant epoxy river.
Look for a slab that:
- Is fully dried: Moisture content should ideally be between 6-8%. Using wet wood will lead to movement, cracking, and potential delamination from the epoxy over time. A moisture meter is an indispensable tool here.
- Has interesting live edges: The natural edge is a key feature. Seek out slabs with unique curves, burls, or natural voids that will define the river’s path. Avoid overly decayed or punky sections unless you plan extensive stabilization.
- Is sufficiently thick: For a coffee table, a slab thickness of 1.75 to 2.5 inches is generally ideal, providing stability and a substantial feel.
- Has minimal major defects: While some cracks and voids can be filled with epoxy, extensive rot, large insect infestations, or severe warpage can complicate the process.
For an in-depth understanding of sourcing and assessing quality, refer to our guide on Live Edge Slab Selection and Preparation: From Raw Material to Finished Showpiece.
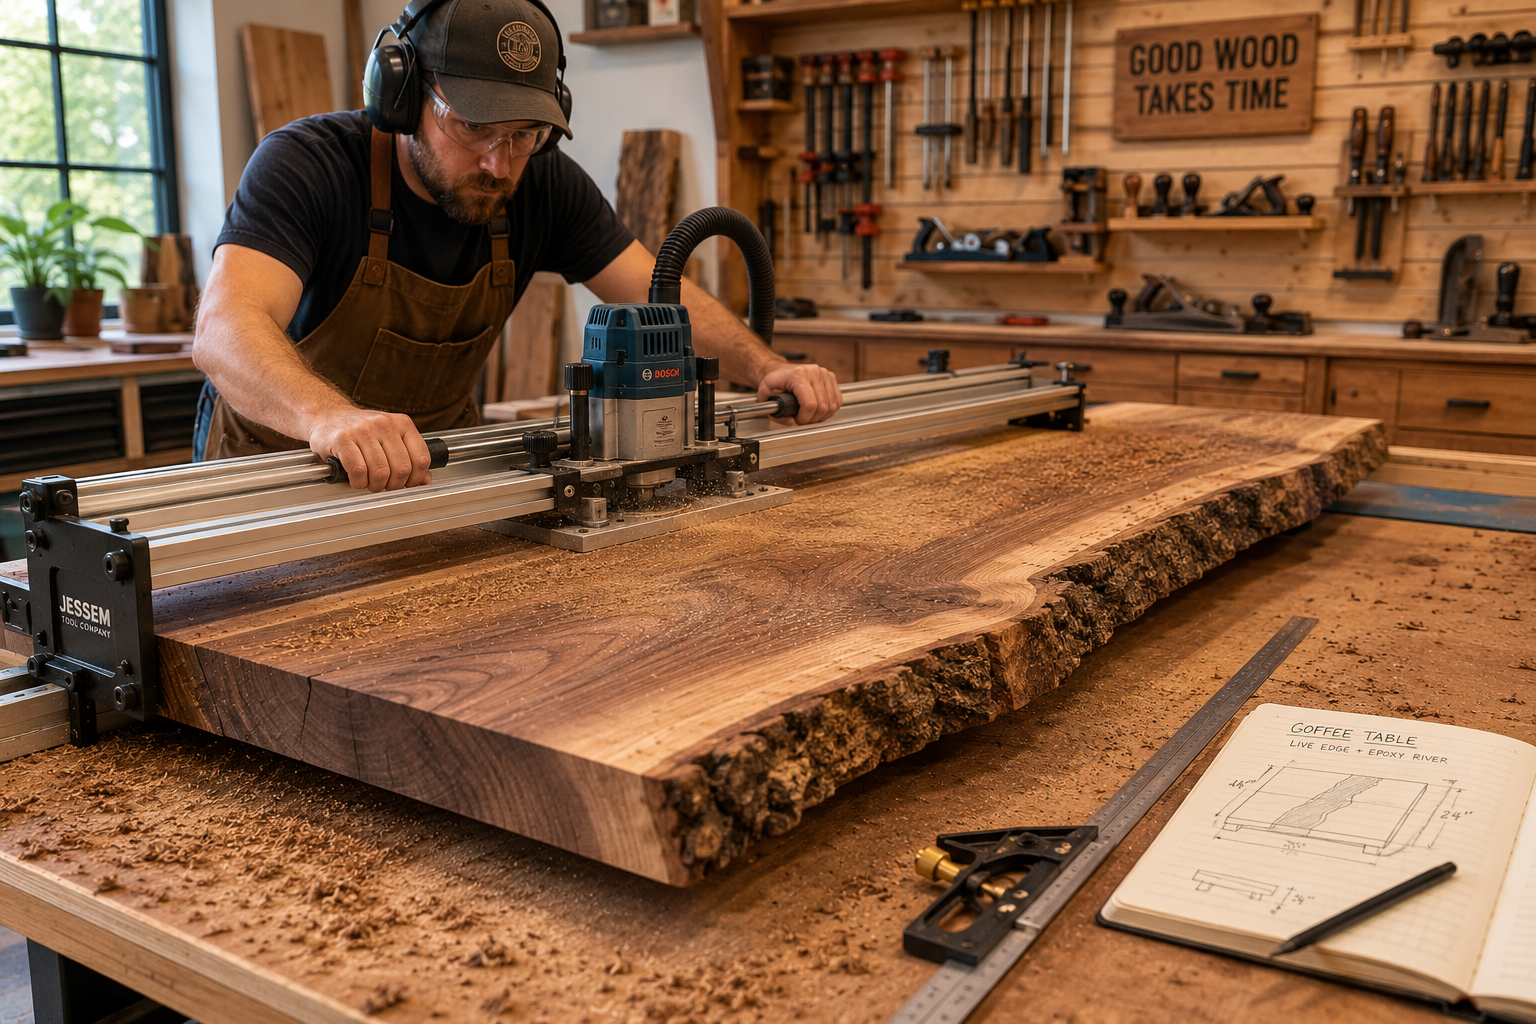
Flattening and Squaring the Slab
Once you have your slab, the next critical step is flattening. Raw slabs are rarely perfectly flat and can have significant cups, bows, or twists. This must be addressed to ensure a stable, level surface for your coffee table and a consistent thickness for the epoxy river.
Methods for Flattening:
- Router Sled (Recommended): This is the most common and effective method for achieving precise flatness. A router sled involves mounting your router to a carriage that slides along parallel rails, systematically planing down the slab.
- Process:
- Securely fasten your slab to a workbench, shimming as necessary to prevent rocking.
- Build or set up a sturdy router sled system with parallel rails that span the length and width of your slab. Ensure the rails are perfectly co-planar.
- Use a large-diameter, flat-bottom router bit (e.g., a spoilboard surfacing bit).
- Make shallow passes, moving the router systematically across the entire surface.
- Flip the slab and repeat the process on the second face.
- Process:
- Wide Belt Sander/Drum Sander: If you have access to professional-grade machinery, these can quickly flatten large slabs.
- Hand Planes/Jointers (Advanced): For experienced woodworkers, a combination of hand planes and a jointer can achieve flatness, though it requires significant skill and effort for large slabs.
After flattening, square one long edge (the “river” edge) if necessary to ensure a straight channel for your epoxy. For the outer edges, decide whether to keep the natural live edge or to trim it straight, depending on your design.
Preparing the River Channel and Sealing
The “river” channel needs careful preparation to ensure a strong bond with the epoxy and to prevent leaks.
- Define the River: Carefully examine your flattened slab. If it’s a single slab, you’ll likely cut a channel down the middle. If it’s two separate live edge pieces, arrange them to create your desired river width and shape.
- Clean and Stabilize: Use a wire brush to remove any loose bark, dirt, or debris from the live edges. For softer, punky spots or small voids within the wood that won’t be part of the main river, you may need to stabilize them with a thin, penetrating epoxy or wood hardener. This prevents these areas from absorbing too much river epoxy and improves adhesion.
- Sand the Edges: Lightly sand the live edges that will contact the epoxy with 80-120 grit sandpaper. This creates a good mechanical bond for the resin.
- Seal the Wood (Optional but Recommended): For porous wood species, or if you want to prevent air bubbles from outgassing into your epoxy river, apply a thin coat of clear epoxy or a compatible sanding sealer to all surfaces that will be in contact with the river epoxy. Let it fully cure.
The Epoxy River Pour: Achieving Clarity and Depth
The epoxy pour is where your vision comes to life. Precision, patience, and attention to detail are paramount when Building a Modern Live Edge Coffee Table with Epoxy River: A Step-by-Step Advanced Guide.
Building the Containment Form
A perfectly sealed containment form is absolutely critical. Any leak will result in lost epoxy and a significant mess.
- Material: Use a non-porous material like melamine or HDPE for your form base and sides. These materials won’t bond with epoxy, making demolding easy.
- Construction:
- Cut your base and side pieces to size, allowing at least 2 inches of overhang around your slab.
- Position your prepared slab(s) on the melamine base.
- Secure the side pieces tightly around the slab, using screws from the outside into the melamine. Ensure the sides are perfectly perpendicular and tall enough to contain your desired epoxy depth.
- Seal All Seams: This is the most important step. Apply a generous bead of silicone caulk along all interior seams where the wood meets the form and where the form sides meet the base. Smooth it out for a watertight seal. Allow the silicone to cure fully according to the manufacturer’s instructions (typically 24 hours).
- Mold Release: Apply a mold release agent (e.g., paste wax, specific mold release spray) to all surfaces of the form that will contact the epoxy, including the top edges of the wood if you’re pouring flush.
Mixing and Pouring Epoxy
Choosing the right epoxy is crucial. Deep pour epoxies are designed for thicker pours (typically over 1/2 inch) without overheating, which can cause cracking or yellowing. Standard casting epoxies are suitable for thinner layers.
Epoxy Best Practices:
- Read Manufacturer Instructions: Different epoxies have varying mix ratios (by volume or weight), pot life, and cure times. Follow these precisely.
- Calculate Volume: Measure the length, average width, and depth of your river channel to accurately calculate the required epoxy volume. Add 10-20% extra to account for absorption and minor spillage.
- Accurate Mixing: Use separate, clean containers for Part A (resin) and Part B (hardener). Measure accurately, then combine them into a larger, clean mixing bucket.
- Thorough Mixing: Stir slowly but thoroughly for 5-7 minutes, scraping the sides and bottom of the bucket frequently. Incomplete mixing will result in uncured, sticky spots. Avoid whipping air into the mixture.
- Coloring: If adding color, do so after thorough mixing. Use liquid pigments designed for epoxy resin. Add small amounts gradually until the desired opacity and hue are achieved.
- Pouring:
- Pour slowly and steadily into the river channel. Avoid dumping large amounts at once.
- Work in layers if recommended by your epoxy manufacturer, especially for very deep pours. This helps manage exothermic reactions.
- Allow the epoxy to settle for 5-10 minutes.
- Bubble Removal: Use a heat gun or propane torch (held at a safe distance and in constant motion) to bring surface bubbles to the top, then pop them. Repeat this process for the first 30-60 minutes after pouring, and periodically over the next few hours, as bubbles may continue to rise. Avoid over-torching one spot, which can scorch the epoxy or wood.
- Curing: Cover your project to protect it from dust and allow it to cure in a temperature-controlled environment as per manufacturer guidelines. This can take several days to reach full hardness.
Finishing and Polishing Your Live Edge Epoxy Table
The final stages of sanding, shaping, and finishing are what elevate your project from a good build to a truly professional showpiece. This attention to detail defines a successfully completed Building a Modern Live Edge Coffee Table with Epoxy River: A Step-by-Step Advanced Guide.
Demolding and Initial Shaping
Once the epoxy is fully cured (usually 72 hours to 7 days, depending on the product and conditions), you can demold your table.

- Remove Form: Carefully remove the screws from the melamine form and separate the sides. The epoxy should release cleanly.
- Trim Excess: You’ll likely have some epoxy overflow or “flash” on the underside or edges. Use a trim router with a flush trim bit to clean up these edges. For larger overhangs, a hand saw or bandsaw may be necessary first.
- Leg Attachment Considerations: Plan your leg attachment method. This often involves creating custom wooden legs, steel bases, or hairpin legs. If using wood, consider joinery methods like mortise and tenon or robust lag screws into custom blocking. Our article on Building Statement Furniture Pieces: Designing and Constructing Coffee Tables, Benches, and Console Tables That Sell for $500 in 2026 offers further design insights.
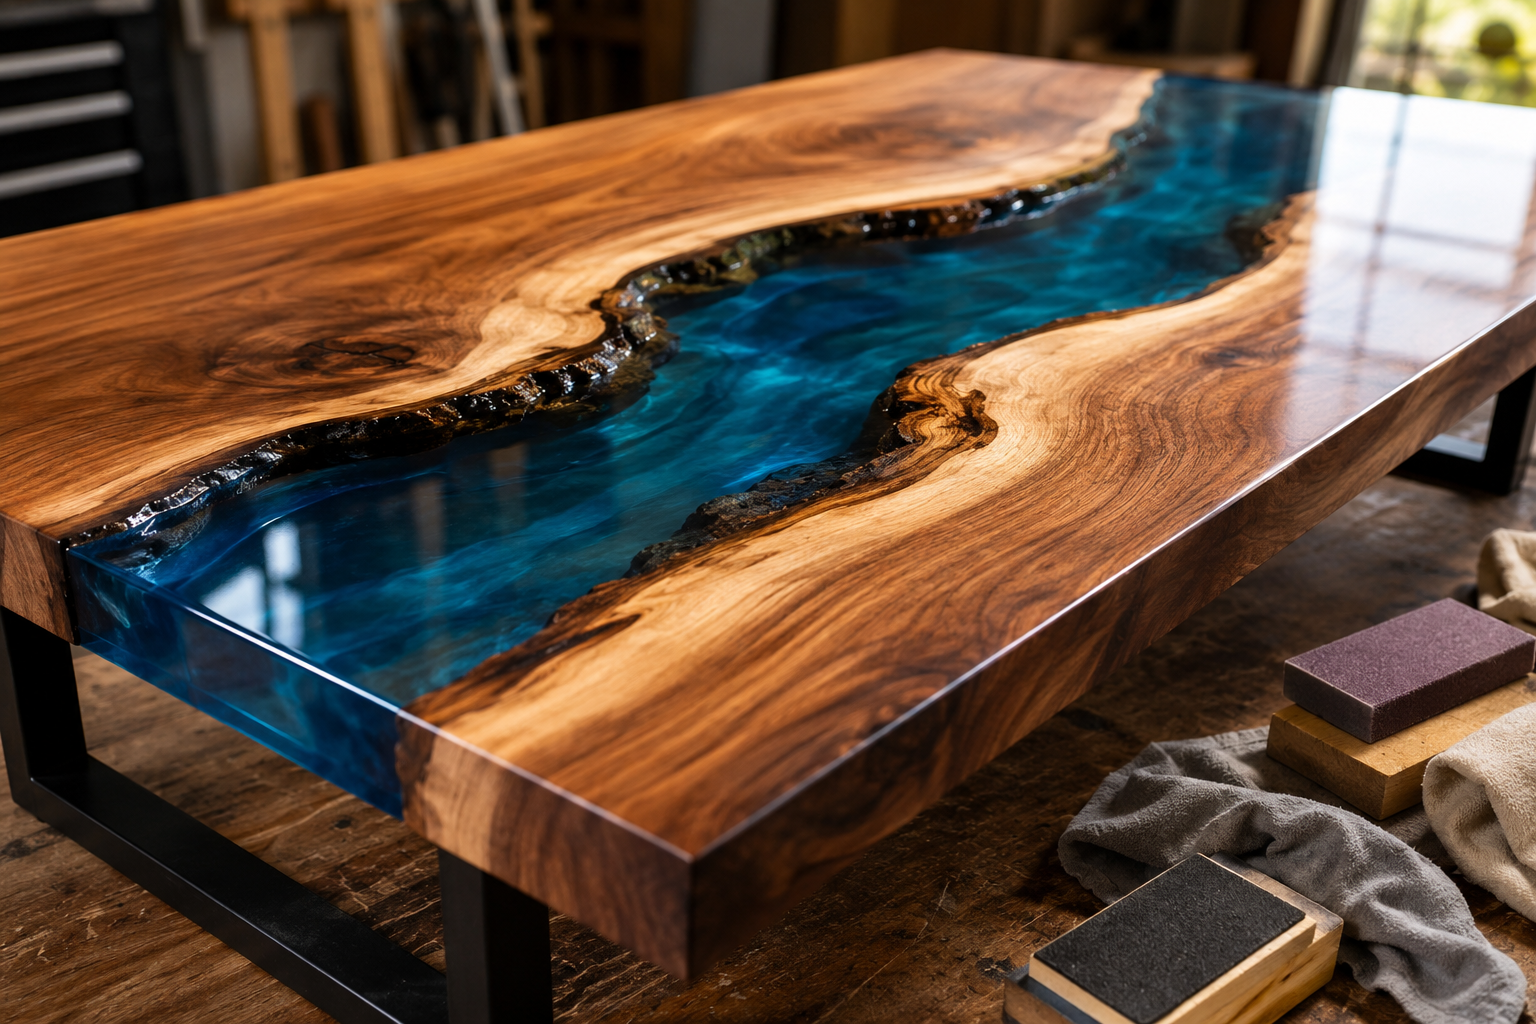
Extensive Sanding and Finishing Schedule
Achieving a perfectly smooth, glossy finish requires a meticulous sanding progression. This is where patience truly pays off.
- Coarse Sanding (Leveling): Begin with a random orbit sander using 80-grit sandpaper to aggressively level the entire surface, ensuring the wood and epoxy are perfectly flush. This is crucial for removing any slight epoxy ridges or high spots from the pour.
- Progressive Sanding: Systematically work through finer grits: 120, 180, 220, 320, 400. For an ultra-high gloss epoxy finish, you may need to go up to 600, 800, 1000, or even 1500-2000 grit.
- Dust Removal: After each grit, thoroughly clean the surface with a vacuum and a tack cloth to remove all sanding dust before moving to the next grit. Remaining coarse dust can create scratches with the finer grits.
- Wet Sanding (Optional for Epoxy): For the highest gloss on epoxy, wet sanding with very fine grits (1000+) can yield exceptional results, but it’s an advanced technique requiring careful execution.
- Edge Treatment: Gently break the sharp edges of the wood (a slight chamfer or roundover) to prevent chipping and improve comfort. The live edges should be sanded smooth to the touch, highlighting their natural contours.
Applying the Final Finish
The choice of finish depends on the desired aesthetic and durability.
- Oil-Based Finishes (e.g., Rubio Monocoat, Osmo Polyx-Oil, Tung Oil): These penetrate the wood, enhancing its natural color and grain while leaving a natural, low-sheen finish. They are generally easy to repair but offer less protection against scratches than film-building finishes. They do not significantly affect the epoxy’s appearance.
- Film-Building Finishes (e.g., Polyurethane, Lacquer, Conversion Varnish): These create a durable protective layer on top of the wood. They can offer high scratch and water resistance. Apply multiple thin coats, sanding lightly between coats (e.g., with 320-400 grit) for optimal adhesion and smoothness.
- Epoxy Topcoat (for ultra-gloss): For a truly seamless, high-gloss finish across both wood and epoxy, a flood coat of clear bar-top epoxy can be applied over the entire sanded table surface. This requires meticulous preparation to avoid dust and bubbles.
Allow the chosen finish to cure completely according to the manufacturer’s recommendations before placing it into service. For related insights on furniture construction, consider reading our guide on Console Tables That Wow: Build Sleek Entryway and TV Stand Alternatives, which discusses various finishing approaches.
Conclusion
Building a Modern Live Edge Coffee Table with Epoxy River: A Step-by-Step Advanced Guide is a rewarding endeavor that combines traditional woodworking with contemporary resin artistry. From the careful selection and preparation of your raw live edge slab to the precise pouring of the epoxy river and the meticulous final finishing, each step demands attention and skill. The resulting piece is not merely furniture, but a unique statement, a testament to craftsmanship that will captivate admirers and serve as a cherished focal point in any home for years to come. This project, while challenging, offers an unparalleled opportunity to hone advanced woodworking techniques and create something truly exceptional.
Actionable Next Steps:
- Assess Your Skill Set: Before embarking on this project, ensure you have a solid foundation in woodworking and a willingness to learn advanced techniques. Consider starting with smaller epoxy projects if you are new to resin.
- Gather Your Materials: Acquire a high-quality, dried live edge slab, appropriate deep pour epoxy, and all necessary safety gear, form materials, and finishing supplies.
- Set Up Your Workspace: Ensure you have a clean, well-ventilated, and temperature-controlled environment for pouring and curing epoxy, free from dust.
- Practice Techniques: If unsure, practice mixing and pouring small batches of epoxy to get a feel for its working properties before committing to your main project.
- Commit to Patience: This project cannot be rushed. Allow adequate time for each step, especially curing, to ensure a high-quality, durable outcome.
Meta Title: Build Modern Live Edge Epoxy River Coffee Table | Advanced Guide 2026 Meta Description: Master building a modern live edge coffee table with an epoxy river. Our 2026 guide covers slab prep, resin pouring, and expert finishing.
