
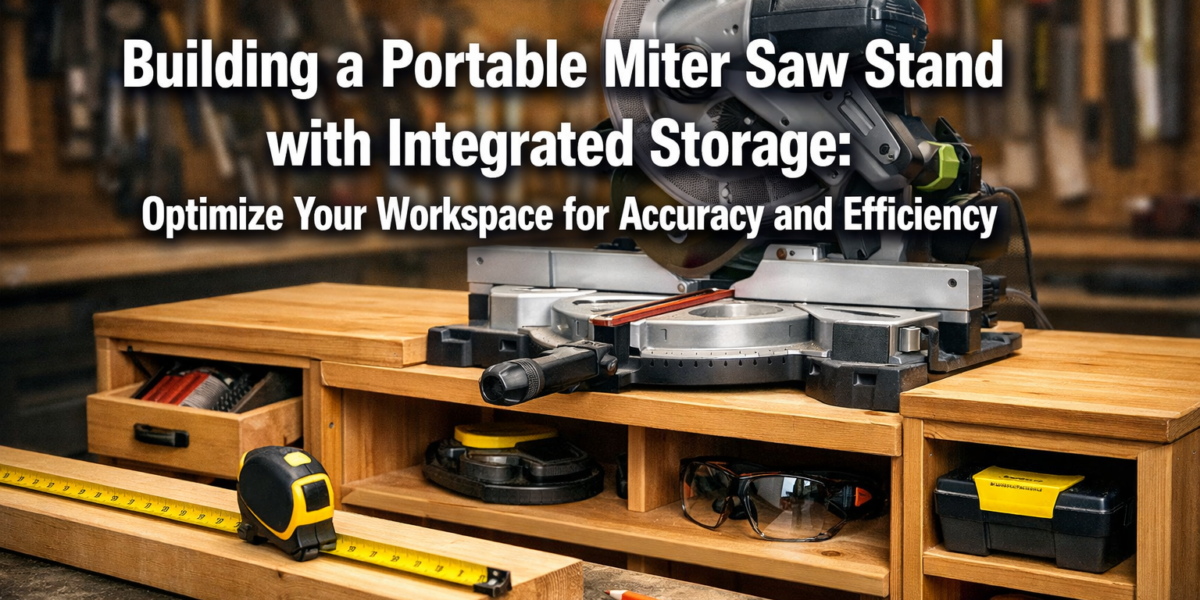

The average hobbyist or professional woodworker spends nearly 15% of their workshop time searching for tools or wrestling with awkward setups. This inefficiency directly impacts project timelines and the quality of work. For anyone serious about enhancing precision and maximizing productivity in their workspace, Building a Portable Miter Saw Stand with Integrated Storage: Optimize Your Workspace for Accuracy and Efficiency is not just a project; it’s a strategic investment. Such a stand transforms a cluttered, static workstation into a dynamic, organized powerhouse, ensuring that your miter saw is always ready for accurate cuts, and its accessories are precisely where you need them.
Key Takeaways
- Enhanced Accuracy: A stable, level miter saw stand with integrated outfeed support significantly reduces measurement errors and cutting inconsistencies.
- Optimal Organization: Integrated drawers and shelves keep blades, clamps, and measuring tools within arm’s reach, minimizing time wasted searching.
- Superior Portability: Heavy-duty locking casters allow easy repositioning of the stand, adapting your workspace to the project at hand.
- Customization Potential: Design flexibility enables tailoring the stand’s dimensions and storage solutions to your specific tools and workshop layout.
- Increased Efficiency: A well-designed stand streamlines workflow, making cutting tasks faster, safer, and more enjoyable in any workshop size.
Why a Portable Miter Saw Stand with Integrated Storage is Essential for Your Workspace
A miter saw is a cornerstone tool for many woodworking projects, providing the accuracy needed for crosscuts, miters, and bevels. However, merely placing it on a workbench often compromises its potential. Without proper support, long workpieces sag, leading to inaccurate cuts and potential safety hazards. Furthermore, the accompanying accessories—blades, wrenches, dust bags, stop blocks, and measuring tools—tend to scatter, creating clutter and costing valuable time. This is where Building a Portable Miter Saw Stand with Integrated Storage: Optimize Your Workspace for Accuracy and Efficiency becomes indispensable.

A custom-built stand offers several critical advantages over off-the-shelf solutions or makeshift setups:
- Custom Fit and Stability: Factory stands may not perfectly match your saw’s dimensions or your personal working height. A DIY stand allows for precise customization, ensuring your saw is at an ergonomic level and securely mounted. This stability is paramount for precision cutting.
- Integrated Dust Management: Woodworking generates a lot of dust. A well-designed stand can incorporate dedicated ports for dust collection, connecting directly to your miter saw’s dust chute or a larger shop vacuum system. This significantly improves air quality and reduces cleanup time. For more on this, consider exploring Building a DIY Smart Workshop Dust Collection System: Integrating IoT.
- Optimized Workflow: With all essential items stored directly on the stand, you eliminate unnecessary movement and searching. This creates a fluid workflow, allowing you to focus on the task at hand rather than logistical challenges. Imagine having your combination square, tape measure, and spare blades all within a hand’s reach, neatly tucked away in dedicated drawers.
- Adaptability for Small and Evolving Spaces: Many woodworkers operate in garages, basements, or shared spaces. The ability to easily move your miter saw stand, tuck it into a corner when not in use, or roll it out for full functionality is a game-changer. Heavy-duty locking casters are key to this versatility, allowing you to reconfigure your workspace on the fly. This flexibility is akin to the advantages found in Smart Workshop Storage Solutions: Maximizing Small Spaces with.
- Increased Safety: A stable platform minimizes saw movement during operation. Integrated outfeed supports prevent long stock from tipping, reducing kickback risks. Dedicated storage for blades and accessories means less fumbling around sharp objects. Safety should always be a priority in the workshop.
| Feature | Benefit | Impact on Workspace |
|---|---|---|
| Heavy-Duty Casters | Easy repositioning and storage | Maximizes floor space, adapts to project needs |
| Extendable Outfeed | Supports long workpieces securely | Improves cutting accuracy, enhances safety |
| Integrated Drawers | Organized storage for blades, jigs, and small tools | Reduces clutter, speeds up tool retrieval |
| Adjustable Stop Blocks | Ensures repeatable cuts | Increases efficiency for batch work |
| Dust Collection Port | Keeps workspace clean and air clear | Healthier environment, less cleanup |
| Custom Height | Ergonomic working position | Reduces fatigue, improves comfort and precision |
This custom approach empowers you to create a stand that isn’t just a place for your saw, but an integral part of an optimized, efficient, and safe woodworking environment.
Design Considerations and Planning Your Portable Miter Saw Stand
Before you start cutting wood, thoughtful design and meticulous planning are crucial for Building a Portable Miter Saw Stand with Integrated Storage: Optimize Your Workspace for Accuracy and Efficiency. A well-planned stand will serve you for years, enhancing your workflow and accuracy.
1. Miter Saw Compatibility and Dimensions
The first step is to accurately measure your miter saw. Pay attention to:
- Base Dimensions: Length and width of the saw’s base, especially where it mounts.
- Saw Height: From the bottom of the base to the top of the cutting surface. This is critical for ensuring your outfeed supports are perfectly level with your saw’s bed.
- Clearance: Account for dust chutes, fences, and any moving parts that might require extra space.
- Mounting Holes: Note the pattern and size of the holes for securing the saw to the stand.
Consider the saw’s plunge depth and potential fence adjustments. Your design should allow full range of motion without obstruction.
2. Stand Structure and Material Selection
Plywood is an excellent choice for miter saw stands due to its stability, strength, and ease of working. ¾-inch (19mm) baltic birch or cabinet-grade plywood is recommended for the main frame, top, and drawers. For internal dividers or less load-bearing components, ½-inch (12mm) plywood can be used.
Key structural elements to plan:
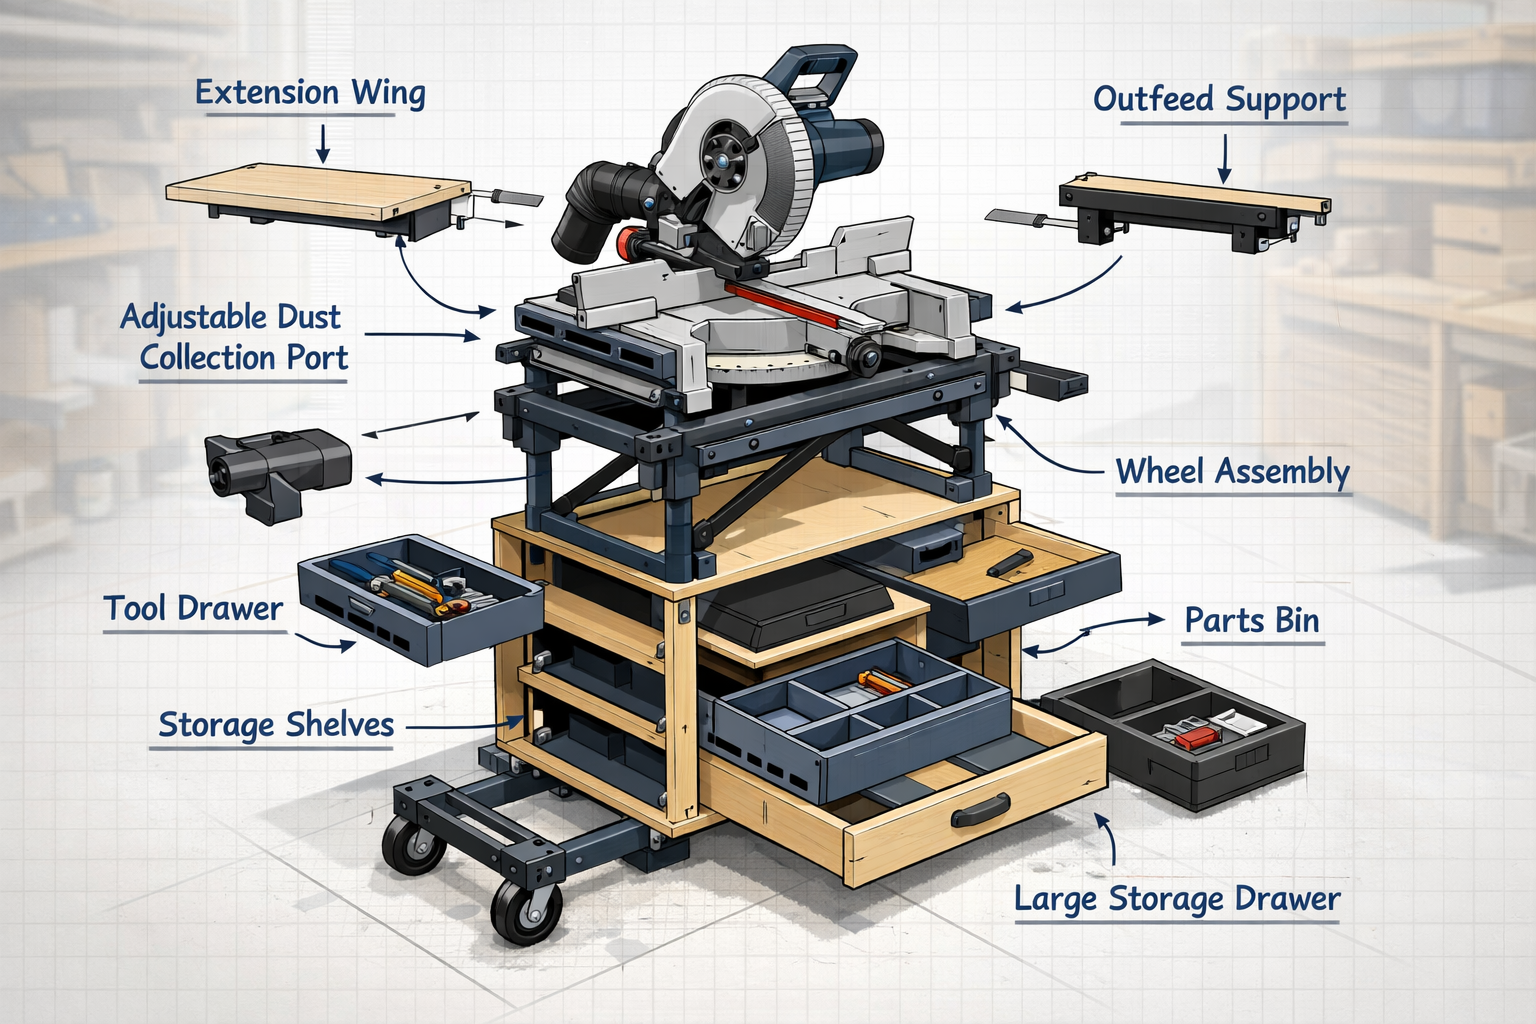
- Main Cabinet/Base: This forms the core of your stand and houses the saw. It should be robust enough to handle the saw’s weight and vibrations.
- Extension Wings/Outfeed Supports: These are essential for supporting long material. They should be level with the saw bed and ideally adjustable or collapsible for storage. Consider incorporating a T-track system for adjustable stop blocks and clamps.
- Integrated Storage: This is where customization truly shines.
- Drawers: Perfect for smaller items like blades, wrenches, pencils, and measurement tools. DIY Modular Desk Organizers: Custom Solutions for a Clutter-Free Woodworking Workspace can offer inspiration for drawer layouts.
- Shelves: Ideal for larger items like safety glasses, hearing protection, or even a smaller shop vacuum.
- Cubby Holes: Can be designed for specific jigs or frequently used items.
- Casters: Choose heavy-duty locking casters (at least 4-inch diameter) that can support the total weight of your saw, stand, and anticipated materials. Two fixed and two swiveling/locking casters provide good maneuverability and stability.
- Joinery: Robust joinery is crucial. Pocket hole screws, dadoes, rabbets, and glue are excellent choices for ensuring a strong and durable structure. For beginners, pocket holes are often the easiest and most effective. For more advanced joinery, refer to Mastering Dovetail Joints with Hand Tools: A Step-by-Step Guide for.
3. Ergonomics and Workflow Optimization
Think about how you work.
- Working Height: What height is most comfortable for you to operate the miter saw without stooping or reaching excessively? The top of the stand, with the saw mounted, should ideally be around your hip height.
- Accessibility: Ensure drawers and shelves are easy to open and reach. Consider pull-out trays for frequently used items.
- Dust Collection: Integrate a dust port and plan for hose routing to a shop vacuum or dust collector. This is vital for maintaining a clean and safe workspace.
A sketch or digital design (using CAD software) will help visualize the stand, verify dimensions, and identify potential issues before you make any cuts. Factor in the dimensions of your largest common workpieces to ensure adequate support.
Step-by-Step Construction Guide for Your Portable Miter Saw Stand
Now that you’ve meticulously planned your design, it’s time to bring your vision to life. This section will guide you through Building a Portable Miter Saw Stand with Integrated Storage: Optimize Your Workspace for Accuracy and Efficiency.
Phase 1: Building the Main Cabinet
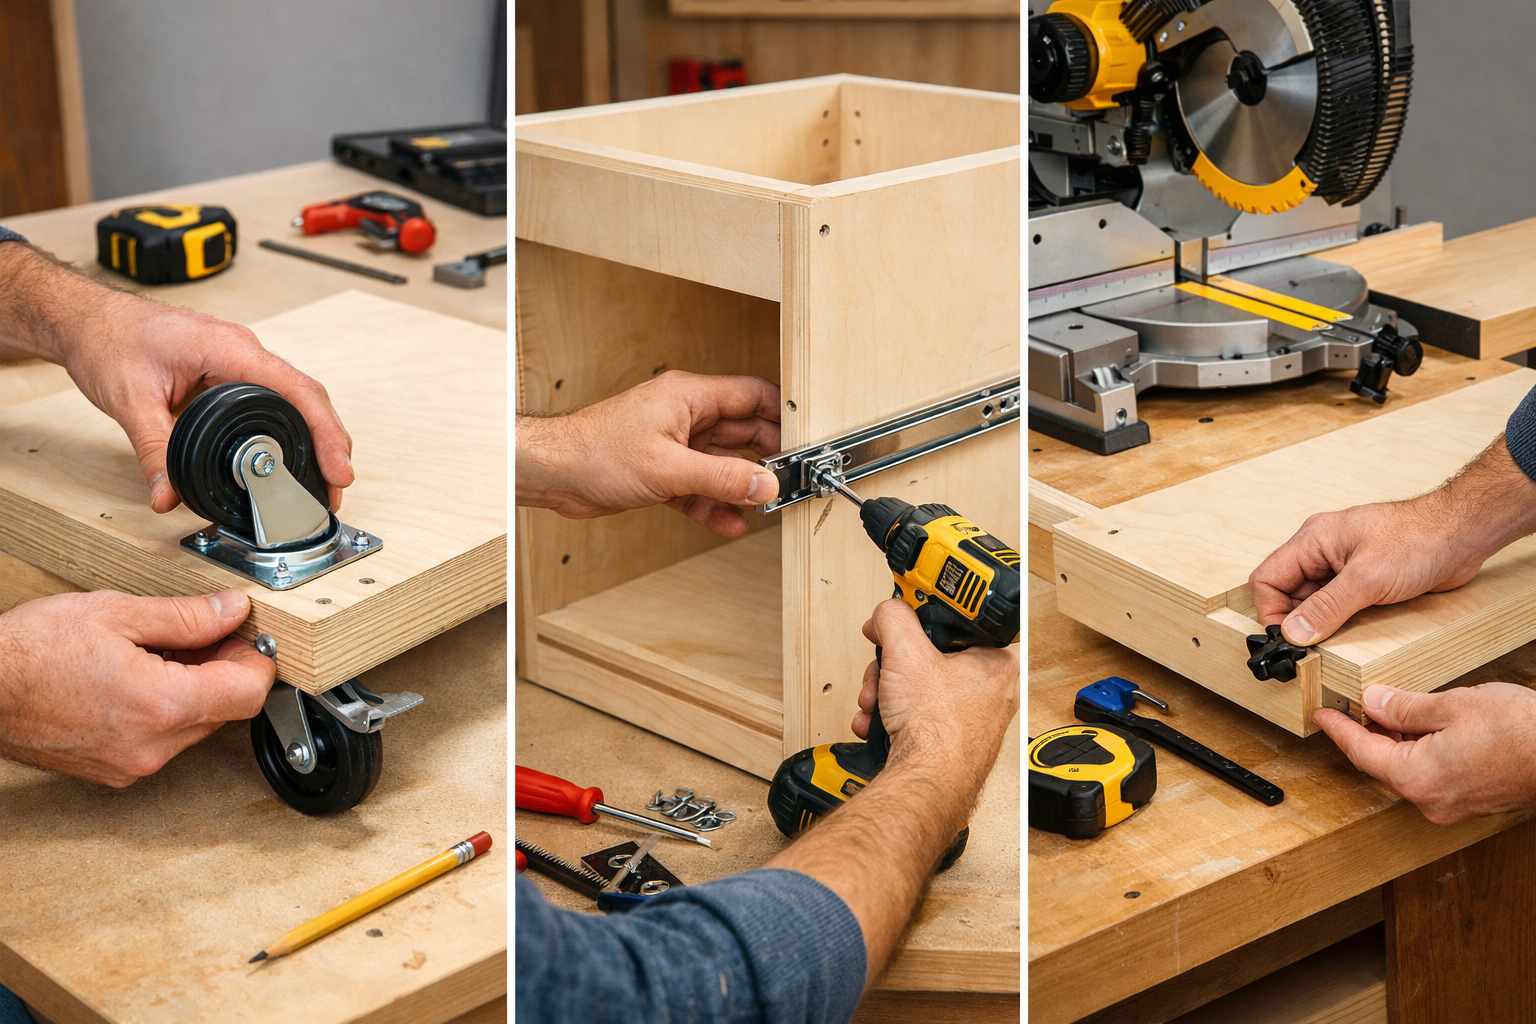
- Cut Plywood Panels: Based on your design, accurately cut all plywood panels for the sides, bottom, top, and internal dividers of your main cabinet. Use a track saw or a circular saw with a straight edge for precise cuts.
- Assemble the Box: Use pocket hole joinery or dadoes and screws with wood glue to assemble the main cabinet box. Ensure all corners are square. Clamp generously until the glue sets.
- Install Internal Dividers: If your design includes fixed shelves or vertical dividers for cubbies, install these now. This creates the framework for your integrated storage.
Phase 2: Constructing Drawers and Outfeed Supports
- Build Drawer Boxes: Cut plywood for drawer fronts, backs, and sides. Simple butt joints with screws and glue, or more robust rabbet joints, work well. Ensure your drawer boxes are slightly smaller than the drawer openings to allow for smooth operation with slides.
- Install Drawer Slides: Attach quality full-extension drawer slides to the inside of your cabinet openings and to the sides of your drawer boxes. Follow the manufacturer’s instructions for proper alignment and spacing. Test each drawer for smooth operation.
- Attach Drawer Fronts: Once drawers are operating smoothly, attach the decorative drawer fronts. Use shims to achieve even gaps around the drawer fronts, then secure them from the inside of the drawer box.
- Fabricate Outfeed Supports: Cut plywood or solid wood for your extension wings. These should be designed to be perfectly level with your miter saw’s bed when extended.
- Fixed Outfeed: If your design is for a fixed outfeed, build a simple torsion box or a strong framework and attach it directly to the main cabinet.
- Collapsible/Adjustable Outfeed: For portability and space-saving, design these with sturdy hinges or sliding mechanisms. Ensure they lock securely in the extended position. Incorporate T-tracks into the top surface for future accessories like stop blocks.
Phase 3: Mounting the Miter Saw and Adding Mobility
- Mount the Miter Saw: Securely attach your miter saw to the top surface of the main cabinet using bolts, washers, and nuts. Ensure the saw is centered and aligned as per your design. Double-check that all mounting points are snug to prevent any movement.
- Install Casters: Attach heavy-duty locking casters to the bottom of the main cabinet. Use appropriate length screws or bolts to ensure they are firmly secured. Test the mobility and locking mechanism of the casters.
- Dust Collection Integration: Cut a hole in the back of the cabinet, if necessary, to accommodate your miter saw’s dust port and connect it to a shop vac hose. Consider an internal plenum or baffle for improved efficiency.
- Finishing Touches: Sand all surfaces smooth, paying attention to edges. Apply a durable finish such as polyurethane or an oil-based clear coat to protect the wood from wear and tear, and to make cleanup easier. Add drawer pulls, hardware for stop blocks, and any other accessories.
Remember to regularly check for squareness and levelness throughout the build process. A well-built stand will be sturdy and accurate, making your woodworking projects significantly more enjoyable and precise.
Optimizing Your Workspace with Your New Portable Miter Saw Stand
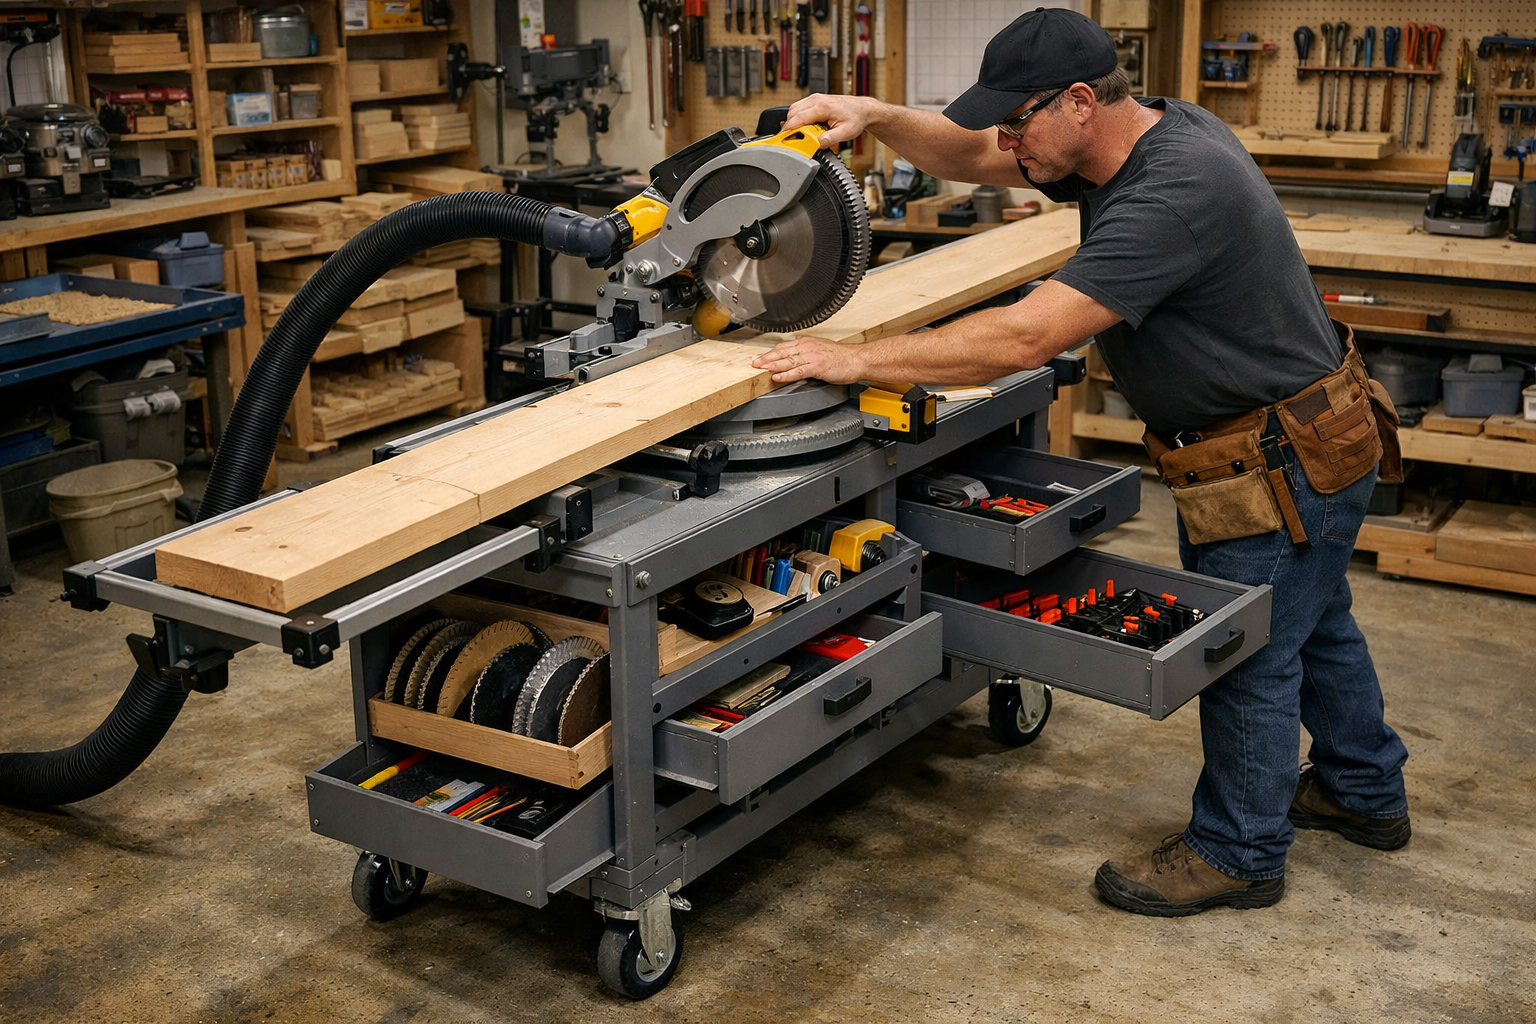
Once your portable miter saw stand is complete, it’s time to integrate it seamlessly into your workshop and unlock its full potential for Building a Portable Miter Saw Stand with Integrated Storage: Optimize Your Workspace for Accuracy and Efficiency. The goal is not just to have a stand, but to create a highly efficient and accurate cutting station.
Enhancing Accuracy and Repeatability
- Calibrate Your Saw: Even with a perfect stand, your miter saw itself needs to be accurately calibrated. Check blade squareness to the fence and table, and verify all miter and bevel angle detents.
- Zero Clearance Insert: Consider cutting a zero-clearance insert for your saw bed on the stand. This dramatically reduces tear-out and provides better support for small pieces.
- Adjustable Stop Blocks: Utilize the T-tracks on your outfeed supports to incorporate adjustable stop blocks. These are invaluable for making multiple cuts of the same length quickly and accurately. Learn more about improving accuracy with jigs in our Beginner’s Guide to Essential Woodworking Jigs: Improve Accuracy and.
- Integrated Measuring Tape: Affix a stick-on measuring tape along the front edge of your outfeed supports. This allows for quick, on-the-fly measurements directly at the saw.
Maximizing Integrated Storage
The beauty of a custom stand lies in its tailored storage.

- Dedicated Tool Placement: Assign specific drawers or compartments for frequently used items.
- Top Drawer: Miter saw blades (in protective sleeves), arbor wrench, pencil, tape measure, combination square.
- Middle Drawer: Clamps, push blocks, safety glasses, hearing protection.
- Bottom Shelf/Cubby: Dust masks, spare sandpaper, small jigs.
- Modular Organization: Use drawer dividers or small bins within drawers to prevent tools from shifting and clumping together. For more advanced modular ideas, check out Building Modular Wood Storage Systems for Small Workshops: Maximizing.
- Vertical Storage: If space allows, consider incorporating a small side rack for long rulers or level storage.
Leveraging Portability and Adaptability
- Workflow Zones: Use the casters to position your miter saw stand strategically. For example, move it closer to your lumber rack when breaking down long stock, then shift it near your workbench for assembly tasks.
- Temporary Worksurface: When the miter saw is not in use, the outfeed supports can serve as a temporary extra workbench, especially useful in compact workshops. This versatility echoes the principles of Building a Compact and Ergonomic Workbench for Small Workshops.
- Shared Spaces: If your workshop is a garage or shared space, the ability to roll the stand away and store it against a wall or in a corner is invaluable. Locking casters ensure it stays put during use.
By actively thinking about how your new stand integrates into your overall woodworking process, you’ll discover new levels of efficiency and accuracy in 2026. This isn’t just a piece of furniture; it’s a productivity enhancer.
Conclusion
Building a Portable Miter Saw Stand with Integrated Storage: Optimize Your Workspace for Accuracy and Efficiency is a transformative project for any woodworker. From the initial meticulous planning to the final coat of finish, each step contributes to creating a workspace that is not only highly functional but also a pleasure to work in. This stand goes beyond merely holding your saw; it serves as a central hub for precise cuts, organized accessories, and adaptable workflow, ultimately allowing you to produce higher quality work with less effort and frustration.
The investment of time and materials in this project pays dividends in accuracy, reduced setup times, and a safer, more enjoyable woodworking experience. In 2026, where efficiency and thoughtful design are paramount, a custom portable miter saw stand with integrated storage is an indispensable asset for any serious craftsman. Take the leap, build your ultimate miter saw station, and witness the profound positive impact on your productivity and project outcomes.
Actionable Next Steps:
- Review Your Needs: Re-evaluate your current miter saw setup and identify specific pain points (e.g., lack of support, cluttered accessories, poor mobility).
- Sketch Your Design: Draw out a basic plan, incorporating your saw’s dimensions and desired storage features.
- Gather Materials: Create a cut list and procure high-quality plywood, casters, drawer slides, and hardware.
- Start Building: Follow a structured approach, focusing on accuracy and squareness at each stage.
- Calibrate and Organize: Once built, calibrate your saw, install a zero-clearance insert, and systematically organize all your miter saw accessories within the integrated storage.
- Refine Workflow: Experiment with different stand placements and utilize its features (e.g., stop blocks, dust collection) to continuously optimize your cutting workflow.
