
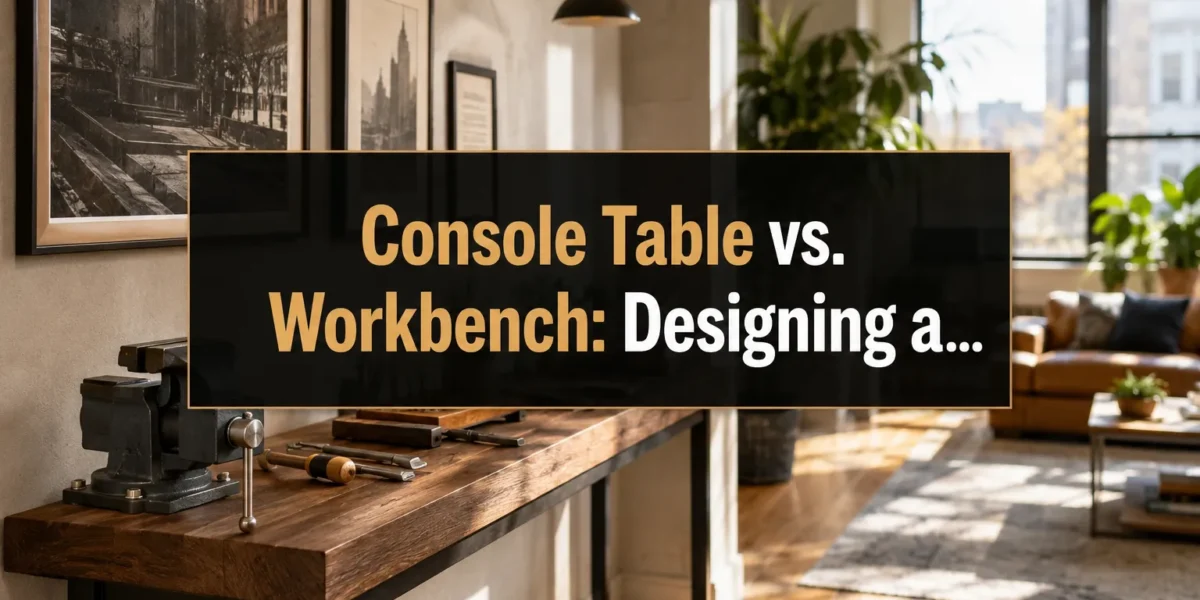
The modern maker, often residing in apartments or homes with limited dedicated workshop space, faces a recurring dilemma: how to incorporate essential woodworking functionality without sacrificing domestic aesthetics. This challenge directly addresses the need for a solution in the realm of Console Table vs. Workbench: Designing a Narrow Wood Table That Doubles as a Small-Shop Assembly Station. This article explores how to craft a narrow wood table that seamlessly transitions from elegant living room furniture to a robust small-shop assembly station, offering practical solutions for those who demand both form and function from their home furnishings and tools.
Key Takeaways
- A hybrid console table/workbench offers an ideal solution for small-space makers, blending aesthetic appeal with practical functionality.
- Key design elements include reinforced construction, integrated clamping points, and smart storage to support woodworking tasks.
- Selecting durable, attractive wood and appropriate finishes ensures the table withstands workshop demands while complementing home decor.
- Careful planning of height, dimensions, and added features like casters maximizes versatility for various projects.
- Proper maintenance is crucial for preserving both the appearance and utility of a dual-purpose piece.
Bridging the Gap: Console Table vs. Workbench Functionality
The fundamental difference between a console table and a traditional workbench lies in their primary purpose and perceived aesthetics. A console table is typically a narrow, long table designed for decorative purposes in entryways, living rooms, or hallways. It often serves as a display surface for lamps, artwork, or other decorative items, and its construction prioritizes visual appeal over heavy-duty utility. In contrast, a workbench is built for durability, stability, and utility, featuring a robust top, strong joinery, and often integrated clamping mechanisms or storage. Its appearance is secondary to its ability to withstand impacts, vibrations, and heavy loads associated with crafting and assembly.
For those with small living spaces, combining these two disparate functions into a single, elegant piece of furniture represents an ingenious solution. The goal is not merely to make a workbench “look nice,” but to engineer a console table that possesses the underlying strength and features of a light-duty workbench, capable of supporting small woodworking projects. This fusion requires thoughtful design choices that address both aesthetic integration and practical functionality.
One of the primary considerations in designing a narrow wood table that doubles as a small-shop assembly station is structural integrity. A typical console table might rely on delicate legs and joinery, unsuitable for the lateral forces of clamping or the downward pressure of assembly tasks. Our hybrid design must incorporate features traditionally found in workbenches:
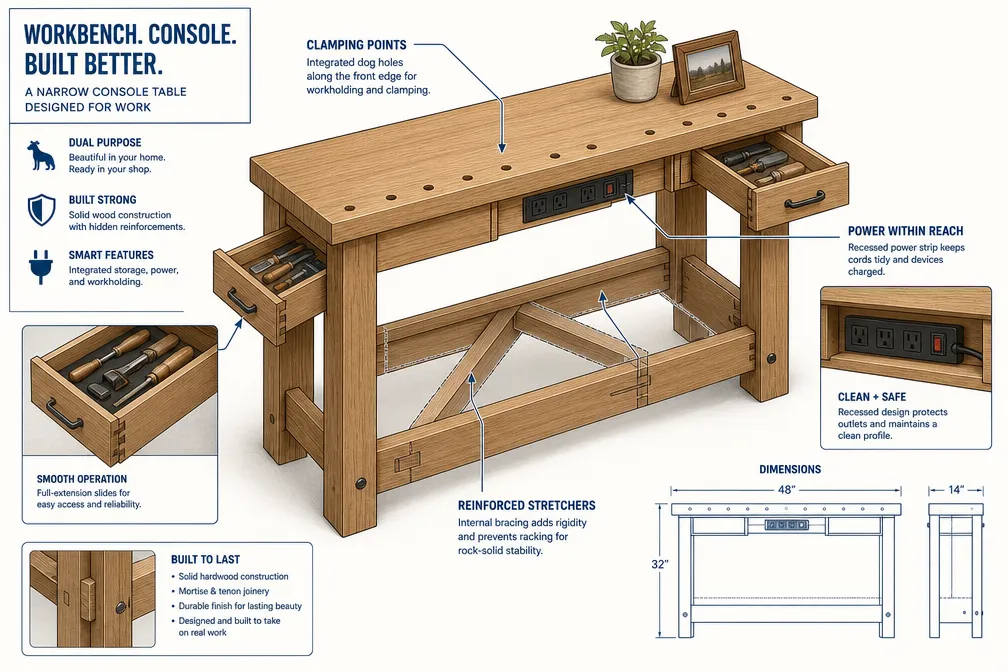
- Robust Top: A solid, flat tabletop, ideally 1.5 to 2 inches thick, made from a durable hardwood, will resist dents and provide a stable work surface.
- Sturdy Legs and Joinery: Legs should be thick (e.g., 2×2 inches or larger) and connected with strong joinery such as mortise and tenon or robust lag bolts into reinforced stretchers. This ensures stability under pressure. For more on strong connections, explore Mastering Wood Joinery Techniques: Essential Methods for Strong and Beautiful Furniture.
- Integrated Stretchers: Horizontal elements connecting the legs at the bottom and/or middle add significant rigidity, preventing racking. These can be designed to double as shelves for tool storage or footrests.
The design must also integrate features that facilitate woodworking without compromising the table’s appearance. Clamping points are essential for holding workpieces securely. This can be achieved through:
- Dog Holes: Strategically placed holes in the tabletop and/or along the apron, compatible with bench dogs and clamps. When not in use, these can be plugged with matching wood dowels for a seamless look.
- Concealed Vise Mounting: A small woodworking vise can be mounted beneath the tabletop, with the jaws flush or slightly recessed. When needed, it can be extended for use and then retracted. A removable faceplate matching the table’s wood can further conceal it.
- Apron Reinforcement: A thicker apron (the frame directly under the tabletop) provides strength for attaching clamping accessories or even a small, clamp-on router table.
Consider the dimensions carefully. A typical console table might be 12-18 inches deep and 30-36 inches high. For a comfortable assembly station, a height around 34-36 inches is often ergonomic for standing work, but consider adjustable feet or casters if seated work is also anticipated. The narrow depth is crucial for its “console table” identity, making efficient use of the available workspace vital.
Designing for Dual Purpose: Aesthetics Meets Workshop Efficiency
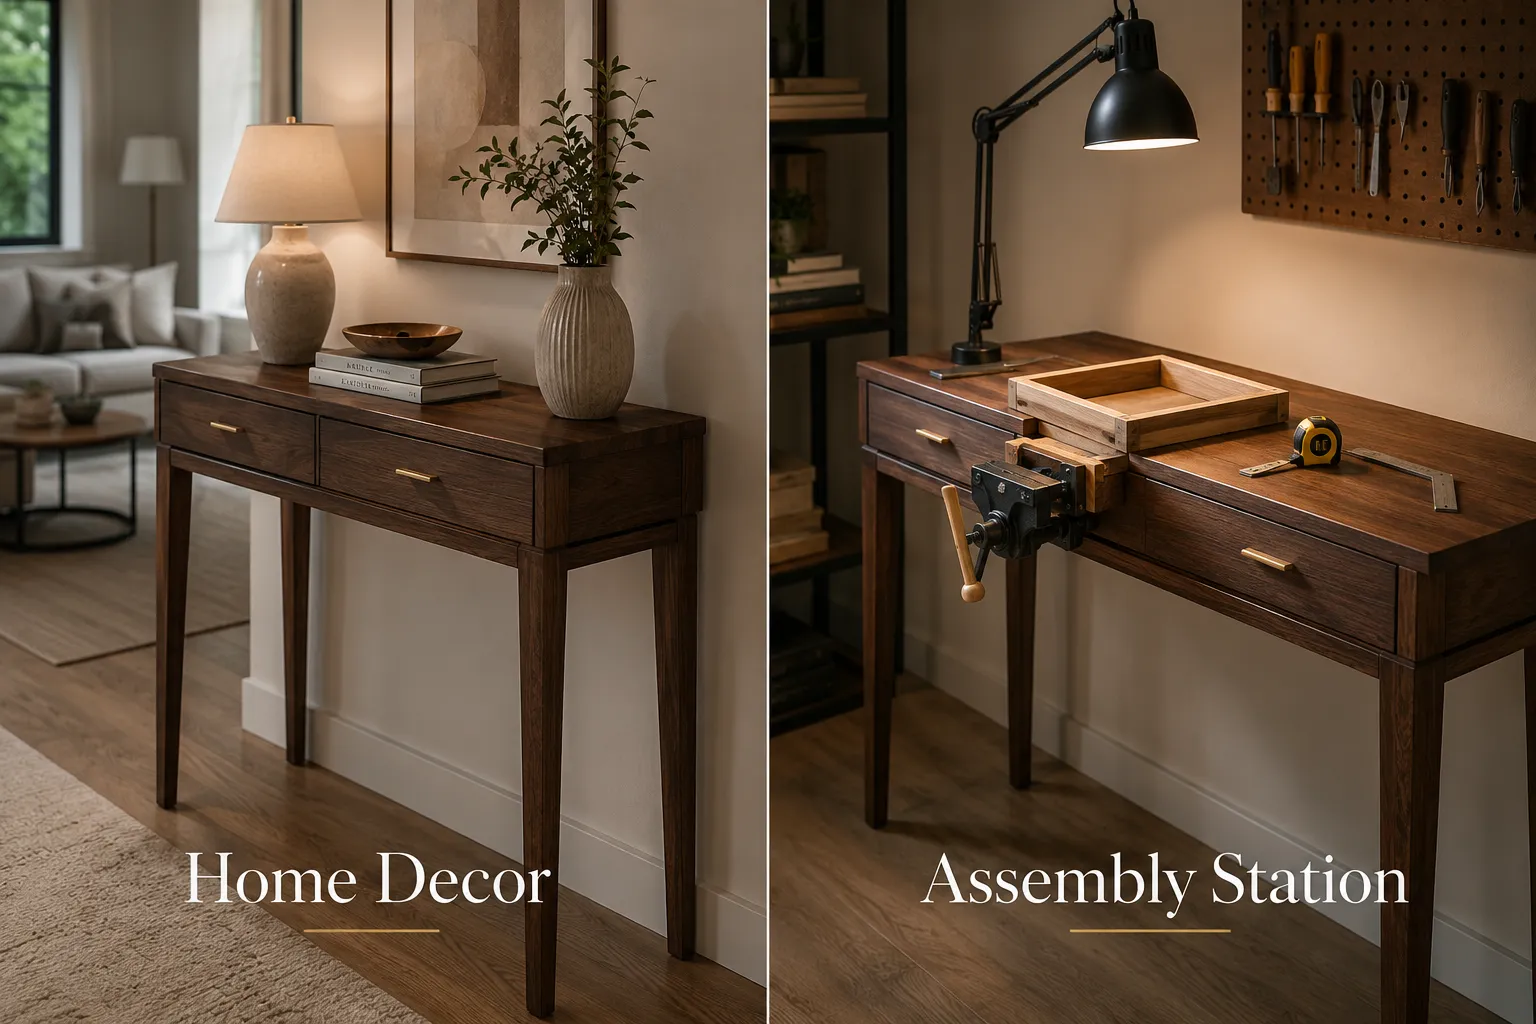
The true art of creating a successful hybrid lies in the intelligent integration of both form and function. This means that while the table must be structurally sound and capable of supporting assembly tasks, it must also genuinely enhance the living space where it resides. The key is to make the workshop elements either hidden, subtly integrated, or aesthetically pleasing in their own right.
Material Selection: Blending Durability with Beauty
Choosing the right wood is paramount for a Console Table vs. Workbench: Designing a Narrow Wood Table That Doubles as a Small-Shop Assembly Station. Hardwoods are generally preferred for their durability and resistance to dents, making them suitable for a workbench top. Yet, they also offer exquisite grain patterns and colors for furniture.
- Walnut: Offers deep, rich tones and excellent durability. It’s a premium choice that exudes sophistication.
- Cherry: Known for its warm, reddish-brown hues that deepen with age. It’s a beautiful, stable wood.
- Maple: A very hard and light-colored wood, excellent for a work surface due to its density. It can be stained to match various decors.
- Oak: A classic choice, known for its strength and prominent grain. Red oak is slightly warmer, while white oak is more muted and water-resistant.
For the visible surfaces, selecting a premium wood ensures the table looks like a high-end piece of furniture. For less visible structural elements (like inner stretchers or reinforcement), more economical but still strong woods like pine or poplar can be used, as long as they are appropriately sized and joined. Learn more about premium wood selection for 2026 projects.
Integrated Storage and Organizational Solutions
One of the hallmarks of a good workbench is its ability to keep tools and materials organized. For a console table, this translates to discreet yet accessible storage.
Consider these options:
- Shallow Drawers: Under-top drawers can store small hand tools, measuring devices, and finishing supplies. These can be designed with finger pulls or push-to-open mechanisms for a clean, handle-free look.
- Pull-Out Trays/Shelves: Similar to kitchen pantry pull-outs, these can be hidden behind an apron or low stretcher, providing easy access to tools without cluttering the surface.
- Magnetic Strips: Concealed beneath the apron or on an inner face, magnetic strips can hold small metal tools securely out of sight.
- Pegboard/French Cleat System: A small section of pegboard or a French cleat system can be installed on the back side of the table, facing the wall. When the table is pulled out for work, these provide vertical storage. When pushed against the wall, they are hidden. For more on workshop organization, check out our guide on integrating smart storage and organization with bespoke wooden solutions.
Finishing Touches: Protecting and Enhancing
The finish applied to your hybrid table is critical. It must protect the wood from the rigors of workshop use (spills, minor impacts, abrasion) while maintaining an attractive appearance suitable for living spaces.
- Durable Topcoats: Polyurethane (oil-based or water-based), epoxy, or conversion varnish are excellent choices for their hardness and resistance to chemicals and moisture.
- Matte or Satin Finishes: These tend to hide minor scratches and dust better than high-gloss finishes and offer a more contemporary, understated aesthetic that suits both home and workshop. Explore warm matte wood finishes for coffee tables for inspiration.
- Oil Finishes (e.g., Tung oil, Linseed oil): While less protective than film-forming finishes, oils penetrate the wood, enhancing its natural beauty and offering a soft, repairable surface. They require more frequent reapplication but are easier to touch up if damaged.
Practical Considerations and Project Implementation
Bringing a Console Table vs. Workbench: Designing a Narrow Wood Table That Doubles as a Small-Shop Assembly Station to life requires careful planning and execution. Beyond the core design, several practical considerations can enhance its utility and longevity.
Height and Ergonomics
The ideal height for a workbench varies depending on the user and the tasks performed. For general assembly, a height where you can comfortably stand and work without bending over is usually preferred. This often falls between 34-38 inches.
- Adjustable Feet: Incorporating heavy-duty adjustable leveling feet allows for fine-tuning the height and ensuring stability on uneven floors.
- Locking Casters: Adding sturdy, locking casters can make the table highly portable. This is invaluable in a small space where the table might need to be moved for different projects or to reclaim living space. When locked, good casters should prevent any wobble.
- Footrests: If the table is on the taller side, a lower stretcher can double as a comfortable footrest, reducing fatigue during long assembly sessions.
Integrating Power and Lighting
For a truly functional assembly station, access to power and adequate lighting is essential.
- Recessed Power Strip: Install a recessed power strip along the back edge or side of the tabletop. When not in use, a flush-fitting wooden cover can conceal it. This keeps cords tidy and readily available.
- Task Lighting: Consider designing the table to accommodate a clamp-on LED task light. A sturdy apron or leg can provide a good mounting point. The light can be removed and stored when the table is in “console mode.”
Build Techniques for Strength and Aesthetics
When building, prioritize strong joinery methods. While pocket screws can be used for hidden connections, exposed joints should be well-executed and sturdy. Mortise and tenon, dadoes, or even substantial lag bolts reinforced with appropriate joinery are preferable for critical load-bearing connections. For more on compact workbenches, see our guide on building a compact and ergonomic workbench for small workshops.
For those considering a DIY approach, detailed plans for robust console tables can be adapted. Think about how a standard console table design could be beefed up structurally, how a vise could be integrated without being overly conspicuous, and where discrete storage could be added. Our article on building a DIY folding console table provides insights into space-saving designs that can inspire a hybrid approach.
Maintenance and Longevity
Regular maintenance is key to preserving the dual nature of your table.
- Cleanliness: Wipe down the work surface after each use to remove dust, glue, or paint. This prevents buildup and maintains the aesthetic.
- Surface Protection: Use cutting mats or sacrificial boards when performing tasks that could damage the tabletop.
- Finish Touch-Ups: Periodically inspect the finish for wear and tear. Small scratches or dents can often be repaired with a spot application of the original finish. For oil finishes, reapplication every 6-12 months will keep the wood nourished.
- Joint Inspection: Periodically check all fasteners and joints for tightness. Re-tighten screws or wedges as needed to maintain structural integrity.
By focusing on these practical elements, your narrow wood table can truly excel as both a beautiful piece of furniture and a highly functional small-shop assembly station, making the most of every square inch in your home or apartment in 2026.

Conclusion
The convergence of home decor and workshop utility in a single piece of furniture is no longer a niche concept but a practical necessity for the modern woodworker operating in confined spaces. The successful design of a hybrid console table and small-shop assembly station hinges on thoughtful material selection, clever integration of functional features, and a commitment to durable construction. By prioritizing robust joinery, discreet storage, adaptable clamping points, and a protective yet attractive finish, you can create a narrow wood table that not only complements your living space but also empowers your woodworking aspirations. This versatile piece transforms from an elegant display surface into a resilient assembly station with ease, truly maximizing the utility of every inch of your home in 2026.
Actionable Next Steps
- Assess Your Needs: Determine the specific types of woodworking tasks you’ll perform and the dimensions required for your projects.
- Sketch Your Design: Create a detailed sketch, incorporating features like dog holes, concealed storage, and potential vise mounting points.
- Choose Materials Wisely: Select a durable hardwood for the top and visible elements, considering both aesthetics and resilience.
- Plan Joinery: Opt for strong joinery methods for critical structural components to ensure stability.
- Select a Finish: Choose a durable, low-sheen finish that offers protection while complementing your home decor.
SEO Meta Title: Console Table vs. Workbench: Dual-Purpose Design for Small Shops SEO Meta Description: Transform your living space with a narrow wood table designed as a console table and robust assembly station. Explore smart design and storage for 2026.