

The craft beer revolution, which has seen an explosion of unique brews and microbreweries, has simultaneously fueled a demand for sophisticated and practical ways to transport these liquid treasures. While commercially produced carriers exist, nothing quite captures the essence of appreciation and personalization like a handcrafted wooden beer caddy. The art of Crafting Wooden Beer Caddies: Portable Carriers for Craft Brew Enthusiasts involves more than simply cutting wood; it’s about precision joinery for robust handles, meticulous bottle slot design, and the satisfying tactile experience of a finely finished piece. Using power sanders to achieve smooth surfaces and incorporating personalization for tailgates and gifts from affordable lumber elevates a simple carrier into a cherished item.
Key Takeaways
- Precision in handle joinery and bottle slot design is crucial for a durable and functional wooden beer caddy.
- Power sanders are essential tools for achieving a professional, smooth finish on all wood surfaces, enhancing both aesthetics and ergonomics.
- Affordable and readily available lumber types like pine, poplar, and common hardwoods can be used effectively for crafting high-quality caddies.
- Personalization through engraving, wood burning, or custom finishes transforms a basic caddy into a unique gift or branding statement.
- Proper finishing techniques are vital for protecting the wood, enhancing its appearance, and ensuring the longevity of the beer caddy.
The Foundation: Design Principles and Material Selection for Crafting Wooden Beer Caddies
Embarking on the journey of Crafting Wooden Beer Caddies: Portable Carriers for Craft Brew Enthusiasts begins with thoughtful design and judicious material selection. A well-designed caddy balances aesthetics with functionality, ensuring it is both appealing to the eye and practical for carrying beverages. This initial phase dictates the project’s success, influencing everything from stability to portability.

Essential Design Considerations
The primary function of a beer caddy is to securely transport bottles or cans without breakage. This necessitates careful planning for bottle slot dimensions and internal dividers. Standard beer bottles typically range from 2.5 to 2.75 inches in diameter, while some craft cans can be wider. Therefore, designing slots slightly larger than the widest anticipated container (e.g., 3 inches) allows for versatility.
- Capacity: Decide on the number of bottles or cans the caddy will hold (e.g., 4-pack, 6-pack). This directly impacts the overall dimensions.
- Dimensions: Calculate the length, width, and height based on bottle sizes and desired capacity. Remember to account for the thickness of the wood used for dividers and side panels.
- Handle Design: The handle is a critical component, bearing the entire weight of the loaded caddy. It must be comfortable to grip and robustly attached. Common handle designs include a simple dowel, a routed integrated handle, or a shaped piece of wood with finger grooves.
- Stability: A wider base relative to its height improves stability, preventing the caddy from tipping over when loaded.
- Aesthetics: Consider the overall visual appeal. Chamfered edges, rounded corners, and decorative elements can enhance the caddy’s look.
For those interested in mastering various woodworking techniques, understanding different types of joints can be incredibly beneficial for building durable caddies. Our guide on Beginner’s Guide to Essential Woodworking Joints provides an excellent starting point.
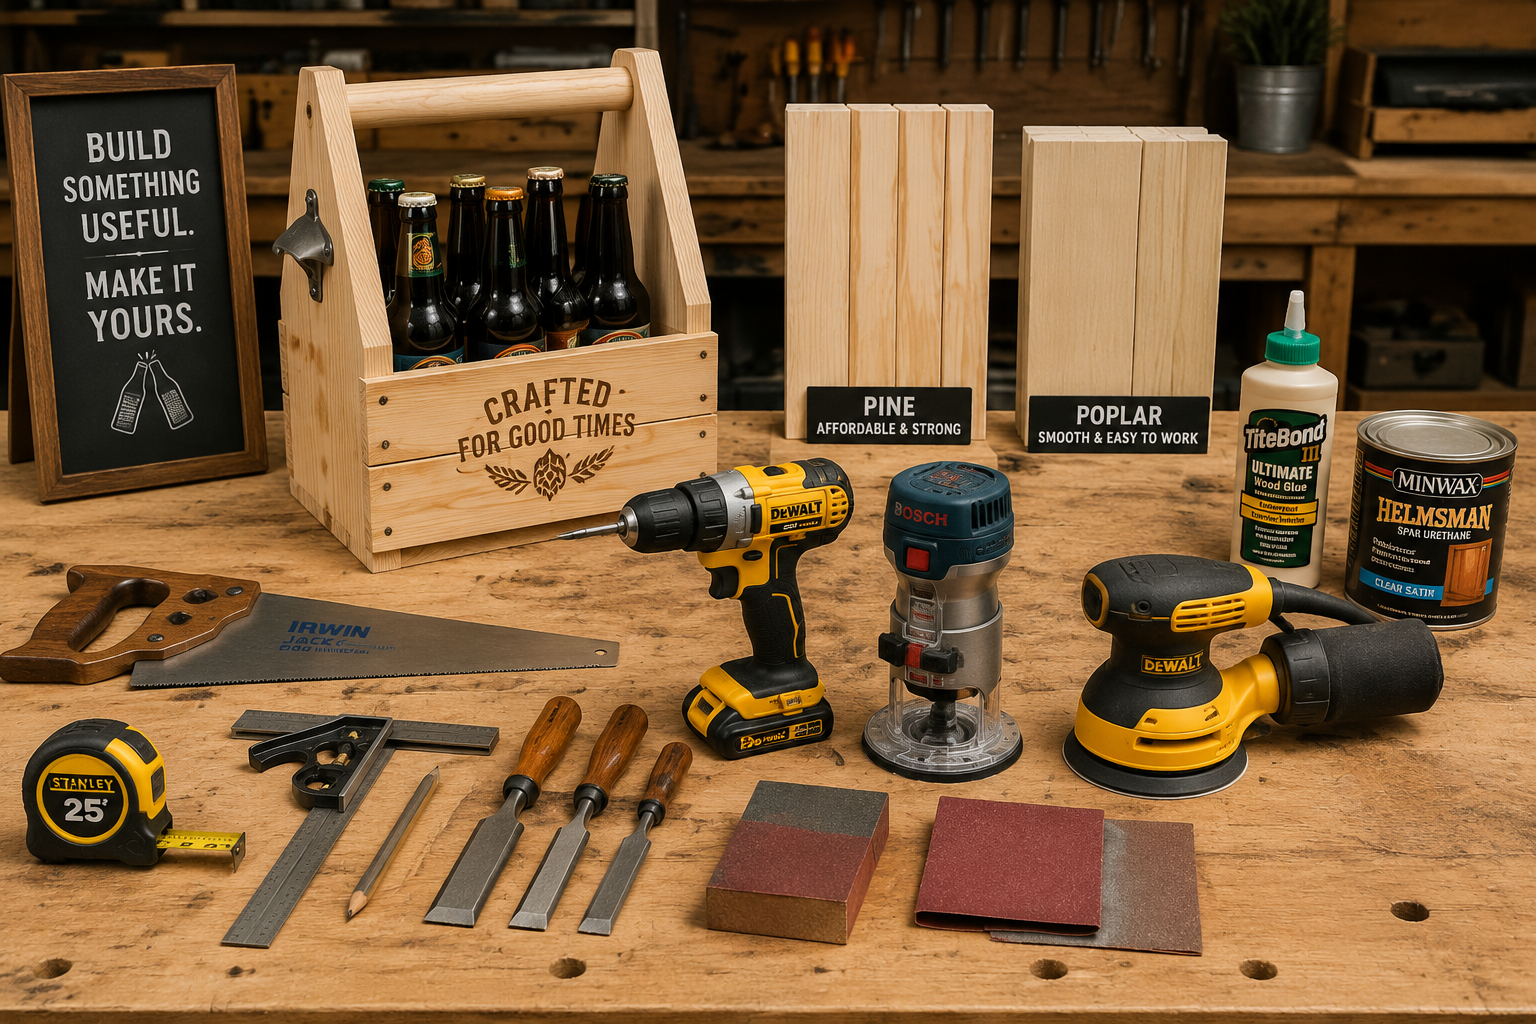
Selecting Affordable Lumber
While exotic hardwoods offer luxurious aesthetics, affordable lumber options are perfectly suitable for crafting sturdy and attractive beer caddies. The key is to choose wood that is strong enough to bear the load and can be worked easily.
| Wood Type | Characteristics | Advantages for Beer Caddies | Disadvantages |
|---|---|---|---|
| Pine | Softwood, light color, prominent grain, readily available | Inexpensive, easy to work with, takes stain well | Prone to dents, less durable |
| Poplar | Hardwood, light green/brown, fine grain, relatively soft | Affordable, good for painting, takes stain evenly | Can be bland without finish, less character |
| Oak | Hardwood, distinct grain patterns, very durable | Extremely strong, long-lasting, attractive grain | More expensive, harder to work, heavier |
| Maple | Hardwood, fine, consistent grain, very strong | Smooth finish, durable, clean modern look | More expensive, can be difficult to stain evenly |
When sourcing wood, especially if aiming for cost-effectiveness, consider local lumberyards or even reclaimed wood. Utilizing sourcing reclaimed and salvaged wood can add unique character and sustainability to your project. Always inspect wood for warps, cracks, and knots that could compromise structural integrity.
Precision Crafting: Joinery, Sanding, and Bottle Slot Design
The craftsmanship involved in Crafting Wooden Beer Caddies: Portable Carriers for Craft Brew Enthusiasts becomes evident in the precision of its joinery, the smoothness of its finish, and the thoughtful design of its bottle slots. These elements not only contribute to the caddy’s durability but also its overall user experience.
Mastering Handle Joinery
The handle is perhaps the most critical structural component. It must withstand repetitive lifting and the weight of full bottles. Poor joinery here can lead to premature failure.
- Dovetail Joints: For the ultimate in strength and aesthetic appeal, dovetail joints are an excellent choice for attaching the handle supports to the side panels. Their interlocking nature provides incredible resistance to pulling forces. Our guide on Mastering Dovetail Joints with Hand Tools offers detailed instructions.
- Mortise and Tenon Joints: Another exceptionally strong option, particularly for attaching a horizontal handle piece to vertical supports. This joint creates a deep, robust connection that can handle significant stress.
- Reinforced Butt Joints: While simple butt joints can be used, they require significant reinforcement with wood glue and screws or dowels to ensure adequate strength. Pocket hole joinery is a quick and effective method for reinforced butt joints.
Regardless of the chosen joint, ensure precise measurements and tight-fitting connections. A strong wood adhesive, like Titebond III, is indispensable. Clamp the joints securely during drying to ensure maximum bond strength.
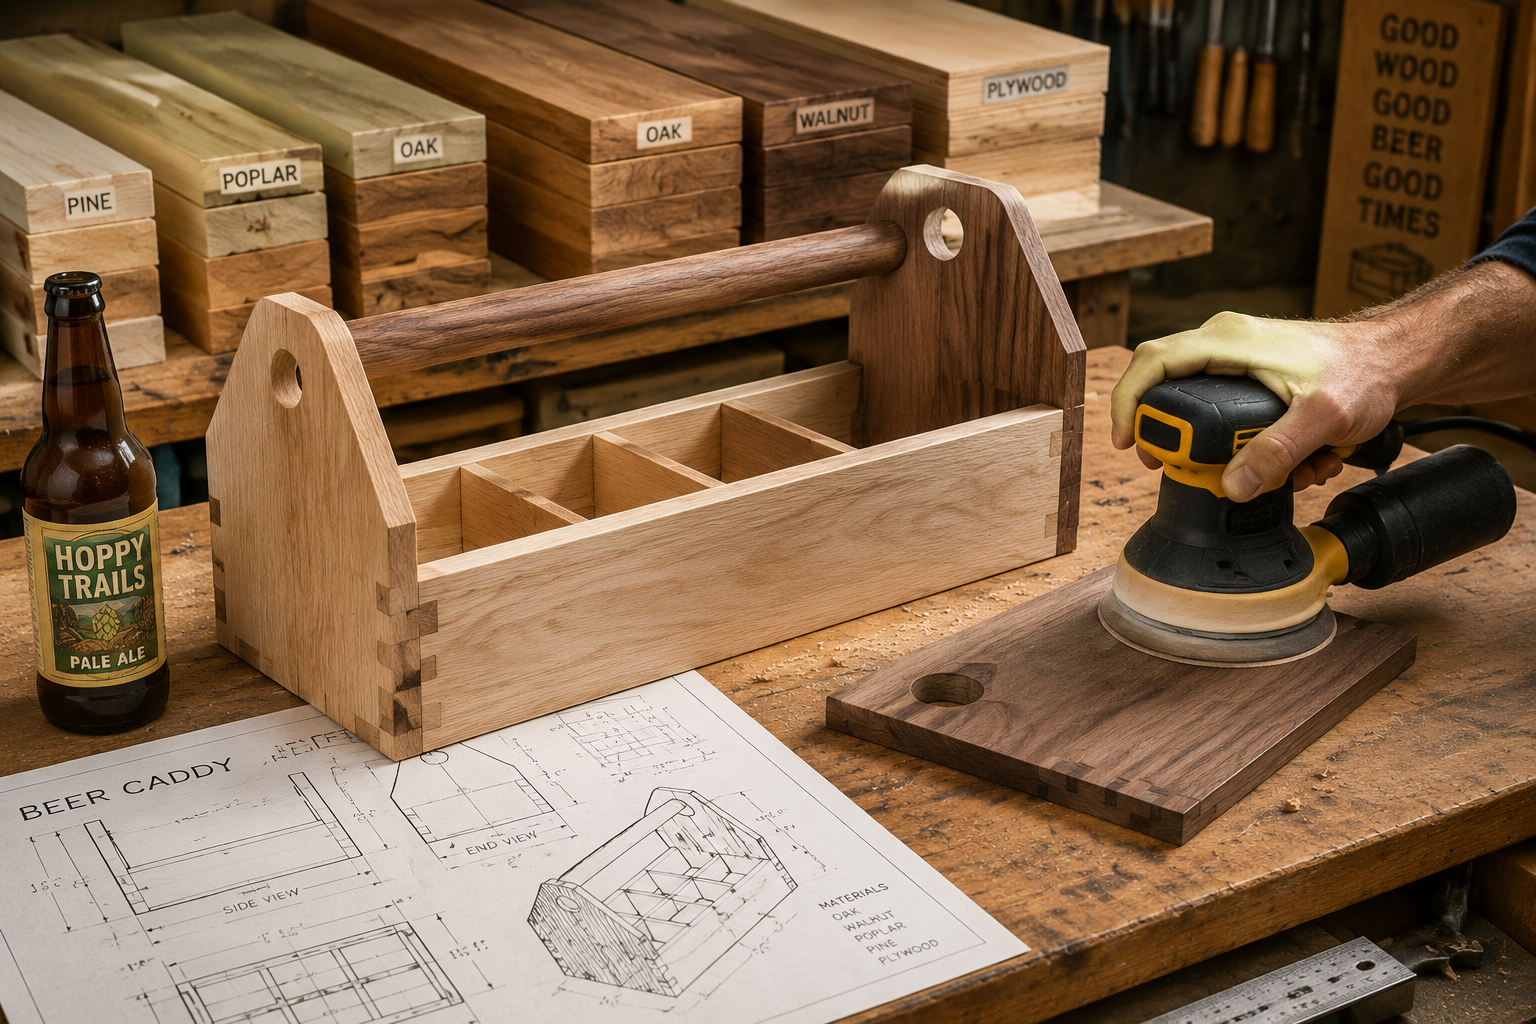
Achieving Smooth Finishes with Power Sanders
A professional finish elevates a wooden beer caddy from a basic box to a refined accessory. Power sanders are indispensable for achieving silky-smooth surfaces, preparing the wood perfectly for finishing.
- Orbital Sander: Ideal for general surface preparation. It removes material efficiently while minimizing swirl marks. Start with a coarser grit (e.g., 80-100) to remove milling marks or imperfections, then progress through finer grits (120, 150, 180, 220) for a smooth finish.
- Detail Sander: Perfect for reaching tight corners and intricate areas where an orbital sander cannot fit, such as inside bottle slots or around handle joints.
- Belt Sander: While powerful for rapid material removal, a belt sander is typically too aggressive for the final finishing of a beer caddy and should be used with extreme caution, if at all, for initial shaping.
Sanding Best Practices:
- Work progressively: Always move from coarser to finer grits. Skipping grits leaves deeper scratches that finer grits struggle to remove.
- Even pressure: Apply consistent, light pressure and keep the sander moving to avoid creating depressions or flat spots.
- Dust removal: Between grits, thoroughly clean the surface to remove dust particles, which can cause scratches when mixed with the next, finer grit. A shop vacuum or tack cloth works well.
- Edge treatment: Lightly ease all sharp edges with a fine-grit sandpaper or a router with a small roundover bit. This not only improves ergonomics but also makes the caddy more pleasant to handle.
Designing and Cutting Bottle Slots
The internal dividers and bottle slots are crucial for keeping bottles secure and preventing rattling or breakage during transport.
- Fixed Dividers: The most common method involves a cross-shaped divider or individual partition walls. These can be secured with dado cuts into the base and sides, or simply glued and screwed in place.
- Removable Dividers: For added versatility, some designs incorporate removable dividers, allowing the caddy to be used for other purposes when not carrying bottles. This often involves precisely cut slots that the dividers slide into.
- Precision Cutting: A table saw with a dado stack or a router with a straight bit is excellent for cutting uniform slots or dados for dividers. Ensure all cuts are straight and the same depth for a professional appearance and snug fit.
- Finishing Slots: After cutting, use a detail sander or sandpaper wrapped around a dowel to smooth the inside edges of the bottle slots, preventing scratches on bottles and splinters for the user.
Personalization and Finishing: Elevating Your Wooden Beer Caddy
The final stages of Crafting Wooden Beer Caddies: Portable Carriers for Craft Brew Enthusiasts are where personalization and proper finishing transform a functional item into a cherished possession. Whether for a tailgate party or a thoughtful gift, these steps add character and ensure longevity.
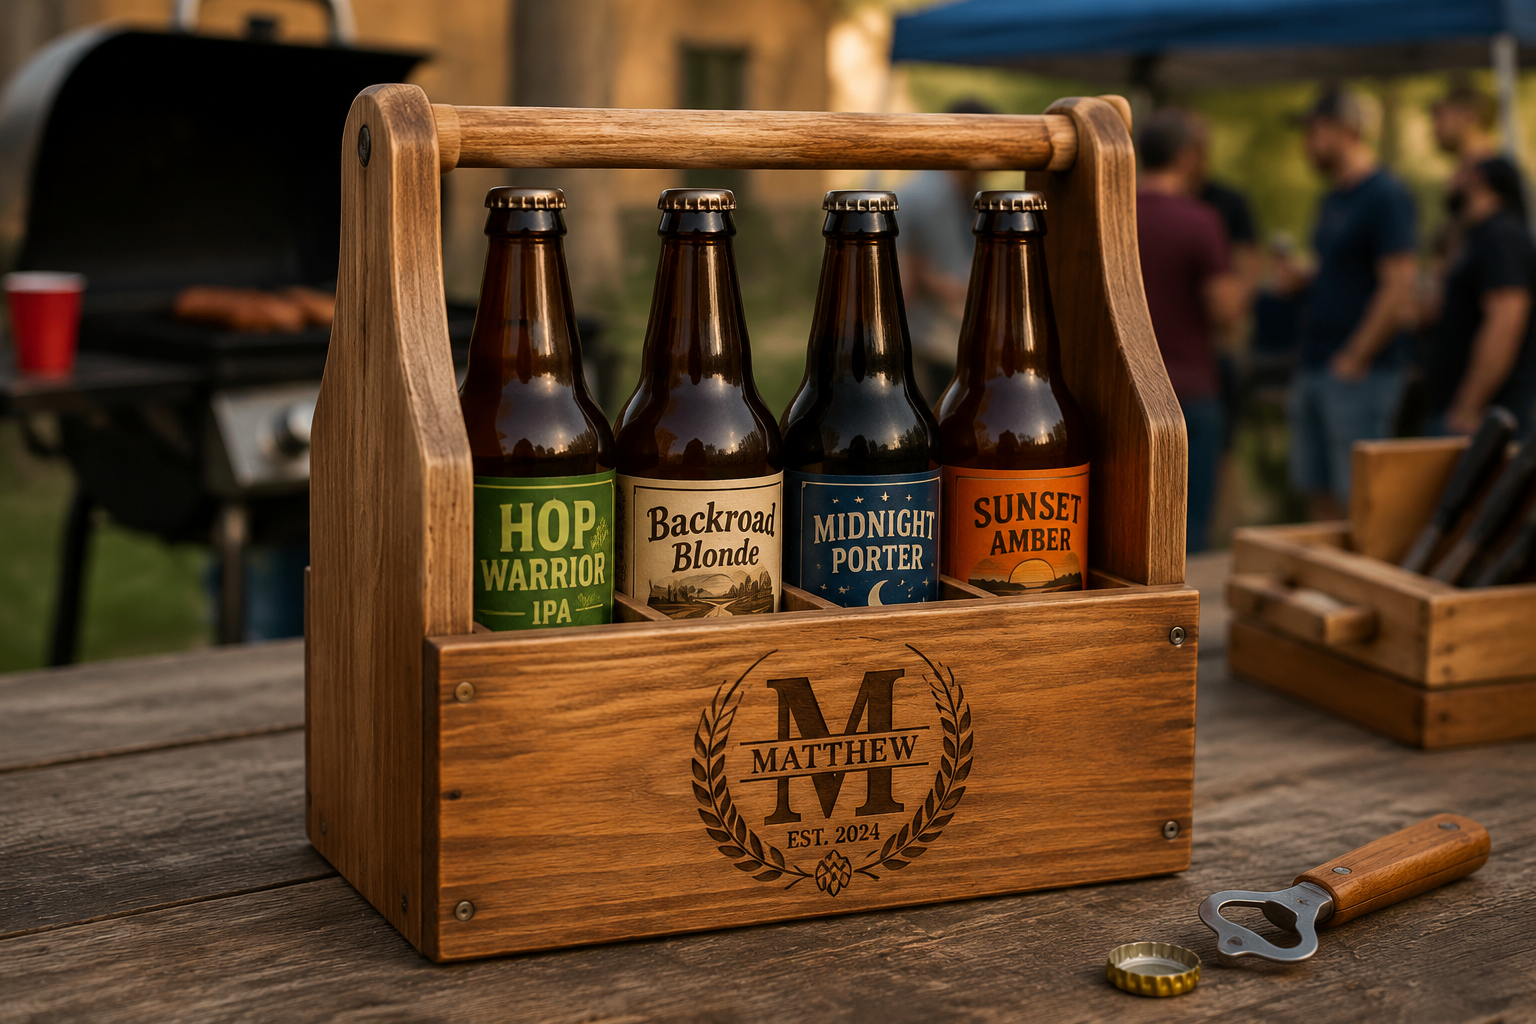
Customization for Tailgates and Gifts
Personalization adds immense value and uniqueness to a wooden beer caddy. This can range from subtle branding to intricate designs.
- Engraving: Laser engraving or CNC routing allows for precise and detailed customization. Options include monograms, names, dates, brewery logos, or even a favorite quote. This is particularly popular for wedding gifts or corporate branding.
- Wood Burning: For a rustic, handcrafted touch, wood burning (pyrography) allows for freehand designs, intricate patterns, or personalized messages. This technique requires a steady hand and practice.
- Painting/Stenciling: For vibrant designs or team logos, painting offers a wide array of color options. Stencils can be used to achieve clean, sharp images. Ensure the paint is suitable for wood and will withstand handling.
- Stains and Dyes: Different wood stains can dramatically alter the appearance of the wood, highlighting its grain or giving it an aged look. Dyes penetrate deeper into the wood fibers, offering more vibrant and uniform coloring.
- Integrated Bottle Openers: A practical and popular addition is a built-in bottle opener. These can be mounted on the side panel or even integrated into the handle design.
When considering mass-producing personalized small woodcrafts, our article on Customization Strategies for Mass-Producing Small Woodcraft provides valuable insights.

Applying a Protective and Aesthetic Finish
A proper finish protects the wood from moisture, spills, and wear, while also enhancing its natural beauty. The choice of finish depends on the desired look and level of durability.
- Oil Finishes (e.g., Danish Oil, Tung Oil): These finishes penetrate the wood, providing a natural, matte look that highlights the grain. They are easy to apply and repair, but offer less protection against moisture than film-forming finishes. For more on oil finishes, explore Danish Oil vs Linseed: The Ultimate Wood Finishing Guide.
- Varnish/Polyurethane: These create a durable, protective film on the surface of the wood. Available in various sheens (matte, satin, gloss), they offer excellent resistance to moisture and abrasion. Applying multiple thin coats with light sanding between coats is crucial for a smooth, even finish.
- Lacquer: Provides a fast-drying, hard, and durable finish. It can be sprayed for a smooth, professional look. Lacquer is typically used for fine furniture but can be effective for caddies if a high-gloss finish is desired.
- Shellac: A natural finish that provides a warm, amber tone. It is easy to apply and dries quickly but offers less water resistance than varnish or polyurethane.
Finishing Steps:
- Preparation: Ensure the wood is impeccably clean and smooth (sanded to at least 220-grit). Any dust or imperfections will be magnified by the finish.
- Stain (Optional): If applying a stain, do so before the topcoat. Apply evenly and wipe off excess according to product instructions. Allow ample drying time.
- Seal Coat (Optional): For open-grain woods or to ensure even stain absorption, a seal coat (e.g., thinned shellac or sanding sealer) can be applied before the main finish.
- Topcoat Application: Apply the chosen finish according to manufacturer directions. Typically, multiple thin coats are better than one thick coat. Lightly sand with very fine grit sandpaper (e.g., 320-400) between coats to improve adhesion and smoothness.
- Curing: Allow the finish to fully cure (not just dry to the touch) before heavy use. This can take days or even weeks depending on the product.
For various wood finishing techniques, consider exploring resources like Natural Wood Finishing Techniques or Unique Wood Finishing Techniques to find inspiration for your project. The goal is to create a durable, attractive finish that withstands the rigors of being a portable carrier for craft brew enthusiasts.
Conclusion
Crafting Wooden Beer Caddies: Portable Carriers for Craft Brew Enthusiasts is a rewarding endeavor that combines practical woodworking skills with personal expression. From the initial selection of affordable yet robust lumber to the meticulous execution of handle joinery and bottle slot precision, each step contributes to a durable and aesthetically pleasing end product. The judicious use of power sanders ensures a professional, smooth finish, while personalization techniques like engraving or wood burning transform a utilitarian item into a cherished gift or a statement piece for any tailgate.
By focusing on strong joinery, accurate dimensions, and a protective finish, woodworkers can create beer caddies that not only safely transport beloved craft brews but also stand as a testament to thoughtful craftsmanship. These carriers become more than just boxes; they are companions for gatherings, celebrations, and quiet moments of enjoyment, reflecting the care and passion of their creator.
For those eager to further hone their woodworking abilities and undertake similar projects, exploring different project ideas or mastering advanced joinery techniques can be a natural progression. Consider tackling other useful and decorative items that incorporate precision and personalization.
SEO Meta Title: Crafting Wooden Beer Caddies: Portable Carriers Guide SEO Meta Description: Learn to craft durable wooden beer caddies. Master handle joinery, bottle slot precision, power sanding, and personalization for gifts and tailgates in 2026.
