
The satisfying thud of a beanbag hitting a perfectly crafted cornhole board is a sound synonymous with backyard gatherings and competitive fun. Yet, not all cornhole sets are created equal. Many off-the-shelf options compromise on materials and build quality, leading to warped surfaces, uneven play, and diminished longevity. For those seeking superior performance and durability, Building a Custom Cornhole Board Set: Wood Selection, Finish, and Regulation Dimensions for Backyard Fun offers an unparalleled experience. This guide will walk you through the essential steps, from choosing the right wood to applying a resilient finish and adhering to official regulation dimensions, ensuring your custom set provides years of enjoyment.
Key Takeaways
- Optimal Wood Selection: Prioritize high-quality plywood like Baltic birch for the playing surface for stability and smooth play, and sturdy hardwoods or exterior-grade plywood for frames and legs to ensure durability.
- Regulation Dimensions: Adhere strictly to ACL/ACA specifications: 48″ L x 24″ W board surface, 6″ diameter hole centered 9″ from the top and 12″ from each side, and a 12″ front height with a 36″ back height.
- Durable Finishing: Apply multiple coats of a high-quality, weather-resistant finish like exterior-grade polyurethane or spar urethane to protect against elements, ensure a smooth sliding surface, and prolong the board’s life.
- Construction Techniques: Use strong joinery methods such as pocket holes, wood glue, and screws to create a robust and stable frame that can withstand repeated use and transport.
- Personalization: Customization in paint, stain, or decals allows for unique designs, making your cornhole set a true reflection of your style or team spirit.
Choosing the Right Wood for Your Custom Cornhole Board Set
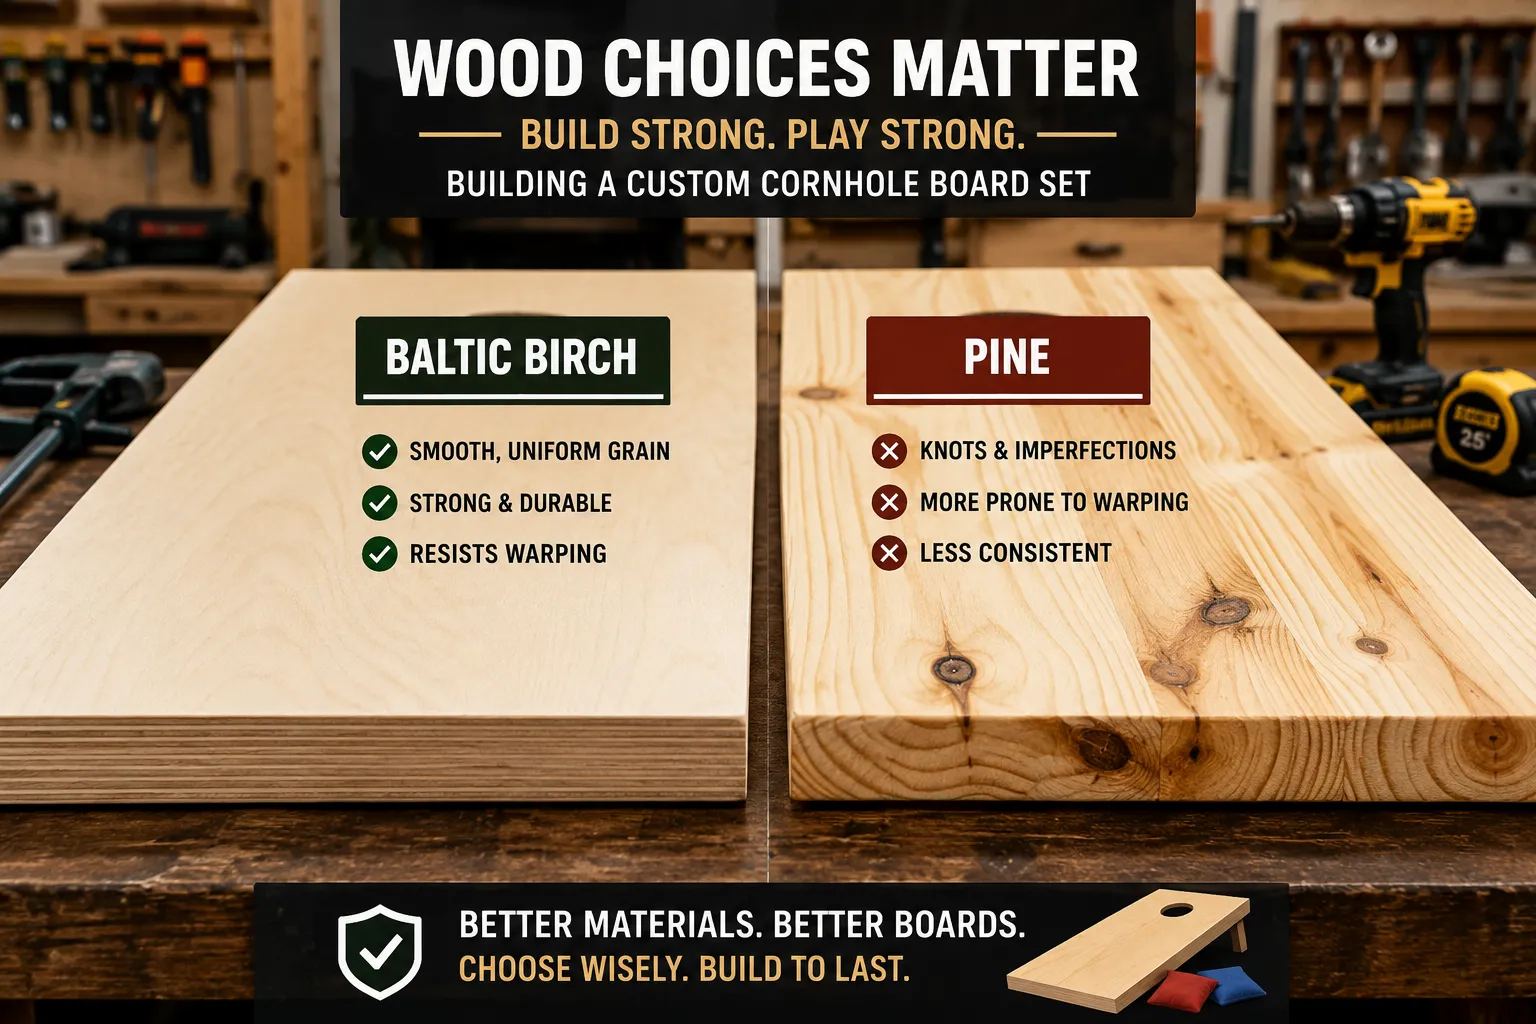
The foundation of a great cornhole board lies in its material. The type of wood you select directly impacts the board’s durability, weight, playability, and resistance to outdoor elements. Investing in quality wood from the outset will prevent issues like warping, splintering, and premature wear, which are common with cheaper alternatives.
Plywood for the Playing Surface
The playing surface is arguably the most critical component, demanding a material that is flat, smooth, and resistant to warping.
- Baltic Birch Plywood (1/2″ or 5/8″ thickness): This is often considered the gold standard for cornhole board surfaces. Baltic birch is known for its void-free core, multiple thin plies, and exceptional stability. Its smooth surface takes paint and finish beautifully, providing a consistent slide for beanbags. It’s dense, durable, and less prone to warping or cupping, making it ideal for a high-performance board.
- Cabinet-Grade Plywood (e.g., Maple, Oak, or Birch faced, 1/2″ or 5/8″ thickness): While not quite as dense or void-free as Baltic birch, high-quality cabinet-grade plywood is an excellent alternative. Look for plywood with a smooth, clean face veneer and a stable core. These options offer good paint adhesion and a durable surface.
- Exterior-Grade Plywood (1/2″ or 5/8″ thickness): If your boards will be exposed to the elements frequently, exterior-grade plywood (like marine-grade or treated plywood) offers enhanced moisture resistance. However, ensure the surface is smooth enough for play; some exterior plywoods can have rougher veneers.
Avoid standard construction-grade plywood (e.g., CDX) for the playing surface. Its rougher surface, voids in the core, and tendency to warp will compromise playability and the longevity of your board.
Solid Wood for Frames and Legs
For the frame and legs, you need wood that provides structural integrity and withstands impact.
- Pine (Select Grade or Clear Pine): A popular and economical choice. Pine is relatively lightweight and easy to work with. Opt for “select” or “clear” grades to minimize knots, which can weaken the wood and make finishing more challenging. While generally durable, pine can be softer and more prone to denting than hardwoods. For other outdoor projects, you might consider how wood species selection for visible joinery affects appearance.
- Poplar: A medium-density hardwood that is often overlooked. Poplar is stable, relatively inexpensive, and takes paint exceptionally well. It’s harder than pine, offering better resistance to dents and dings, making it a good choice for frames.
- Oak or Maple: For maximum durability and a premium feel, hardwoods like oak or maple are excellent choices. They are heavier and more resistant to impact, but also more expensive and harder to work with. If you’re building a set that will see heavy use or you desire a truly high-end product, these are worth considering.
- Cedar or Treated Lumber (for extreme outdoor exposure): If your cornhole boards will be stored outdoors permanently or exposed to harsh weather, cedar or pressure-treated lumber offers superior rot and insect resistance. However, ensure treated lumber is completely dry before finishing, and be aware of its potential for warping and splitting.
| Component | Recommended Wood Type | Notes |
|---|---|---|
| Playing Surface | Baltic Birch Plywood (1/2″-5/8″) | Best for stability, smooth play, paint adhesion. Void-free core. |
| Cabinet-Grade Plywood | Good alternative, smooth face veneer, stable. | |
| Frame & Legs | Pine (Select/Clear) | Economical, easy to work with, lightweight. Prone to dents. |
| Poplar | Stable, good paint adhesion, harder than pine. | |
| Oak/Maple | Maximum durability, heavier, more impact-resistant. | |
| Cedar/Treated Lumber | For extreme outdoor exposure. Ensure fully dry before finishing. |
Achieving the Perfect Finish: Protection and Playability
The finish on your cornhole boards serves two critical purposes: protecting the wood from the elements and creating a smooth, consistent surface for optimal beanbag slide. A well-applied finish can significantly extend the life of your custom cornhole board set and enhance the playing experience. For further insight into protective coatings, consider exploring natural wood finishing without chemicals.
Sanding for Smoothness
Before any finish is applied, proper sanding is essential. Start with a coarser grit sandpaper (e.g., 80-100 grit) to remove any imperfections, glue residue, or major surface irregularities. Gradually move to finer grits (120, 150, 180, and finally 220 grit) across all surfaces that will be painted or sealed, especially the playing surface. The goal is to achieve a glass-smooth surface. After sanding with each grit, thoroughly wipe down the surface with a tack cloth or a damp rag to remove all dust, as dust can compromise finish adhesion and create an uneven surface. For a deeper dive into finishing techniques, you might find our guide on beyond basic sanding helpful.
Painting and Staining
This is where you bring your design to life.
- Primer: Always apply a good quality wood primer to all surfaces, especially the plywood playing surface. Primer helps seal the wood, provides a uniform base for paint, and improves paint adhesion, leading to a more durable and vibrant finish.
- Paint: Use exterior-grade latex or acrylic paint for vibrant colors and weather resistance. Apply multiple thin coats, allowing each coat to dry thoroughly and performing light sanding (220-320 grit) between coats for optimal smoothness and adhesion. For custom designs or logos, consider using stencils or masking tape for crisp lines.
- Stain: If you prefer to showcase the natural wood grain, use an exterior-grade wood stain. Apply according to manufacturer directions, typically wiping off excess after a short dwell time. A stain will require a topcoat for protection.
Protective Topcoats
The topcoat is your board’s primary defense against wear, moisture, and UV damage.
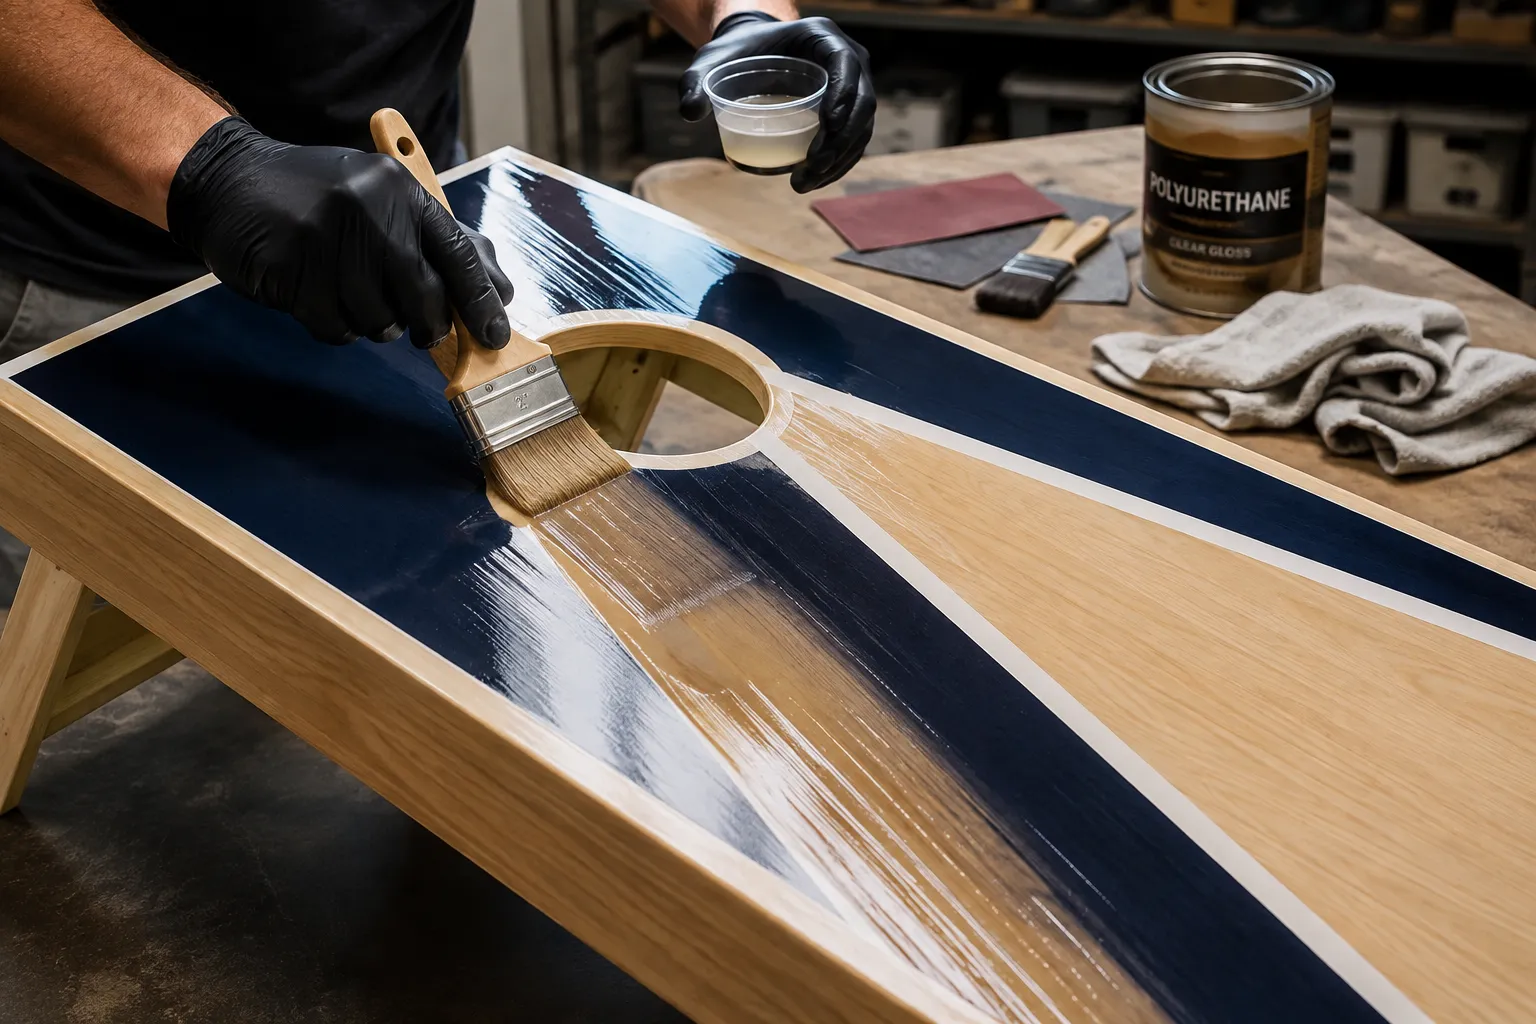
- Exterior-Grade Polyurethane: This is a highly recommended option. Look for oil-based or water-based exterior-grade polyurethanes. Oil-based versions tend to be more durable and amber slightly, while water-based versions dry faster and stay clear. Apply at least 3-4 coats, allowing ample dry time between coats and lightly sanding (320-400 grit) to ensure maximum adhesion and a smooth finish. This creates a hard, clear, protective layer that provides excellent beanbag slide.
- Spar Urethane: Designed for marine applications, spar urethane offers superior flexibility and UV resistance, making it an excellent choice for boards frequently exposed to sunlight and moisture. It flexes with the wood, reducing cracking over time. Apply multiple coats, following the same sanding and drying protocols as polyurethane.
- Epoxy Coating: For the ultimate in durability and a high-gloss, ultra-smooth finish, a thin layer of clear epoxy resin can be applied to the playing surface. This method is more involved and expensive but provides unparalleled protection and a consistent slide. Ensure the epoxy is suitable for outdoor use and follow all mixing and application instructions carefully.
Key Finishing Tips:
- Work in a clean, dust-free environment. Dust is the enemy of a smooth finish.
- Apply thin, even coats. Thick coats can lead to drips, sags, and prolonged drying times.
- Always read and follow the manufacturer’s instructions for dry times, recoat windows, and safety precautions.
- Test your finish on scrap wood to ensure compatibility and desired appearance.
Understanding Regulation Dimensions for Backyard Fun and Competitive Play
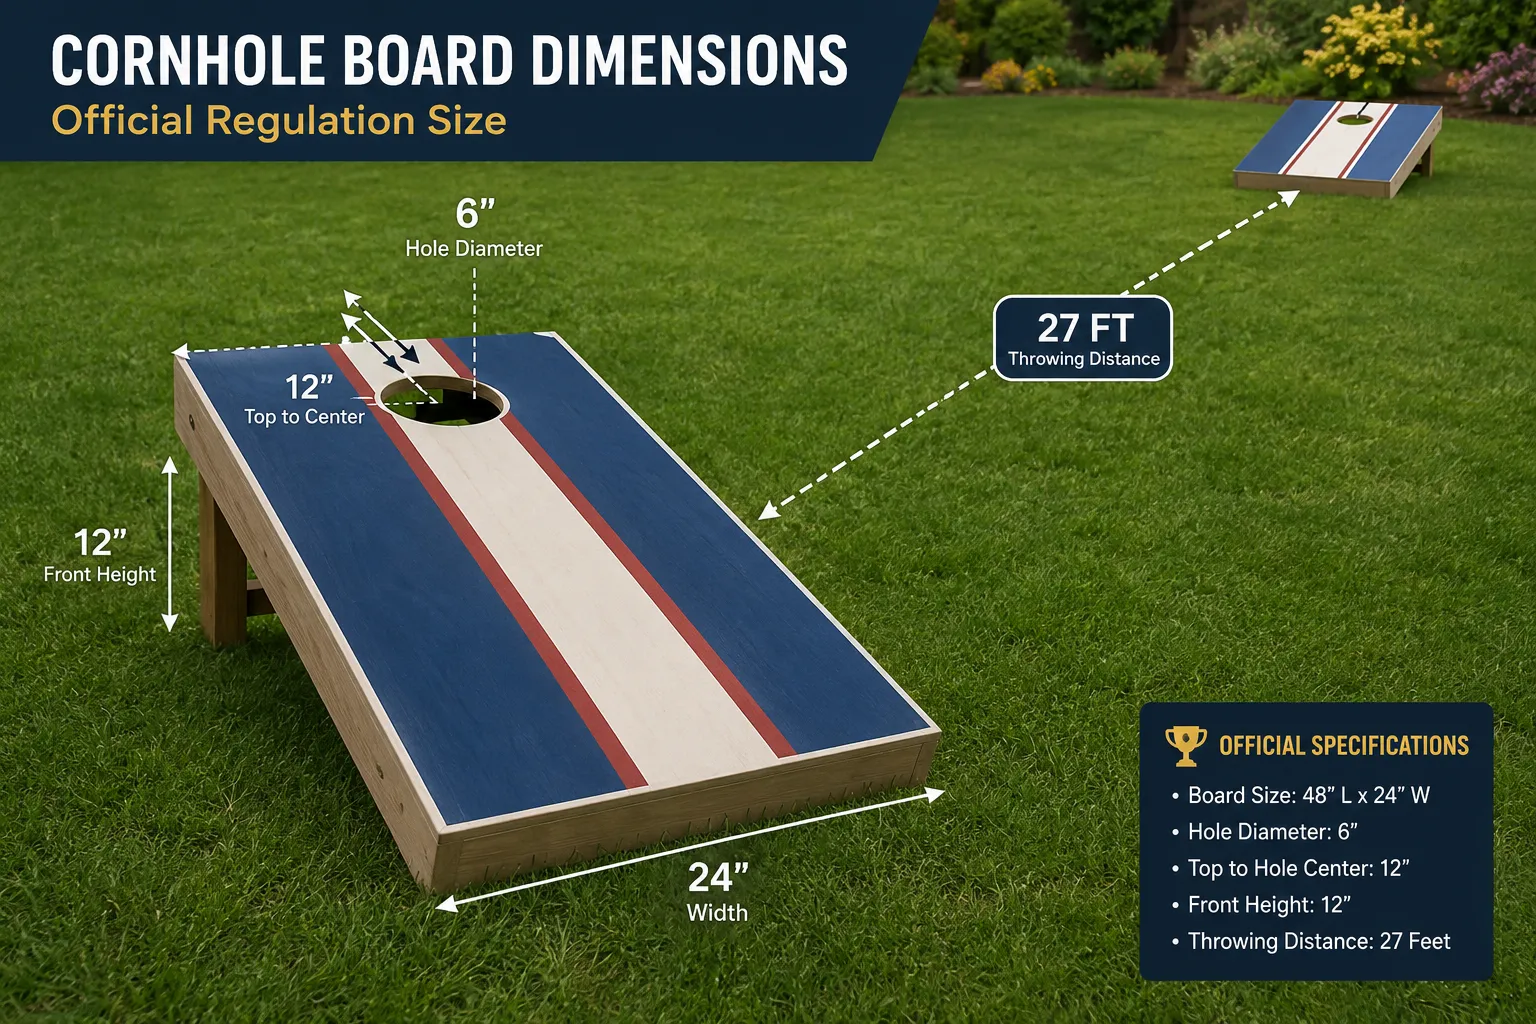
Adhering to regulation dimensions is crucial whether you’re building a cornhole set for casual backyard fun or competitive play. The American Cornhole League (ACL) and American Cornhole Association (ACA) set the official standards, ensuring fair and consistent gameplay. Deviating from these dimensions can affect game physics, beanbag slide, and even competition eligibility.
Board Surface Dimensions
The playing surface itself has very specific dimensions:
- Length: 48 inches (4 feet)
- Width: 24 inches (2 feet)
These dimensions create the standard rectangular playing field.
Hole Placement and Size
The all-important “hole” is not just any size or placed anywhere:
- Hole Diameter: 6 inches
- Hole Placement (from the top edge): The center of the hole should be 9 inches from the top edge of the board.
- Hole Placement (from the side edges): The center of the hole should be 12 inches from each side edge, meaning it’s centered width-wise.
Board Height
The elevation of the board is also critical for shot trajectory:
- Front Height: The front edge of the playing surface should be 2.5 to 4 inches off the ground. Most builders aim for 3.5 inches.
- Back Height: The back edge of the playing surface should be 12 inches off the ground.
These heights are achieved by designing collapsible legs that pivot and lock into place. The angle created by these varying heights is essential for the trajectory of the beanbags.
Common Construction Techniques to Achieve Regulation Dimensions
To ensure your boards meet these specifications, precision in cutting and assembly is key.
- Cut Plywood Top: Begin by accurately cutting your chosen plywood to 48″ x 24″. Use a straight edge and a circular saw or table saw for clean, straight cuts.
- Cut Hole: Use a 6-inch hole saw or a jigsaw with a trammel to cut the hole. Mark the center point precisely: 9 inches down from the top edge and 12 inches in from either side.
- Build Frame: Construct a rectangular frame using 1×4 lumber (or similar, ensuring a 3/4″ nominal thickness). The frame should measure 48″ L x 24″ W (outer dimensions) with additional cross braces for support. A popular method involves a cross brace 12 inches from the top and another about 12 inches from the bottom, or just one centered cross brace. Use the ultimate guide to wood glue in combination with screws for robust joinery.
- Attach Top to Frame: Secure the plywood playing surface to the frame using wood glue and screws. Ensure the screws are countersunk so the heads are flush or slightly below the surface, then fill with wood putty and sand smooth.
- Construct Legs: Legs are typically made from 1×4 lumber, cut to a specific length to achieve the 12-inch back height when pivoted. The top of the legs should be rounded to allow for smooth rotation.
- Attach Legs: Attach the legs to the inside of the frame using carriage bolts, washers, and wing nuts. This allows the legs to pivot for storage and to be locked in place for play. A spacer block might be needed to maintain the correct front height.
- Support Brace: A brace connecting the two legs prevents them from splaying out and ensures stability. This brace often incorporates a method to lock the legs in their playing position (e.g., by resting on the back frame or a cleat).
Pro Tip for Stability: While regulation dimensions dictate the playing surface and height, adding a cross brace just below the hole can significantly improve the board’s stability and reduce bounce, creating a more consistent playing experience.
Recommended Tool List for Building a Custom Cornhole Board Set
To achieve precision and efficiency, a basic set of woodworking tools is essential. Consider the following:
- Measuring Tape and Square: For accurate measurements and marking.
- Circular Saw or Table Saw: For precise cuts on plywood and frame pieces.
- Jigsaw or 6-inch Hole Saw: For cutting the 6-inch hole.
- Drill/Driver: For pilot holes and driving screws.
- Pocket Hole Jig (Optional but Recommended): For strong, hidden joinery on the frame.
- Sander (Orbital or Belt): For surface preparation and smoothing.
- Clamps: To hold pieces securely during assembly and gluing.
- Safety Glasses and Hearing Protection: Always prioritize safety.
By meticulously following these dimensions and using sound construction techniques, your custom cornhole board set will not only look professional but also play like a champion’s set, ready for countless hours of backyard fun in 2026.
Conclusion
Building a custom cornhole board set is a rewarding woodworking project that combines practical skill with the joy of creating something truly personalized for entertainment. By prioritizing careful wood selection, applying a durable finish, and meticulously adhering to regulation dimensions, you ensure your boards are not only visually appealing but also offer superior playability and longevity. This process allows you to craft a set that stands out from mass-produced alternatives, reflecting your craftsmanship and style, ready for years of backyard gatherings and competitive tosses in 2026.
The satisfaction of seeing friends and family enjoy a game on boards you built yourself is immense. Embrace the process, pay attention to detail, and you’ll soon have a high-quality cornhole set that’s the envy of your neighborhood. The effort invested in selecting premium materials, such as Baltic birch plywood for the playing surface and robust hardwoods for the frame, will translate directly into a more resilient and enjoyable game. Similarly, a meticulous finishing process, including thorough sanding and multiple coats of exterior-grade polyurethane or spar urethane, will protect your investment and ensure a consistent beanbag slide. Now, gather your tools, choose your wood, and start crafting a custom cornhole experience that’s built to last.