


A recent study revealed that properties featuring well-designed outdoor living spaces can command up to a 10% higher sale price compared to those without (National Association of Realtors, 2023). This statistic underscores the undeniable value that thoughtfully constructed outdoor elements add to a home. For the dedicated DIY enthusiast, the prospect of enhancing a backyard with personalized woodworking structures like pergolas, arbors, and robust outdoor kitchen frameworks presents an exciting and rewarding challenge. This article will guide you through the process of building DIY Backyard Woodworking Structures: Building Pergolas, Arbors, and Outdoor Kitchen Frameworks with Traditional Joinery, focusing on techniques that ensure both enduring strength and aesthetic appeal.
Key Takeaways

- Traditional joinery, such as mortise and tenon, offers superior strength and durability for outdoor woodworking structures.
- Selecting the right weather-resistant wood species and applying appropriate finishes are crucial for longevity.
- Careful planning, accurate measurements, and proper tool usage are fundamental to successful construction.
- Building pergolas, arbors, and outdoor kitchen frameworks provides a significant opportunity to customize your outdoor living space.
- Safety protocols must be observed diligently throughout all stages of the woodworking process.
The Foundation of Strength: Why Traditional Joinery Matters for DIY Backyard Woodworking Structures: Building Pergolas, Arbors, and Outdoor Kitchen Frameworks with Traditional Joinery
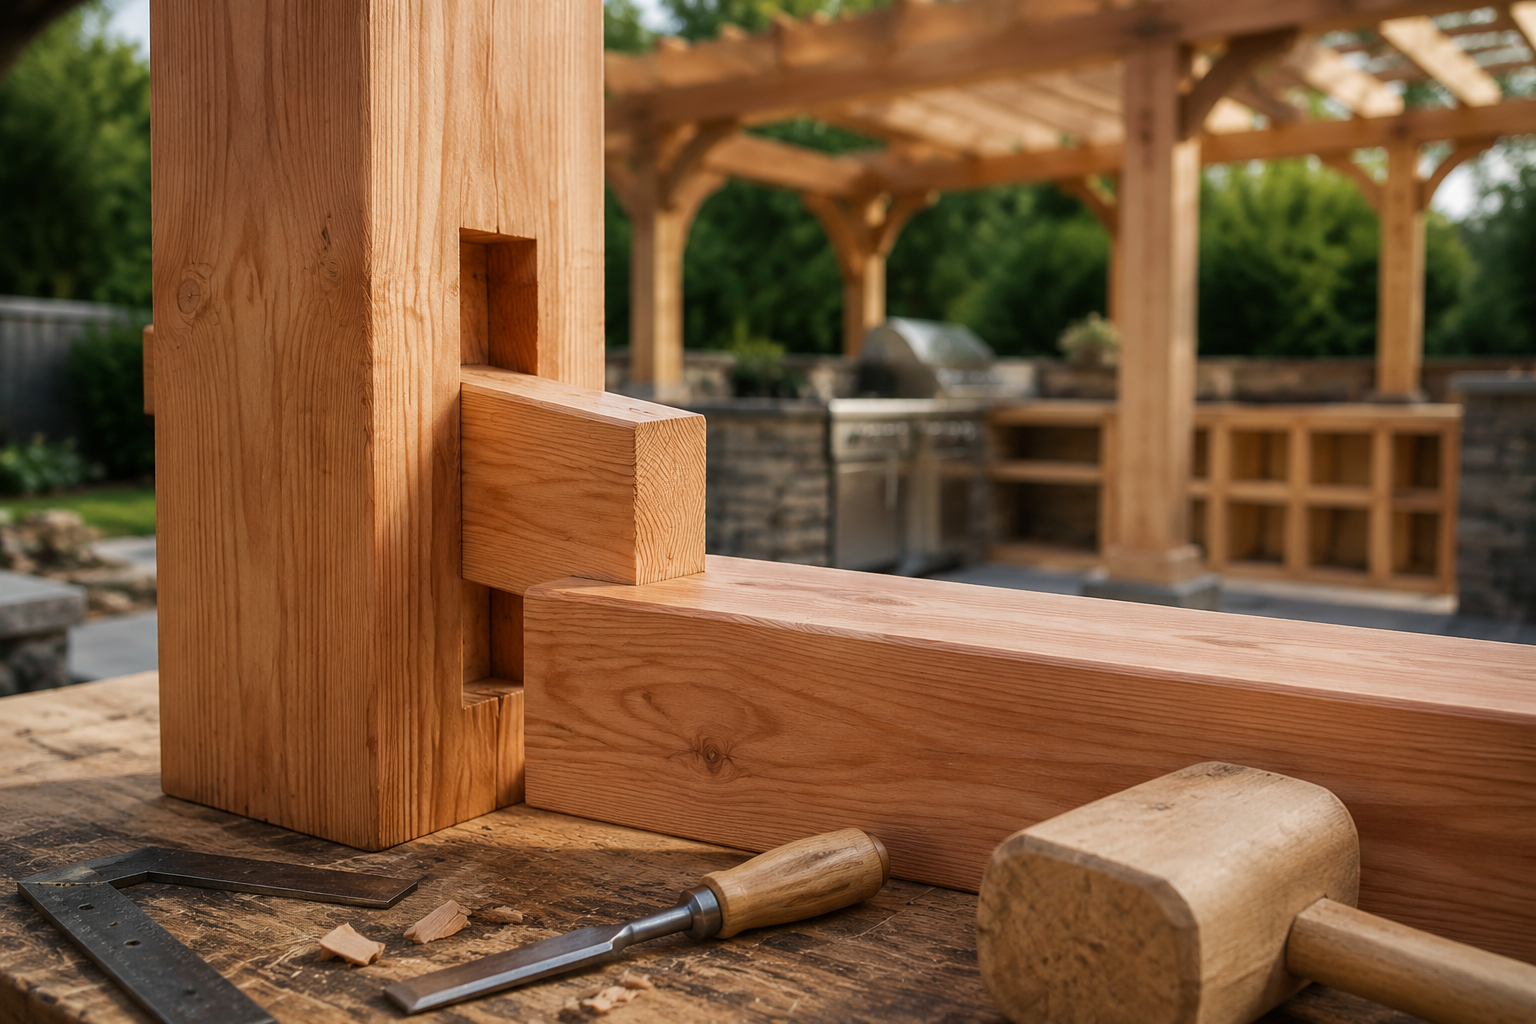
When envisioning lasting outdoor structures, the temptation to rely solely on screws and bolts might arise. However, traditional woodworking joinery techniques offer a time-tested approach to durability and structural integrity that far surpasses mechanical fasteners alone, especially for exposed environments. Mortise and tenon joints, dovetail joints, and half-lap joints provide significant surface area for glue adhesion, interlocking wood fibers for incredible strength, and allow for the natural expansion and contraction of wood. This intrinsic strength is paramount for structures exposed to the elements year-round.

Understanding Key Traditional Joinery Types
- Mortise and Tenon: This iconic joint involves fitting a protruding tenon (from one piece of wood) into a cavity, or mortise (in another piece). It’s incredibly strong, especially when secured with wooden pegs or waterproof glue. It’s ideal for connecting vertical posts to horizontal beams in pergolas and outdoor kitchen frames.
- Half-Lap Joint: Created by removing half the thickness from the end of two pieces of wood, allowing them to overlap and create a flush surface. This joint is simpler to cut and provides good strength, often used for connecting horizontal members or creating strong corner braces.
- Dovetail Joint (for specific applications): While more complex, miniature dovetails can be used in some outdoor kitchen cabinetry or smaller arbor details where extreme racking resistance is needed, though less common for primary structural members. For a deeper dive into different joinery types, consider exploring our Beginner’s Guide to Essential Woodworking Joints: When to Use Which.
Choosing the right joint for each connection point in your DIY Backyard Woodworking Structures: Building Pergolas, Arbors, and Outdoor Kitchen Frameworks with Traditional Joinery ensures that the structure can withstand wind, snow, and general wear and tear for decades.
Essential Tools for Traditional Joinery
To master traditional joinery, you’ll need a selection of reliable tools:
- Chisels and Mallets: For precise shaping and clearing out mortises. Keep them sharp!
- Hand Saws: Tenon saws and rip saws are crucial for accurate cuts.
- Measuring and Marking Tools: A reliable square, marking gauge, and sharp pencil are non-negotiable for precision.
- Routers (Optional but helpful): While traditional joinery is often done with hand tools, a router with appropriate bits can expedite cutting dados, rabbets, and even mortises, especially for repeated cuts on multiple identical pieces. For tips on maximizing precision with routers, check out Choosing and Using Router Tables: Maximizing Precision and Safety for.
- Drills: For creating pilot holes and pegging mortise and tenon joints.
- Clamps: Essential for holding workpieces securely during marking, cutting, and gluing.
Material Selection and Design Considerations for Outdoor Structures
The success and longevity of any outdoor woodworking project hinge significantly on two critical factors: the type of wood chosen and thoughtful design. Unlike indoor furniture, outdoor structures face constant assault from moisture, UV radiation, temperature fluctuations, and pests.
 , displayed as labeled planks with distinct grain patterns and colors.)
, displayed as labeled planks with distinct grain patterns and colors.)
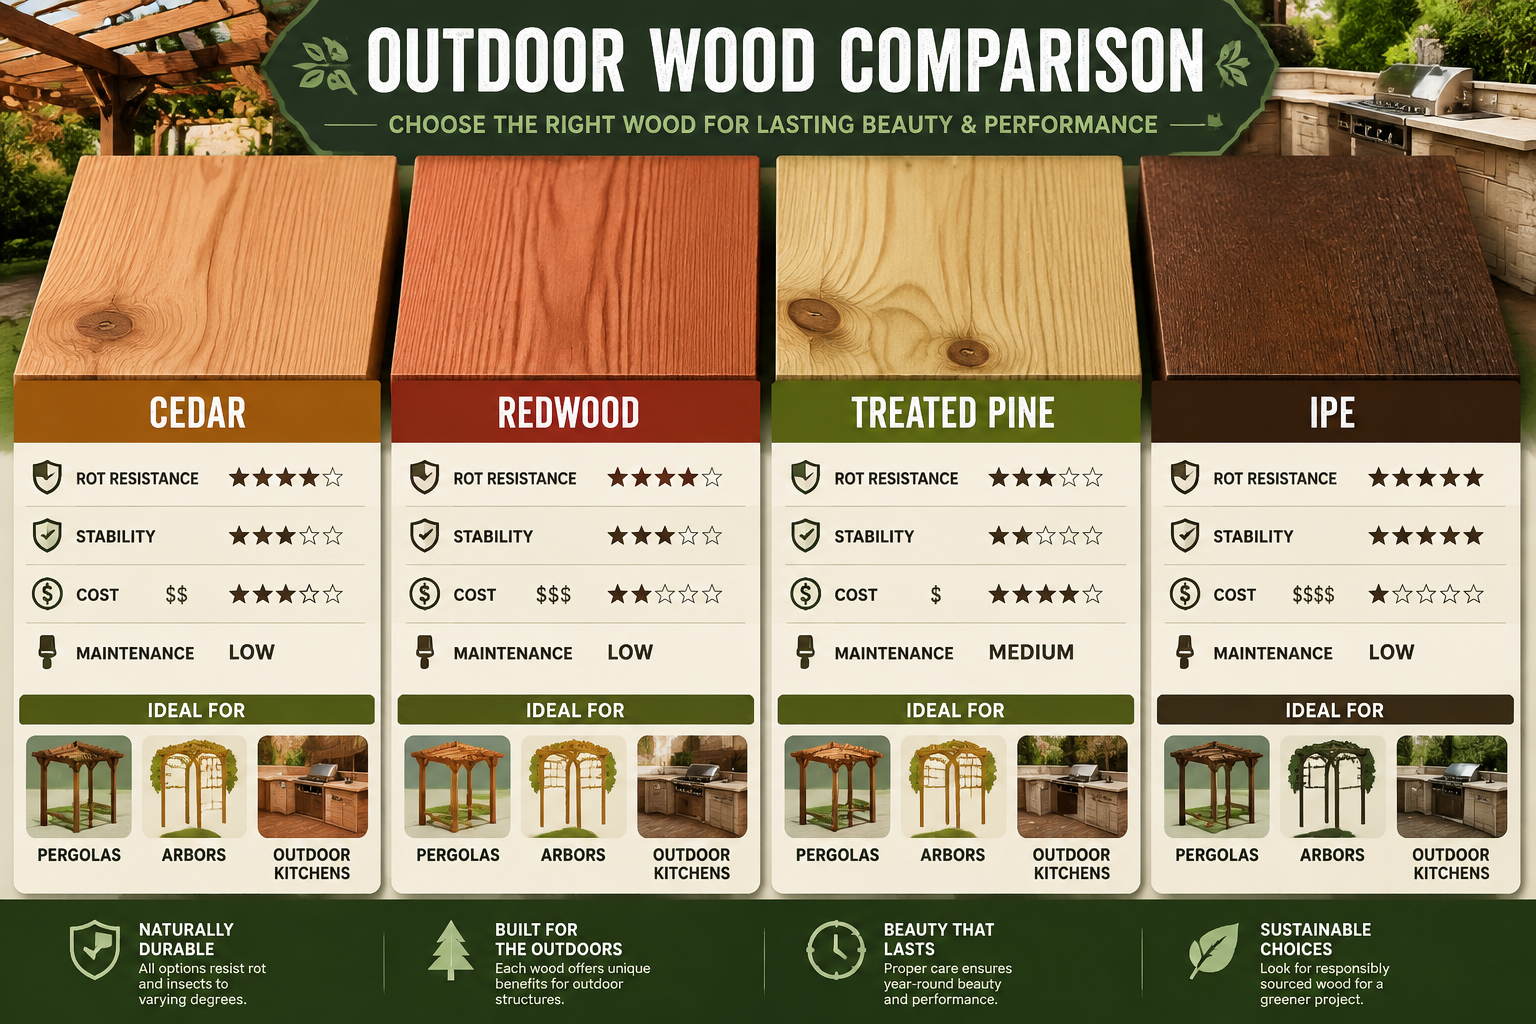
Selecting the Right Wood Species
For DIY Backyard Woodworking Structures: Building Pergolas, Arbors, and Outdoor Kitchen Frameworks with Traditional Joinery, weather resistance is paramount. Here are common choices:
| Wood Species | Key Characteristics | Best For | Considerations |
|---|---|---|---|
| Cedar | Naturally resistant to rot, insects; lightweight; beautiful aroma; stable | Pergolas, Arbors, Siding for outdoor kitchens | Softer, can dent; higher cost than pine |
| Redwood | Exceptional rot and insect resistance; stable; beautiful reddish hue; lightweight | High-end pergolas, arbors, decking, outdoor kitchen frameworks | Premium price; can be difficult to source in some regions |
| Pressure-Treated Pine | Chemically treated to resist rot, fungi, and insects; readily available; affordable | Structural posts, hidden framework for outdoor kitchens, budget-friendly pergolas | Contains chemicals (wear gloves, avoid inhaling sawdust); less aesthetically pleasing, often requires staining/painting |
| Cypress | Naturally resistant to decay and insects; beautiful grain; good stability | Pergolas, arbors, outdoor furniture | Moderate cost; can be knotty |
| Ipe / Tropical Hardwoods | Extremely dense and durable; highly resistant to rot, insects, and decay; beautiful dark color; excellent longevity | Decking, high-wear surfaces for outdoor kitchens, premium structural elements | Very expensive; extremely heavy and hard to work with; requires specialized tools |
Understanding how different woods behave is crucial for building structures that last. Our article on Understanding Wood Movement: How to Design and Build Furniture That provides valuable insights into this topic. Consider sourcing reclaimed wood for a sustainable and character-rich option, as detailed in Sourcing Reclaimed and Salvaged Wood: Quality Assessment, Re.
Designing for Durability and Aesthetics
1. Site Analysis: Before drawing plans, assess your backyard. * Sun Exposure: Where does the sun hit throughout the day? This impacts pergola shade patterns and outdoor kitchen comfort. * Wind Patterns: Prevailing winds can stress structures; consider bracing. * Drainage: Ensure water drains away from posts and foundations. * Utilities: Locate any underground pipes or cables before digging.
2. Scale and Proportion: * A pergola should complement your home, not overwhelm it. Consider the height of your house and existing landscape features. * Arbors should comfortably frame a pathway or entry point. * Outdoor kitchen frameworks need to accommodate appliances and counter space without feeling cramped.
3. Foundation is Key: * Post Anchors: Set posts in concrete footings or use sturdy metal post bases to keep wood off the ground, preventing rot. * Leveling: A level foundation is essential for a stable structure. Use a post-hole digger, gravel for drainage, and a level.
4. Weather Protection: * Roofing/Slats: Pergolas typically have open roofs with slats for partial shade, but you might consider adding clear roofing panels for rain protection over an outdoor kitchen. * Finishes: Apply a high-quality exterior stain, sealant, or paint to protect the wood from UV damage, moisture, and mildew. Reapply every few years.
Step-by-Step Construction: Pergolas, Arbors, and Outdoor Kitchen Frameworks
Building these structures involves similar core principles but with specific considerations for each. Always prioritize safety: wear safety glasses, hearing protection, and appropriate clothing.

Building a Sturdy Pergola
Pergolas are open structures typically consisting of posts, beams, and rafters/slats, designed to provide partial shade and a visual focal point.
- Plan and Layout:
- Measure and mark the footprint of your pergola on the ground.
- Dig post holes, ensuring they are deep enough for your climate’s frost line and wider than your posts for concrete.
- Set Posts:
- Place gravel at the bottom of each hole for drainage.
- Set posts, ensuring they are plumb (perfectly vertical) using a level and temporary braces.
- Fill holes with concrete. Allow concrete to cure fully.
- Attach Beams:
- Using mortise and tenon or heavy-duty half-lap joints, connect the main horizontal beams to the tops of the posts. This is where precise joinery ensures maximum strength.
- Ensure all beams are level and square.
- Install Rafters/Slats:
- Cut decorative ends on rafters if desired.
- Space rafters evenly and attach them to the top beams using half-lap joints, dadoes, or strong hidden fasteners, creating the characteristic open roof.
- Finishing: Apply your chosen exterior finish.
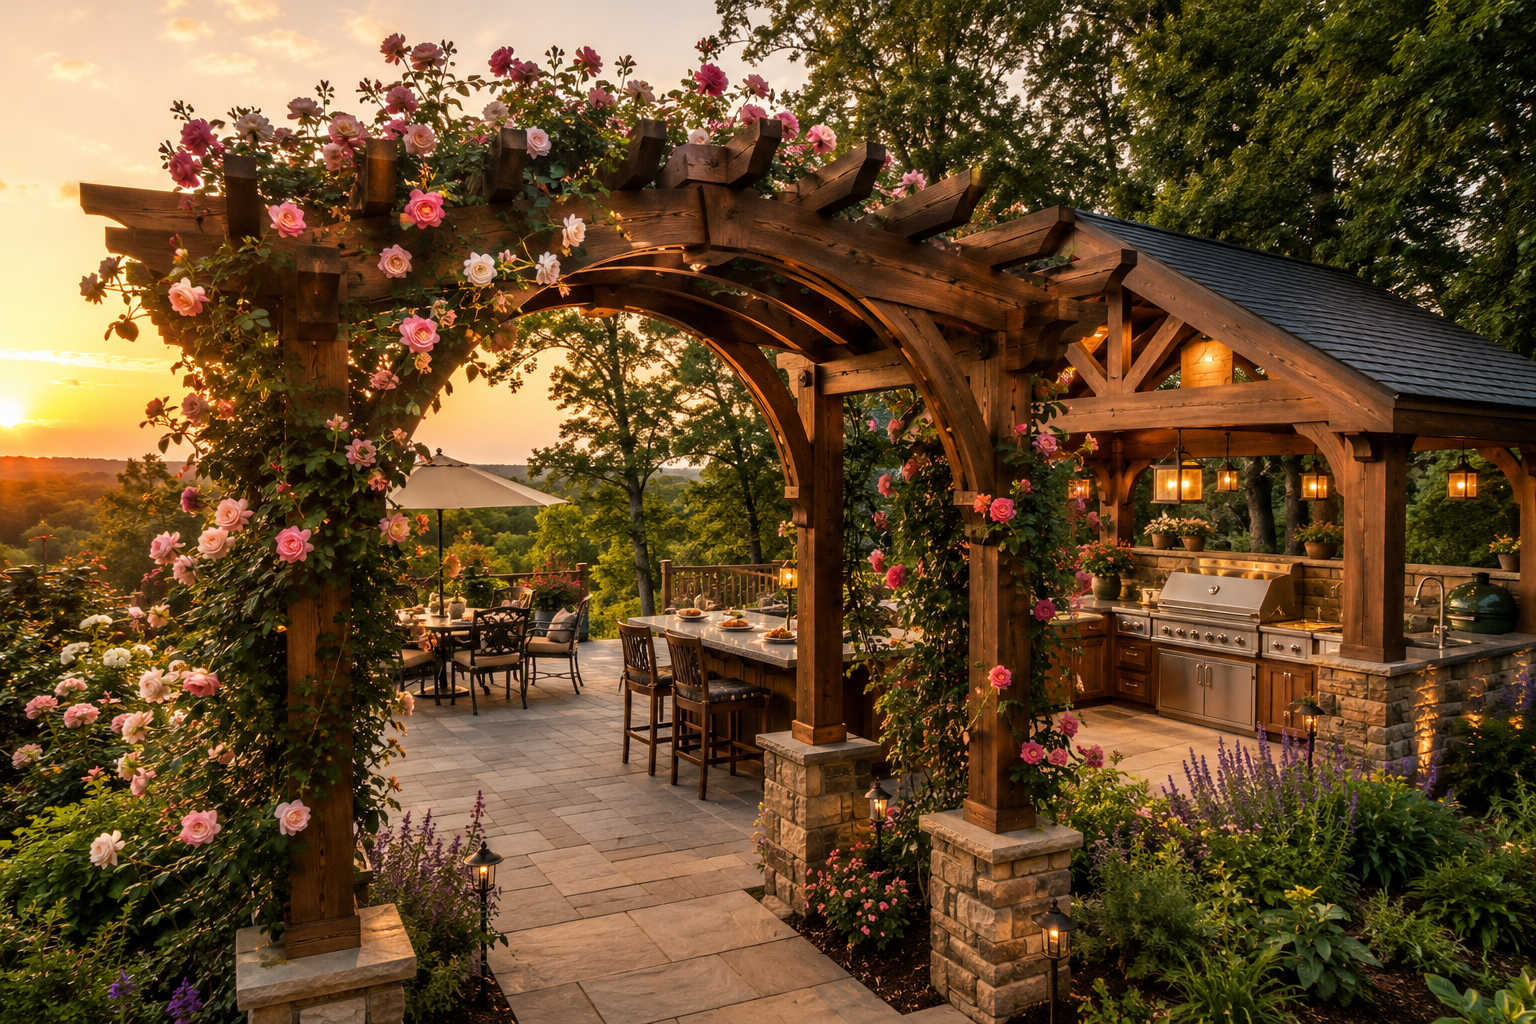
Crafting an Elegant Arbor
Arbors are smaller, often arched or gabled structures, typically framing a gate or pathway, designed to support climbing plants.
- Design and Measurements: Determine the desired width, height, and depth. Consider an arch or a flat top.
- Cut Components:
- Cut posts, side supports, and top members (arched or straight).
- For an arched top, you might laminate thin strips of wood or carefully cut a curve from a thicker board.
- Assemble Sides:
- Attach horizontal cross-members to the posts using mortise and tenon or half-lap joints for rigidity.
- Consider adding lattice panels for climbing plants.
- Connect Top:
- Join the two side assemblies with the top arch or straight beams.
- Ensure all connections are strong and square.
- Installation: Dig post holes, set posts with gravel and concrete, ensuring the arbor is plumb and stable.

Building an Outdoor Kitchen Framework
An outdoor kitchen framework provides the structure for countertops, appliances, and storage, making DIY Backyard Woodworking Structures: Building Pergolas, Arbors, and Outdoor Kitchen Frameworks with Traditional Joinery a truly comprehensive outdoor living upgrade.
- Detailed Planning:
- Sketch a precise layout, marking the location of the grill, sink, refrigerator, and storage.
- Account for appliance dimensions and necessary ventilation clearances.
- Foundation:
- Create a solid, level concrete pad or gravel base to support the framework and heavy appliances.
- Install sturdy posts set in concrete, similar to a pergola, but potentially shorter depending on your counter height.
- Build the Base Cabinets:
- Construct robust frames for each cabinet section using mortise and tenon or half-lap joints.
- Use treated lumber or naturally resistant hardwoods for any wood that will be in contact with the ground or directly exposed to moisture.
- Ensure openings for plumbing and electrical lines are planned. For a deeper dive into smart home integration with custom woodwork, you might find DIY Smart Home Integration with Custom Woodwork: Hiding Tech with helpful for ideas on concealing outdoor tech.
- Add Countertop Support:
- Install strong horizontal members to support the weight of your chosen countertop material (e.g., granite, concrete, tile).
- Ensure these supports are perfectly level.
- Cladding and Finishing:
- Once the framework is complete, you can clad it with weather-resistant materials like cement board for stucco/tile, cedar planks, or marine-grade plywood.
- Apply appropriate exterior finishes.
Finishing Touches and Maintenance for Lasting Beauty
After investing time and effort into building DIY Backyard Woodworking Structures: Building Pergolas, Arbors, and Outdoor Kitchen Frameworks with Traditional Joinery, the final steps of finishing and ongoing maintenance are crucial for protecting your investment and ensuring long-term enjoyment.
Protecting Your Woodwork
- Sanding: Start with a thorough sanding to prepare the wood surface. Begin with coarser grits (e.g., 80-100) and progress to finer grits (e.g., 150-220) for a smooth finish that allows the protective coating to adhere properly.
- Cleaning: Before applying any finish, thoroughly clean the wood to remove dust, dirt, and any natural oils that might hinder adhesion. A damp cloth or a soft brush works well.
- Exterior Stains and Sealants: These are vital for outdoor structures.
- Penetrating Stains: Soak into the wood, offering UV protection and moisture resistance while allowing the natural grain to show.
- Film-Forming Sealants/Varnishes: Create a protective layer on the surface. These often provide excellent water repellency and UV blocking but can peel or chip over time if not maintained.
- Paint: Offers the most robust protection and allows for color customization, but obscures the wood grain. Ensure you use exterior-grade paint with a good primer.

Longevity Through Regular Maintenance
Even with the best wood and joinery, outdoor structures require periodic care.
- Regular Cleaning: Wash down your structures annually with a mild detergent and water to remove dirt, mold, and mildew. A soft brush or pressure washer (used carefully on a low setting) can be effective.
- Reapplication of Finish:
- Inspect your finish annually for signs of wear, fading, or peeling.
- Depending on the product and exposure, most stains and sealants need reapplication every 2-5 years. Follow the manufacturer’s recommendations.
- Joint Inspection: Periodically check all traditional joints for any signs of loosening or stress. Re-peg or re-glue as needed.
- Hardware Check: If any metal fasteners (bolts, screws, anchors) were used, inspect them for rust or corrosion and replace as necessary.
By diligently performing these finishing and maintenance tasks, your DIY Backyard Woodworking Structures: Building Pergolas, Arbors, and Outdoor Kitchen Frameworks with Traditional Joinery will remain beautiful and functional for many years to come.
Conclusion
Embarking on the journey to build DIY Backyard Woodworking Structures: Building Pergolas, Arbors, and Outdoor Kitchen Frameworks with Traditional Joinery is a commitment that promises significant returns in terms of enhanced outdoor living, increased property value, and personal satisfaction. By embracing the strength and beauty of traditional joinery, carefully selecting weather-resistant materials, and adhering to sound design principles, you can create outdoor structures that are not only aesthetically pleasing but also exceptionally durable. The meticulous planning, precise execution, and thoughtful finishing ensure that your pergolas, arbors, and outdoor kitchen frameworks will stand as testaments to your craftsmanship for decades. Start with detailed plans, acquire the right tools, and approach each step with patience and precision. The reward of relaxing in your custom-built outdoor sanctuary in 2026 will be well worth the effort.
