

The average apartment size in major U.S. cities has shrunk by nearly 10% over the last decade, pushing homeowners and renters alike to seek ingenious solutions for maximizing their living areas (National Apartment Association, 2023). This trend makes smart, space-saving furniture not just a convenience, but a necessity. Creating your own DIY nightstands and side tables offers a unique opportunity to tailor storage and surface solutions precisely to your compact bedrooms and living rooms, blending functionality with personal style.
Key Takeaways

- DIY nightstands and side tables are essential for optimizing space in smaller homes and apartments.
- Three distinct designs—open-shelf, compact drawer, and slim-legged—offer versatile solutions for various needs.
- These projects emphasize efficiency, requiring basic tools and materials, making them accessible for most DIY enthusiasts.
- Customization is key to ensuring these pieces perfectly integrate with existing decor and storage requirements.
- Building your own furniture provides a sense of accomplishment and cost savings compared to store-bought alternatives.
Maximizing Small Spaces with DIY Nightstands and Side Tables: 3 Space-Saving Designs
Creating furniture for small spaces demands a thoughtful approach, focusing on utility, footprint, and aesthetic integration. DIY projects empower you to address these challenges directly, allowing for precise measurements and material choices that perfectly suit your environment. This article will guide you through three distinct, space-saving designs for DIY nightstands and side tables, each offering unique benefits for compact bedrooms and living rooms in 2026. These designs are chosen for their efficiency in space utilization, ease of construction, and potential for customization.
Whether you’re looking to store bedtime essentials, hold a lamp, or simply add a decorative touch without overwhelming a room, these projects provide practical solutions. We’ll delve into the necessary tools, materials, and steps, ensuring you can tackle these builds with confidence, even if you have limited woodworking experience.
The Power of Customization in Small Furniture
One of the greatest advantages of building your own furniture, especially for tight spaces, is the ability to customize every aspect. Unlike off-the-shelf options, DIY allows you to:
- Tailor dimensions: Fit an exact nook or cranny.
- Select materials: Choose wood species, finishes, and hardware that match your existing decor.
- Optimize storage: Design specific compartments or shelves for your particular items.
- Control costs: Utilize reclaimed wood or affordable materials to stay within budget.
Consider the dimensions of your available space. A good rule of thumb for nightstands is to keep the top surface roughly level with your mattress for easy access. Side tables in living rooms should generally be no higher than the arm of your sofa or armchair.
Design 1: The Open-Shelf Floating Nightstand
For ultimate space-saving and a minimalist aesthetic, the open-shelf floating nightstand is an excellent choice. This design eliminates legs, freeing up floor space and making the room feel larger and airier. It’s particularly effective in bedrooms where every square inch counts, allowing for easy cleaning underneath and preventing the room from feeling cluttered.
Materials and Tools
This design is surprisingly simple and requires minimal materials.
Materials:
- 1 piece of pre-cut plywood or solid wood board (e.g., 18″ x 12″ x 0.75″ for the top/bottom, 18″ x 4″ x 0.75″ for the back, 10.5″ x 4″ x 0.75″ for sides)
- Wood glue
- Wood screws (1.5″ and 2″)
- Wood filler
- Sandpaper (various grits)
- Primer and paint/stain/finish
- Heavy-duty floating shelf brackets or French cleat system (ensure they can support desired weight)
Tools:
- Measuring tape
- Pencil
- Circular saw or miter saw (if cutting your own wood)
- Drill/driver
- Level
- Stud finder
- Clamps
- Orbital sander (optional, but recommended)
- Safety glasses and hearing protection
Construction Steps for the Open-Shelf Floating Nightstand
The beauty of this design lies in its straightforward construction.
Cut and Prepare Wood:
- If you’re cutting your own wood, precisely cut your pieces for the top, bottom, back, and two sides. For an 18″ wide, 12″ deep, and 4″ high internal shelf, your pieces might be:
- Top: 18″ x 12″
- Bottom: 18″ x 12″
- Back: 18″ x 4″
- Sides: 10.5″ x 4″ (These will be recessed slightly to accommodate the back piece).
- Smooth all edges with an orbital sander or sandpaper, ensuring no splinters or rough spots.
- For a detailed look at selecting suitable materials, especially for cabinet-grade projects, explore our guide on 12 plywood for cabinets.
- If you’re cutting your own wood, precisely cut your pieces for the top, bottom, back, and two sides. For an 18″ wide, 12″ deep, and 4″ high internal shelf, your pieces might be:
Assemble the Box:
- Apply wood glue to the edges of the side pieces and attach them to the bottom piece, ensuring they are flush at the front and sides. Use clamps to hold them in place.
- Attach the back piece between the side pieces, flush with the top and bottom edges.
- Drill pilot holes and secure the joints with wood screws.
- Attach the top piece, aligning it perfectly with the sides and back. Use glue and screws.
- Wipe off any excess glue with a damp cloth.
Finishing Touches:
- Fill all screw holes and seams with wood filler. Allow to dry completely.
- Sand the entire unit smooth, working your way up through finer grits of sandpaper (e.g., 120, 180, 220).
- Clean off all sanding dust.
- Apply your chosen primer, paint, stain, or clear finish. Several thin coats are better than one thick coat. For insights into various finishing techniques, refer to our article on natural wood finishing techniques.
Installation:
- Determine the desired height and location on the wall. Use a stud finder to locate wall studs for secure mounting. This is crucial for stability.
- Install your chosen floating shelf brackets or French cleat system according to manufacturer instructions, ensuring they are perfectly level.
- Mount your assembled nightstand onto the brackets or cleat. If using a French cleat, ensure the cleat on the nightstand matches the wall-mounted one. For more advanced floating shelf designs, consider reviewing our guide on building robust floating shelves.

Benefits and Customization Options
- Visual Lightness: Creates an illusion of more space.
- Easy Cleaning: No legs to obstruct vacuuming or mopping.
- Customization: Paint it to match your wall for a seamless look, or use contrasting wood for a focal point. Add LED strip lighting underneath for ambiance.
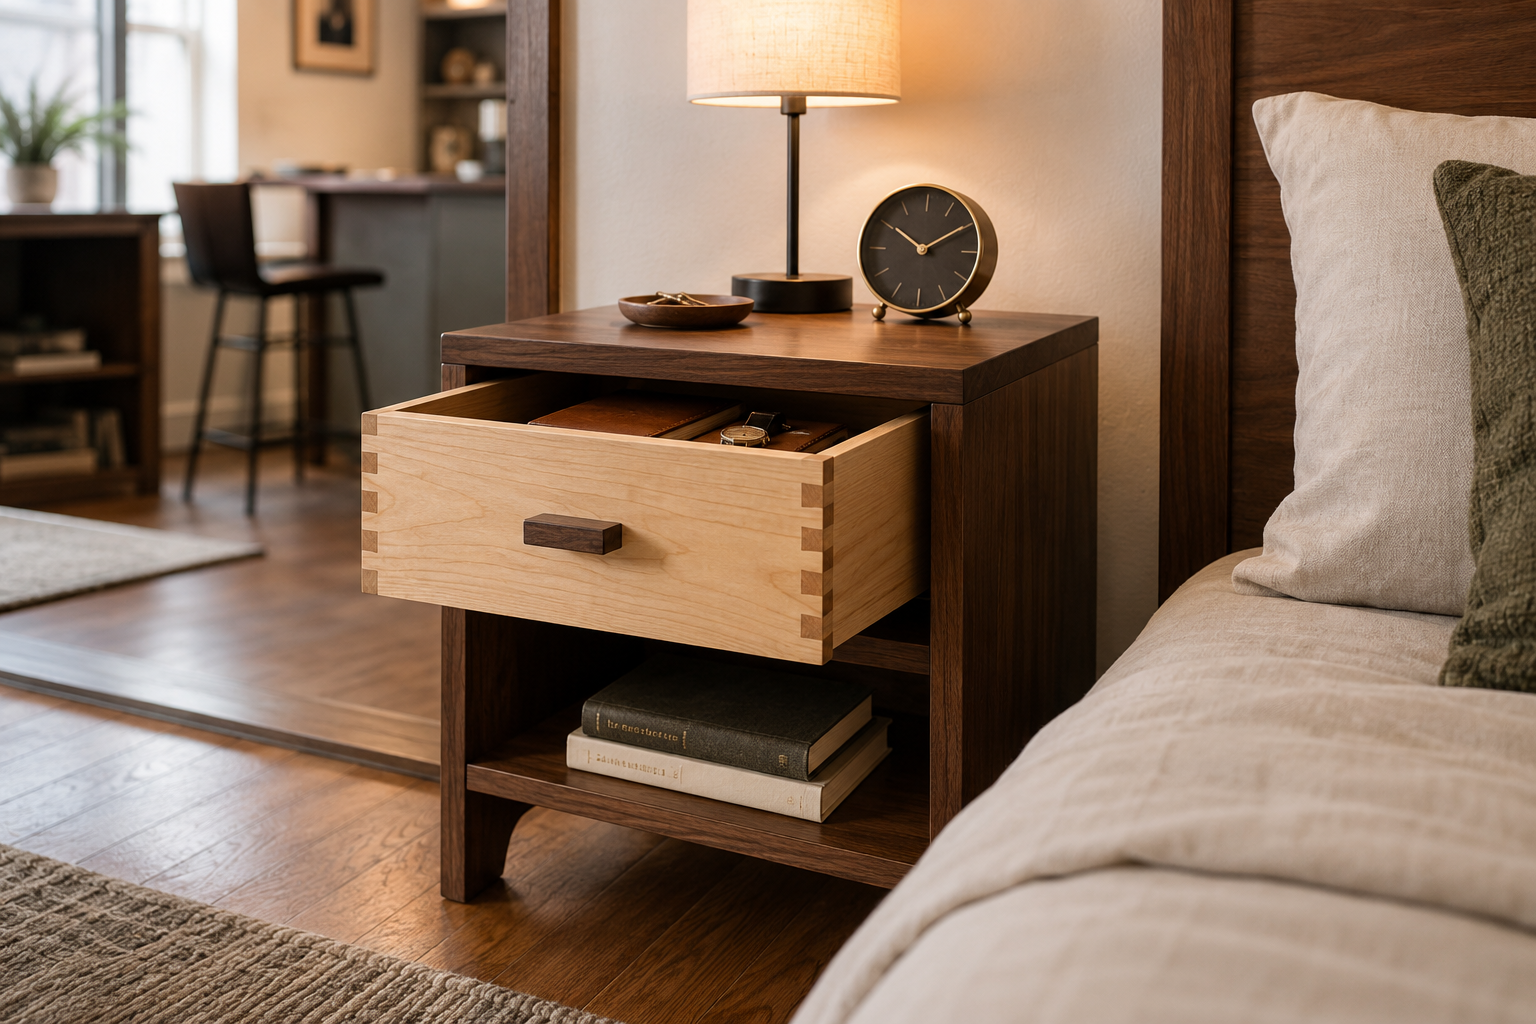
Design 2: The Compact Drawer Nightstand
When discreet storage is a priority, a compact drawer nightstand provides an ideal solution without sacrificing too much space. This design adds functionality by allowing you to keep essentials like remote controls, medications, or personal items out of sight, maintaining a tidy appearance.
Materials and Tools
This design is slightly more involved than the floating shelf due to the drawer mechanism.
Materials:
- Plywood or solid wood boards for the frame (e.g., 20″ x 14″ x 0.75″ for top/bottom, 12.5″ x 20″ x 0.75″ for sides, 12.5″ x 18.5″ x 0.75″ for back)
- Wood for drawer box (e.g., 0.5″ thick plywood or pine)
- Drawer slides (full extension, side-mount or undermount, appropriate length for your depth)
- Drawer pull/knob
- Wood glue
- Wood screws (various sizes for frame and drawer slides)
- Wood filler
- Sandpaper
- Primer and paint/stain/finish
Tools:

- Measuring tape
- Pencil
- Circular saw or miter saw
- Drill/driver
- Clamps
- Orbital sander
- Router with a rabbeting bit (optional, for drawer construction)
- Square
- Safety glasses and hearing protection
Construction Steps for Your DIY Nightstands and Side Tables: 3 Space-Saving Designs for Bedrooms and Living Rooms – Compact Drawer
Building a drawer requires precision, especially for smooth operation. For a deep dive into drawer construction, our article on mastering dovetail drawers for cabinets offers advanced techniques, but simpler joinery works well here.
Cut and Prepare Frame Pieces:
- Cut the top, bottom, and side panels for your nightstand frame. A common compact size might be 20″ high, 14″ deep, and 12″ wide.
- Cut the back panel.
- Sand all pieces smooth.
Assemble the Frame:
- Attach the side panels to the bottom panel using wood glue and screws, ensuring they are square.
- Attach the top panel similarly.
- Install the back panel, ensuring the frame is rigid and square.
Build the Drawer Box:
- Cut pieces for the drawer front, back, and sides from thinner stock (e.g., 0.5″ plywood). Ensure the drawer box fits within the frame with appropriate clearance for drawer slides (usually 1/2″ to 5/8″ total).
- Cut a groove (dado) on the inside bottom edge of all four drawer box pieces to accept the drawer bottom.
- Cut the drawer bottom from 1/4″ plywood.
- Assemble the drawer box using wood glue and screws, sliding the bottom panel into the grooves before final assembly. Ensure the drawer is perfectly square.
Install Drawer Slides:
- Separate the drawer slides into their two parts: the cabinet member and the drawer member.
- Mount the cabinet members inside the nightstand frame, ensuring they are level and parallel to each other. Use a spacer block to ensure consistent height from the bottom.
- Mount the drawer members onto the sides of the drawer box, aligning them precisely with the cabinet members.
- Test the drawer mechanism by sliding the drawer box into the frame. Adjust if necessary for smooth operation.
Attach Drawer Front:
- Cut the drawer front panel to be slightly larger than the drawer box opening, allowing for an even reveal around all edges.
- Temporarily attach the drawer front to the drawer box using double-sided tape or clamps, ensuring alignment.
- From inside the drawer box, drill pilot holes and secure the drawer front with screws.
- Install the drawer pull or knob.
Finishing:
- Fill all screw holes with wood filler and sand smooth.
- Apply your chosen finish to the entire nightstand and drawer front. Consider a durable finish for frequently used surfaces, such as those discussed in our guide to wood glue.
Benefits and Customization Options
- Hidden Storage: Keeps clutter out of sight, promoting a cleaner look.
- Security: Provides a small, private space for personal items.
- Customization: Choose a unique drawer pull, use contrasting wood for the drawer front, or add internal dividers for organization. Legs can also be added to elevate the unit, should space allow.
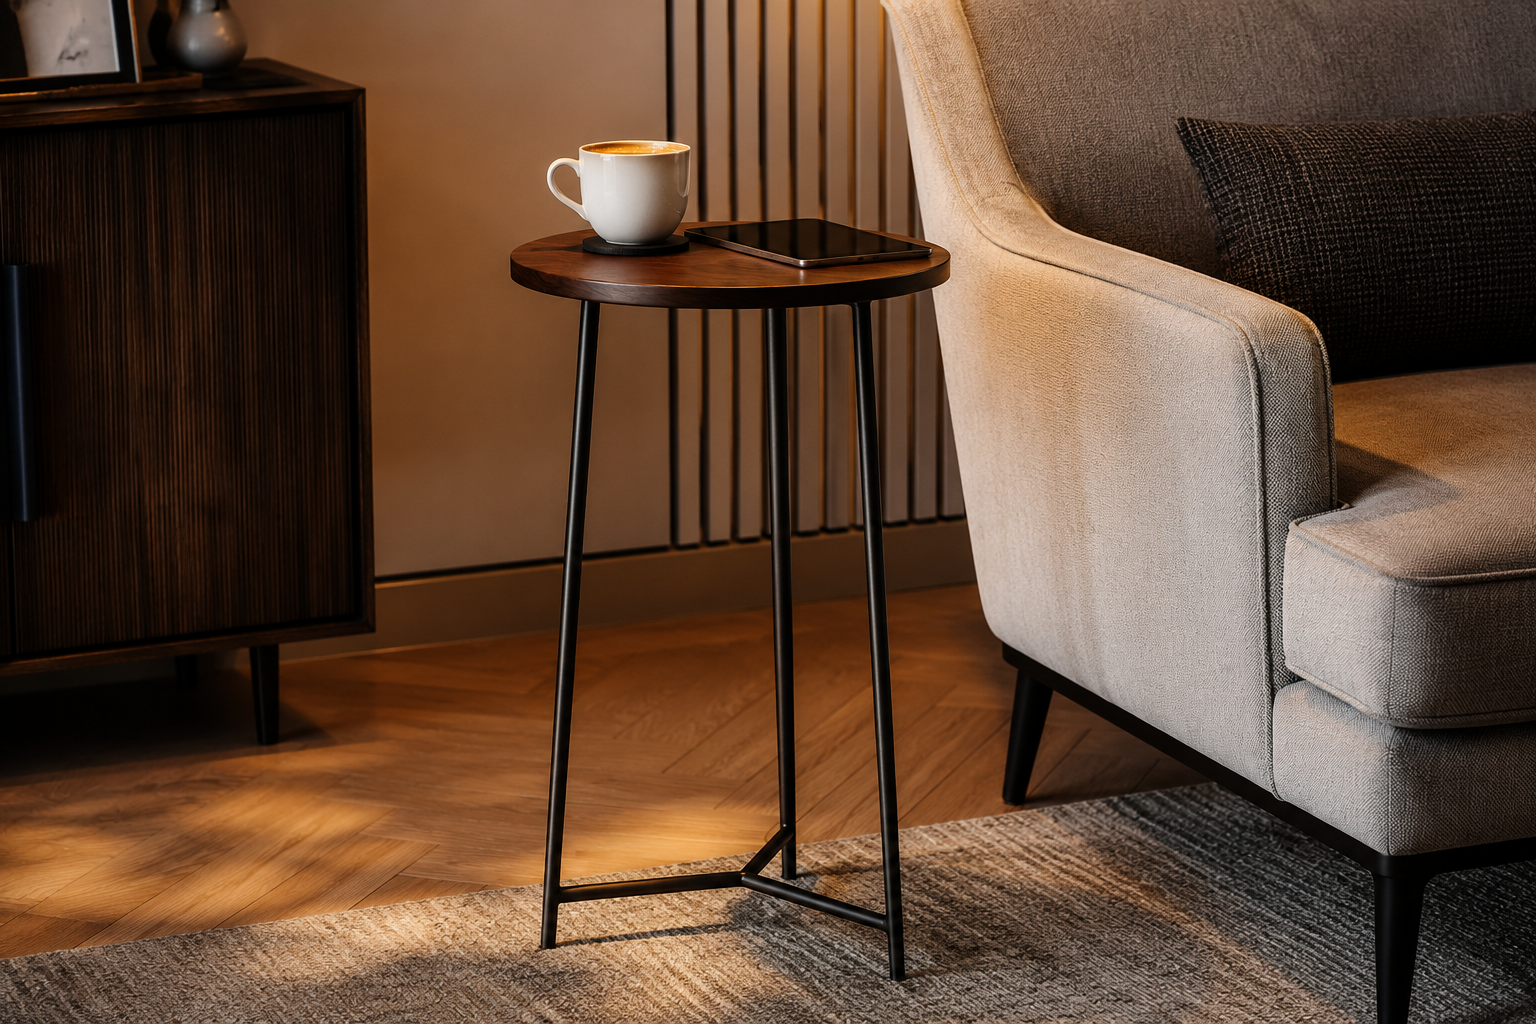
Design 3: The Slim-Legged Minimalist Side Table
For those needing a surface more than storage, the slim-legged minimalist side table offers elegant simplicity. This design prioritizes a light visual footprint, making it perfect for tucking beside a sofa, armchair, or even in a narrow hallway. Its open design prevents it from feeling bulky, even in the smallest of living rooms.
Materials and Tools
This design is often the easiest to build, especially if using pre-made legs.
Materials:
- 1 piece of solid wood or plywood for the tabletop (e.g., 16″ diameter circle or 16″ x 16″ square, 0.75″ thick)
- Four tapered furniture legs (e.g., 18″ to 24″ tall, with mounting plates) or suitable lumber for custom legs (e.g., 1.5″ x 1.5″ x 24″)
- Wood glue (if making custom legs)
- Wood screws (for mounting plates or custom leg joinery)
- Sandpaper
- Primer and paint/stain/finish
Tools:
- Measuring tape
- Pencil
- Jigsaw or band saw (if cutting a circular tabletop)
- Drill/driver
- Orbital sander
- Router with a round-over bit (optional, for tabletop edges)
- Square
- Safety glasses and hearing protection
Construction Steps for Your DIY Nightstands and Side Tables: 3 Space-Saving Designs for Bedrooms and Living Rooms – Slim-Legged
This design focuses on clean lines and minimal bulk.
Prepare the Tabletop:
- Cut your tabletop to the desired shape and size. A 16-inch diameter circular top or a 16×16-inch square is often ideal for compact spaces.
- Sand all edges and surfaces thoroughly, potentially using a router to apply a small round-over for a softer feel.
Prepare and Attach Legs:
- If using pre-made legs with mounting plates:
- Mark the positions for the leg mounting plates on the underside of the tabletop, typically 1-2 inches in from each corner/edge.
- Drill pilot holes and secure the mounting plates with screws.
- Screw the tapered legs into the mounting plates.
- If making custom wooden legs:
- Cut four pieces of lumber to your desired leg height (e.g., 24 inches).
- Consider tapering the legs for a more elegant look using a jig on a table saw or band saw.
- Attach the legs to the underside of the tabletop using sturdy joinery such as pocket holes, mortise and tenon, or robust L-brackets, combined with wood glue and screws. Ensure legs are evenly spaced and angled correctly if desired. For projects requiring more elaborate leg construction, consider our guide on illuminate your space: a comprehensive guide to lamp woodworking which often involves similar base-making techniques.
- If using pre-made legs with mounting plates:
Finishing:
- Fill any exposed screw holes or imperfections with wood filler and sand smooth.
- Apply your chosen finish to the entire table. For a light, modern look, a clear oil finish might be suitable (e.g., Danish oil vs. linseed), while paint offers versatility.
Benefits and Customization Options
- Minimalist Aesthetic: Blends seamlessly into modern and contemporary decor.
- Visual Airiness: The open space between the legs prevents the table from dominating a small room.
- Customization: Experiment with different leg styles (e.g., hairpin, industrial pipe), various tabletop materials (e.g., reclaimed wood, painted plywood, even glass), or unique finishes to make it truly yours.
General Woodworking Tips for DIY Furniture
Regardless of the design you choose, adhering to basic woodworking principles will ensure a successful and durable outcome.
- Measure Twice, Cut Once: This adage is a cornerstone of woodworking. Precision in measurement prevents waste and ensures components fit together correctly.
- Safety First: Always wear safety glasses when operating power tools. Use hearing protection for prolonged use of loud machinery. Understand your tools before you use them.
- Proper Adhesion: Wood glue provides significant strength to joints. Apply an even coat and clamp pieces firmly while the glue dries. For critical structural joints, choose the right adhesive; our guide on the ultimate guide to wood glue offers extensive details.
- Sanding is Key: A well-sanded piece accepts finish better and feels smoother. Start with a coarser grit (e.g., 80 or 120) to remove imperfections, then progressively move to finer grits (180, 220, or even 320) for a silky-smooth surface.
- Test Fit Components: Before applying glue or permanent fasteners, always dry-fit your pieces to ensure they align correctly. This allows for adjustments before it’s too late.
- Finishing Protects and Beautifies: The right finish protects your wood from moisture, wear, and tear, while enhancing its natural beauty. Take your time with finishing, applying thin, even coats and allowing proper drying time between each.
Building your own furniture can be a rewarding experience. It’s a chance to learn new skills, save money, and create pieces that are perfectly suited to your home and lifestyle. These three designs for DIY nightstands and side tables demonstrate how thoughtful design can transform even the smallest spaces into functional and stylish areas.
Conclusion
In 2026, where living spaces continue to trend smaller, the ability to craft custom furniture becomes an invaluable asset for homeowners and renters alike. The three DIY nightstand and side table designs outlined—the open-shelf floating unit, the compact drawer nightstand, and the slim-legged minimalist table—offer practical, stylish, and space-saving solutions for bedrooms and living rooms. Each design addresses different needs, from maximizing floor space to providing discreet storage, all while allowing for personal touches that reflect individual style.
Embracing these DIY projects not only equips you with functional furniture but also fosters a deeper connection to your living environment through handcrafted pieces. Begin by carefully assessing your space and choosing the design that best suits your needs and skill level. Don’t be afraid to experiment with materials and finishes. With a little planning and effort, you can transform your compact areas with bespoke furniture that is both beautiful and highly efficient. Start your next woodworking project today and discover the satisfaction of creating something truly unique for your home.
References
National Apartment Association. (2023). 2023 Apartment Size Report.
SEO Meta Title: DIY Space-Saving Nightstands & Side Tables: 3 Designs SEO Meta Description: Learn to build 3 DIY space-saving nightstands and side tables for bedrooms and living rooms in 2026. Get plans for floating, drawer, and minimalist designs.

