
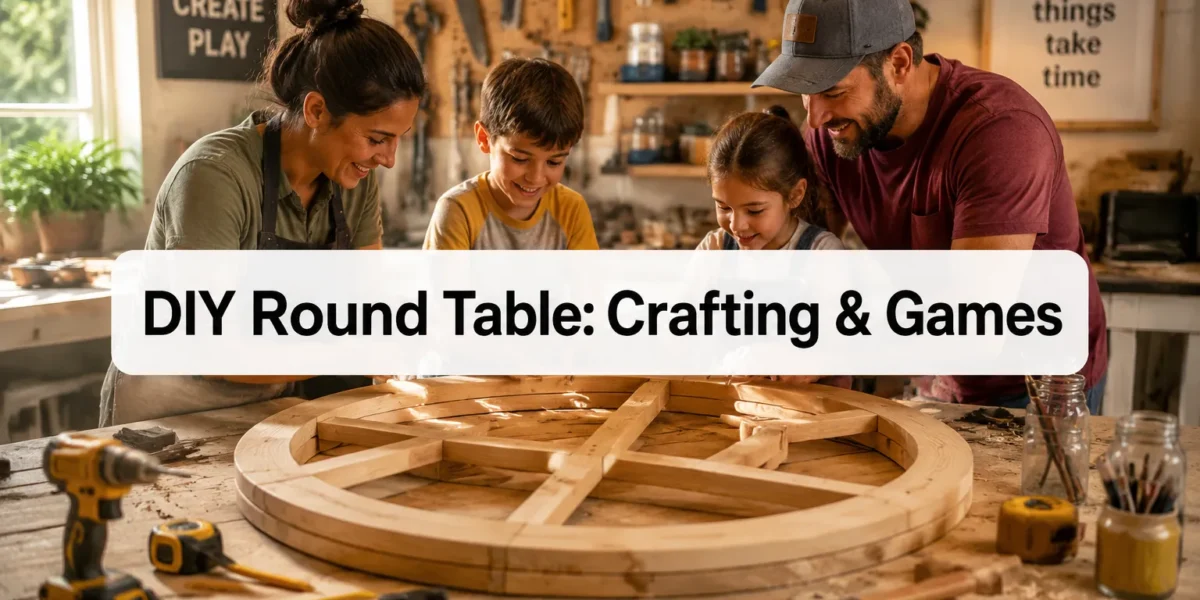
The average family spends over 6 hours a day together, yet often struggles to find a central hub for shared activities that isn’t the television. This challenge highlights a compelling opportunity for homeowners to create a dedicated, versatile space. Constructing a DIY Round Table for Crafting and Games: Building a Multi-Use Wood Table for Family Fun offers a practical and rewarding solution, fostering connection and creativity. Such a table isn’t merely a piece of furniture; it’s an investment in family interaction, a canvas for creativity, and a centerpiece for memorable game nights. In 2026, with the increasing desire for engaging, screen-free family time, a custom-built round table provides an unparalleled platform for diverse activities, from intricate craft projects to lively board game sessions.
Key Takeaways
- A DIY round table promotes family interaction, offering a dedicated space for crafting, games, and casual dining.
- Wood selection, size, and design considerations are crucial for durability, stability, and aesthetic integration into your home.
- Essential tools for this project include a circular saw, jigsaw, router, drill, and various clamps, along with safety gear.
- Step-by-step construction involves preparing the tabletop, building a sturdy pedestal base, assembling components with strong joinery, and applying a protective finish.
- Customization options, such as integrated storage or a reversible top, enhance the table’s multi-use functionality and appeal.
Why a DIY Round Table for Crafting and Games is Ideal for Family Fun
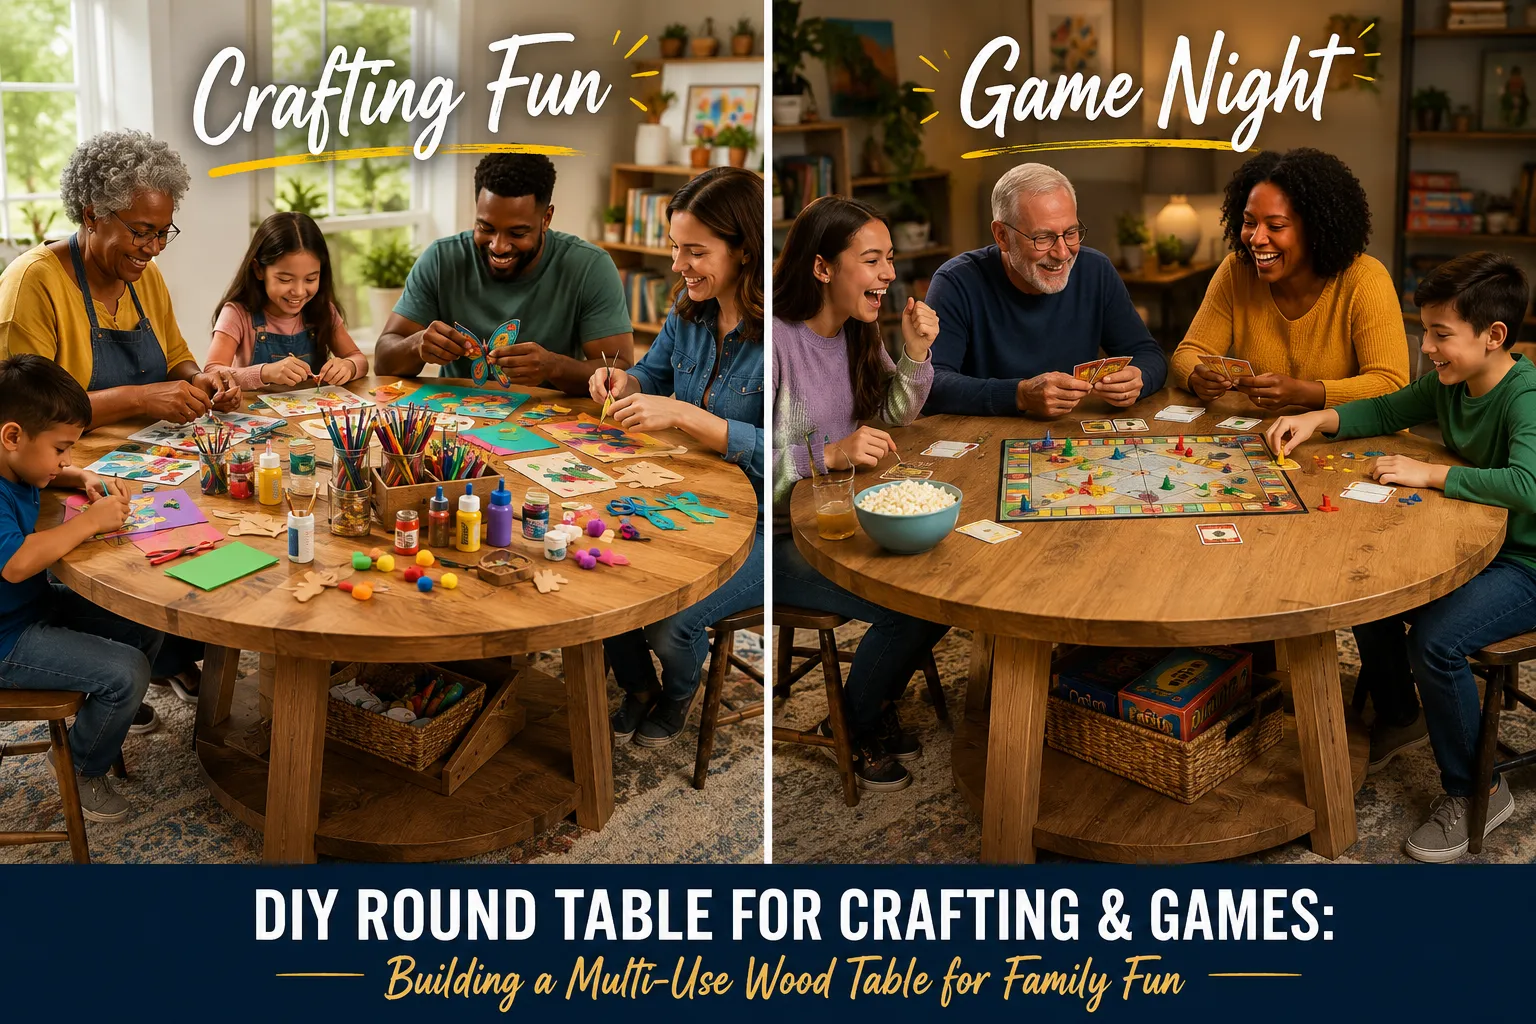
A round table inherently promotes intimacy and equal participation, making it a superior choice for family activities compared to rectangular alternatives. The absence of a “head of the table” encourages open conversation and collaboration, ideal for both focused crafting sessions and competitive game nights. Building a multi-use wood table allows for a design tailored to your family’s specific needs, ensuring it can seamlessly transition from a vibrant art station to a strategic gaming arena or even a casual dining spot.
Benefits of a Multi-Use Design
The primary advantage of a multi-use design is its adaptability. Space in modern homes is often at a premium, making furniture that serves multiple purposes invaluable. A well-designed DIY round table can offer:
- Dedicated Crafting Surface: A smooth, spacious top perfect for spreading out art supplies, sewing projects, or modeling clay.
- Game Night Hub: Ample room for board games, card games, puzzles, and snacks, with everyone feeling included in the action.
- Casual Dining Area: An inviting spot for family meals, especially in smaller spaces where a formal dining table may be impractical. Consider exploring options for a round dining table for small spaces to gather further ideas on optimizing space.
- Homework Station: A comfortable and distraction-free zone for children to complete schoolwork or engage in creative learning.
This versatility means your investment in time and materials yields a piece of furniture that genuinely enhances daily family life.
Choosing the Right Wood and Dimensions
The selection of wood is critical for both the aesthetics and durability of your DIY round table. Hardwoods like oak, maple, cherry, or walnut are excellent choices due to their strength and resistance to dents and scratches, making them ideal for a frequently used crafting and gaming surface. Pine or poplar can be more budget-friendly options, especially for the base, but may require a more robust finish to withstand heavy use.
Consider the following factors when choosing wood:
- Hardness: A harder wood will stand up better to the rigors of crafting and gaming.
- Grain Pattern: Different woods offer unique visual textures that can complement your home decor.
- Cost: Balance your budget with your desire for durability and appearance.
- Workability: Some woods are easier to cut, sand, and finish than others.
For dimensions, a common size for a multi-use round table for a family of 4-6 ranges from 42 to 60 inches in diameter. This provides ample space for activities without overwhelming a room.
| Family Size | Recommended Diameter Range | Key Activities Supported |
|---|---|---|
| 2-4 people | 36 – 48 inches | Small crafts, card games, casual dining |
| 4-6 people | 48 – 60 inches | Large crafts, board games, family meals |
| 6-8 people | 60 – 72 inches | Extensive crafting, large group games, entertaining |
Remember to account for the necessary clearance around the table for chairs and movement. A good rule of thumb is to allow at least 30-36 inches from the table edge to the nearest wall or furniture. For more on optimizing space, see our guide on dining area table placement.
Essential Tools and Materials for Your DIY Round Table Project
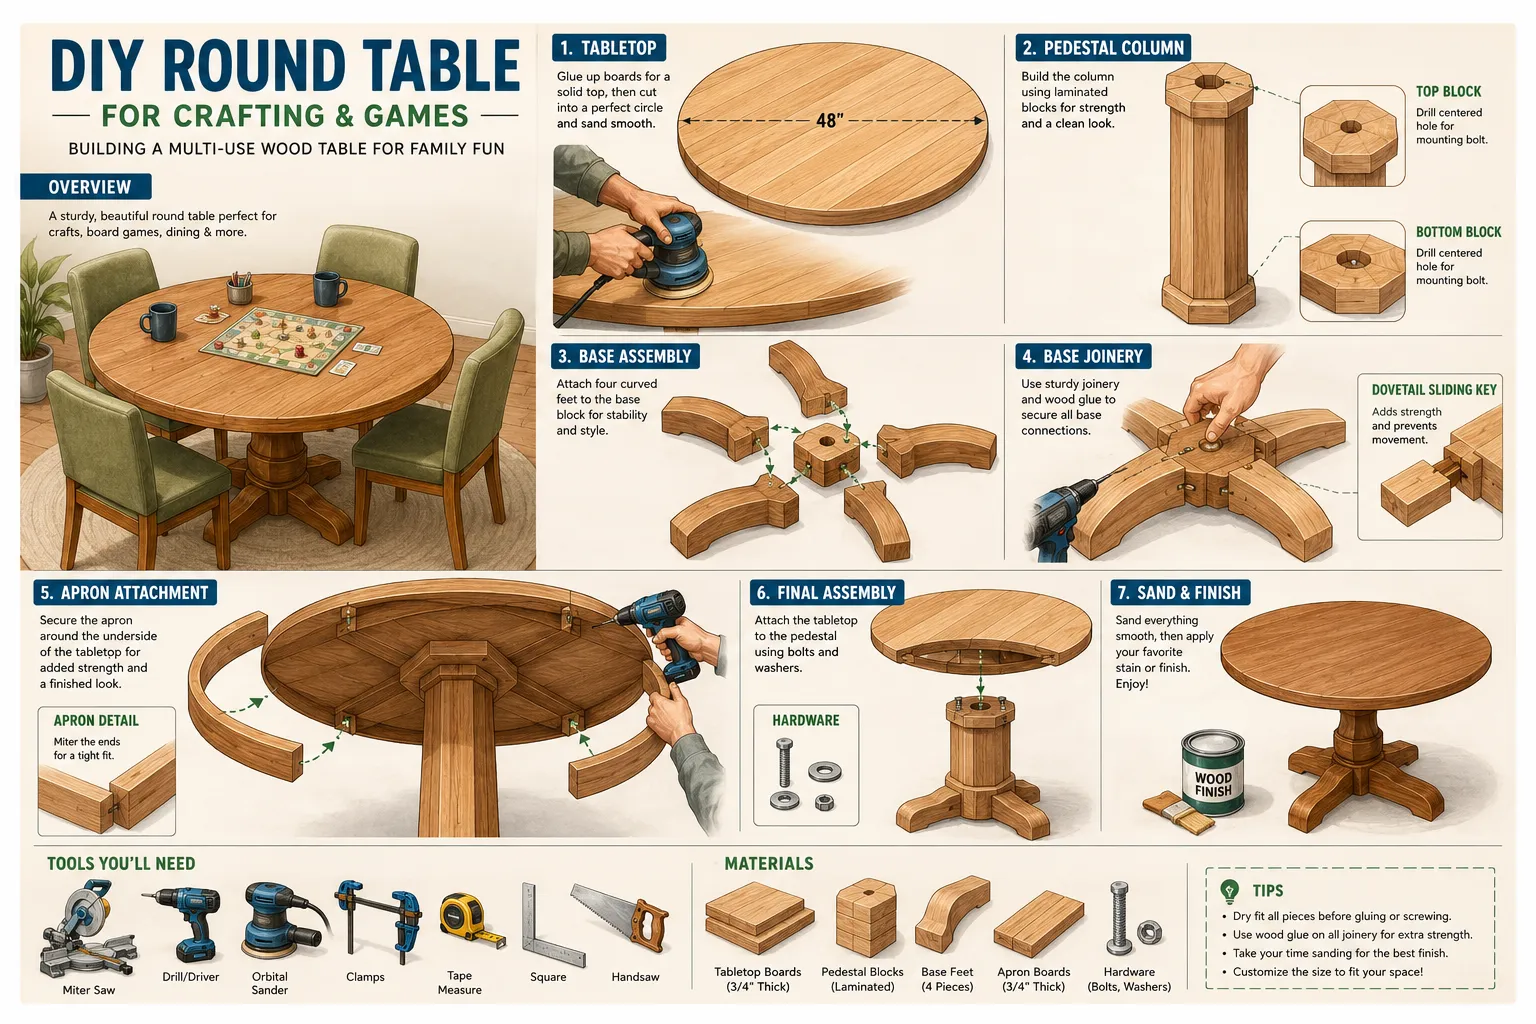
Embarking on a woodworking project like building a DIY Round Table for Crafting and Games: Building a Multi-Use Wood Table for Family Fun requires a thoughtful selection of tools and materials. Having the right equipment ensures accuracy, safety, and a smoother building process. While some specialized tools can be rented, many of these are staples for any aspiring woodworker.
Must-Have Tools for the Job
A well-equipped workshop, even a small one, is crucial. If you’re just starting, consider foundational tools that offer versatility.
- Circular Saw or Table Saw: Essential for cutting your wood panels to size for the tabletop and base components. A small workshop setup for table saw projects can help you optimize your space.
- Jigsaw: Perfect for cutting the perfect circular shape for your tabletop and any curved base elements.
- Router: Indispensable for creating decorative edges (like a round-over or chamfer) on the tabletop and for cutting dadoes or rebates if your joinery plan requires them. If you’re new to routers, our DIY router table build guide offers excellent insights.
- Drill/Driver: For pilot holes and fastening screws.
- Clamps: A variety of clamps (bar clamps, pipe clamps, F-clamps) are vital for holding pieces together during glue-up and assembly.
- Measuring Tools: Tape measure, combination square, straight edge, and a compass for drawing perfect circles.
- Sanding Equipment: Orbital sander, sanding blocks, and a range of sandpaper grits (80-220+) for a smooth finish.
- Safety Gear: Safety glasses, hearing protection, and dust mask are non-negotiable.
Materials Checklist
Beyond the primary wood for your tabletop and base, you’ll need a range of fasteners, adhesives, and finishing products.
- Wood Stock:
- Large wood panels (plywood, MDF, or solid wood planks) for the tabletop.
- Dimensional lumber (e.g., 2x4s, 4x4s) for the pedestal base structure.
- Wood Glue: High-quality wood glue for strong, lasting joints. For advice on adhesives, refer to the ultimate guide to wood glue.
- Screws: Various lengths and types of wood screws to reinforce joints.
- Dowel Rods or Biscuits (Optional): For added strength and alignment in tabletop glue-ups or base joinery.
- Wood Filler: To address any gaps or imperfections.
- Finishing Supplies:
- Wood conditioner (especially for softwoods).
- Stain (if desired).
- Polyurethane, lacquer, or other protective topcoat.
- Paintbrushes or rags for application.
Remember to purchase slightly more material than you estimate to account for mistakes or practice cuts.
Step-by-Step Guide to Building Your Multi-Use Wood Table

Building a DIY Round Table for Crafting and Games: Building a Multi-Use Wood Table for Family Fun is a rewarding project that can be broken down into manageable steps. Precision and patience are key to achieving a professional-looking and durable result.
1. Preparing the Tabletop
The tabletop is the focal point, so accurate cutting and a smooth finish are paramount.
- Create Your Blank: If using solid wood, glue up several planks to create a large enough panel for your desired diameter. Use ample wood glue and clamps, ensuring the joints are flush. Let it dry completely, ideally overnight. If using plywood or MDF, you can often find sheets large enough to cut your circle from directly.
- Draw the Circle: Find the exact center of your blank. Using a large compass or a string-and-pencil method, draw a perfect circle of your desired diameter.
- Cut the Circle: Carefully cut out the circle using a jigsaw or a router with a circle-cutting jig. A jigsaw is faster but may require more sanding to smooth the edge, while a router offers a cleaner cut. Take your time to ensure a smooth, even edge.
- Edge Treatment: Use a router with a decorative bit (e.g., round-over, chamfer) to soften the edges, making the table safer and more comfortable for use.
- Sanding: Begin sanding with a coarser grit (e.g., 80 or 100), progressively moving to finer grits (150, 180, 220). Ensure the entire surface is smooth and free of imperfections.
2. Constructing the Pedestal Base
A pedestal base provides stability and allows for unobstructed seating around the entire table, which is ideal for a multi-use round table. A robust pedestal design, similar to those found in custom round dining tables, is recommended. For more inspiration on pedestal designs, check out our article on crafting a custom round dining table with a pedestal base.
- Design the Pedestal: Common pedestal designs include a single central column with splayed legs, or a wider, hollow box-like structure. For strength and stability, especially for a large tabletop, consider a design with a wide footprint.
- Cut Components: Cut all pieces for the column and legs according to your design plans. This may involve straight cuts for the column and angled cuts for splayed feet.
- Assemble the Column: Join the column pieces. If using solid lumber, sturdy joinery like mortise and tenon or robust dowel joints are excellent choices. For simpler construction, pocket hole screws reinforced with glue can work well.
- Attach Legs/Feet: Securely attach the splayed legs to the base of the column. Ensure these are evenly spaced and firmly attached to prevent wobbling. Heavy-duty screws and wood glue are essential here.
- Create a Top Support Frame (Apron): Build a small, square or octagonal frame from dimensional lumber that will attach to the top of your pedestal and provide a wide, flat surface for screwing the tabletop on. This apron also helps distribute the weight evenly.
3. Assembling and Finishing
With the tabletop and base prepared, it’s time for final assembly and protection.
- Attach Tabletop to Base: Carefully center the tabletop on the pedestal’s top support frame. Pre-drill pilot holes through the frame into the underside of the tabletop. Use robust screws (e.g., 2-inch wood screws) to secure the tabletop firmly, ensuring they are not too long to penetrate the top surface.
- Final Sanding: Do a final light sanding with 220-grit sandpaper to remove any raised grain or minor imperfections that may have appeared.
- Apply Finish:
- Clean: Wipe down the entire table with a tack cloth to remove all dust.
- Condition/Stain (Optional): If using softwood or wanting a specific color, apply wood conditioner followed by your chosen stain. Let dry according to product instructions.
- Topcoat: Apply several coats of a durable topcoat like polyurethane, lacquer, or a hard wax oil. Sand lightly with very fine sandpaper (320-400 grit) between coats to ensure a smooth finish. Polyurethane is an excellent choice for a table that will see heavy use with crafting and games, as it provides good protection against spills and wear. Follow the manufacturer’s instructions for drying times and reapplication.
Customization and Enhancements
To truly maximize the “multi-use” aspect of your DIY Round Table for Crafting and Games: Building a Multi-Use Wood Table for Family Fun, consider these enhancements:
- Reversible Top: Create a second, slightly smaller top (perhaps with a different finish or a felt-lined side for gaming) that can be flipped over or placed on top of the main table.
- Integrated Storage: Incorporate small drawers or cubbies into the pedestal design for storing craft supplies or game pieces.
- Cup Holders: Rout out shallow depressions around the perimeter of the tabletop to serve as integrated cup holders, preventing spills during intense game sessions.
- Protective Mats/Inserts: Consider custom-cut clear acrylic or tempered glass inserts to protect the table surface during particularly messy crafts.
- Adjustable Height: While more complex, an adjustable height mechanism could allow the table to transition from a child’s crafting station to an adult-height gaming table.
These customizations elevate the table from a simple piece of furniture to a dynamic hub for family engagement.
Conclusion
Building a DIY Round Table for Crafting and Games: Building a Multi-Use Wood Table for Family Fun is more than just a woodworking project; it’s an investment in creating a dedicated space for connection, creativity, and shared enjoyment within your home. From the careful selection of durable wood to the precise joinery of the pedestal base, each step contributes to a piece of furniture that is not only functional but also a source of pride and lasting memories.
The versatility of a custom-built round table makes it an invaluable addition to any household. It offers a central gathering point that encourages interaction, supports a myriad of activities, and stands as a testament to your craftsmanship. As you complete this project in 2026, you’re not just assembling wood; you’re crafting a centerpiece for family life, designed to withstand years of enthusiastic games, imaginative crafts, and cherished conversations.
Embark on this rewarding journey with confidence, armed with the knowledge and tools to create a beautiful and durable multi-use wood table. The satisfaction of building something with your own hands, coupled with the joy it brings to your family, makes this DIY project truly worthwhile.
SEO Meta Title: Build a DIY Round Table for Family Crafting & Games SEO Meta Description: Learn to build a durable, multi-use wood round table for family fun. Perfect for crafting, board games, and casual dining in 2026.