
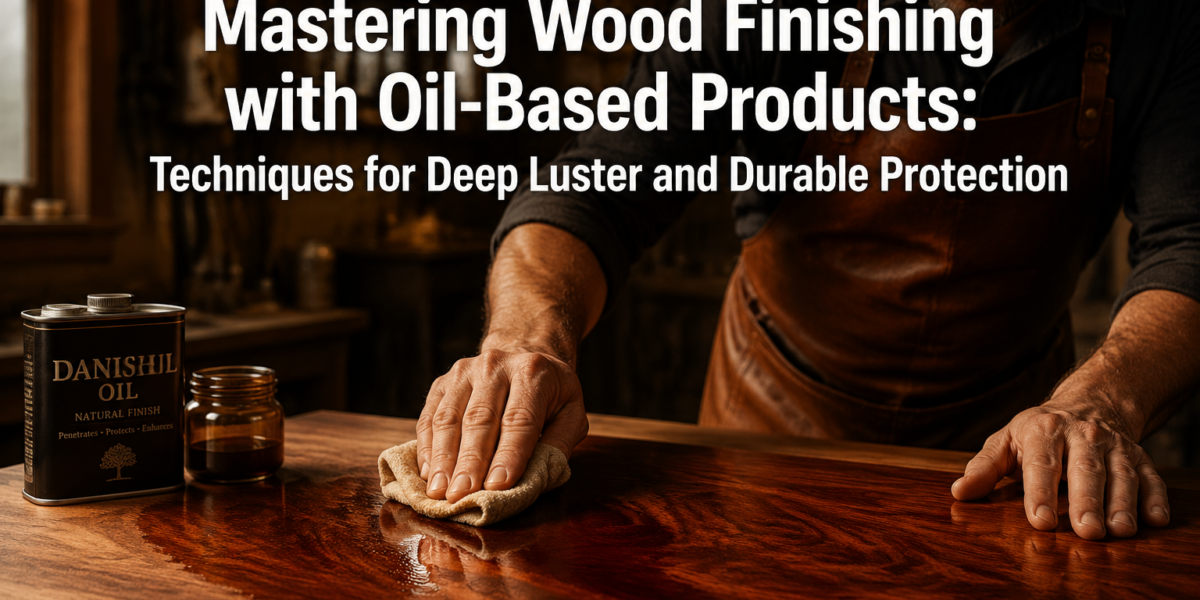

A single misplaced sanding scratch, an uneven coat, or an insufficient cure can transform a potentially magnificent piece of woodworking into a mere approximation of its intended glory. This article, “Mastering Wood Finishing with Oil-Based Products: Techniques for Deep Luster and Durable Protection,” delves into the precise methodologies required to elevate your projects, ensuring not just beauty, but also longevity. Far from being a simple application, oil-based finishing is an art and a science, demanding a nuanced understanding of wood, product, and process. Without this mastery, even the finest craftsmanship can fall short of its full potential, leaving wood vulnerable and visually understated. In 2026, as woodworking techniques advance, the timeless appeal of a deeply lustrous, well-protected oil finish remains a benchmark of quality.
Key Takeaways
- Optimal Surface Preparation is Paramount: Achieve superior adhesion and uniform absorption through meticulous sanding, dust removal, and grain raising, progressing through appropriate grit sequences.
- Understand Oil Types and Properties: Differentiate between pure oils, oil-varnish blends, and hardwax oils to select the best product for your project’s aesthetic and durability needs.
- Master Application Techniques for Depth: Employ methods like flood coating, wiping, and wet-sanding to build deep luster and enhance grain without brush marks or unevenness.
- Prioritize Proper Curing: Allow adequate time for oxidation and polymerization, ensuring maximum hardness and protection, which is crucial for long-term durability.
- Implement Effective Maintenance: Regular cleaning and reapplication of finish are essential for preserving the deep luster and protective qualities of oil-finished wood over time.
The Foundation: Impeccable Surface Preparation for Oil Finishing
The journey to mastering wood finishing with oil-based products begins long before the first drop of finish touches the wood. A truly deep luster and durable protection hinge on the quality of your surface preparation. Oils penetrate the wood fibers, and any imperfections—scratches, glue squeeze-out, or uneven sanding—will be magnified, not hidden, by the finish.

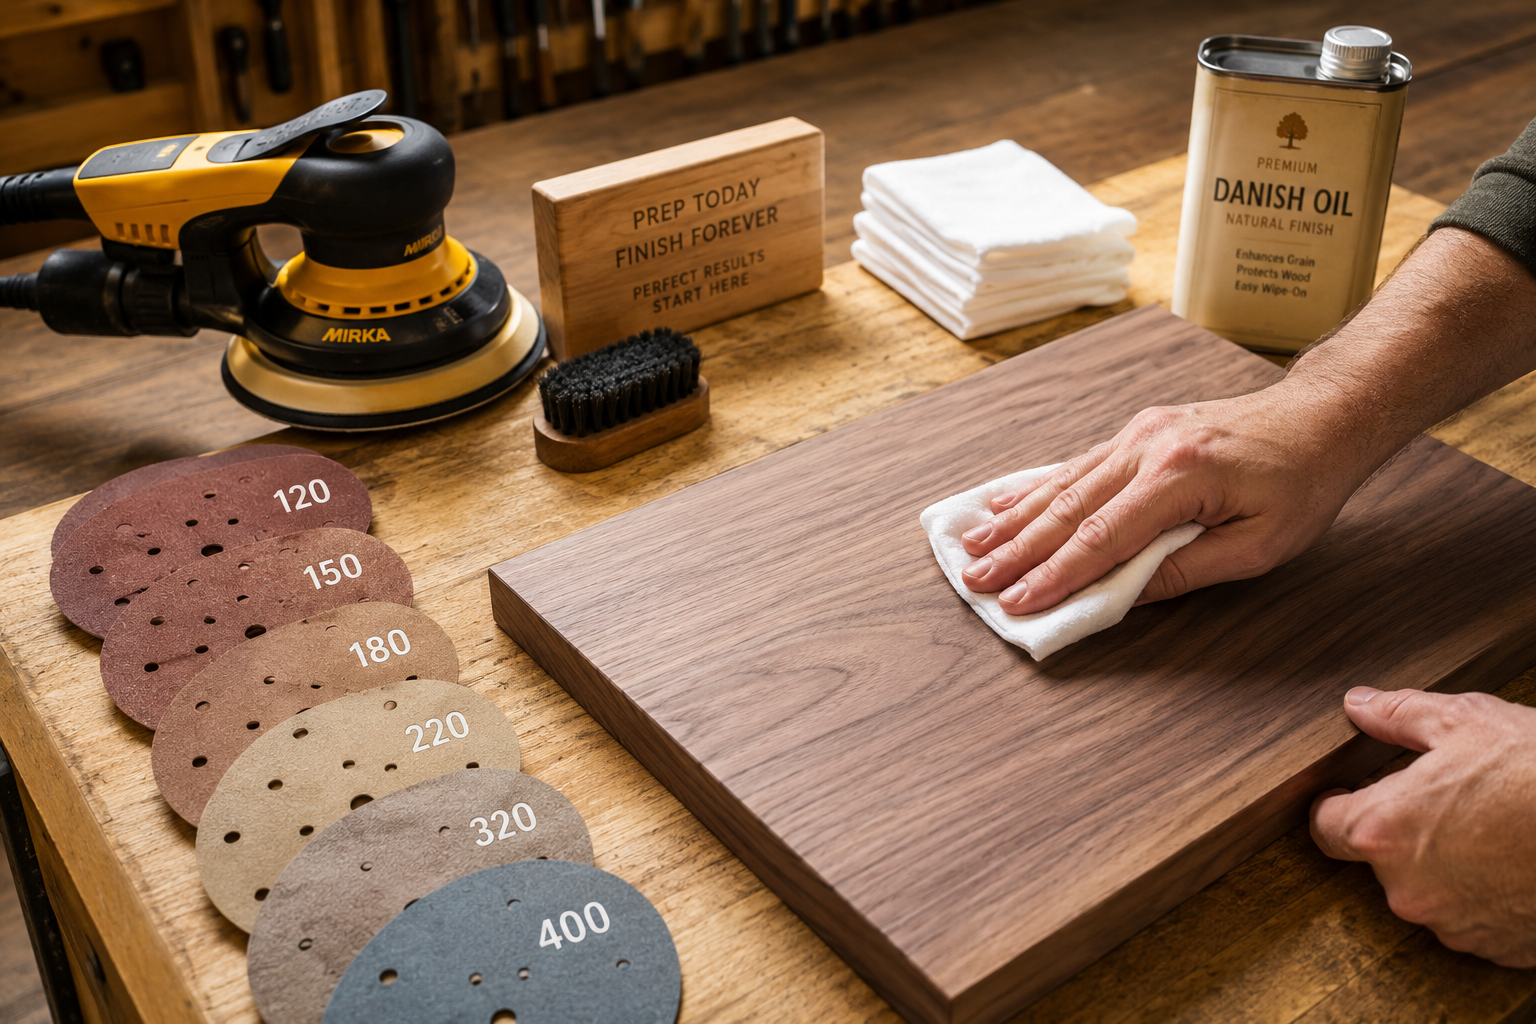
Sanding Schedules and Techniques
The goal of sanding is to create a uniformly smooth surface that allows the oil to penetrate evenly. This is crucial for achieving both aesthetic depth and consistent protection.
- Start Coarse, Finish Fine: Begin with sandpaper appropriate for the wood’s initial condition. For most new projects, 120-grit is a good starting point to remove mill marks or minor imperfections. Gradually progress through finer grits, typically 150, 180, 220, and sometimes even 320 or 400 for exceptionally fine work.
- Rule of Thumb: Never skip more than one grit. For example, after 120-grit, move to 150 or 180, not directly to 220. Skipping grits leaves deeper scratches from the coarser paper that the subsequent finer grit cannot fully remove.
- Even Pressure and Consistent Motion: Whether using a random orbital sander, block sander, or sanding by hand, maintain even pressure. Over-sanding one area can create depressions. Keep the sander moving constantly to avoid burnishing the wood, which can prevent proper oil absorption.
- Sanding with the Grain: Always sand in the direction of the wood grain. Cross-grain scratches, even microscopic ones, become glaringly visible once an oil finish is applied.
- Dust Removal: Dust is the enemy of a perfect finish. After each grit, thoroughly remove all sanding dust. Use a vacuum, followed by compressed air, and finally a tack cloth. For a comprehensive guide on workshop cleanliness, explore smart workshop storage solutions.
- Grain Raising (Optional but Recommended): For an even smoother final finish, especially on open-pored woods, consider grain raising. After sanding to your desired grit (e.g., 220), wipe the wood with a damp cloth or sponge. This will cause the exposed wood fibers to swell and stand up. Once dry (typically a few hours), lightly sand again with the final grit (e.g., 220 or 320) to remove the raised fibers. This prevents them from rising with the oil application, leading to a silkier feel.
Addressing Imperfections Before Oil Application
Even with careful sanding, sometimes imperfections remain or are introduced.
- Glue Squeeze-Out: Any residual glue will prevent oil from penetrating, leaving light, unfinished spots. Remove all glue squeeze-out with a chisel or scraper immediately after clamping, and sand the area thoroughly once dry. For insights on precise joinery, consider mastering dovetail joinery for drawers.
- Dents and Dings: Minor dents can often be steamed out. Place a damp cloth over the dent and apply a hot iron to it. The steam will cause the compressed wood fibers to swell back to their original position. Allow to dry completely before sanding.
- Stains: For stubborn stains, deeper sanding might be required, or specialized wood cleaners/bleaches could be used, always followed by thorough rinsing and drying.
By dedicating sufficient time and precision to surface preparation, you lay the groundwork for an oil finish that truly sings, revealing the wood’s inherent beauty with a deep, inviting luster and robust protection.
Selecting and Applying Oil-Based Finishes for Deep Luster
With the wood perfectly prepared, the focus shifts to selecting the right oil-based product and mastering its application. The world of oil finishes is diverse, offering varying levels of protection, color enhancement, and ease of application.
Understanding Different Oil-Based Finishes
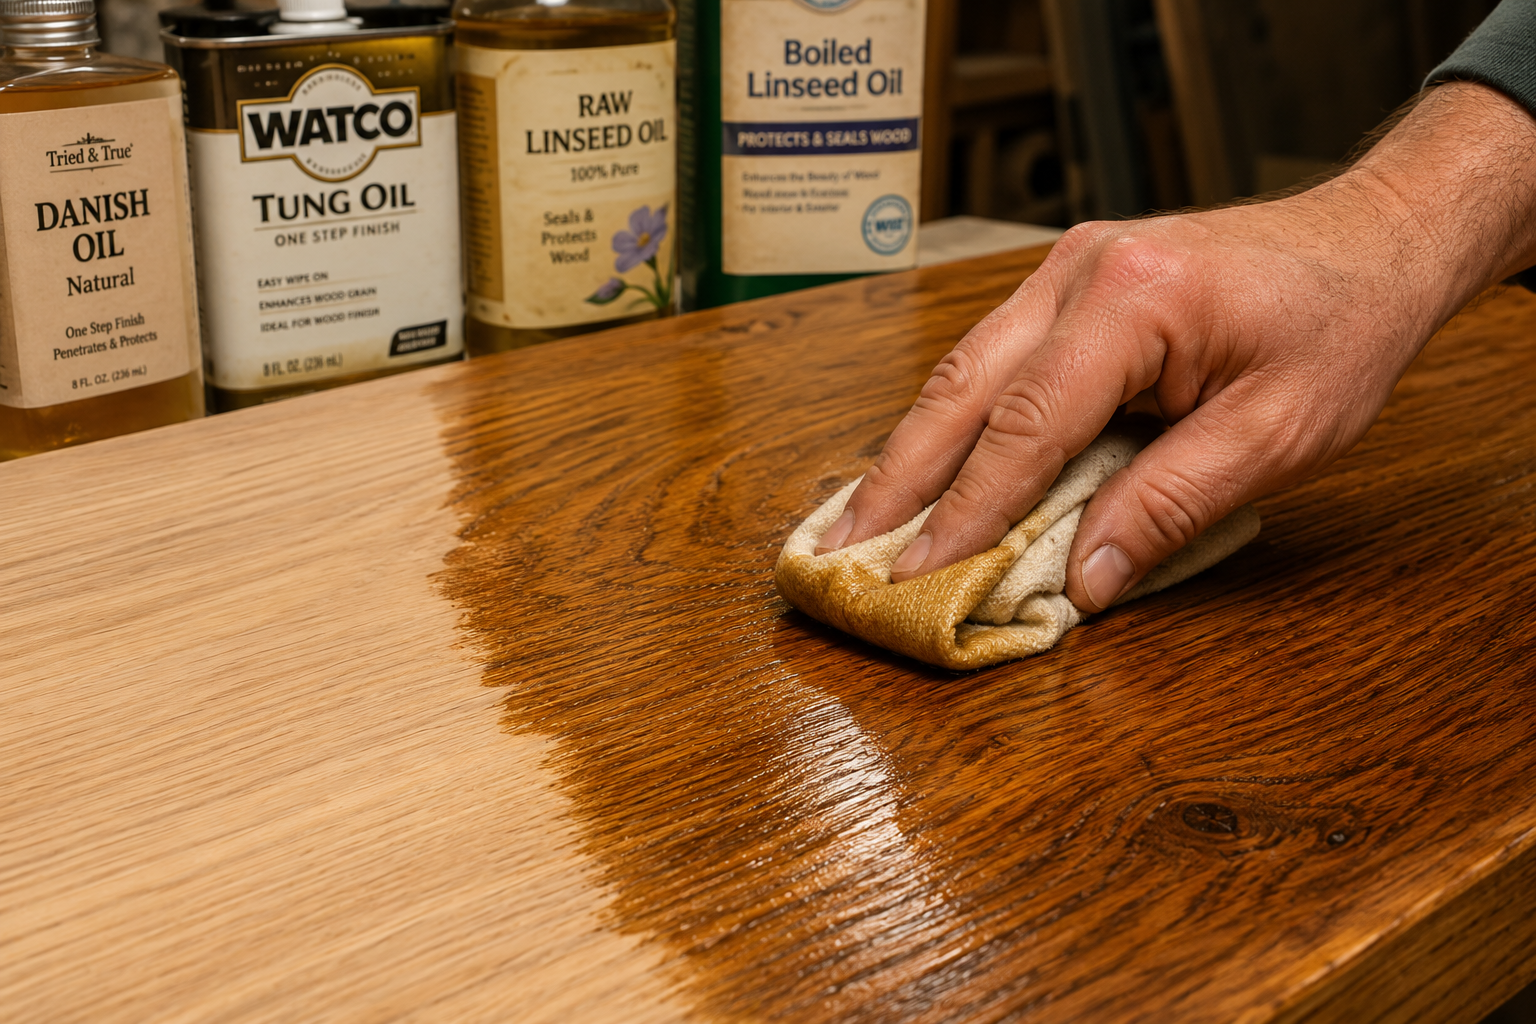
Not all “oil finishes” are created equal. They generally fall into a few categories:
- Pure Oils (e.g., Tung Oil, Linseed Oil): These penetrate deeply into the wood, hardening within the fibers to create a natural, matte to satin finish. They enhance the wood’s natural color and provide excellent water resistance.
- Tung Oil: Known for its clarity, water resistance, and moderate durability. It cures harder and faster than linseed oil.
- Linseed Oil (Flaxseed Oil): Offers a warm, slightly amber tone. It’s slower to cure and can be softer than tung oil. Always use “boiled linseed oil” (BLO) which contains metallic dryers to speed up curing; raw linseed oil takes excessively long to dry.
- Advantages: Natural feel, easy to repair, enhances grain depth.
- Disadvantages: Less durable against abrasion than varnish, requires multiple coats and long curing times.
- Oil-Varnish Blends (e.g., “Danish Oil,” “Teak Oil”): These are commercial products that combine oil for penetration and varnish for increased film build and durability. They offer a good balance of natural feel and protection.
- Advantages: Faster build-up, better abrasion resistance than pure oils, good color enhancement.
- Disadvantages: Can obscure grain slightly more than pure oils, repairs might be slightly more complex than pure oils.
- Hardwax Oils: A modern category gaining popularity, hardwax oils combine natural oils (like linseed, tung, or sunflower oil) with waxes (like carnauba or beeswax). They penetrate to protect the wood while also forming a thin, durable, and highly water-resistant surface film.
- Advantages: Excellent durability, beautiful natural look, easy maintenance, single-product solution.
- Disadvantages: Can be more expensive, some brands require specific application tools.
The choice depends on the project: a DIY wooden plant stand might benefit from the natural look of pure oil, while a custom wooden mantel might need the added protection of a hardwax oil or oil-varnish blend.
Mastering Application Techniques for Deep Luster and Durable Protection
Achieving a deep luster with an oil finish is about saturating the wood, allowing it to drink in the finish, and then carefully removing excess.
- Environment: Work in a well-ventilated, dust-free environment with moderate temperature and humidity.
- First Coat – Flood and Penetrate: Apply the first coat generously. For pure oils, “flood” the surface, allowing the wood to absorb as much as it can. Let it sit for 15-30 minutes, keeping the surface wet by reapplying to any dry spots. This ensures maximum penetration.
- Wiping Off Excess: This is critical. After the dwell time, thoroughly wipe off all excess oil with clean, lint-free cloths. Do not leave any puddles or shiny spots. Unwiped oil will not cure properly, remaining sticky and attracting dust. Change cloths frequently.
- Crucial Safety Note: Oil-soaked rags are highly susceptible to spontaneous combustion. Always lay them flat to dry outside or submerge them in water before discarding.
- Subsequent Coats – Build and Polish:
- Drying Time: Allow each coat to dry completely before applying the next. This can range from 12 hours to several days for pure oils, depending on the product, wood type, and environmental conditions. Refer to the manufacturer’s instructions.
- Light Sanding (Optional): Between coats, after the previous coat has fully dried, a very light sanding with 320 or 400-grit sandpaper can smooth any raised grain or dust nibs. This is often called “denibbing.” Remove all dust before the next coat.
- Wet-Sanding (Advanced Technique): For an incredibly smooth, filled-pore finish, particularly with pure oils, wet-sand the first few coats. Apply oil, then immediately sand with 400 or 600-grit wet/dry sandpaper, using the oil as a lubricant. The sanding slurry will mix with the oil and fill the wood’s pores. After 10-15 minutes, wipe off all excess thoroughly. This technique dramatically enhances the perceived depth and luster.
- Number of Coats: Pure oils often require 3-5 coats, sometimes more for highly absorbent woods or high-wear surfaces. Oil-varnish blends and hardwax oils typically require 2-3 coats. The goal is to reach a point where the wood no longer readily absorbs the finish, and a uniform sheen is achieved.
Curing, Maintenance, and Enhancing Durability
The application of the final coat is not the end of the finishing process. Proper curing and ongoing maintenance are vital for ensuring the deep luster and durable protection of your oil-finished wood for years to come.
Understanding the Curing Process
Oil finishes cure through oxidation and polymerization, a chemical reaction that hardens the oil within the wood fibers. This is distinct from drying, which is merely the evaporation of solvents.
- Full Cure Time: While a surface might feel dry to the touch in hours or a day, a full cure—where the finish reaches its maximum hardness and durability—can take weeks, or even months, for pure oils.
- Guideline: For pure oils (like tung or linseed), allow at least 30 days before heavy use, and often 60-90 days for complete hardness. Oil-varnish blends and hardwax oils typically cure faster, often within 7-14 days. Always consult the product’s technical data sheet.
- Protection During Curing: During the curing period, treat the finished piece gently. Avoid placing heavy or sharp objects on it, and protect it from excessive moisture or extreme temperature fluctuations. Do not use cleaning products on it until fully cured.
- Off-Gassing: Some oil finishes, particularly those with strong solvents, may off-gas during curing. Ensure good ventilation in the space where the piece is curing.
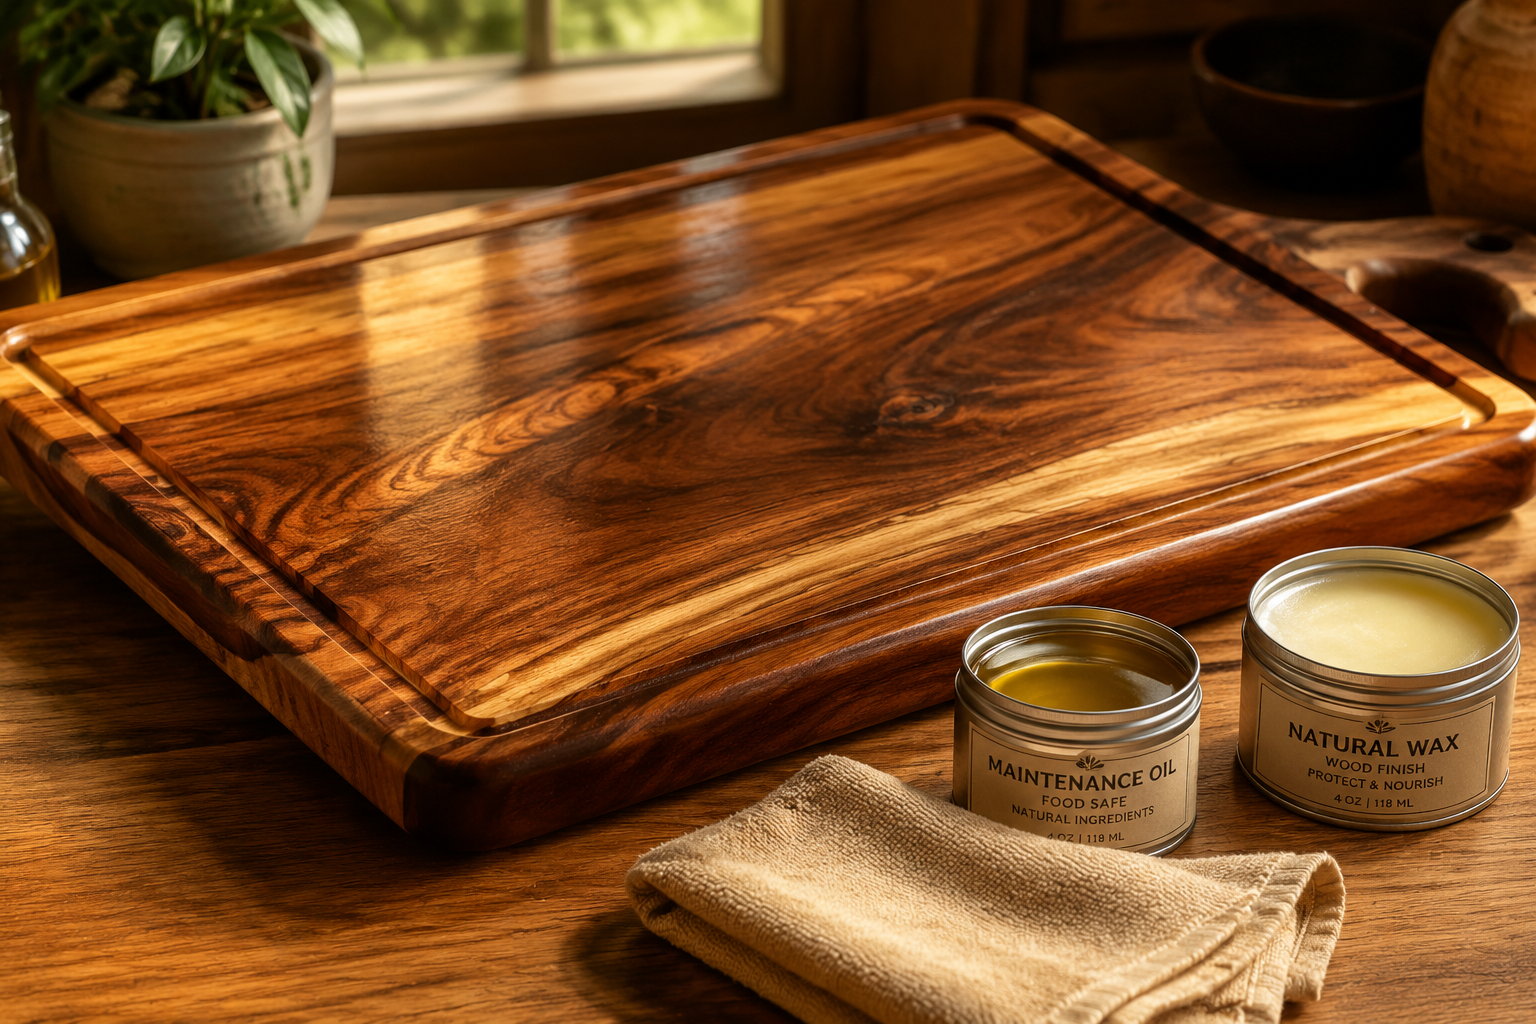
Enhancing and Maintaining Long-Term Durability
Even the most durable oil finish benefits from proper care.
- Buffing for Sheen (Optional): Once fully cured, some oil finishes can be buffed with a soft cloth or a buffing pad on a polisher to increase the sheen to a higher satin or semi-gloss, if desired.
- Wax Topcoat (Optional): For added protection and a smoother feel, especially on tabletops or pieces subject to frequent handling, a topcoat of furniture wax can be applied after the oil has fully cured. Apply a thin layer of paste wax, let it haze, then buff to a shine. This provides an additional sacrificial layer of protection.
- Regular Cleaning: For routine cleaning, simply wipe the surface with a damp cloth. Avoid harsh chemical cleaners, as these can strip or damage the oil finish. Mild soap and water are generally safe for occasional, light cleaning.
- Reapplication and Repair: One of the significant advantages of oil finishes is their reparability.
- Periodic Rejuvenation: Over time, the finish might dull or show signs of wear, especially on high-use surfaces. A light reapplication of oil can bring it back to life. Clean the surface, lightly scuff sand with fine grit (e.g., 320-400) if there are minor scratches, then apply a thin coat of the original oil finish, wiping off all excess.
- Spot Repairs: For isolated scratches or damaged areas, gently sand the affected area with fine grit sandpaper until the scratch is removed, then reapply the oil finish, blending it into the surrounding area. Since oil finishes don’t build a thick film, spot repairs are often seamless. This makes them ideal for pieces like wooden fruit bowls that see frequent use.
- Understanding Wood Movement: Wood is a hygroscopic material, meaning it absorbs and releases moisture, causing it to expand and contract. While oil finishes offer protection, they do not completely prevent wood movement. Understanding this phenomenon is key to furniture longevity; for more detail, refer to our article on understanding wood movement.
By diligently following these curing and maintenance practices, your oil-finished woodworking projects will continue to exude deep luster and provide durable protection for decades, showcasing the true beauty of the wood.
Conclusion
Mastering wood finishing with oil-based products is a rewarding endeavor that transforms raw lumber into pieces of lasting beauty and durability. From the meticulous initial surface preparation to the careful selection and application of various oil types, and finally, to the crucial stages of curing and ongoing maintenance, each step is integral to achieving a professional-grade result. The deep luster and tactile warmth imparted by a well-executed oil finish celebrate the natural character of the wood, offering a look and feel that paint and film-building finishes cannot replicate. In 2026, as makers continue to seek authentic and resilient finishes, oil-based solutions remain a top choice for their blend of aesthetic appeal, repairability, and protective qualities.
To elevate your woodworking projects, begin by investing time in impeccable sanding, experiment with different oil types to find the perfect match for your wood and desired outcome, and commit to the recommended curing times. Remember, patience is a virtue in finishing, and proper maintenance will ensure your creations endure for generations. By embracing these techniques, you will not only protect your work but also unveil the hidden beauty within every grain, leaving a legacy of craftsmanship that glows with an unparalleled depth.

SEO Meta Title: Master Oil Wood Finishing: Deep Luster & Durable Protection SEO Meta Description: Unlock techniques for mastering wood finishing with oil-based products in 2026. Achieve deep luster, durable protection, and pro-level results on all your projects.
