
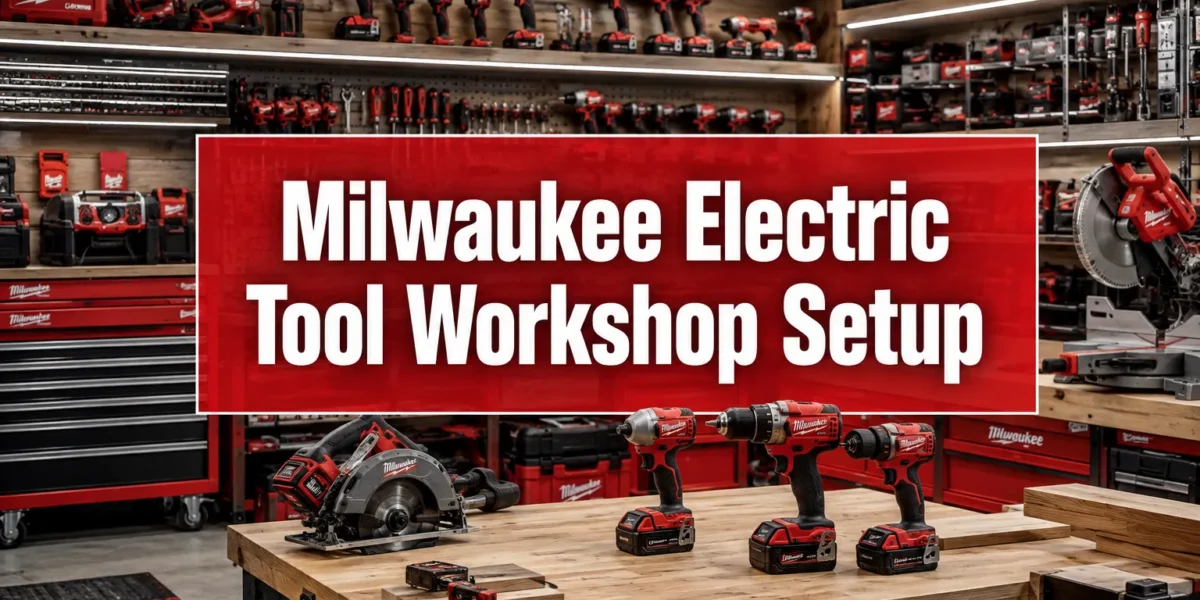
The average hobbyist or professional woodworker spends approximately 15% of their workshop time searching for tools, untangling cords, or reconfiguring their workspace. This statistic highlights a fundamental inefficiency that a well-designed Milwaukee Electric Tool Workshop Setup, centered on cordless systems, can decisively resolve. By strategically organizing your space around the flexibility and power of Milwaukee’s M12 and M18 platforms, you can transform wasted minutes into productive output, enhancing both safety and overall project quality. This article will guide you through optimizing your workshop for peak efficiency using Milwaukee’s robust cordless tool ecosystem.
Key Takeaways
- Embrace Cordless: Transitioning to Milwaukee’s M12 and M18 cordless systems eliminates cord clutter, enhances mobility, and improves safety.
- Strategic Layout: Design your workshop into distinct zones (cutting, assembly, finishing, storage) to optimize workflow and reduce wasted movement.
- Organized Storage: Utilize Milwaukee Packout systems, pegboards, and custom solutions for efficient, accessible tool and accessory storage.
- Battery Management: Implement a dedicated, visible battery charging station and a system for rotating batteries to ensure continuous power.
- Ergonomics and Safety: Prioritize adjustable work surfaces, proper lighting, and integrated dust collection for a healthier, safer, and more comfortable environment.
Designing Your Milwaukee Electric Tool Workshop Setup for Optimal Workflow
An efficient workshop isn’t just a collection of tools; it’s a carefully orchestrated environment that supports your creative process. When focusing on a Milwaukee Electric Tool Workshop Setup, the inherent portability of cordless tools allows for greater flexibility in layout and workflow than traditional corded setups. The key is to design your space in logical zones, minimizing unnecessary movement and maximizing accessibility.
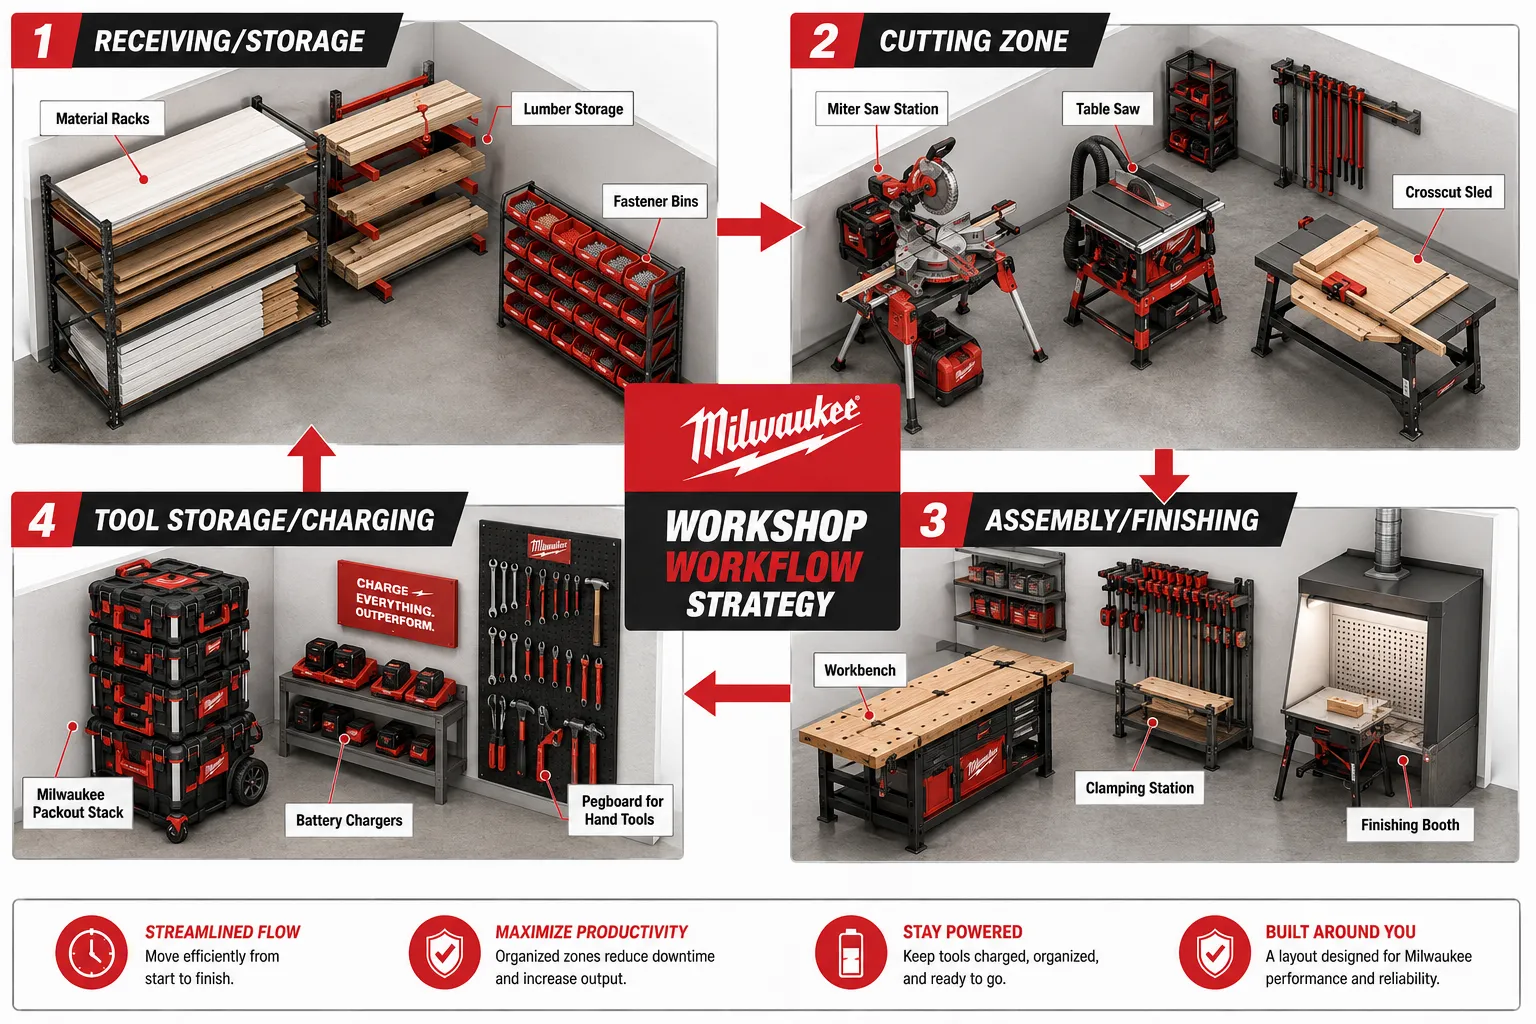
Begin by mapping out your workshop space, considering the natural flow of materials from raw stock to finished product. A common and highly effective approach involves segmenting the workshop into the following zones:
- Receiving and Storage Zone: This is where raw materials, such as lumber or sheet goods, are stored upon arrival. Proximity to an exterior door is ideal. Efficient storage solutions, like vertical lumber racks or designated shelving for sheet goods, are crucial. Consider the weight and size of materials you frequently handle.
- Cutting Zone: This area houses your primary cutting tools. For many woodworkers, this includes a table saw, miter saw, and possibly a band saw. The cordless nature of Milwaukee’s circular saws and miter saws (like the M18 FUEL 12″ Dual Bevel Sliding Miter Saw) offers immense flexibility here, allowing temporary setups or movement for specific cuts without being tethered to an outlet. Ensure ample clear space around these tools for safe material handling.
- Preparation and Assembly Zone: This is the heart of your workshop, typically centered around your primary workbench. Here, tasks like drilling, sanding, fastening, and detailed joinery occur. Milwaukee’s M18 FUEL Drills, Impact Drivers, and Sanders truly shine in this zone due to their mobility. A large, sturdy workbench is essential, preferably one with built-in storage or the capacity to integrate modular storage underneath. Having frequently used hand tools and cordless power tools within arm’s reach is critical. For more on optimizing this space, explore Building A Compact And Ergonomic Workbench For Small Workshops Maximizing Space And Efficiency.
- Finishing Zone: Ideally, this zone should be somewhat isolated from the main work areas to prevent dust contamination. It’s where you apply stains, paints, and protective coats. Good ventilation is paramount. Cordless finishing tools, like Milwaukee’s M18 FUEL Orbital Sanders, make tasks here much easier without dealing with power cords.
- Tool Storage and Charging Zone: This dedicated area is for organizing all your Milwaukee tools, accessories, and batteries. This is where the Milwaukee Packout system truly excels.
By clearly defining these zones, you create a workshop that isn’t just clean, but actively promotes a smooth, logical progression through your projects. Minimizing travel between zones, especially for frequently repeated tasks, directly translates to increased efficiency.
The Cordless Advantage: Maximizing Efficiency with Milwaukee’s M12 and M18 Systems
The true paradigm shift in workshop efficiency comes with fully embracing cordless power tool systems. For a Milwaukee Electric Tool Workshop Setup, this means leveraging the power and versatility of their M12 and M18 platforms. The elimination of cords drastically improves safety, reduces setup time, and offers unparalleled freedom of movement around your projects.
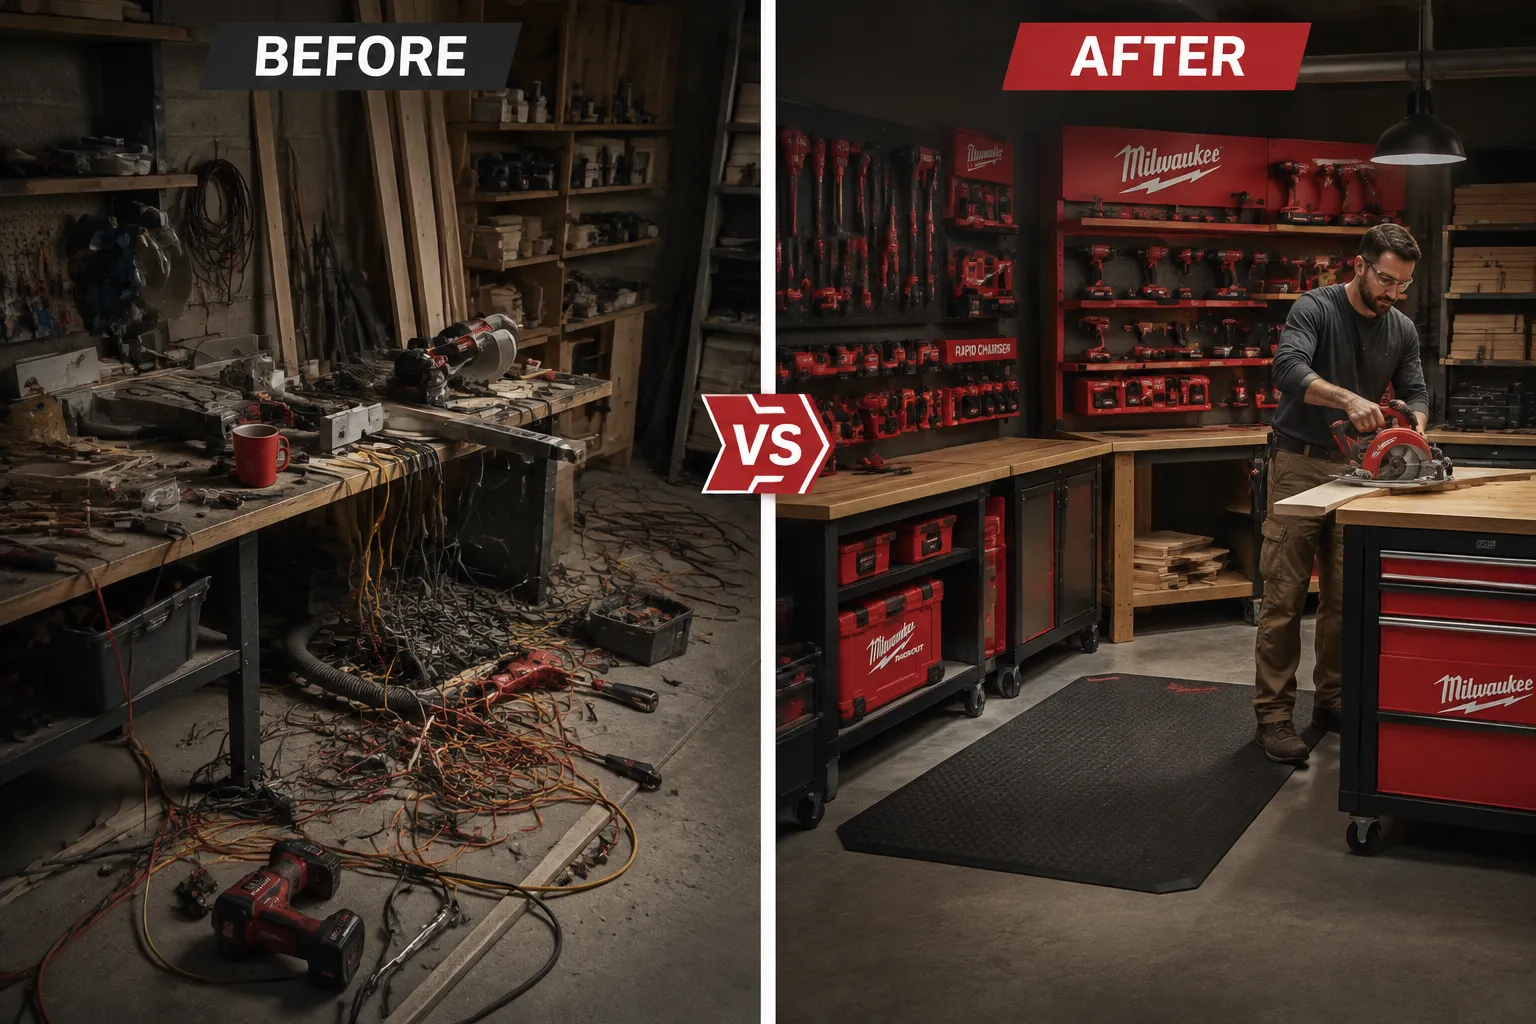
Benefits of a Cordless-Centric Workshop:
- Enhanced Mobility: Move freely around large projects, take tools to the material instead of bringing the material to an outlet, and even work outdoors or in remote areas of your property without generators or extension cords.
- Improved Safety: No more tripping hazards from tangled cords. This significantly reduces the risk of falls and damage to tools or materials.
- Faster Setup and Cleanup: Grab a tool and go. No time wasted unwinding, plugging in, or packing up cords. This translates to more actual working time.
- Reduced Clutter: A workshop free of electrical cords feels cleaner, more organized, and less stressful.
Integrating Milwaukee’s Systems:
Milwaukee’s M12 and M18 lines offer a comprehensive range of tools, ensuring you have a cordless option for almost any task. The M18 FUEL line, in particular, delivers performance often equal to or exceeding corded alternatives, from circular saws to routers.
- Unified Battery Platform: One of the greatest strengths is the common battery system. Investing in M18 batteries means they power dozens of tools, reducing the need for multiple chargers and battery types. The same applies to the compact M12 system, which is perfect for lighter tasks and confined spaces.
- Packout System Integration: Milwaukee’s Packout modular storage system is a game-changer for organization and portability. Tools, batteries, and accessories can be neatly stored, transported, and stacked, keeping your workshop tidy and making project setup a breeze. Consider using Packout rolling toolboxes, crates, and organizers to create mobile workstations or organized storage walls. For ideas on smart storage, refer to Building Modular Wood Storage Systems For Small Workshops Maximizing Space And Organization.
- Dedicated Tool Storage: Beyond Packout, custom storage solutions like pegboards or French cleat systems can provide quick access to your most-used cordless tools. Mount chargers strategically within your tool storage zone for easy battery access.
By making the full transition to Milwaukee’s cordless ecosystem, you are not just buying tools; you are investing in a fundamentally more efficient, safer, and enjoyable workshop experience.
Essential Organization and Battery Management for Your Milwaukee Electric Tool Workshop Setup
An optimized workshop relies as much on systematic organization and intelligent power management as it does on the tools themselves. With a Milwaukee Electric Tool Workshop Setup, proper organization of your cordless tools and, crucially, your batteries, is paramount to maintaining peak efficiency.
Strategic Tool Storage
The goal is to store tools in a way that makes them easily accessible yet neatly organized.
- Milwaukee Packout System: This modular storage system is ideal for keeping your Milwaukee tools and accessories together. Stackable boxes, organizers, and rolling carts allow you to customize your storage based on your specific needs. You can organize by tool type (e.g., all drills in one box, all saws in another), or by project type, creating mobile kits that can be rolled to your work area.
- Wall-Mounted Storage: Pegboards or French cleat systems are excellent for frequently used cordless tools like drills, impact drivers, and smaller Sanders. Mount them near your assembly or preparation zone for quick grab-and-go access. Labeling spots for each tool ensures they always return to their home.
- Drawer Organizers: For smaller accessories like drill bits, drivers, and sanding discs, use drawer organizers within your workbench or tool chests. Milwaukee offers various small parts organizers that integrate with their Packout system, further enhancing this strategy.
Battery Charging and Management
The Achilles’ heel of a cordless workshop can be dead batteries if not managed proactively. A dedicated battery charging station is non-negotiable for a truly efficient Milwaukee Electric Tool Workshop Setup.
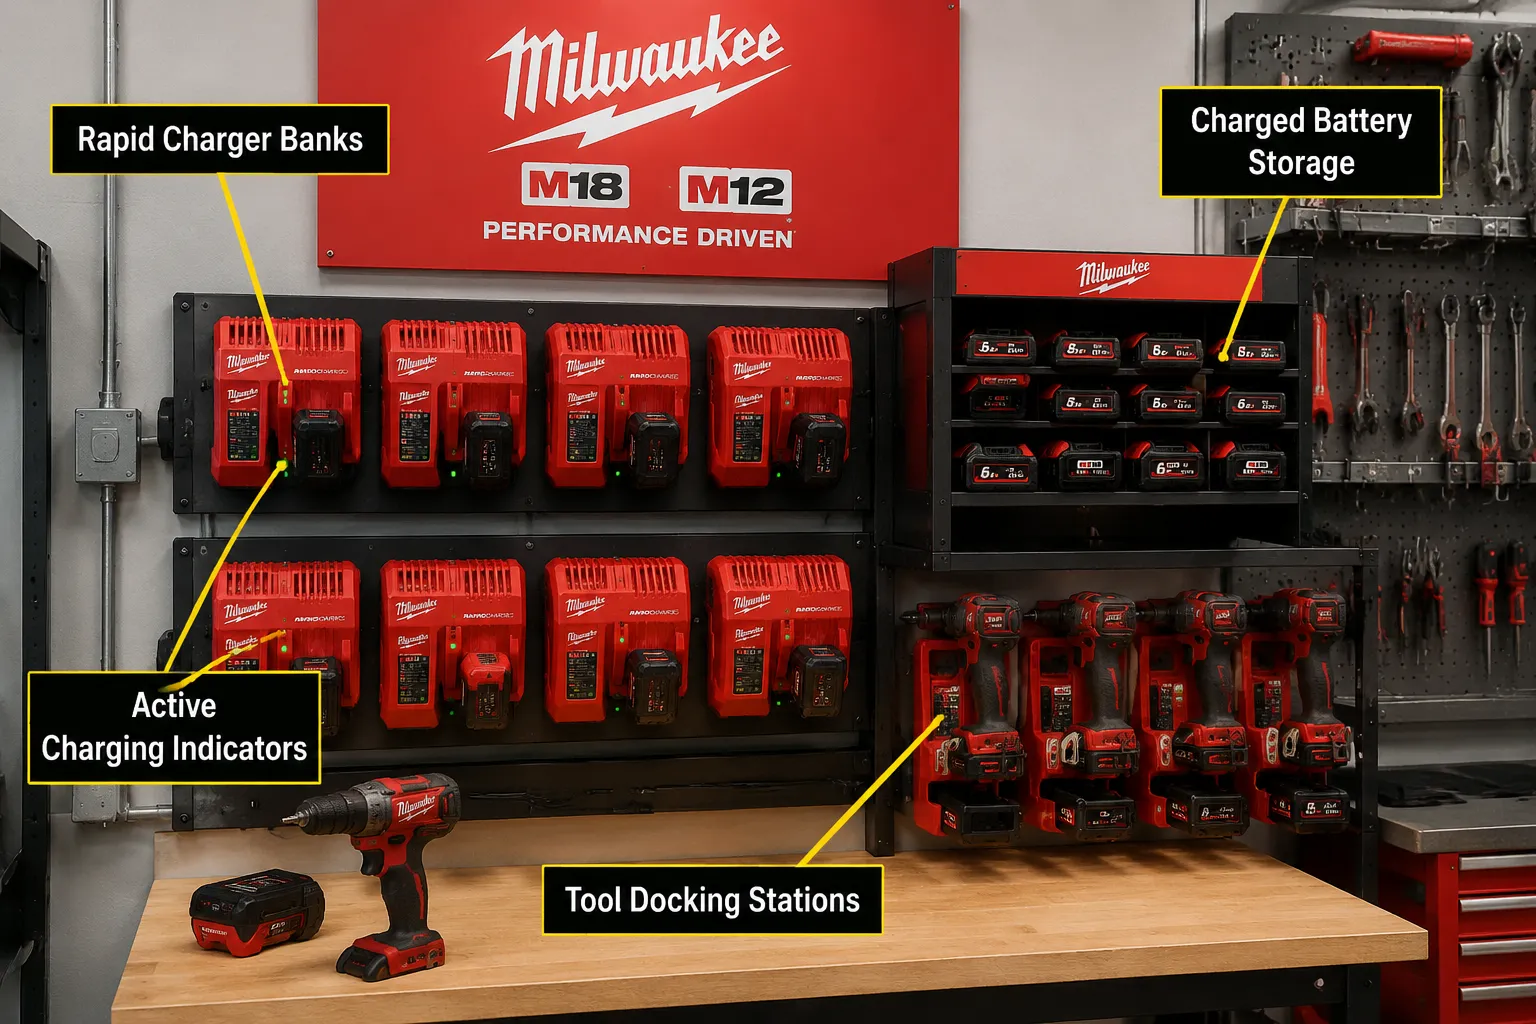
- Dedicated Charging Station:
- Location: Position your charging station in an easily accessible, well-ventilated area, preferably within your tool storage zone or near your main workbench. Avoid placing it where it can accumulate excessive dust.
- Capacity: Invest in multiple Milwaukee chargers, including rapid chargers, to ensure you can charge several batteries simultaneously. Consider a multi-port charger if space is limited.
- Visibility: Make it easy to see which batteries are charging and which are ready to go. Some users employ simple visual cues, like placing charged batteries upright and depleted batteries upside down, or using a “charged” bin and a “charging” bin.
- Power Strips and Surge Protectors: Ensure your charging station has adequate power outlets and is protected by a surge protector to safeguard your valuable batteries and chargers.
- Battery Rotation System: To ensure continuous operation, implement a battery rotation system. Have at least two batteries per heavily used tool, with one always on the charger while the other is in use. For larger, power-hungry tools, having even more spare batteries can prevent workflow interruptions.
- Storage of Charged Batteries: Store fully charged batteries in a cool, dry place, away from extreme temperatures. While Milwaukee batteries are robust, proper storage extends their lifespan. Avoid leaving them on chargers indefinitely once fully charged.
- M12 and M18 Segregation: If you utilize both Milwaukee M12 and M18 systems, clearly segregate their batteries and chargers to avoid confusion and streamline your workflow.
By meticulously organizing your tools and implementing a robust battery management strategy, you ensure that your Milwaukee cordless tools are always ready when you need them, keeping your projects moving forward smoothly and efficiently. This holistic approach to a Milwaukee Electric Tool Workshop Setup creates a truly optimized and productive environment.
Ergonomics, Safety, and Smart Upgrades for Your Milwaukee Workshop
Beyond efficient layout and cordless integration, optimizing your Milwaukee Electric Tool Workshop Setup also involves creating an ergonomic, safe, and potentially “smart” environment. These elements contribute significantly to long-term productivity and user well-being.
Ergonomics for Sustained Comfort and Productivity
Working comfortably prevents fatigue and injury, allowing for longer, more focused work sessions.
- Adjustable Work Surfaces: Consider a workbench with an adjustable height mechanism. This allows you to set the ideal working height for various tasks, whether you’re standing for detailed work or sitting for assembly. For ideas, check out Creating Ergonomic Workshop Furniture Building Custom Workbenches Stools And Storage To Prevent Strain And Increase Productivity.
- Anti-Fatigue Mats: Standing on concrete for extended periods can take a toll on your back and feet. Invest in quality anti-fatigue mats for areas where you stand most often, such as around the table saw or workbench.
- Proper Seating: For tasks that require sitting, an ergonomic stool or chair with back support and adjustable height is invaluable.
- Tool Placement: Store frequently used Milwaukee tools at waist height or slightly above, minimizing bending and reaching. Use overhead storage for less frequently accessed items.
Prioritizing Safety in Your Cordless Workshop
While cordless tools eliminate trip hazards from cords, other safety considerations remain paramount.
- Dust Collection: Even with cordless tools, woodworking generates significant dust. Integrate a robust dust collection system, potentially leveraging smart technology to activate with tool use. This is crucial for air quality and tool longevity. Milwaukee offers cordless vacuums that can connect to some of their tools, further enhancing the cordless efficiency. Learn more about automated systems with Building A Diy Smart Workshop Dust Collection System Integrating Iot Sensors For Automated Air Quality And Tool Activation.
- Adequate Lighting: Good lighting is essential for precision and safety. Combine overhead ambient lighting with task lighting focused on your workbench and specific tool areas. LED shop lights are energy-efficient and provide excellent illumination.
- First Aid and Fire Safety: Have a fully stocked first aid kit readily accessible. Keep a fire extinguisher (ABC rated) in your workshop, especially if working with flammable finishes or sawdust.
- Personal Protective Equipment (PPE): Always use safety glasses, hearing protection, and appropriate respiratory protection when operating power tools, even cordless ones.
Incorporating Smart Workshop Upgrades in 2026
The rapid advancements in smart technology offer exciting opportunities to enhance your workshop.
- Smart Lighting: Install smart LED lighting that can be controlled via an app or voice commands. This allows for customized lighting scenes, motion detection for convenience, and energy savings.
- IoT Sensors: Integrate IoT sensors for air quality monitoring or humidity control, especially in finishing zones. These can trigger ventilation systems automatically.
- Digital Inventory Management: Use apps to track your Milwaukee tools, batteries, and accessories, including maintenance schedules or loaner tracking.
- Automated Dust Collection: As mentioned, smart dust collection systems can detect when a tool is running and automatically power on the extractor. This streamlines operation and maintains a cleaner environment. Explore how to integrate such systems by reading Diy Smart Workshop Upgrades Integrating Ai Powered Tools And Automated Systems For Precision And Efficiency.
By investing in ergonomic principles, unwavering safety practices, and thoughtful smart upgrades, your Milwaukee Electric Tool Workshop Setup becomes not just efficient, but also a healthy, productive, and modern space for craftsmanship in 2026.
Conclusion
Creating an optimized Milwaukee Electric Tool Workshop Setup is a strategic investment in your productivity, safety, and enjoyment of woodworking. By consciously embracing Milwaukee’s M12 and M18 cordless systems, you unlock a level of mobility and freedom previously unimaginable in traditional workshops. The journey to optimization involves designing a workflow-centric layout, implementing smart and accessible storage solutions like the Packout system, and establishing a rigorous battery management protocol to ensure continuous power.
Furthermore, prioritizing ergonomics in your workbench and tool placement, coupled with unwavering commitment to safety protocols like robust dust collection and proper PPE, will foster a healthier and more sustainable working environment. As technology evolves, consider integrating smart workshop upgrades to further automate and refine your space. The ultimate goal is a workshop where your tools work for you, not the other way around, allowing you to focus on the craft and bring your creative visions to life with unparalleled efficiency. Begin planning your layout today, invest in organization, and experience the transformative power of a truly optimized cordless workshop.
References
- Milwaukee Tool. (2024). M18 FUEL™ Tools. Retrieved from https://www.milwaukeetool.com/Products/Power-Tools/M18-FUEL
- Milwaukee Tool. (2024). PACKOUT™ Modular Storage System. Retrieved from https://www.milwaukeetool.com/Products/Storage/PACKOUT
- Wood Magazine. (2023). Workshop Layout Basics. Retrieved from https://www.woodmagazine.com/workshop/layout/workshop-layout-basics