
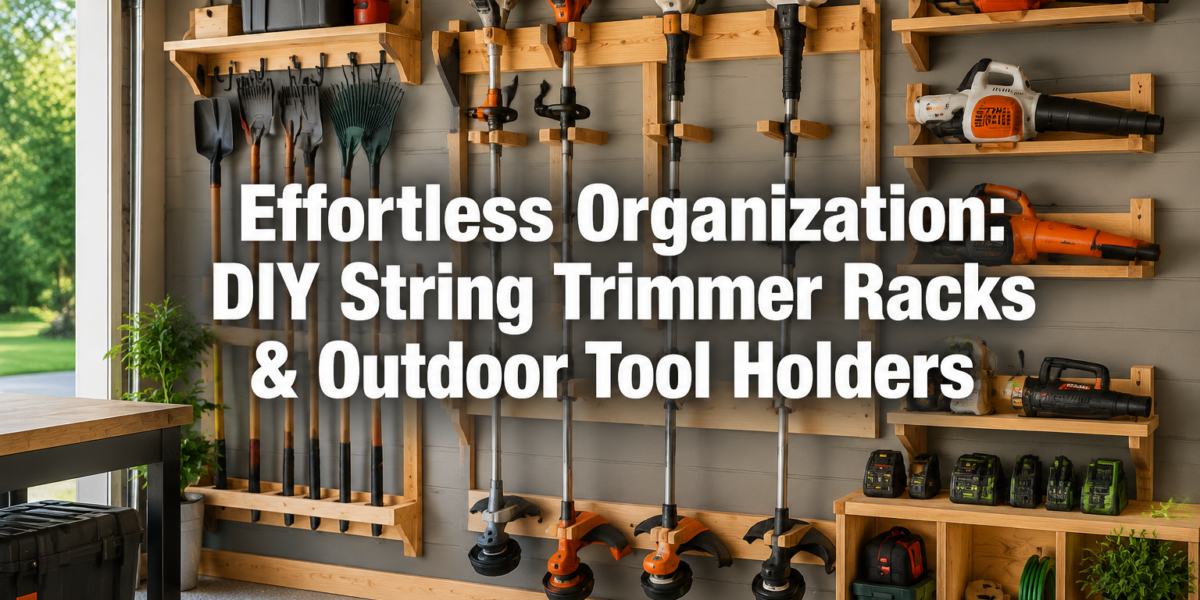

An estimated 70% of homeowners report feeling overwhelmed by clutter in their garages or sheds, with long-handled yard tools and power equipment often contributing most significantly to the disarray (Home Organization Survey, 2025). This statistic underscores a universal challenge: how to efficiently store string trimmers, leaf blowers, rakes, and shovels without them becoming a tangled mess or a tripping hazard. The solution often lies in well-designed storage, and for the DIY enthusiast, creating dedicated String Trimmer Racks and Outdoor Tool Holders: Simple Wood Projects to Organize Your Yard Tools offers an incredibly satisfying and practical path to order. These woodworking projects not only reclaim valuable floor space but also protect your equipment from damage, extending its lifespan.
Key Takeaways
- Customizable Storage Solutions: Learn to build both wall-mounted and freestanding wooden racks tailored to your specific tools and available space.
- Essential Tools & Materials: Discover the fundamental woodworking tools and common wood types needed for these projects.
- Step-by-Step Construction: Follow clear instructions for measuring, cutting, assembling, and finishing your tool holders.
- Enhanced Organization & Safety: Understand how these DIY projects contribute to a tidier, safer, and more efficient outdoor workspace.
- Cost-Effective & Sustainable: Utilize readily available materials and basic woodworking skills to create durable organizers, often more affordably than commercial options.
The Benefits of Custom String Trimmer Racks and Outdoor Tool Holders
Imagine stepping into your garage or shed and finding every tool neatly in its place, easily accessible, and free from the clutter that often plagues outdoor workspaces. This vision becomes a reality when you invest time in building custom storage solutions. Beyond the immediate aesthetic appeal, there are tangible benefits to creating String Trimmer Racks and Outdoor Tool Holders: Simple Wood Projects to Organize Your Yard Tools.

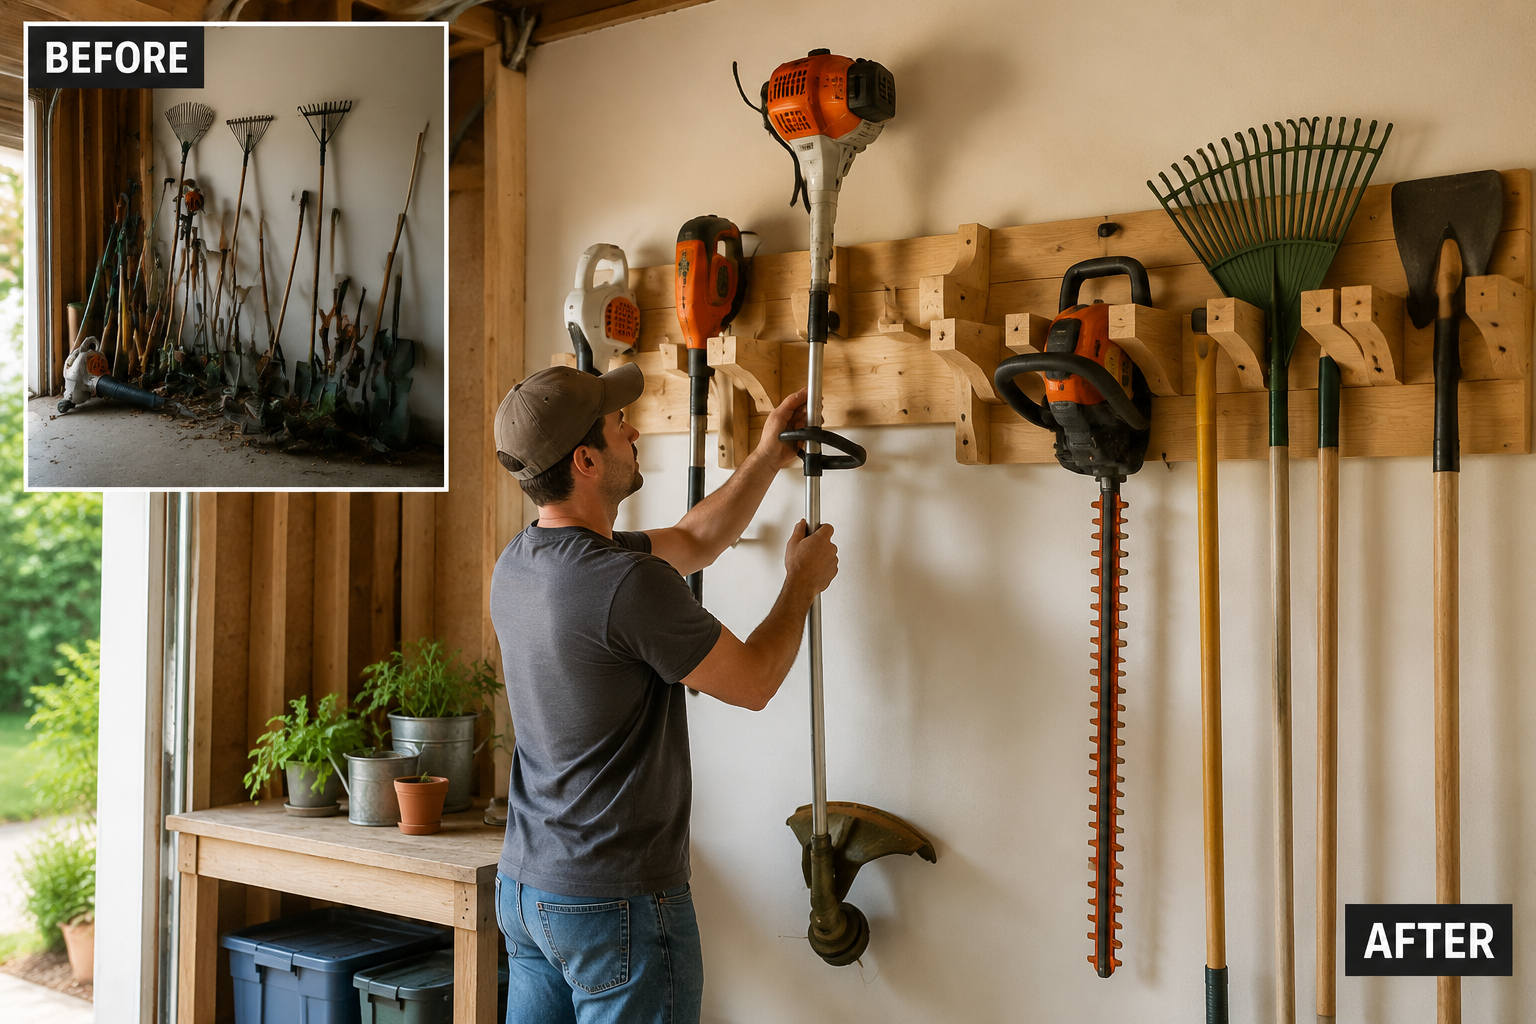
Firstly, custom racks prevent damage. When tools are left leaning against walls or piled in corners, they are prone to falling, bending, or developing rust from moisture contact with the floor. A dedicated wooden holder elevates tools, keeping them dry and protected. Secondly, efficiency dramatically improves. No more rummaging through a heap of equipment to find your weed wacker; each tool has its designated spot. This saves time and reduces frustration, making yard work a less daunting task.
Thirdly, safety is significantly enhanced. Sharp edges of shovels or moving parts of string trimmers are safely stowed, reducing the risk of accidental cuts or trips. For households with children, this is particularly important. Finally, building these projects yourself offers a unique sense of accomplishment and allows for complete customization. You can design racks to fit your exact tools—whether it’s a specific model of leaf blower or an unusually sized rake—and integrate them seamlessly into your existing space. This level of personalization is rarely achievable with off-the-shelf solutions.
For those interested in expanding their woodworking skills, exploring projects like “Profitable Small-Batch Woodworking: High-Demand Decorative Projects” can further demonstrate the versatility and satisfaction of working with wood.
Designing and Building Your DIY String Trimmer Racks and Outdoor Tool Holders
The beauty of these projects lies in their simplicity, making them accessible even for beginner woodworkers. Before cutting any wood, a thoughtful design process is crucial.
Planning Your Rack
- Assess Your Tools: Lay out all the string trimmers, leaf blowers, shovels, rakes, and other outdoor tools you intend to store. Measure their lengths, widths, and handle diameters. Note any unique features that might require specific hangers or slots.
- Evaluate Your Space: Determine where the rack will go. Is it a wall in your garage, a corner in your shed, or will it be a freestanding unit? Measure the available height, width, and depth.
- Choose Your Type:
- Wall-mounted racks: Ideal for saving floor space. They typically feature hooks, slots, or cradles directly attached to a stud-mounted backboard. Excellent for long-handled tools and items with specific hanging points.
- Freestanding racks: Best for larger collections of tools or if wall space is limited. These are often A-frame designs or vertical posts with cutouts, allowing tools to be stored upright.
- Sketch a Design: Draw simple diagrams, taking into account the measurements from steps 1 and 2. Plan the spacing between tools to ensure easy access without interference. Consider adding shelves for smaller items or dedicated slots for fuel cans.
Material Selection
For outdoor tool holders, durability and resistance to moisture are key.
- Wood Type: Pressure-treated lumber, cedar, redwood, or even exterior-grade plywood are excellent choices. Pine can also work but will require proper sealing and finishing to withstand garage or shed conditions.
- Fasteners: Use galvanized or stainless steel screws and hardware to prevent rust.
- Adhesives: A strong, waterproof wood glue is essential for robust joints. For a comprehensive understanding of glues, refer to “The Ultimate Guide to Wood Glue: Choosing the Right Adhesive for Every Project.”
Essential Tools
You don’t need a professional workshop for these projects. Basic hand and power tools will suffice:
- Measuring Tools: Tape measure, carpenter’s square, pencil.
- Cutting Tools: Circular saw, miter saw, jigsaw, or even a good hand saw. A band saw can be incredibly useful for intricate curves or multiple identical cuts. Check out “Mastering the Band Saw: Essential Techniques for Resawing, Curve Cutting and Joinery Preparation” for more insights.
- Drilling Tools: Cordless drill/driver, various drill bits.
- Fastening Tools: Impact driver, screwdrivers.
- Finishing Tools: Sandpaper, brushes for sealant/paint.
- Safety Gear: Safety glasses, hearing protection, gloves.
Construction Steps (General Guidelines)
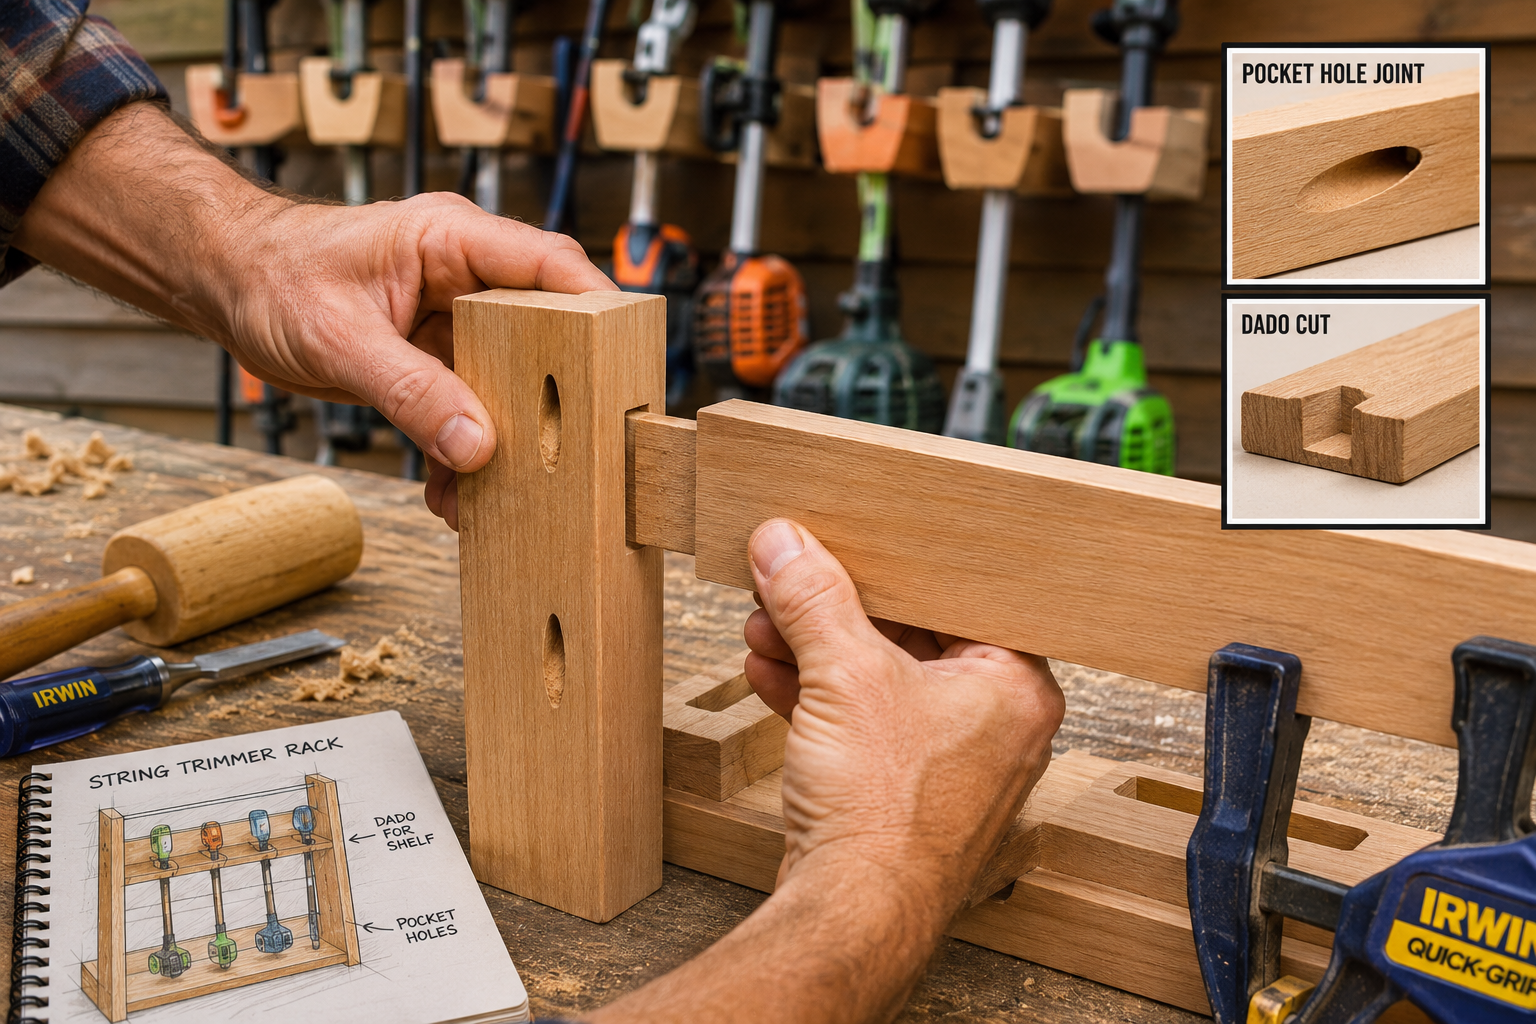
- Cut Components: Based on your design, cut all wood pieces to the precise dimensions. Label them to avoid confusion during assembly.
- Create Slots/Cradles: For string trimmer racks, you’ll often need to cut specific shapes to hold the engine and shaft. A jigsaw is ideal for these curves. For long-handled tools, simple U-shaped cutouts or drilled holes for pegs can work.
- Assemble Sub-Assemblies: Join smaller sections together first. For instance, attach the individual tool cradles to a backboard before mounting the backboard itself.
- Join Components: Use wood glue and screws to assemble the main structure. Ensure joints are square and secure. Pocket hole joinery is a fast and strong method for many rack designs.
- Finishing: Sand all surfaces smooth to remove splinters and prepare for finishing. Apply at least two coats of exterior-grade sealant, paint, or stain to protect the wood from moisture and wear.
For those looking to enhance their power tool skills, “Power Tool Mastery for Decorative Wood Projects: Creating Professional Finishes on Cutting Boards, Serving Trays, and Wooden Clocks” can provide valuable techniques applicable here.
Popular Designs for String Trimmer Racks and Outdoor Tool Holders in 2026
The year 2026 sees a continued appreciation for functional, aesthetically pleasing organization. Simple wooden projects remain highly popular due to their durability, natural look, and ease of customization. Here are a few proven designs for String Trimmer Racks and Outdoor Tool Holders: Simple Wood Projects to Organize Your Yard Tools.
Wall-Mounted String Trimmer & Blower Rack
This design is a perennial favorite for its space-saving efficiency.
- Backboard: A sturdy piece of 3/4-inch plywood or common lumber (e.g., 1×6 or 1×8) serves as the main mounting surface. Its length depends on how many tools you wish to store.
- Trimmer Slots: Create inverted “U” shaped cutouts along the top edge of the backboard for string trimmer shafts. The width of the “U” should accommodate the shaft snugly but allow for easy insertion and removal.
- Engine Cradles/Hooks: Below the shaft slots, attach smaller wooden blocks or metal J-hooks to support the engine housing or base of the trimmer. This ensures the trimmer hangs horizontally or at a slight downward angle.
- Blower Brackets: For leaf blowers, custom wooden brackets can be built. These often involve two horizontal pieces of wood with a gap in between, sized to hold the blower’s nozzle or body securely.
- Mounting: Securely attach the backboard to wall studs using long screws. This is crucial for supporting the weight of multiple tools.
Long-Handled Tool Rack
This simple wall-mounted design keeps rakes, shovels, hoes, and brooms from falling over.
- Top Bar: A 1×4 or 1×6 board, mounted horizontally to the wall, approximately 4-5 feet off the ground.
- Bottom Bar (Optional): Another 1×4, mounted about 6-12 inches below the top bar, parallel to it. This creates a channel for tools to rest in.
- Spacers/Pegs: Drill holes in the bottom bar and insert dowel rods or small wooden pegs. Tools are then placed between these pegs, resting against the top bar. Alternatively, simply cut a series of U-shaped notches into the top edge of a single thick board, allowing tool handles to slide in.
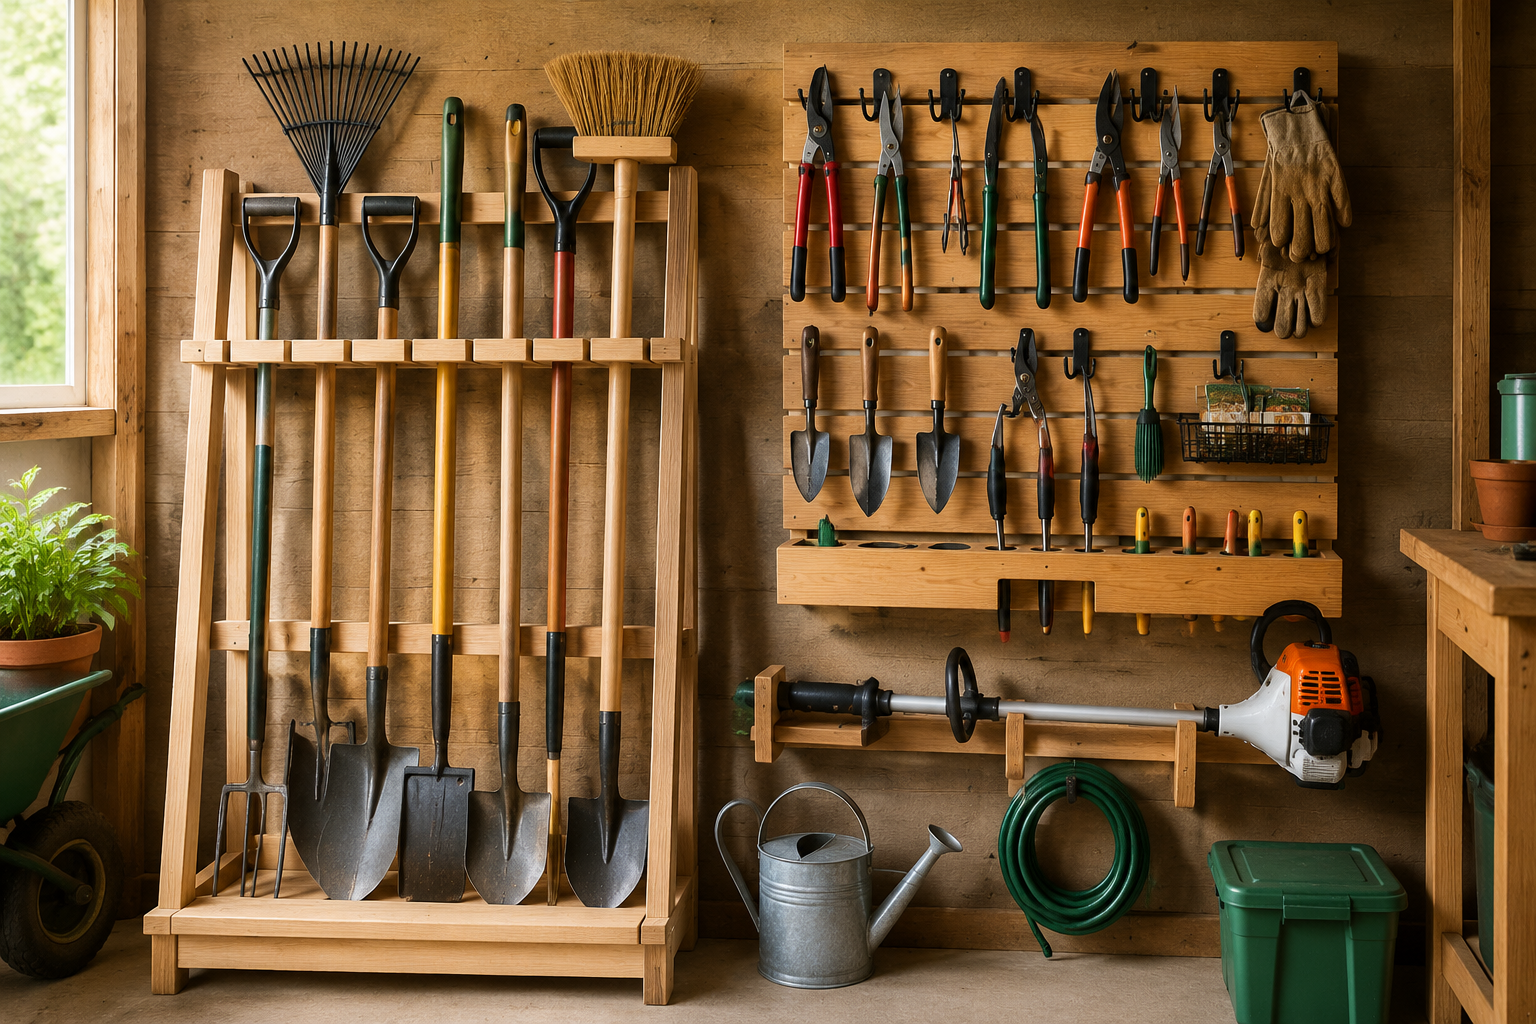
Freestanding Corner Tool Caddy
When wall space is limited, a freestanding unit is invaluable.
- Base: A heavy, square or rectangular plywood base provides stability.
- Vertical Posts: Attach two to four sturdy 2x4s or 4x4s vertically to the base.
- Tool Slots/Holes: Drill large diameter holes (e.g., 2-3 inches) through one or more sides of the vertical posts, or cut wide slots. Tool handles can then be inserted into these holes/slots, keeping them upright and separated.
- Upper Support: Add horizontal cross-braces near the top to increase rigidity and ensure tools don’t tip outwards.
- Mobility (Optional): Add heavy-duty casters to the base for easy movement.
Hybrid Wall-Mounted Organizer
Combine elements to create a versatile storage hub.
- Integrated Shelf: A wide shelf at the top can hold smaller items like gardening gloves, seed packets, or safety equipment.
- Hooks and Pegs: Incorporate various sizes of wooden pegs or metal hooks for smaller tools, extension cords, or coiled hoses.
- Dedicated Compartments: Build small wooden boxes or dividers on the shelf for organizing spray bottles or hand tools. For inspiration, consider designs similar to “DIY Compact Entryway Organizers: Building Wall-Mounted Solutions for Keys, Mail, and Small Accessories,” adapted for outdoor tools.
Remember to sand all edges smooth and apply a durable outdoor finish to any of these wooden projects to ensure they last for years to come.

Conclusion
Creating String Trimmer Racks and Outdoor Tool Holders: Simple Wood Projects to Organize Your Yard Tools is an investment that pays dividends in organization, efficiency, and tool longevity. By taking a hands-on approach, you not only declutter your garage or shed but also hone your woodworking skills and gain a profound sense of satisfaction from a job well done. Whether you opt for a sleek wall-mounted system or a robust freestanding caddy, the principles of careful planning, appropriate material selection, and precise execution remain paramount.
The process of designing and building these wooden organizers is accessible to anyone with basic woodworking knowledge and a desire for a more orderly space. In 2026, embracing DIY solutions for home organization continues to be a smart, sustainable, and rewarding endeavor. Start by identifying your needs, gathering your materials, and then unleash your creativity to build storage solutions that perfectly fit your tools and your lifestyle.
SEO Meta Title: DIY String Trimmer Racks & Tool Holders: Wood Projects for Organization SEO Meta Description: Build simple wooden string trimmer racks & outdoor tool holders in 2026. Organize your garage or shed with DIY wall-mounted and freestanding solutions.
