

The average cost of a new, mid-range pool table in 2026 can easily exceed $3,000, presenting a significant barrier for many enthusiasts. For skilled woodworkers, however, this cost often translates into an opportunity: the chance to construct a high-quality, custom table that rivals commercial offerings. This advanced guide will walk you through the comprehensive process of building a DIY Wooden Pool Table, detailing everything from crafting the robust frame and subframe to expertly installing the heavy slate and meticulously stretching the felt for a truly playable table. This isn’t merely about saving money; it’s about the satisfaction of creating a centerpiece for your home that reflects your craftsmanship and attention to detail.
Key Takeaways
- Building a DIY pool table requires precise woodworking skills, particularly for the frame and subframe construction.
- Accurate leveling of the subframe and slate is paramount for a professional-grade playing surface.
- Installing heavy slate demands careful handling and proper sealing to ensure durability and a smooth game.
- Stretching the felt correctly is a critical final step, impacting the table’s playability and longevity.
- Custom pool tables offer significant cost savings and personalization options compared to store-bought alternatives.
Building the Frame and Subframe: The Foundation of Your DIY Wooden Pool Table
The structural integrity and long-term stability of your DIY wooden pool table depend almost entirely on the quality of its frame and subframe. These components are the unsung heroes, supporting the immense weight of the slate and withstanding the forces of play. Begin by selecting high-quality, dense hardwoods such as oak, maple, or ash, known for their strength and resistance to warping. These materials will ensure your table remains stable for decades.

Designing for Durability and Playability
Before cutting any wood, a detailed plan is essential. Standard pool tables typically measure 7, 8, or 9 feet in length. The playing surface dimensions are critical: a 7-foot table has a 39×78-inch playing area, an 8-foot a 44×88-inch, and a 9-foot a 50×100-inch. Your frame must accommodate these dimensions with appropriate overhangs for the rails.
The main frame consists of four sturdy rails, joined with robust techniques like mortise and tenon joints or heavy-duty through-bolted connections. These joints provide superior strength compared to screws alone. Consider the design of the legs, ensuring they are not only aesthetically pleasing but also exceptionally stable. Tapered legs or those with wide feet offer better stability.
The subframe, often referred to as the slate support system, sits within the main frame and directly supports the heavy slate. It typically comprises a grid of equally spaced cross-members designed to distribute the slate’s weight evenly. For a 3-piece slate, ensure the main cross-members align perfectly with the slate seams to provide continuous support and prevent sagging.
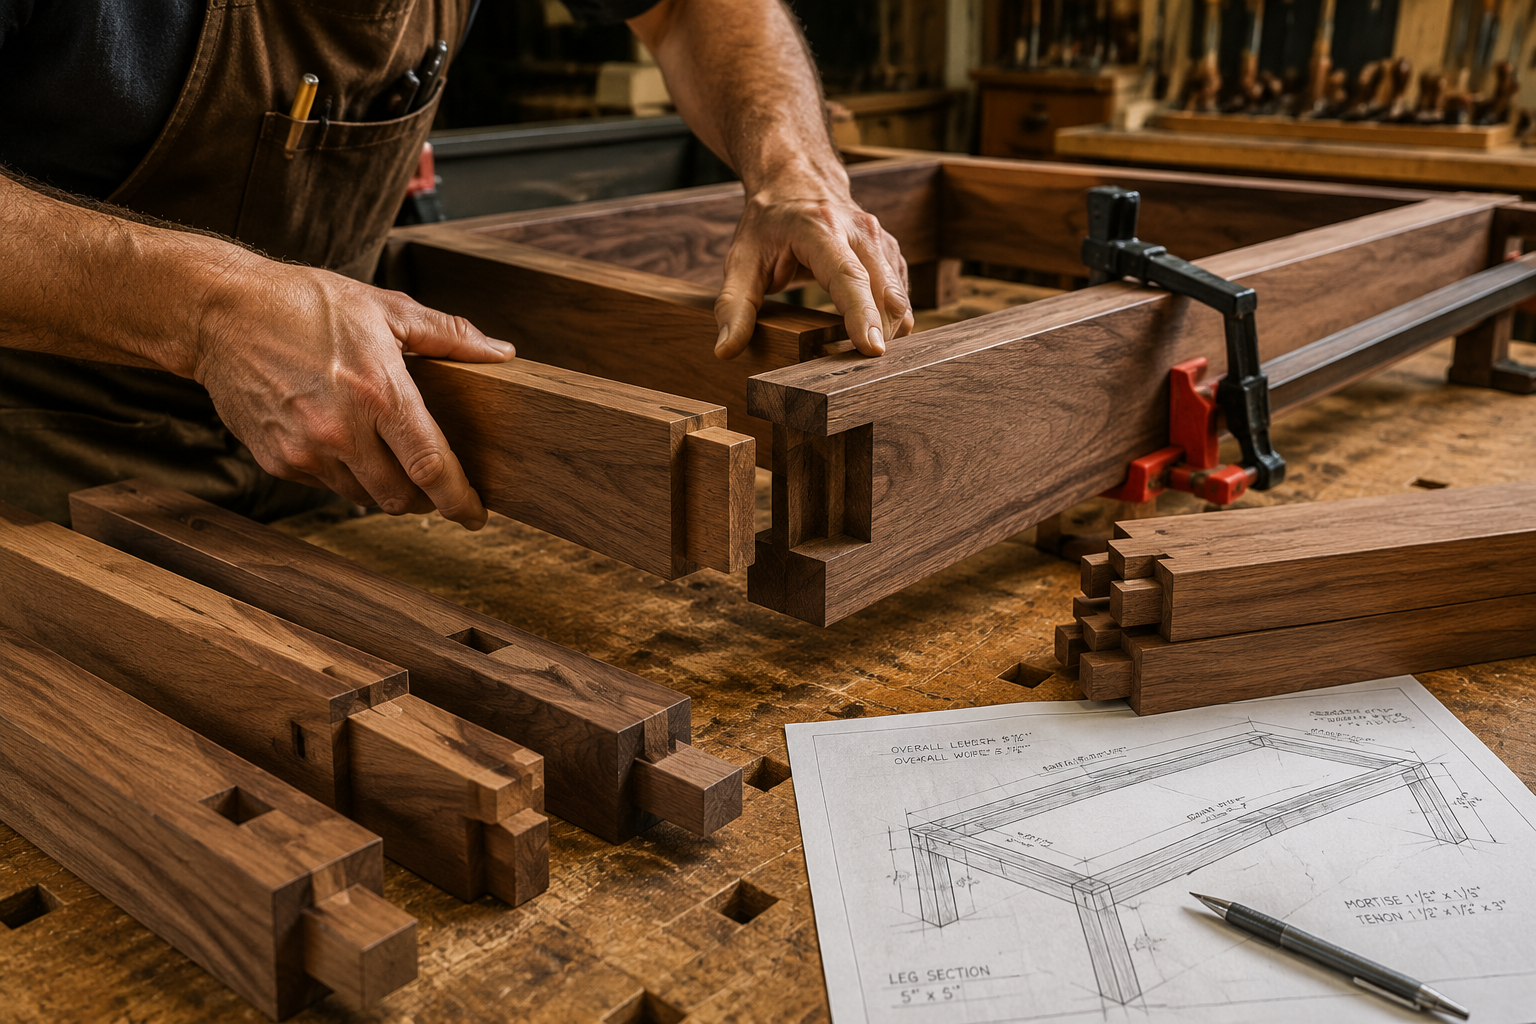
A crucial aspect of subframe construction is creating a flat and level surface. Even the slightest deviation can impact ball roll. When building your subframe, use a high-quality router table to ensure all connecting surfaces are perfectly flat and square. Dry-fit all components before final assembly, using clamps to check for squareness and levelness. For lasting strength, employ strong wood glues and structural fasteners.
For the main frame, here’s a general material list for an 8-foot table:
| Component | Material Suggestion | Quantity (approx.) |
|---|---|---|
| Outer Frame Rails | 4×6″ hardwood stock | 4 pcs (length varies) |
| Leg Assemblies | 4×4″ or 6×6″ hardwood stock | 4 pcs |
| Apron/Skirting Boards | 1×8″ or 1×10″ hardwood planks | 4 pcs |
| Inner Subframe Rails | 2×6″ hardwood stock | 2 pcs |
| Subframe Cross-members | 2×4″ hardwood stock | 5-7 pcs |
Remember to factor in pocket openings during your frame design. The pockets are integrated into the rail system and require specific cutouts that must be precise. These openings need reinforcement to prevent wear over time.
Leveling the Frame for Optimal Play
Achieving a perfectly level frame is non-negotiable for a playable pool table. Once the main frame and subframe are assembled and securely attached to the legs, place the entire structure in its permanent location. Use a long, accurate spirit level (at least 4-foot) across all directions of the subframe.
Initial leveling can be achieved by shimming under the legs. However, for fine-tuning, adjustable leg levelers are invaluable. These allow for precise adjustments, accommodating minor floor imperfections. Check the level constantly as you tighten fasteners, as this can sometimes introduce slight distortions. A truly flat and level surface here will save considerable frustration during slate installation. For a deeper dive into stable constructions, consider exploring guides on understanding wood movement to anticipate material behavior.
Installing Slate and Building the Rails for Your DIY Wooden Pool Table
With the frame and subframe complete and perfectly level, the next critical phase in building your DIY Wooden Pool Table is installing the heavy slate and constructing the rails. This stage requires precision, patience, and often, extra hands.
Handling and Installing the Slate
Pool table slate is heavy and brittle, so handle it with extreme care. Most DIY pool tables use a three-piece slate system, which is easier to transport and install than a single piece. Before installation, inspect each piece for cracks or damage.
- Preparation: Ensure your subframe is impeccably clean and level. Any debris can create an uneven surface under the slate.
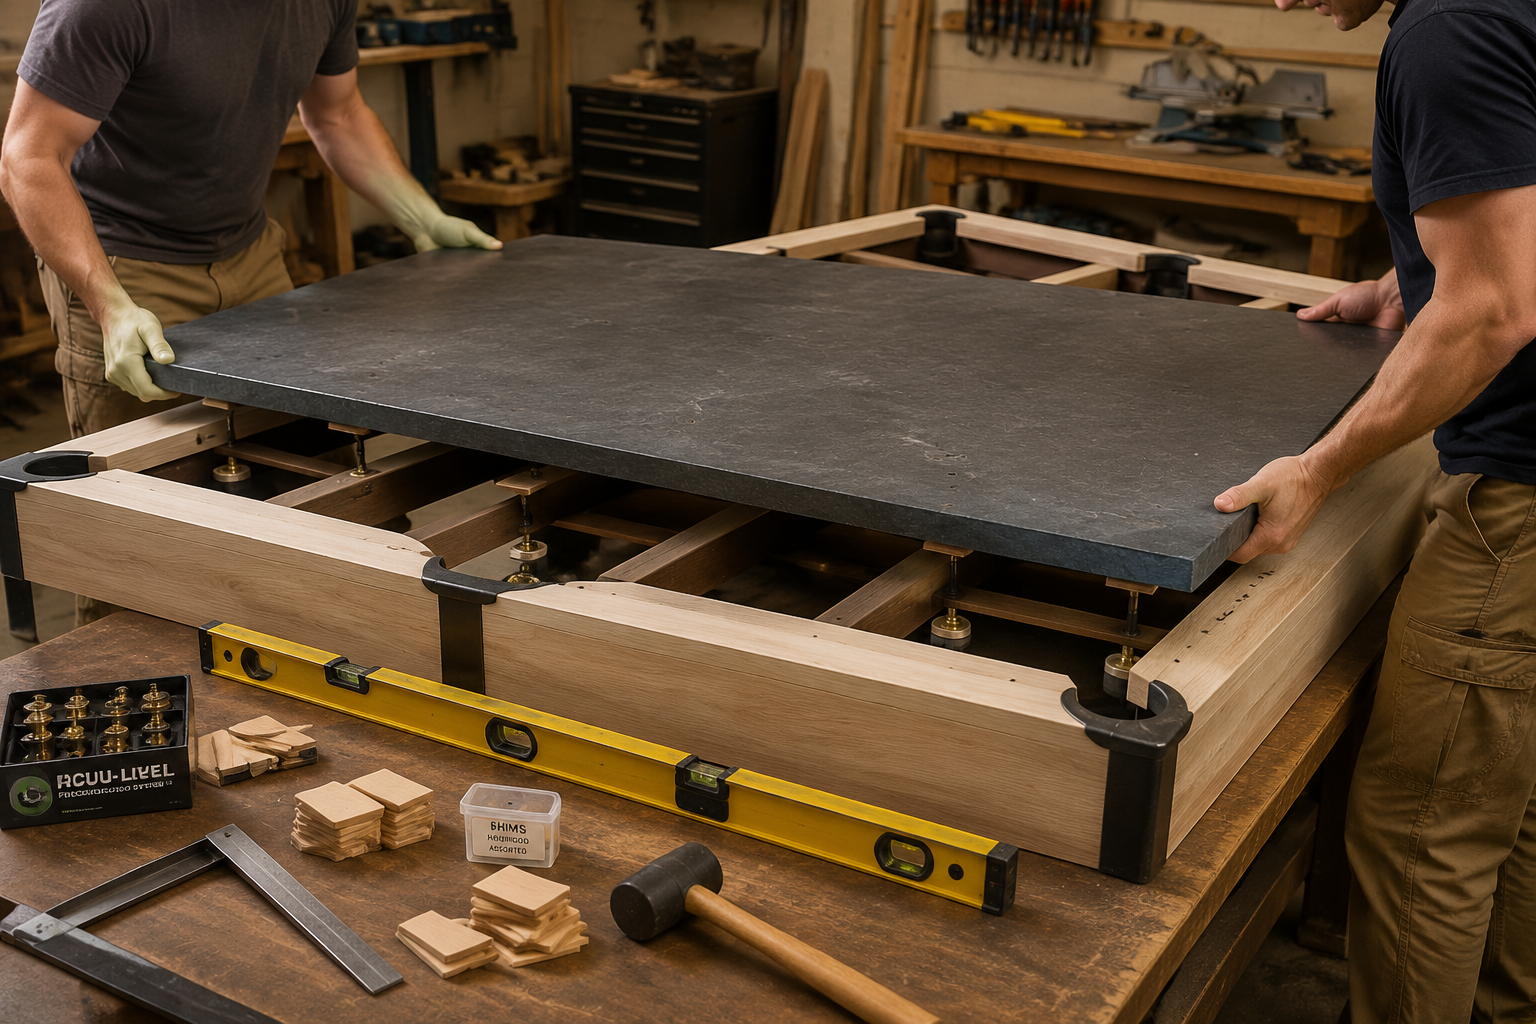
- Placement: With help, carefully lift and position the first slate piece onto the subframe. Align it precisely with the planned edges and pocket openings. Repeat for the remaining two pieces. Ensure the factory-cut edges align perfectly where the pieces meet.
- Shimming and Leveling: This is perhaps the most crucial step. Use a precision level across the entire surface of the slate, checking both along the lengths and widths of each piece, and across the seams where they meet. Use small wooden or plastic shims under the slate, resting directly on the subframe, to achieve absolute levelness. You’ll likely need to adjust these numerous times. A flat, level surface is critical for fair play.
- Securing the Slate: Once perfectly level, the slate needs to be securely fastened to the subframe. Predrill small pilot holes through the slate’s existing fastening points (often small recesses) and into the wooden subframe. Use specialty slate screws, ensuring they are flush with or slightly below the slate surface. Avoid over-tightening.
- Seaming the Slate: The seams between the slate pieces must be perfectly smooth. Use a high-quality beeswax-based slate filler or Bondo auto body filler for this. Apply the filler evenly into the seams, allow it to dry, and then carefully sand it flush with the slate surface. The goal is an undetectable transition between the pieces. Clean any dust thoroughly before proceeding.
Constructing and Attaching the Rails
The rails are the most visible wooden part of your table and house the cushions. Precision in their construction is essential for accurate ball rebound.
- Rail Components: Each rail typically consists of a wooden rail block, a cushion rubber, and a rail cap. You’ll need six rail assemblies: two long, two medium (for the side pockets), and two short.
- Milling the Rail Blocks: Start with hardwood stock. Carefully mill the rail blocks to the correct dimensions, ensuring the inner edge (where the cushion attaches) is perfectly straight. The angle at which the cushion rubber is mounted is crucial. Most cushions require a specific angle (e.g., K-66 profile), which dictates the cut on the rail block.
- Attaching Cushions: Adhere the cushion rubber to the rail blocks using a strong, flexible contact cement. Clamp them firmly and allow adequate drying time. Ensure the cushion is perfectly aligned and tight against the wood.
- Drilling Bolt Holes: Mark and drill holes through the rail blocks for the rail bolts. These bolts will pass through the rail, the cushion, and ultimately attach to the main frame of the table. Ensure these holes are straight and accurately spaced.
- Pocket Cuts: Create the pocket openings in the rail assemblies. These cuts must align perfectly with the pocket openings in the slate and the frame. Use precise jigs for clean, consistent cuts.
- Attaching to the Table: Carefully position each assembled rail onto the table frame. Insert the rail bolts through the frame and tighten them. Ensure the cushions press firmly against the edge of the slate without bowing or leaving gaps. Fine-tune the rail alignment, ensuring consistent cushion height around the entire table.
Stretching Felt for a Playable DIY Wooden Pool Table
The final step in bringing your DIY wooden pool table to life is the installation of the felt. This process demands meticulous care, as a poorly stretched felt will ruin the table’s playability, causing balls to roll inconsistently or slow down prematurely.
Choosing the Right Felt
Not all felt is created equal. For a playable table, invest in high-quality worsted wool billiard cloth. Worsted felt is combed to remove short fibers, resulting in a smooth, nap-free surface that provides consistent ball speed and accuracy. Standard felt (napped) is less expensive but will exhibit “directional nap,” affecting ball roll. Felt typically comes in green, blue, or burgundy. Ensure you purchase enough felt for both the playing surface and the rails.

Preparing the Surface
Before laying the felt, ensure the slate surface is impeccably clean and smooth. Any dust, debris, or imperfections from the slate seaming process will show through the felt and affect play. Use a vacuum, a tack cloth, and your hands to check for smoothness.
Main Playing Surface Felt Installation
This is a two-person job for best results.
- Positioning: Unroll the felt over the slate, allowing plenty of overhang on all sides. Center it, ensuring the weave is perfectly square to the table. Let it relax for an hour or two.
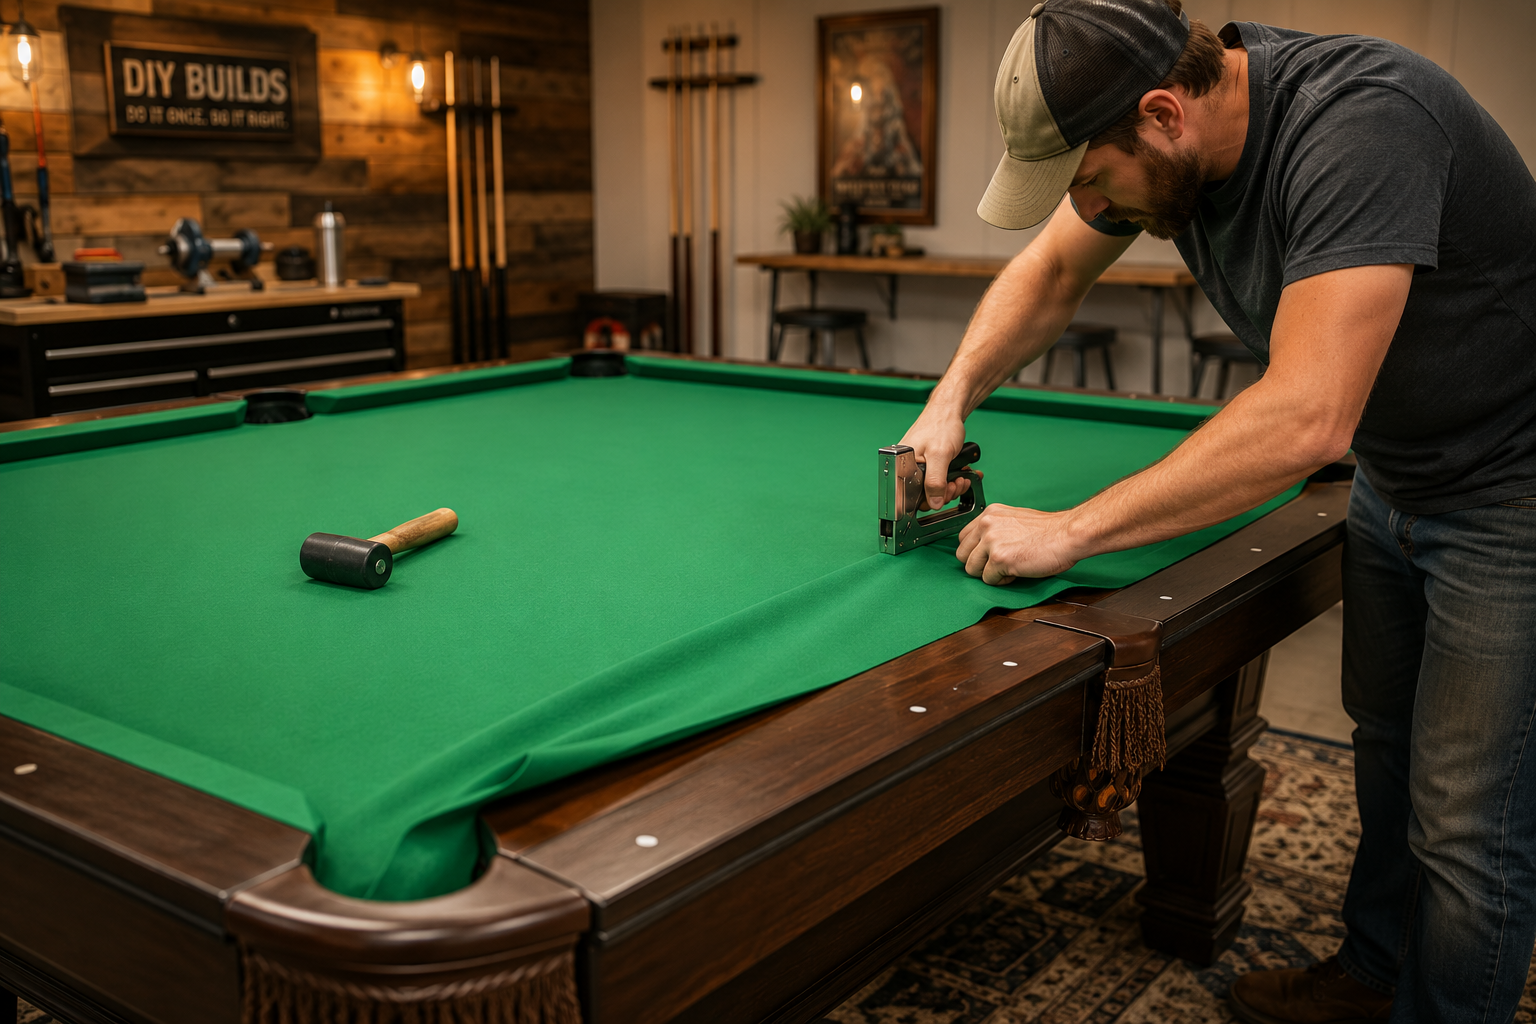
- Initial Fastening (Lengthwise): Start with one long side of the table. Using a staple gun, place a few temporary staples along the underside of the frame, near the edge of the slate, pulling the felt just taut enough to hold it. Work your way down this side, spacing staples every 4-6 inches.
- Stretching (Opposite Long Side): Move to the opposite long side. This is where the primary stretching occurs. With one person holding the felt firmly and evenly, the other pulls it tautly, but not excessively, and staples it underneath the frame. The goal is to eliminate all wrinkles without distorting the weave. Work from the center outwards, checking for evenness.
- Short Sides: Repeat the stretching process for the two short ends, again pulling tautly and stapling underneath. Be particularly careful around the pocket openings, ensuring the felt is pulled smoothly into the curves without creating folds.
- Pocket Cuts and Finishing: Once the main felt is stretched and secured, carefully cut the felt around the pocket openings, leaving enough material to pull it under and staple it cleanly. The exact method varies by pocket design, but the goal is a smooth, tight finish. Trim any excess felt neatly.
“Achieving a perfectly stretched felt surface is the hallmark of a professional pool table build. Patience and an even hand are your most valuable tools in this final stage.”
Rail Felt Installation
The felt on the rails is equally important for aesthetics and play.
- Cutting Rail Felt: Cut strips of felt for each rail, ensuring they are wide enough to wrap around the top, front, and bottom of the cushion, with a little extra for stapling.
- Adhering Felt to Rails: Starting with the top surface of the rail, apply a thin bead of contact cement or specialty rail felt adhesive. Lay the felt smoothly and firmly onto the top, pressing down to ensure full adhesion.
- Wrapping and Stapling: Wrap the felt tightly around the front face of the cushion and pull it under the rail, stapling it to the underside. Be extremely careful to stretch the felt evenly over the cushion face, avoiding any wrinkles or bunching that could affect ball rebound. Work from the center outwards for each rail.
- Pocket Ends: For the rail ends near the pockets, meticulously cut and fold the felt to create a clean, seamless finish. This often involves careful trimming and strategic stapling to hide raw edges. Consider visiting our guide on wood finishing techniques to explore ways to protect your wooden rails and frame.
Final Touches
Once all felt is installed, inspect the entire table surface. Run your hand over the felt to detect any unevenness. Roll a few balls to test the playability. Your custom-built DIY Wooden Pool Table is now ready for countless games and will stand as a testament to your woodworking skill. For inspiration on further custom woodworking projects, consider building a custom wood workbench or modular wood storage systems in your workshop.
Conclusion
Constructing a DIY Wooden Pool Table: Building the Frame, Installing Slate, and Stretching Felt for a Playable Table is an ambitious yet incredibly rewarding endeavor for any dedicated woodworker. From the careful selection of hardwoods and the precise joinery of the subframe to the delicate process of leveling the slate and the meticulous stretching of the felt, each step demands a high level of craftsmanship and attention to detail. The result is not merely a functional piece of furniture, but a custom-built, playable work of art that can provide years of enjoyment and stand as a proud testament to your skills. By following these advanced techniques, you can achieve a professional-grade pool table that rivals commercial models, tailored exactly to your specifications and built to last.
Actionable Next Steps:
- Finalize Your Design: Before buying any materials, create detailed plans for your chosen table size, incorporating specific joint types and leg designs.
- Source Quality Materials: Invest in dense, stable hardwoods and high-quality worsted wool felt. Do not compromise on the slate.
- Prepare Your Workspace: Ensure you have a level, clean area large enough for assembly, with adequate space for handling heavy slate.
- Gather Specialized Tools: Acquire a precision level, a reliable staple gun, slate filler, and robust clamps before beginning the project.
- Seek Assistance: Enlist help for handling and installing the heavy slate pieces to prevent injury and ensure accurate placement.
SEO Meta Title: Build a DIY Wooden Pool Table: Frame, Slate & Felt Guide SEO Meta Description: Master building a DIY Wooden Pool Table in 2026. Expert guide on frame construction, slate installation, and stretching felt for a playable, custom table.
