

The allure of intricate wood carving, once the exclusive domain of master artisans wielding chisels and mallets, is now more accessible than ever for small shops and dedicated hobbyists. The advent of Computer Numerical Control (CNC) technology has revolutionized the woodworking landscape, allowing for precision, repeatability, and complex designs that were previously unimaginable or prohibitively time-consuming. This comprehensive guide, “Introduction to CNC Wood Carving for Small Shops: Software, Toolpaths, and First Decorative Projects,” aims to demystify the process, providing a clear roadmap for integrating this powerful technology into your workshop in 2026.
Whether you’re looking to create personalized signs, decorative panels, or unique furniture accents, CNC wood carving offers an exciting avenue for expanding your creative and production capabilities. It’s a journey from digital design to tangible wooden art, bridging the gap between imagination and execution with remarkable efficiency.

Key Takeaways
- CNC wood carving opens new possibilities for intricate and repeatable designs in small shops.
- Understanding CAD/CAM software is fundamental for designing projects and generating toolpaths.
- Toolpath generation is the critical step that translates your digital design into machine instructions.
- Starting with simple decorative projects like signs and plaques builds confidence and skill.
- Proper material selection, bit choice, and machine setup are essential for successful carving.
Understanding CNC Fundamentals for Small Shops
For many small woodworking shops, the idea of a CNC machine might seem daunting or overly complex. However, modern CNC routers are increasingly user-friendly and affordable, making them a viable investment for enhancing productivity and expanding product offerings. An “Introduction to CNC Wood Carving for Small Shops: Software, Toolpaths, and First Decorative Projects” begins with grasping the core components and workflow.
What is CNC Wood Carving?
CNC wood carving involves using a computer-controlled machine to cut, engrave, or shape wood. Unlike traditional hand carving, where human skill directly guides the tool, a CNC router executes instructions from a digital file. This digital file, often a 2D drawing or 3D model, is translated into a series of coordinates and commands (G-code) that tell the machine exactly where to move, how fast, and how deep to cut. The precision of CNC allows for identical reproductions and complex geometries that would be difficult or impossible by hand.
Essential Components of a Small Shop CNC Setup
A basic CNC setup for wood carving typically includes:
- CNC Router Machine: This is the physical machine itself, comprising a gantry (moving bridge), a spindle (holds the cutting bit), stepper or servo motors for movement, and a control system. Small shop machines vary in size, from desktop models to larger gantry-style routers capable of handling full sheets of plywood.
- Computer: A dedicated computer is used to run the design software and send commands to the CNC machine.
- CAD Software (Computer-Aided Design): Used to create or import 2D drawings and 3D models of your carving projects. Examples include Vectric Aspire, Fusion 360, Inkscape (2D), and SketchUp.
- CAM Software (Computer-Aided Manufacturing): This software takes your CAD design and generates the “toolpaths” – the instructions for how the cutting tool will move. Often, CAD and CAM functions are integrated into a single software package.
- Cutting Bits (End Mills, V-Bits, Ball-Nose): These are specialized tools that fit into the spindle and perform the actual cutting. Different bits are used for different types of carving (e.g., flat bottom for pockets, V-bits for engraving, ball-nose for 3D contours).
- Workholding System: Essential for securely holding your wood blank in place during carving to prevent movement and ensure accuracy. This can include clamps, vacuum tables, or double-sided tape.
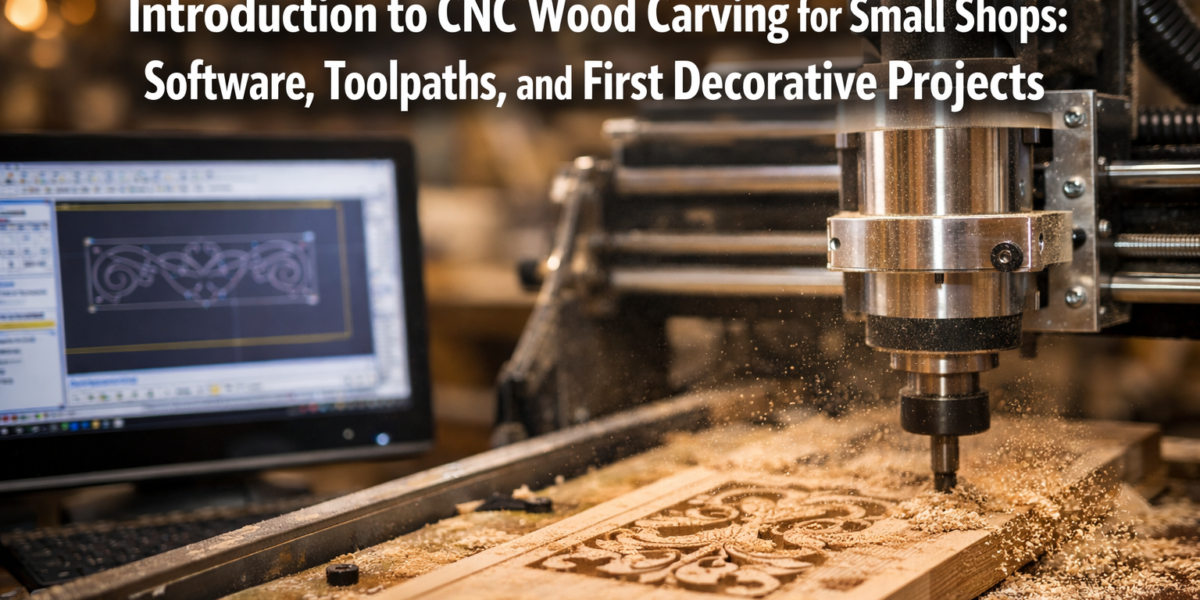
{{IMG_SLOT_1}}
“The beauty of CNC for a small shop is its ability to transform an idea into a repeatable, high-quality product with a level of precision that elevates craftsmanship.”
Software and Toolpaths: The Brains Behind the Carving
At the heart of every CNC carving project is the interplay between design software and toolpath generation. This section delves into these crucial elements, guiding you through the process of preparing your designs for machine execution.
Demystifying CAD/CAM Software
CAD/CAM software is where your creative vision takes shape and is translated into machine-readable instructions. For an “Introduction to CNC Wood Carving for Small Shops: Software, Toolpaths, and First Decorative Projects,” it’s vital to choose software that matches your skill level and project ambitions.
Design (CAD): This phase involves creating or importing your project’s geometry. For decorative carvings, this might mean designing text for a sign, drawing intricate patterns, or importing 3D models of reliefs. Many beginner-friendly programs offer vector drawing tools (for 2D shapes) and robust 3D modeling capabilities.
- Vectric VCarve Desktop/Pro: Excellent for 2D and 2.5D carving, popular for signs, plaques, and decorative panels. Offers intuitive tools for text, vectors, and basic 3D roughing/finishing.
- Carbide Create: Free and straightforward, great for learning the basics, especially if you own a Carbide 3D machine.
- Fusion 360: A more advanced option, offering powerful 3D modeling and integrated CAM. Ideal for complex 3D carvings and product design.
- Inkscape (2D Vector Graphics): A free, open-source alternative for creating vector graphics that can be imported into CAM software.
Toolpath Generation (CAM): Once your design is complete, the CAM module calculates the path the cutting tool will take. This involves defining:
- Tool Type: Which bit to use (e.g., 1/4″ end mill, 60-degree V-bit).
- Cut Depth: How deep the bit will plunge.
- Feed Rate: How fast the bit moves horizontally through the material.
- Plunge Rate: How fast the bit moves vertically into the material.
- Spindle Speed: How fast the bit rotates.
- Strategy: The pattern of the cut (e.g., raster for large areas, spiral for pockets, contour for outlines).
Common Toolpath Types for Decorative Carving
Different toolpath strategies are employed for various carving effects:
| Toolpath Type | Purpose | Typical Bit | Resulting Effect |
|---|---|---|---|
| Profile Cut | Cutting out the external or internal shape of a part. | End Mill | Clean edges, used for outlines or cutting holes. |
| Pocketing | Clearing material from an enclosed area to create a recessed flat surface. | End Mill | Flat-bottomed depressions, great for recessed letters. |
| V-Carving | Creating engraved lines where the depth varies with the width of the line. | V-Bit | Beautiful, sharp-pointed engraved text or intricate lines. |
| 3D Roughing | Quickly removing most of the excess material from a 3D model. | End Mill | Stepped, rough surface, preparing for finer detail. |
| 3D Finishing | Creating smooth, detailed surfaces on 3D models. | Ball-Nose | Intricate contours, flowing shapes, fine details. |
| Drilling | Creating precise holes. | Drill Bit | Perfect for mounting points or dowel holes. |
{{IMG_SLOT_2}}
When choosing toolpaths, consider the desired aesthetic. V-carving is excellent for elegant text and fine details, while 3D finishing allows for complex sculpted surfaces. Many projects combine multiple toolpath types for different elements. For instance, you might use pocketing for a recessed background, V-carving for text, and a profile cut to shape the outer perimeter of a sign. Learning to combine these effectively is a key step in “Introduction to CNC Wood Carving for Small Shops: Software, Toolpaths, and First Decorative Projects.”
Your First Decorative Projects: Putting Theory into Practice
With an understanding of the software and toolpath generation, it’s time to tackle your first projects. Starting simple is key to building confidence and mastering the workflow.
Selecting Your First Project Ideas 💡
For an “Introduction to CNC Wood Carving for Small Shops: Software, Toolpaths, and First Decorative Projects,” focus on designs that are manageable and offer a clear learning curve.
- Personalized Wooden Signs: These are fantastic beginner projects. Start with simple text, perhaps a family name or a motivational quote. You can use V-carving for elegant lettering or pocketing for raised letters. Add a simple border for extra flair.
- Decorative Plaques: Similar to signs, but perhaps featuring a simple relief image or geometric pattern alongside text. This introduces more complex vector work.
- Coasters with Engraved Designs: A smaller-scale project that allows for experimentation with different patterns and bit types. Consider creating engraved wooden coasters as personalized gifts.
- Simple Wall Art Panels: Explore carving abstract patterns or relief designs onto a flat piece of wood. This can be a great way to practice 3D roughing and finishing if your software supports it.
- Wooden Box Lids with Carvings: Once comfortable, try adding a carved design to the lid of a small wooden box. This adds functional artistry. You might also find inspiration in our guide on profitable beginner woodworking projects that often benefit from custom carving.
Material Selection and Workholding
The right material and secure workholding are critical for successful carvings.
Wood Selection:
- Softwoods (Pine, Poplar): Easier to carve, more forgiving for mistakes, but can splinter or fuzz easily. Good for initial practice.
- Hardwoods (Maple, Cherry, Walnut): Hold detail exceptionally well, produce cleaner cuts, and are durable. Ideal for finished projects. Basswood is also an excellent choice for carving due to its fine, even grain. Consider exploring our guide on basswood cutting boards for insights into working with this wood.
- MDF/Plywood: Excellent for practice and jigs, as they are stable and inexpensive, though carving quality isn’t as high as solid wood.
Workholding:
- Clamps: G-clamps or F-clamps are common. Ensure they don’t obstruct the toolpath.
- Double-Sided Tape: Good for smaller, flatter pieces.
- Vacuum Table: (More advanced) Provides strong, even hold over large areas.
- T-Track/Fixture Plates: Versatile systems for bolting down workpieces.
Running Your First Carve: A Step-by-Step Overview
- Design in CAD: Create your design, ensuring all vectors are closed and ready for toolpath generation.
- Generate Toolpaths in CAM: Select appropriate bits, set speeds and feeds, and define the cut strategy. Simulate the toolpaths to check for errors or collisions.
- Export G-Code: Your CAM software will generate a G-code file specific to your CNC machine.
- Prepare the Machine:
- Mount the correct cutting bit securely in the spindle.
- Securely fasten your wood blank to the spoilboard (a sacrificial layer on the machine bed).
- Set the machine’s origin (X, Y, and Z zero points) according to your software’s settings.
- Ensure proper dust collection is active. (For advanced setups, consider a DIY smart workshop dust collection system).
- Load and Run the G-Code: Load the G-code file into your CNC control software and initiate the carving process.
- Monitor the Carve: Stay close to the machine, observing the cutting process. Be ready to hit the emergency stop button if anything goes wrong.
- Post-Carve Finishing: Once carving is complete, remove the piece, sand away any fuzz or tool marks, and apply your chosen finish.
{{IMG_SLOT_3}}

Always start with conservative speeds and feeds, especially on new materials or with new bits. It’s better to cut slower and lighter than to break a bit or damage your workpiece. Remember that practice makes perfect, and each project will teach you something new about CNC wood carving. For projects like DIY wooden wall clocks, CNC can add incredibly precise detailing and unique faces.
Conclusion
Embarking on the “Introduction to CNC Wood Carving for Small Shops: Software, Toolpaths, and First Decorative Projects” journey is a rewarding experience that can transform your woodworking capabilities. By understanding the fundamentals of CNC, leveraging powerful CAD/CAM software, and systematically approaching toolpath generation, small shop owners can unlock unparalleled precision and creativity.
Start with simple projects like personalized signs and gradually work your way up to more complex designs. The learning curve, while present, is highly manageable with today’s intuitive software and robust machines. Embrace the digital tools available in 2026, and you’ll find CNC carving to be an invaluable asset, allowing you to produce stunning, intricate wood pieces with efficiency and artistic flair. Your small shop’s potential for unique, custom creations is now limitless.
Actionable Next Steps:
- Research Entry-Level CNC Routers: Explore options suitable for your budget and shop size.
- Download Free CAD/CAM Software: Start experimenting with Carbide Create or Inkscape to get a feel for the design process.
- Watch Online Tutorials: Numerous resources are available for specific software packages and basic CNC operations.
- Plan Your First Project: Keep it simple – a small sign or plaque is ideal.
