

Over 80% of professional wood carvers cite precision, patience, and a deep understanding of wood grain as the cornerstones of their craft, yet many struggle to transition from basic cuts to truly intricate, three-dimensional forms. Mastering advanced wood carving techniques, from the subtle depths of relief carving to the complex contours of in-the-round sculptures, opens up a world of possibilities for creating both decorative masterpieces and highly functional pieces. This comprehensive guide delves into the methodologies, tools, and artistic principles required to elevate your woodworking skills, transforming raw timber into stunning works of art or sophisticated components for furniture.
Key Takeaways
- Foundation in Advanced Techniques: Learn specialized approaches for both relief and in-the-round carving, essential for complex projects.
- Tool Mastery and Selection: Understand the diverse array of tools required for advanced work, including gouges, chisels, and power carving instruments, and how to maintain them.
- Wood Selection and Preparation: Discover how different wood types influence carving outcomes and proper preparation methods.
- Artistic Principles: Explore the fundamentals of design, proportion, and form that underpin successful intricate carvings.
- Finishing for Impact: Grasp the importance of appropriate finishing techniques to protect and enhance your carved creations.
Demystifying Advanced Wood Carving Techniques: From Relief to In-the-Round
Advanced wood carving is a journey from the two-dimensional illusion of relief to the fully realized three-dimensional presence of in-the-round sculpture. Each technique demands a distinct approach, toolset, and artistic vision. Understanding these differences is the first step toward expanding your carving repertoire and tackling more ambitious projects.

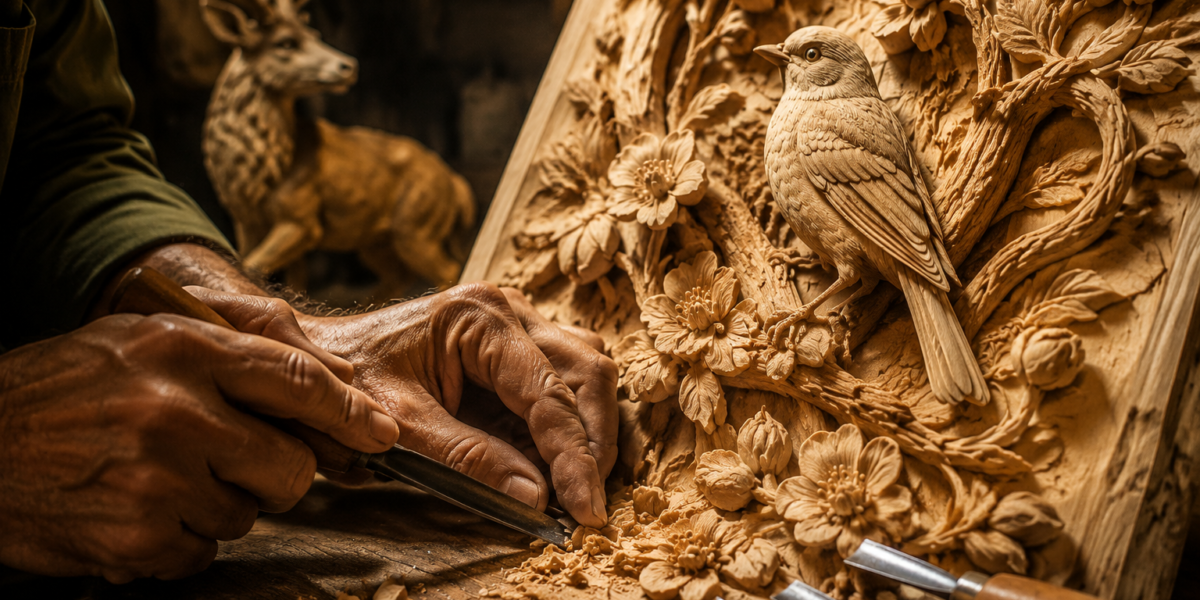
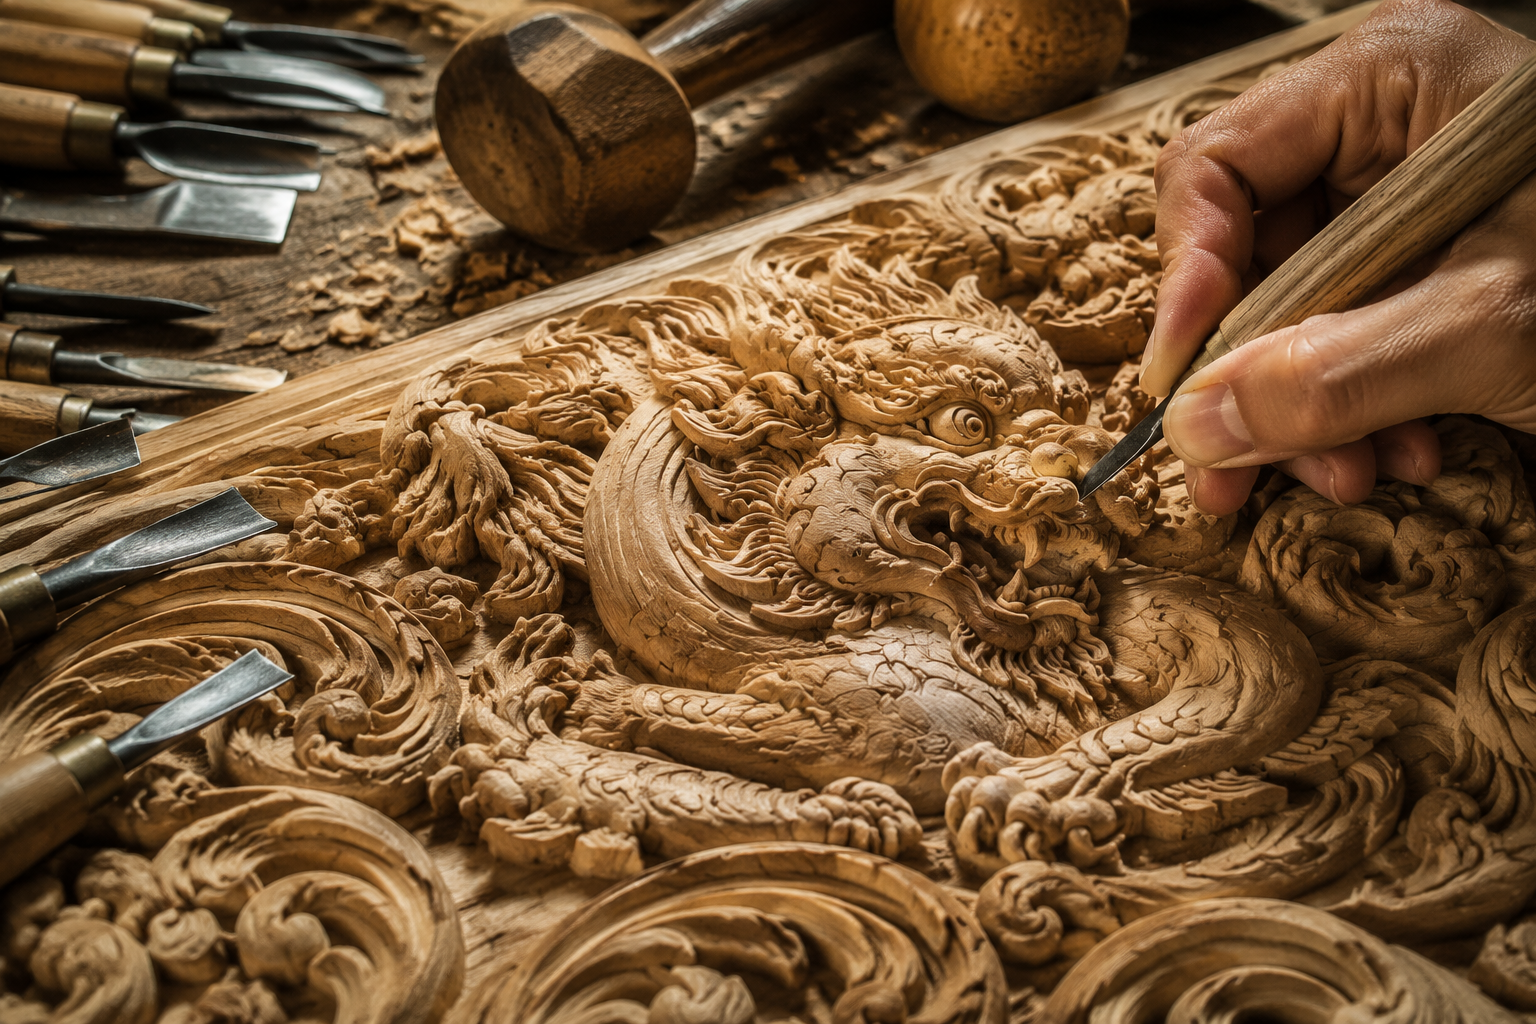
Relief Carving: Creating Depth on a Flat Surface
Relief carving involves creating a raised design against a flat background on a single piece of wood. The illusion of depth is achieved through varying heights and careful undercutting. This technique is often used for decorative panels, furniture accents, and architectural elements.
Types of Relief Carving:
- Bas-Relief (Low Relief): The design is raised only slightly from the background, with minimal depth. Think of coins or carved panels where the form emerges gently. It relies heavily on shadows and highlights to define the shape.
- Haut-Relief (High Relief): The design projects significantly from the background, often by half or more of its full depth, creating a more pronounced three-dimensional effect. Parts of the carving may even be undercut or fully detached from the background, except for a few anchoring points.
- Countersunk (Intaglio) Relief: The carving is cut into the surface rather than raised from it. This creates a recessed design, often used for lettering or specific decorative motifs where a cleaner, less protruding look is desired.
Key Tools for Relief Carving:
Relief carving relies on a diverse set of hand tools to create its subtle and dramatic effects.
- Gouges: These are curved chisels, essential for shaping concave and convex forms, and come in various sweeps (the arc of the curve) and widths.
- Chisels: Flat chisels are used for clearing backgrounds, squaring up edges, and creating crisp lines.
- V-Tools: Crucial for defining outlines, creating sharp valleys, and intricate details. They come in different angles.
- Mallets: Used with gouges and chisels to drive the cut, especially in harder woods or for deeper removal.
- Power Carving Tools: Rotary tools with various burrs and grinders can significantly speed up background removal and rough shaping, especially in larger relief pieces. For more on advanced techniques for furniture, see our article on Advanced Wood Carving Techniques for Decorative Furniture Accents.
Process of Relief Carving:
- Design Transfer: Begin with a clear design transferred onto your wood blank.
- Outline Incision: Use a V-tool or a small gouge to incise the main outline of your design, separating it from the background.
- Background Removal: Systematically lower the background around your design using gouges and flat chisels. For deeper reliefs, power carving tools can be efficient.
- Rough Shaping: Begin to sculpt the raised elements, defining major forms and planes.
- Detailing: Refine contours, add textures, and introduce intricate details using smaller gouges, V-tools, and specialized knives.
- Undercutting: For haut-relief, carefully undercut elements to enhance the three-dimensional effect and create dramatic shadows.
- Finishing: Smooth the carved surfaces and apply appropriate finishes.
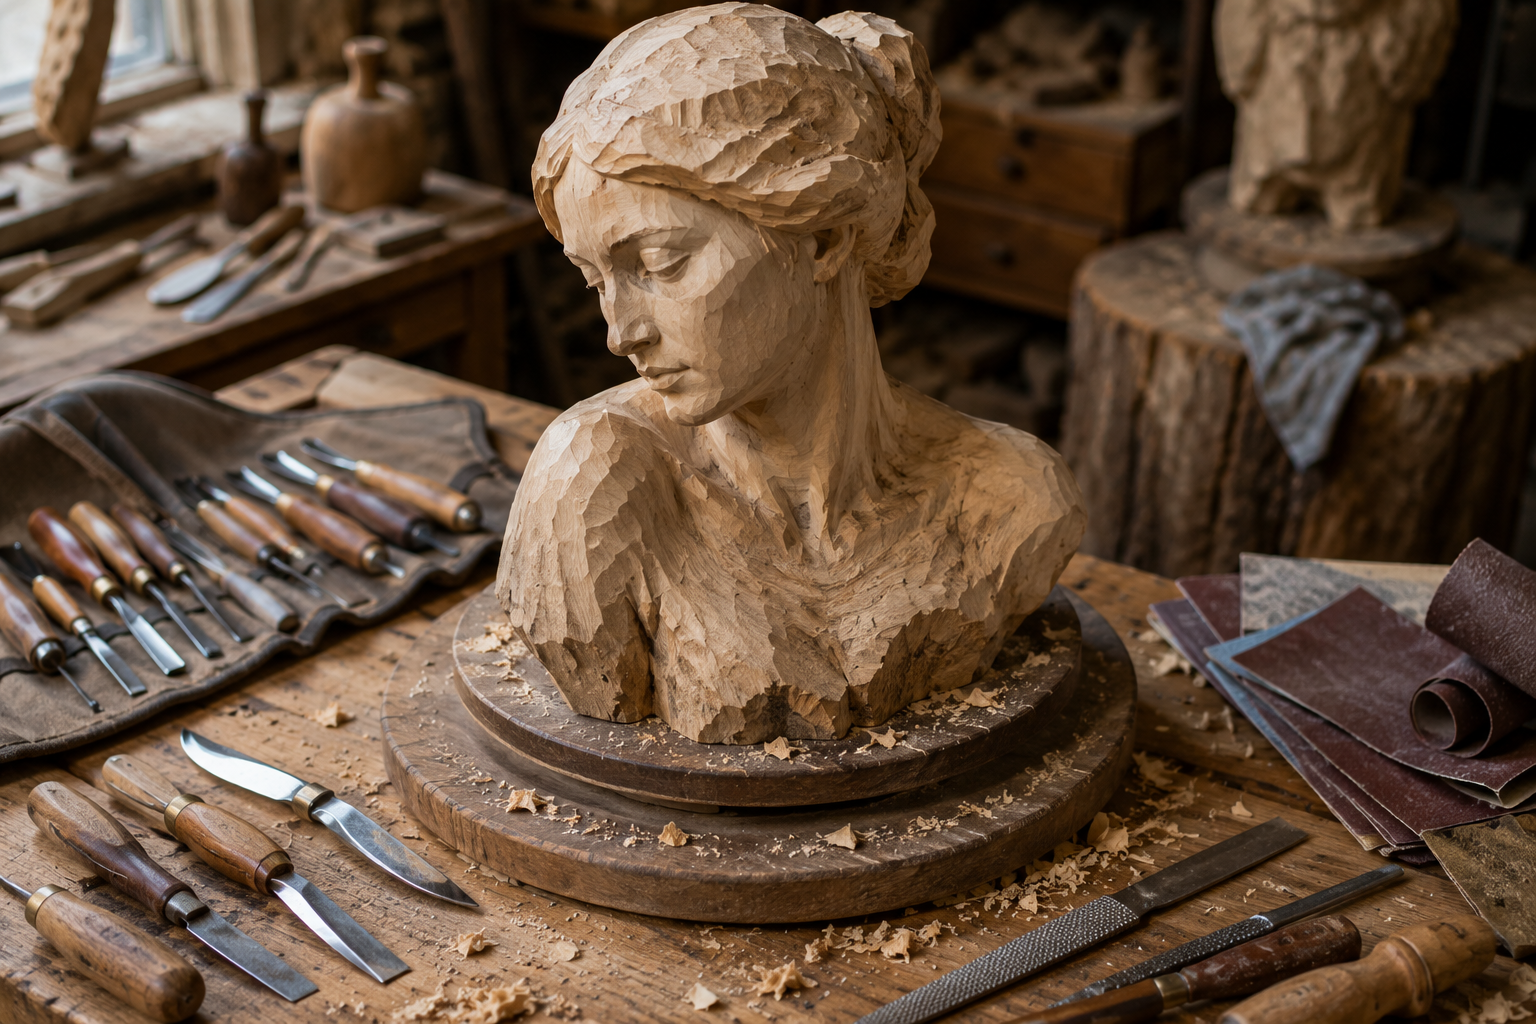
In-the-Round Sculptures: Mastering Three-Dimensional Forms
In-the-round carving, also known as free-standing or full-round sculpture, involves creating a piece that can be viewed from all angles, offering a complete three-dimensional experience. This technique demands a comprehensive understanding of form, balance, and negative space.
Key Tools for In-the-Round Sculptures:
The tools for in-the-round carving largely overlap with relief carving but with a greater emphasis on tools for shaping curves and removing material more aggressively.
- Carving Knives: Essential for detailed work, paring, and refining smaller areas.
- Gouges (Deep Sweep): Used for removing large amounts of wood quickly and shaping major curves.
- Rasps and Rifflers: These abrasive tools are critical for shaping and refining contours, especially in the intermediate stages. Rifflers have curved ends to reach into tight spaces.
- Mallets: For heavy material removal with gouges.
- Power Carving Tools: Angle grinders with carving discs, rotary tools with various burrs, and flexible shaft grinders are invaluable for rapid material removal, roughing out forms, and texturing.
- Band Saw: A band saw can be used to rough out the general silhouette of the sculpture before hand carving begins, saving significant time. Learn more about Mastering the Band Saw.
Process of In-the-Round Carving:
- Maquette and Reference: Often, carvers create a small clay or plaster model (maquette) of their sculpture to refine the form before committing to wood. Detailed reference photos or drawings from all angles are crucial.
- Wood Selection and Blocking Out: Choose a suitable wood block. Use a band saw or axe to remove major excess wood, establishing the basic silhouette of your sculpture.
- Roughing Out: Using larger gouges and mallets (or power carving tools), begin to remove more material, establishing the major planes and overall form. Think of it as shaping a series of large facets.
- Defining Major Forms: Progressively refine the forms, moving from large, general shapes to more specific anatomical or structural elements. Constantly rotate the piece to view it from all angles.
- Refining Details: As the major forms emerge, switch to smaller gouges, carving knives, and rifflers to define features, textures, and subtle curves.
- Smoothing and Sanding: Once the form is complete, smooth the surface progressively with sandpaper of increasing grits, working towards a flawless finish.
- Finishing: Apply oils, waxes, or varnishes to protect and enhance the wood.
Mastering Materials and Artistic Principles in Advanced Wood Carving
Beyond tools and techniques, the success of “Advanced Wood Carving Techniques: From Relief Carving to In-the-Round Sculptures for Decorative and Functional Pieces” hinges on an understanding of your material and the underlying principles of design.
Wood Selection for Carving
The choice of wood significantly impacts the carving process and the final appearance.
| Wood Type | Characteristics | Best For | Considerations |
|---|---|---|---|
| Basswood | Soft, fine, even grain, light color | Detail, beginners, relief, small sculptures | Lacks durability for functional pieces, dents easily |
| Mahogany | Medium hardness, open grain, reddish-brown | Decorative elements, furniture accents | Can be stringy, dusty when carving |
| Walnut | Medium to hard, rich dark color, beautiful grain | Fine furniture, decorative sculptures | Harder to carve, can be expensive |
| Cherry | Medium hard, fine grain, reddish-brown, darkens with age | High-quality furniture, delicate details | Can be prone to burning with power tools |
| Oak | Hard, open grain, durable | Architectural carving, robust functional pieces | Very hard to carve, can splinter |
Proper wood preparation is also vital. Ensure the wood is fully seasoned and free of internal stresses to prevent cracking or warping after carving.
Essential Artistic Principles
To create compelling carvings, consider these fundamental artistic principles:
- Form and Volume: Understand how light interacts with convex and concave surfaces to create the illusion of three-dimensional form. For in-the-round, ensure the form is appealing from all angles.
- Proportion and Scale: Ensure that all elements within your carving are proportionally correct and that the overall scale is appropriate for the intended use.
- Composition: Arrange elements within your relief carving to create balance, movement, and a focal point. For sculptures, consider how the piece interacts with its surrounding space.
- Texture: Incorporate various textures, from smooth to rough, to add visual interest and tactile appeal. This can highlight different areas of the carving.
- Negative Space: The space around and within the carved elements is as important as the carved material itself. Thoughtful use of negative space enhances the overall composition and defines the form.
“The most profound carvings are not merely wood removed, but stories told through the interplay of form and shadow.”
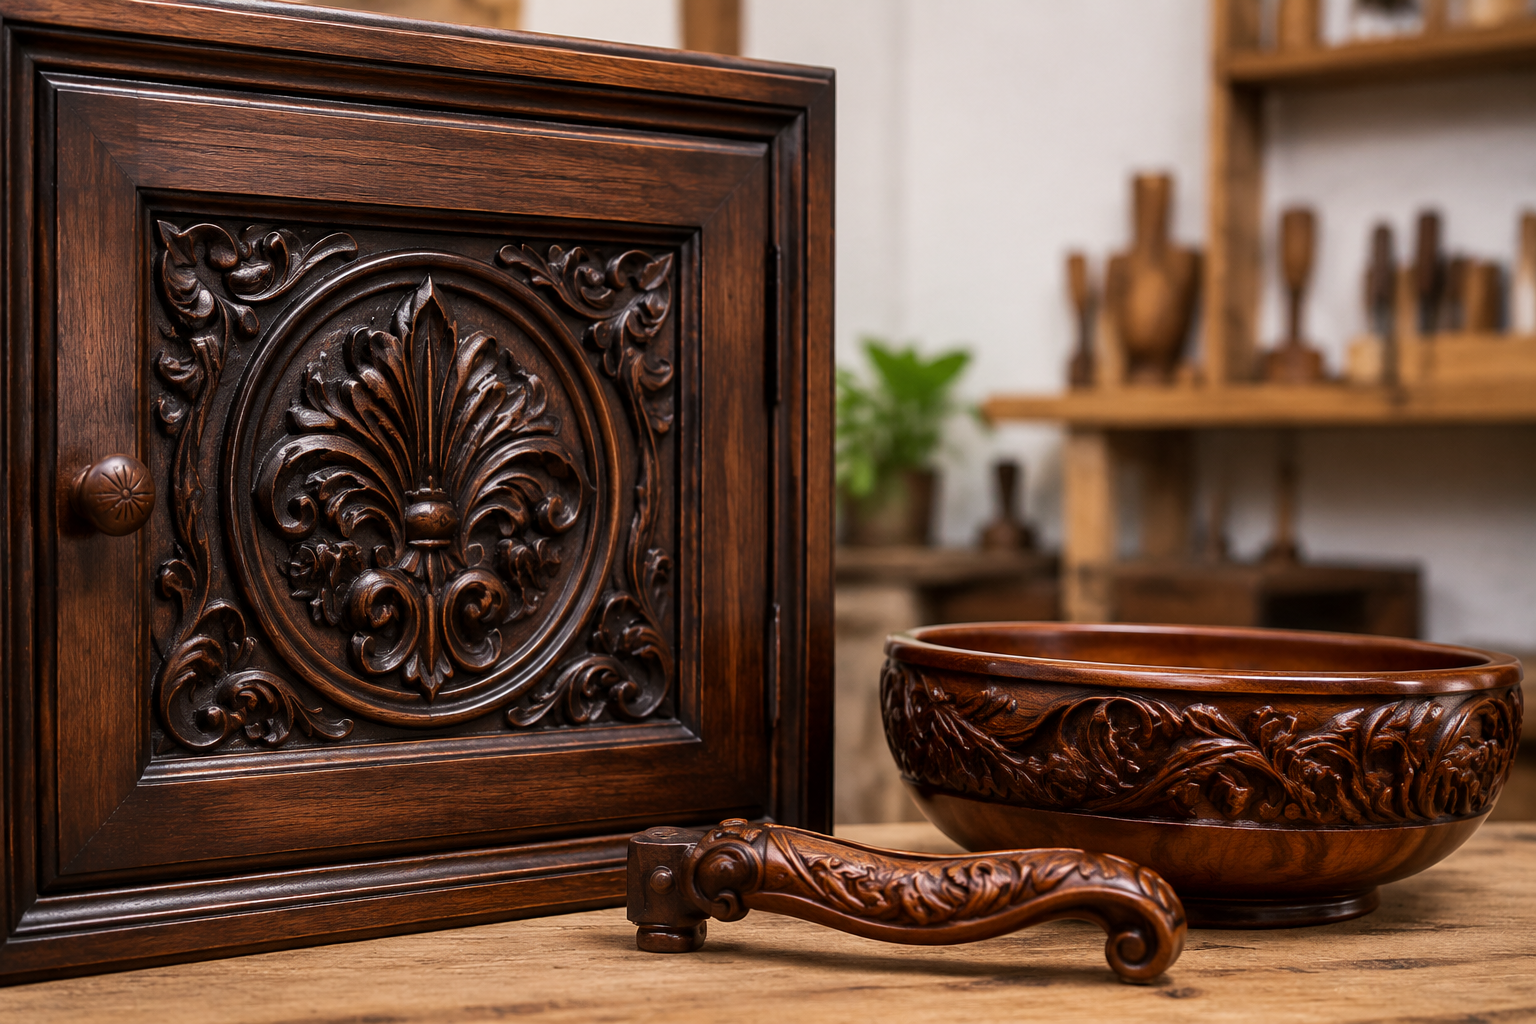
Integrating Advanced Wood Carving Techniques into Decorative and Functional Pieces
The true value of mastering “Advanced Wood Carving Techniques: From Relief Carving to In-the-Round Sculptures for Decorative and Functional Pieces” lies in its application. These skills can transform ordinary wooden objects into extraordinary works of art, adding unparalleled aesthetic and functional value.
Decorative Applications
Advanced carving techniques are inherently decorative, allowing for the creation of unique artistic statements.
- Sculptural Art Pieces: From intricate animal figures to abstract forms, in-the-round carving allows for pure artistic expression, creating stand-alone sculptures for display.
- Wall Art and Panels: Relief carvings can serve as stunning wall art, depicting landscapes, portraits, or abstract patterns, adding texture and depth to interior spaces.
- Architectural Embellishments: Carved corbels, rosettes, and friezes can elevate the aesthetics of a home, harking back to classical architectural traditions.
- Trompe L’oeil: Advanced relief carving can be used to create optical illusions, making a flat surface appear to have objects protruding from it.
Functional Applications
Beyond pure aesthetics, advanced carving can enhance the functionality and ergonomics of everyday objects.
- Furniture Accents: Carved legs, drawer pulls, cabinet door panels, or headboards can transform a piece of furniture into a bespoke item. Imagine a beautifully handcrafted wooden wall clock with a carved frame.
- Utensils and Tools: Carved handles for knives, spoons, or even woodworking tools can provide a more ergonomic grip and a personalized touch.
- Decorative Boxes and Containers: An intricately carved lid or side panel can turn a simple box into a treasured keepsake.
- Figurative Bookends: In-the-round animal or mythological figures make excellent, heavy, and artistic bookends. Our guide on wooden bookends mastery offers inspiration.
- Custom Handles: From cabinet doors to walking sticks, a custom-carved handle can provide both unique aesthetics and improved grip.
Finishing Your Advanced Carvings
The finishing process is crucial for protecting your work and bringing out the beauty of the wood and the carving.

- Sanding: Gradual sanding with increasingly finer grits is essential for a smooth surface. For intricate details, miniature sanding tools or folded sandpaper are necessary.
- Oils: Penetrating oils (like tung oil or linseed oil) enhance the natural grain, provide protection, and offer a soft, natural sheen.
- Waxes: Applied over an oil finish or directly on finely sanded wood, waxes provide a protective layer and a silky smooth feel.
- Varnishes/Polyurethanes: These offer a more durable and water-resistant finish, ideal for functional pieces or those exposed to wear. Be mindful that they can obscure some of the wood’s natural feel. For advice on finishing, check out our insights on cool wood finishing techniques.
- Stains: Can be used to alter the wood’s color, but often advanced carvers prefer to let the natural beauty of the wood shine, perhaps just enhancing it with clear finishes.
Safety Considerations
Always prioritize safety when engaging in wood carving.
- Sharp Tools: Keep all tools razor sharp. Dull tools are more dangerous as they require more force and are prone to slipping.
- Hand Protection: Wear carving gloves, especially on the hand holding the wood.
- Work Holding: Secure your workpiece firmly to prevent it from moving during carving.
- Eye Protection: Always wear safety glasses, particularly when using power carving tools.
- Dust Collection: Wood dust can be harmful. Use dust masks or a proper dust collection system, especially with power tools.
Conclusion
Mastering Advanced Wood Carving Techniques: From Relief Carving to In-the-Round Sculptures for Decorative and Functional Pieces is a deeply rewarding endeavor that combines artistic vision with meticulous craftsmanship. By understanding the distinct demands of relief and in-the-round carving, selecting the right tools, and applying sound artistic principles, you can elevate your woodworking projects to new heights. Whether you aim to create a detailed decorative panel for a cherished piece of furniture or sculpt a captivating figure, the journey of advanced wood carving offers endless opportunities for creativity and skill development. Continuously practicing, experimenting with different woods and tools, and seeking inspiration will solidify your expertise and allow you to produce truly exceptional works in 2026 and beyond.
SEO Meta Title: Master Advanced Wood Carving: Relief to 3D Sculptures SEO Meta Description: Elevate your craft in 2026 with advanced wood carving techniques, from detailed relief panels to intricate in-the-round sculptures for stunning decorative and functional pieces.
