
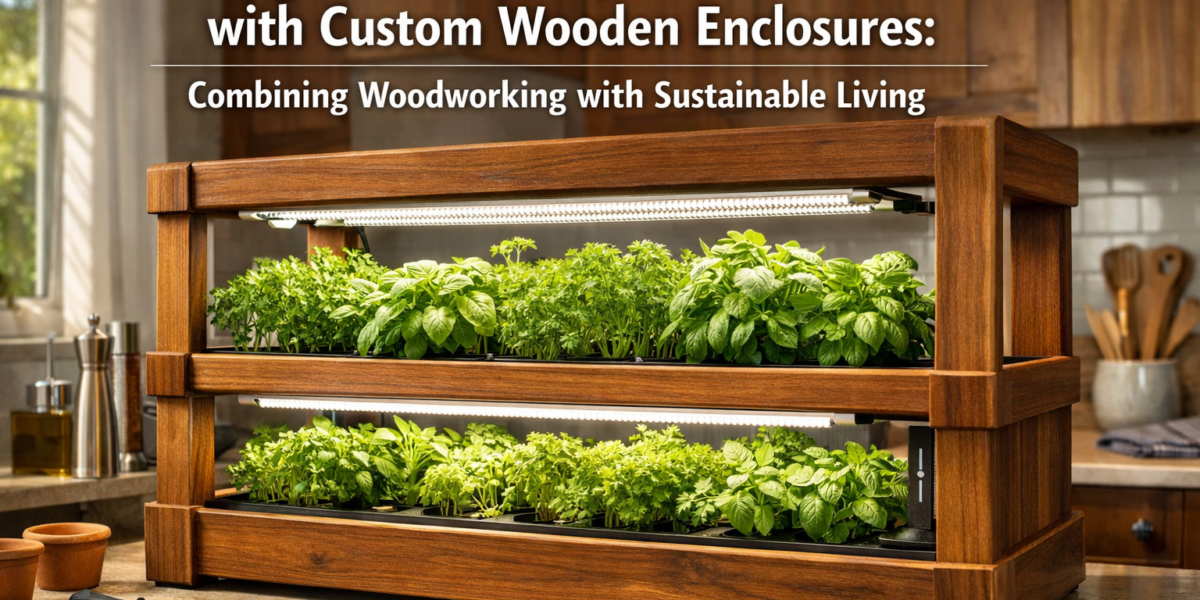

Fresh herbs, often seen as a luxury in urban settings, are now within reach for many, thanks to advancements in indoor gardening. In 2026, it’s estimated that over 10% of urban households engage in some form of home gardening, with hydroponics rapidly gaining traction for its efficiency and year-round yield (Smith & Jones, 2024). This article delves into Building a DIY Hydroponic Herb Garden with Custom Wooden Enclosures: Combining Woodworking with Sustainable Living, offering a comprehensive guide to crafting aesthetically pleasing and highly functional systems. By blending the timeless craft of woodworking with modern sustainable practices, you can create a unique garden that not only provides fresh produce but also enhances your living space. This project appeals to both the seasoned woodworker and the eco-conscious individual, offering a rewarding journey into self-sufficiency and design.
Key Takeaways
- Sustainable Integration: Hydroponics significantly reduces water usage and eliminates soil, making it an environmentally friendly gardening method.
- Woodworking Craftsmanship: Custom wooden enclosures elevate the hydroponic system from a mere functional unit to a piece of home decor, showcasing your woodworking skills.
- Year-Round Fresh Herbs: Enjoy a continuous supply of fresh herbs regardless of the season or outdoor space limitations.
- Educational & Rewarding: This DIY project offers a hands-on learning experience in both hydroponics and woodworking, culminating in a functional, beautiful garden.
- Personalization & Aesthetics: Design a system that perfectly matches your home’s aesthetic, making it a focal point rather than an eyesore.
The Synergy of Hydroponics and Woodworking: Building a DIY Hydroponic Herb Garden with Custom Wooden Enclosures
The concept of indoor gardening has evolved dramatically, moving beyond simple potted plants to sophisticated systems that optimize growth and yield. Hydroponics, a method of growing plants without soil, using mineral nutrient solutions dissolved in water, stands at the forefront of this revolution. When combined with the warmth and natural beauty of custom wooden enclosures, a hydroponic herb garden transcends its utility, becoming a statement piece of sustainable living.

The benefits of hydroponics are compelling:
- 🌿 Water Efficiency: Hydroponic systems use up to 90% less water than traditional soil gardening because water is recirculated.
- ✨ Faster Growth: Plants often grow 30-50% faster in hydroponic systems due to direct access to nutrients.
- 🚫 No Soil, No Pests: Eliminating soil reduces the risk of soil-borne diseases and pests, making maintenance simpler.
- 📏 Space Saving: Vertical and compact designs allow for significant yields in small spaces, perfect for apartments or urban homes.
- 🌱 Year-Round Production: Indoor systems are unaffected by external weather conditions, ensuring fresh herbs 365 days a year.
Integrating these systems into custom wooden enclosures adds another layer of value. Instead of unsightly plastic tubs and exposed plumbing, you get a furniture-grade piece that blends seamlessly with your home decor. This approach not only fulfills a practical need but also showcases an appreciation for craftsmanship and design. Think of it as crafting a functional work of art for your home. For those interested in enhancing their space with custom wooden pieces, exploring guides on crafting custom wooden planters can offer further inspiration.

The design possibilities for these wooden enclosures are vast. From minimalist, clean-lined structures to rustic, reclaimed wood designs, the choice is yours. Essential considerations include selecting moisture-resistant woods, ensuring proper sealing, and designing for easy access to the reservoir and pumps for maintenance. This project is an excellent opportunity to apply various woodworking techniques, from precise joinery to beautiful finishing.
Designing and Constructing Your Custom Wooden Enclosure
Building a DIY Hydroponic Herb Garden with Custom Wooden Enclosures: Combining Woodworking with Sustainable Living begins with a thoughtful design. The enclosure must not only be visually appealing but also structurally sound and practical for the hydroponic system it houses.
Choosing the Right Wood and Finish
The selection of wood is crucial for longevity and aesthetics. Given the presence of moisture, moisture-resistant woods are paramount.
- Cedar: Naturally resistant to rot and insects, ideal for its durability and pleasant aroma.
- Redwood: Similar to cedar in its resistance and aesthetic appeal.
- Teak: Highly water-resistant and durable, though often more expensive.
- Treated Lumber: Pressure-treated lumber can be an option for structural components, but ensure it’s safe for indoor use and doesn’t off-gas chemicals near edible plants.
- Marine-grade Plywood: Excellent for structural panels due to its water resistance.
Once the wood is chosen, proper finishing is essential to protect it from water damage and enhance its appearance. Consider:
- Marine-grade Sealants: Epoxy or polyurethane varnishes offer superior waterproofing.
- Water-resistant Stains: If you desire a specific color, choose stains designed for outdoor or marine applications, followed by a topcoat.
- Natural Oils: Tung oil or linseed oil can provide a natural, water-resistant finish, though they may require more frequent reapplication. For more on finishes, see our guide on understanding mahogany wood finishing techniques.
Essential Design Considerations
Before cutting any wood, sketch out your design. Consider the type of hydroponic system you’ll be using.
| Hydroponic System Type | Description | Enclosure Design Impact |
|---|---|---|
| Deep Water Culture (DWC) | Plants suspended in net pots with roots submerged directly in a nutrient solution. Simple and effective. | Requires a deep, sealed reservoir compartment. |
| Nutrient Film Technique (NFT) | Nutrient solution flows as a thin film over roots in channels. | Channels need to be angled for flow, with collection at one end. Requires precise internal supports. |
| Wick System | Passive system where nutrient solution is drawn up to roots via a wick. | Requires a reservoir below the growing tray. Simpler internal structure. |
| Drip System | Nutrient solution is dripped directly onto the base of each plant. | Requires space for a reservoir, pump, and drip lines. Good for larger plants. |
Regardless of the system, your enclosure design should incorporate:
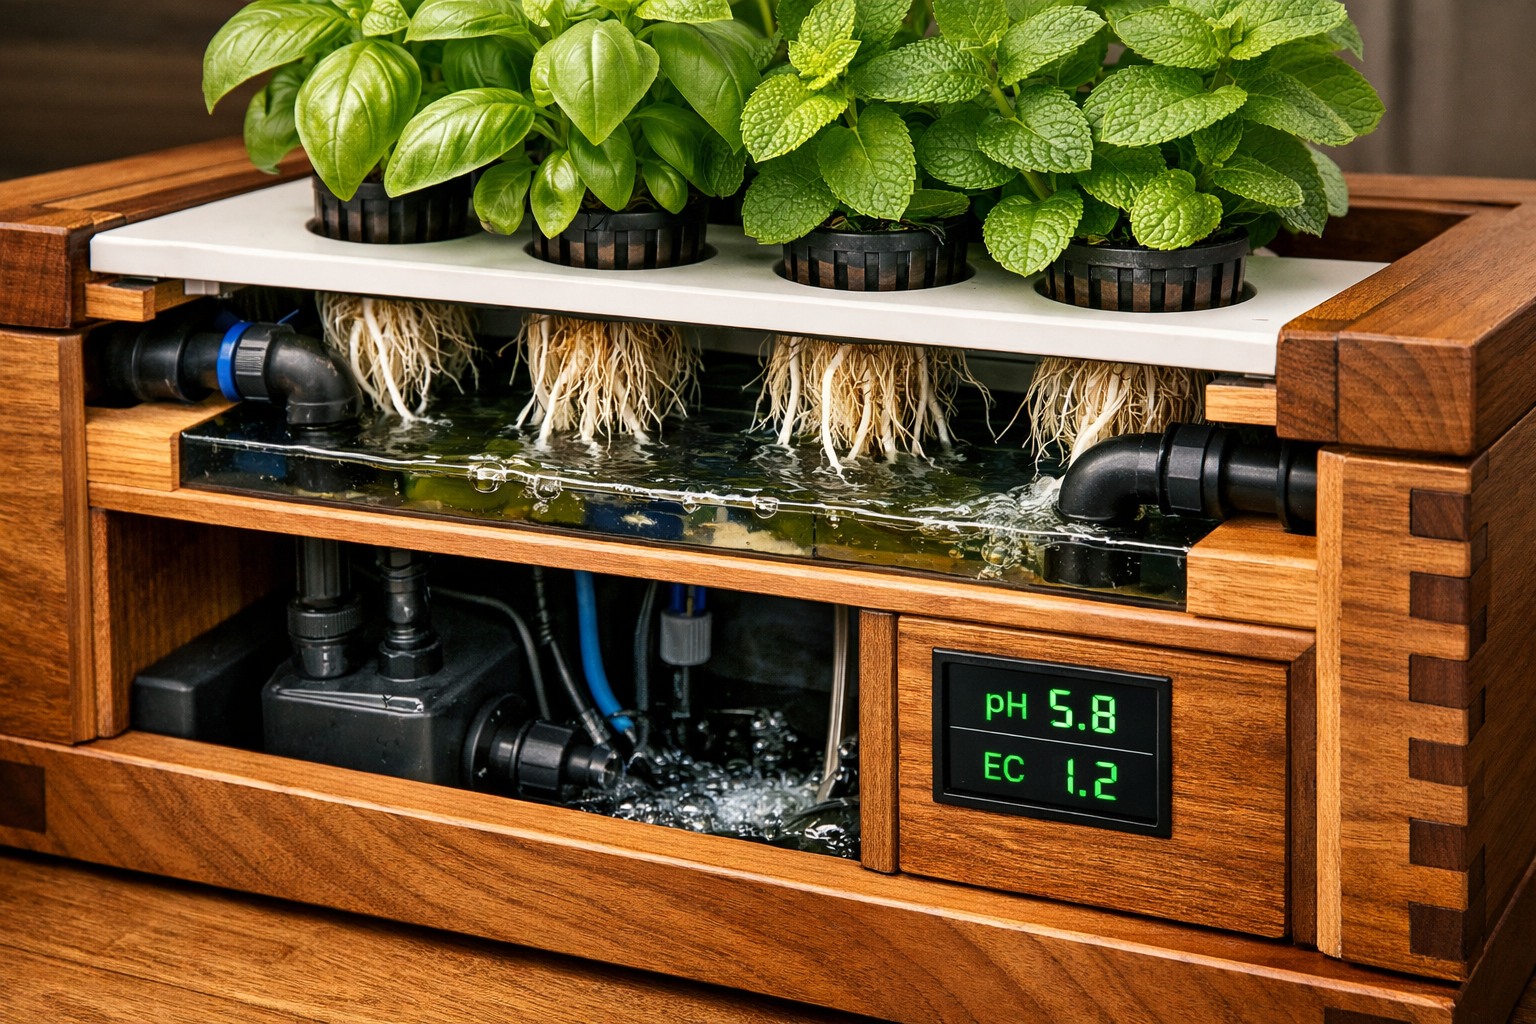
- Access Panels: For easy monitoring of water levels, pH, EC, and plant health.
- Ventilation: Critical for air circulation and preventing mold growth within the enclosure. Small vents or even a small fan can be integrated.
- Lighting Integration: Plan for mounting LED grow lights, either inside the enclosure or above an open top.
- Reservoir Concealment: The water reservoir should be neatly tucked away within the enclosure.
- Power Management: Design for safe routing of power cords for pumps and lights.
A strong, stable workbench is invaluable for this type of project. If you’re looking to upgrade your setup, check out our resource on building a custom wood workbench.
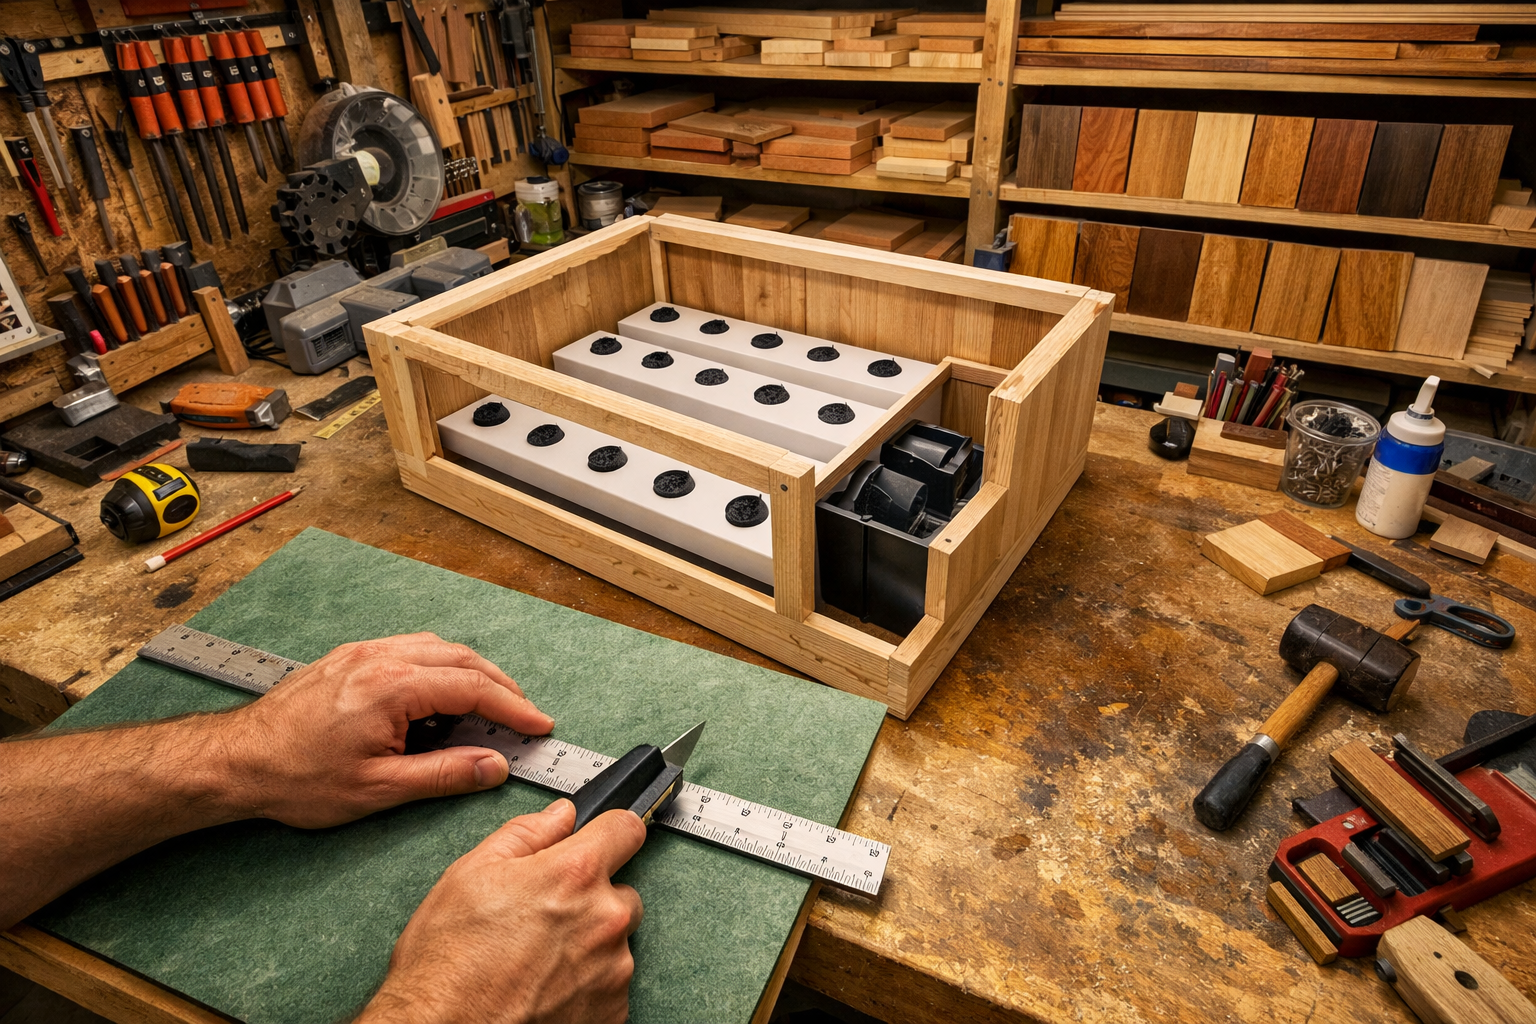
Step-by-Step Construction Outline
- Measure and Cut: Based on your design, accurately measure and cut all wooden components. Remember the principle of “measure twice, cut once.”
- Assemble the Frame: Construct the primary frame using strong joinery. Pocket holes, dado joints, or mortise and tenon joints are excellent choices for durability. Understanding how to build furniture that lasts through seasonal changes is key to ensuring your enclosure remains stable.
- Integrate Hydroponic Components:
- Reservoir Bay: Create a watertight compartment for your reservoir. This might involve lining it with pond liner or using a pre-made food-grade plastic container.
- Growing Channels/Trays: If using NFT, precisely fit your growing channels. For DWC, ensure the top panel supports the net pots.
- Pump & Tubing: Plan the layout for the water pump and tubing. Drill necessary holes for water lines, ensuring they are sealed with appropriate grommets.
- Install Access & Ventilation: Cut and fit hinged doors or removable panels. Integrate small vents near the top and bottom for natural convection, or install a quiet fan.
- Finishing: Apply your chosen sealant or finish meticulously, paying close attention to all edges and internal surfaces exposed to moisture. Allow adequate curing time.
- Lighting Installation: Mount your LED grow lights, ensuring they are securely fastened and positioned correctly for optimal plant growth.
- Testing: Before adding plants, fill the system with water and run the pump for a few hours to check for leaks and proper water flow. This step is critical!

Setting Up and Maintaining Your Hydroponic Herb Garden
Once your custom wooden enclosure is complete, the final phase involves setting up the hydroponic system and cultivating your herbs. This is where the fruits (or rather, herbs! 🌿) of your labor truly come to life.
Essential Hydroponic Components
To get started, you will need:

- Reservoir: A food-grade container to hold the nutrient solution.
- Water Pump: To circulate the nutrient solution (for active systems like NFT or drip).
- Air Pump & Air Stone: (For DWC) To oxygenate the water and prevent root rot.
- Net Pots: Small plastic baskets to hold plants in place.
- Growing Medium: Inert media like rockwool, coco coir, or hydroton (clay pebbles) to support the plants.
- Hydroponic Nutrients: Specially formulated liquid or powdered fertilizers.
- pH Testing Kit/Meter: To monitor and adjust the acidity/alkalinity of the solution.
- EC/TDS Meter: To measure the concentration of nutrients in the solution.
- Grow Lights: Full-spectrum LED lights are energy-efficient and highly effective for herbs.
- Timers: For lights and pumps.
Cultivating Your Herbs
- Seed Starting: Start your herb seeds in rockwool cubes or other inert media. Keep them moist and warm until they sprout.
- Transplanting: Once seedlings have a few true leaves and visible roots, gently transfer them into net pots with your chosen growing medium. Place them into your hydroponic system.
- Nutrient Solution: Prepare your nutrient solution according to the manufacturer’s instructions. Always use filtered water to avoid chlorine or other contaminants.
- pH Management: Maintain the pH level between 5.5 and 6.5 for most herbs. Check daily and adjust using pH up or pH down solutions.
- EC/TDS Monitoring: Monitor nutrient concentration. Replenish the solution as needed, and perform a full reservoir change every 1-2 weeks to prevent nutrient imbalances.
- Lighting Schedule: Most herbs require 12-16 hours of light per day. Use a timer to automate this.
- Harvesting: Harvest herbs regularly by snipping off outer leaves or entire stems. This encourages new growth.
Common Herbs for Hydroponic Systems
Choosing the right herbs can significantly impact your success. Here are some popular, easy-to-grow options:
- 🌿 Basil: A classic, grows quickly and loves warmth.
- 🌿 Mint: Prolific grower, but can be invasive in soil – perfect for contained hydroponics!
- 🌿 Parsley: Both flat-leaf and curly varieties thrive.
- 🌿 Cilantro: Prefers slightly cooler conditions but grows well.
- 🌿 Dill: Easy to grow from seed, adds a fresh flavor.
- 🌿 Chives: Low maintenance and provides a continuous harvest.
- 🌿 Lettuce: While not an herb, many leafy greens are excellent in hydroponics.
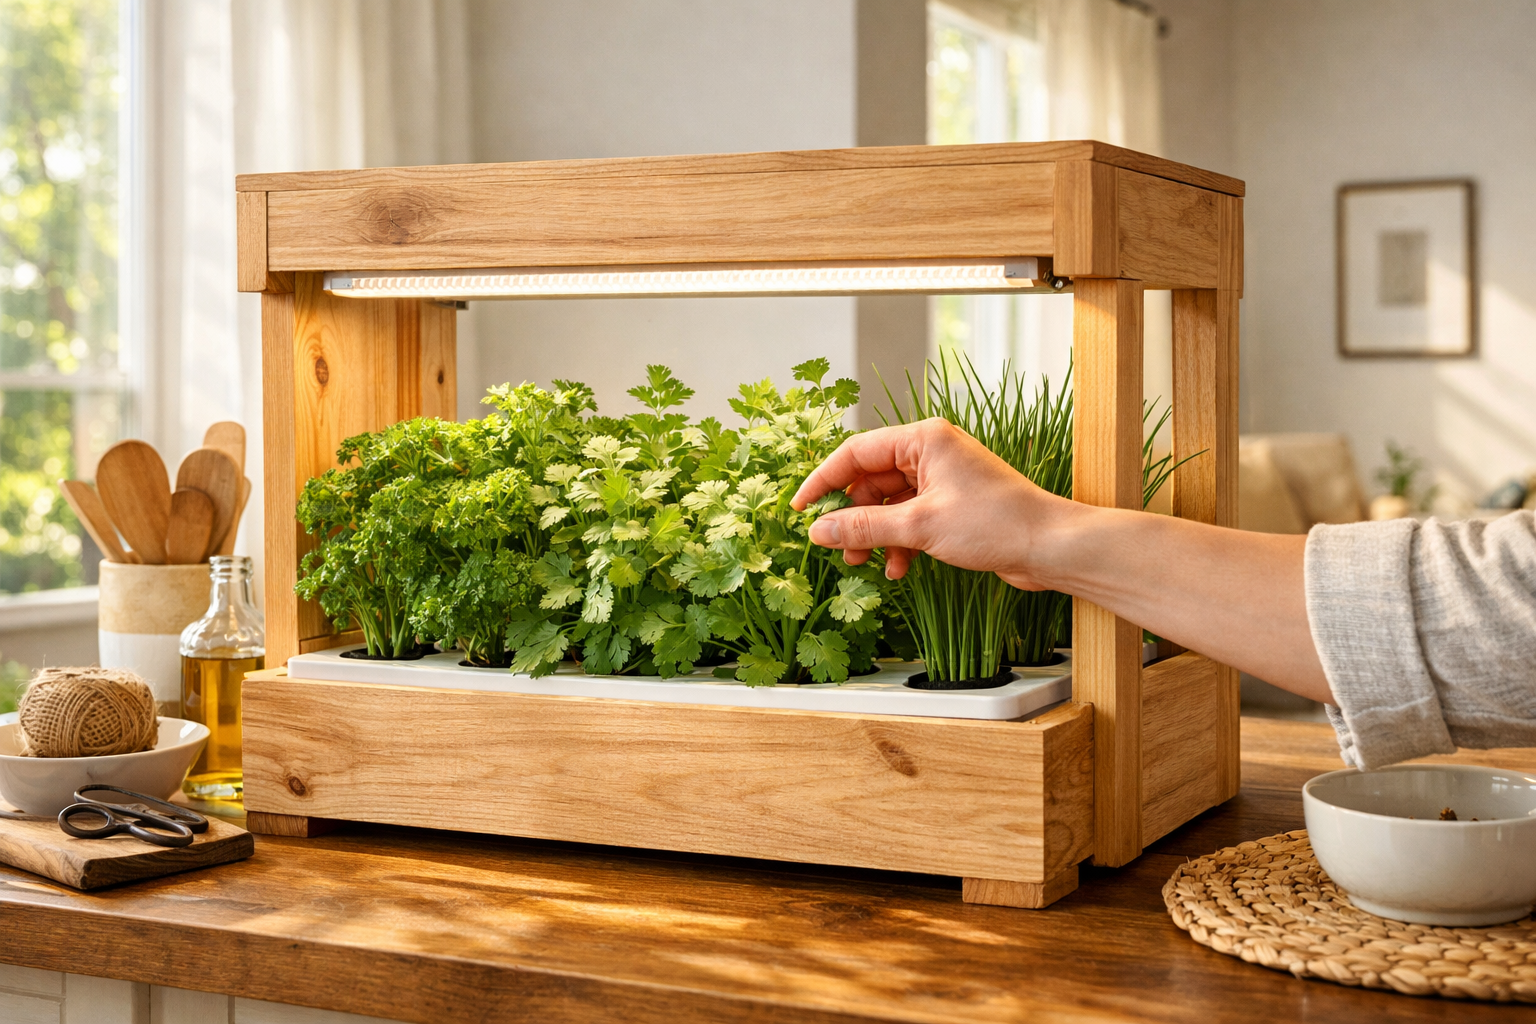

This process not only yields fresh, organic herbs but also integrates a beautiful, handcrafted element into your home. The satisfaction of cultivating your own food within a structure you built with your own hands is immense, perfectly embodying the spirit of Building a DIY Hydroponic Herb Garden with Custom Wooden Enclosures: Combining Woodworking with Sustainable Living.
Conclusion
Embarking on the journey of Building a DIY Hydroponic Herb Garden with Custom Wooden Enclosures: Combining Woodworking with Sustainable Living offers a unique blend of practical gardening, creative craftsmanship, and environmental stewardship. This project empowers you to take control of your food source, cultivating fresh, organic herbs year-round, while simultaneously enhancing your living space with a custom-designed wooden fixture. The synergy between the precise art of woodworking and the efficient science of hydroponics creates a rewarding and sustainable hobby.
By following the detailed steps for designing and constructing your wooden enclosure, selecting appropriate materials, and mastering the basics of hydroponic cultivation, you can create a system that is both highly functional and aesthetically pleasing. This venture is more than just building a garden; it’s about fostering a deeper connection to sustainable practices and showcasing your skills as a maker.
Actionable Next Steps:
- Research & Design: Begin by sketching out your ideal hydroponic setup, considering the type of system and the aesthetic of your wooden enclosure. Consult resources like “Warm Minimalism in Woodworking” for design inspiration if you’re aiming for a sleek look.
- Gather Materials: Source your moisture-resistant wood, hydroponic components, and essential tools.
- Build with Precision: Take your time with the woodworking, ensuring accurate cuts and strong joinery for a durable and beautiful enclosure.
- Setup & Test: Assemble your hydroponic system within the enclosure and rigorously test it for leaks and proper function before introducing plants.
- Plant & Enjoy: Introduce your chosen herbs and monitor their growth, making adjustments to the nutrient solution and lighting as needed. Enjoy the continuous harvest of fresh, homegrown herbs!
