
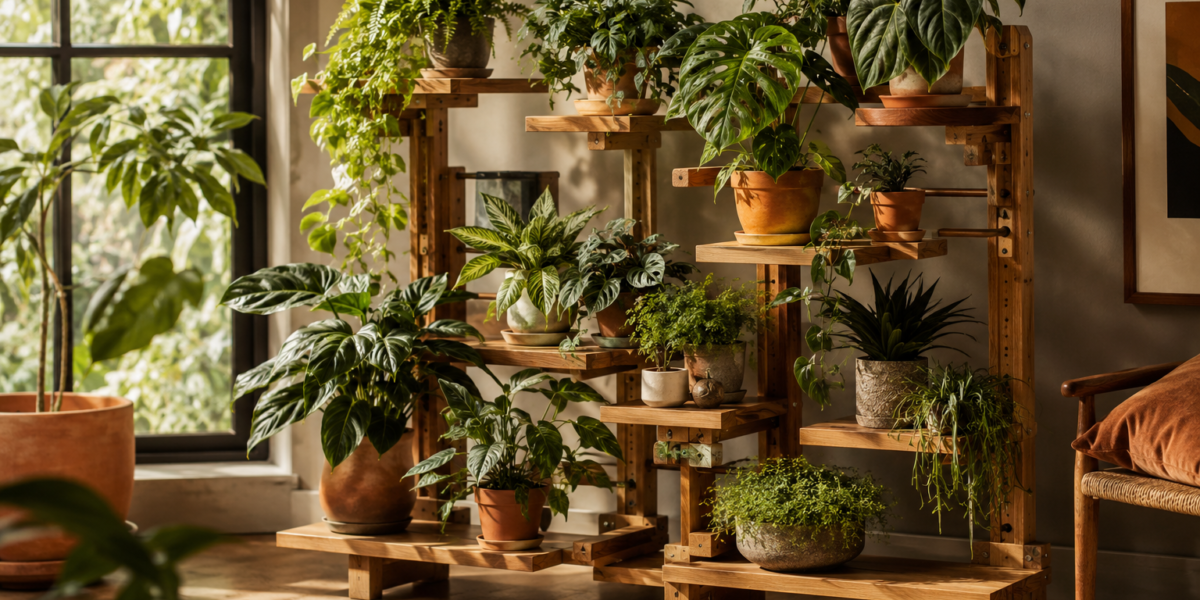
The perception that creating custom furniture requires extensive workshop space and advanced machinery is a common misconception. In reality, the most elegant and functional wooden plant stands, especially those designed to house a thriving indoor jungle, can be meticulously crafted in a small workshop using fundamental tools and techniques. The key lies in strategic design, precise joinery, and a keen understanding of material properties, allowing enthusiasts to elevate their botanical displays beyond the limitations of basic planters. This article delves into how to achieve impressive DIY Plant Stands for Indoor Jungles: Elevated Wooden Designs Beyond Basic Planters, focusing on multi-tiered, adjustable structures with integrated drainage and durable finishes suitable for year-round use.
Key Takeaways
- Custom wooden plant stands can be built in small workshops with basic tools.
- Multi-tiered and adjustable designs maximize space and plant display options.
- Proper drainage integration is crucial for plant health and stand longevity.
- UV-resistant finishes protect wood from sun exposure and moisture.
- Sustainable wood sourcing and mindful design contribute to lasting, eco-friendly projects.
Designing Functional and Aesthetic DIY Plant Stands for Indoor Jungles
Creating the perfect wooden plant stand for an indoor jungle goes beyond simply providing a surface for pots. It involves thoughtful design that considers both the plants’ needs and the aesthetic appeal of the living space. For a true indoor jungle, multi-tiered stands with adjustable heights are invaluable, allowing for dynamic arrangements and optimal light exposure for various plant species. This approach maximizes vertical space, a significant advantage, particularly in smaller living areas.
When planning your DIY plant stands for indoor jungles, consider the following design principles:
Multi-Tiered and Adjustable Height Designs
Multi-tiered stands offer significant benefits. They enable plants to be arranged at different levels, creating a visually rich display that mimics natural forest undergrowth. This layered effect is crucial for achieving an “indoor jungle” aesthetic. Adjustable heights take this functionality a step further, allowing you to:
- Accommodate growth: As plants mature, their height and spread change. Adjustable shelves mean your stand can adapt.
- Optimize light: Different plants have varying light requirements. Being able to raise or lower a plant can ensure it receives the ideal amount of light.
- Enhance aesthetics: Experiment with compositions, placing taller plants in the back or center, and trailing plants on lower tiers.
Common methods for achieving adjustability include:
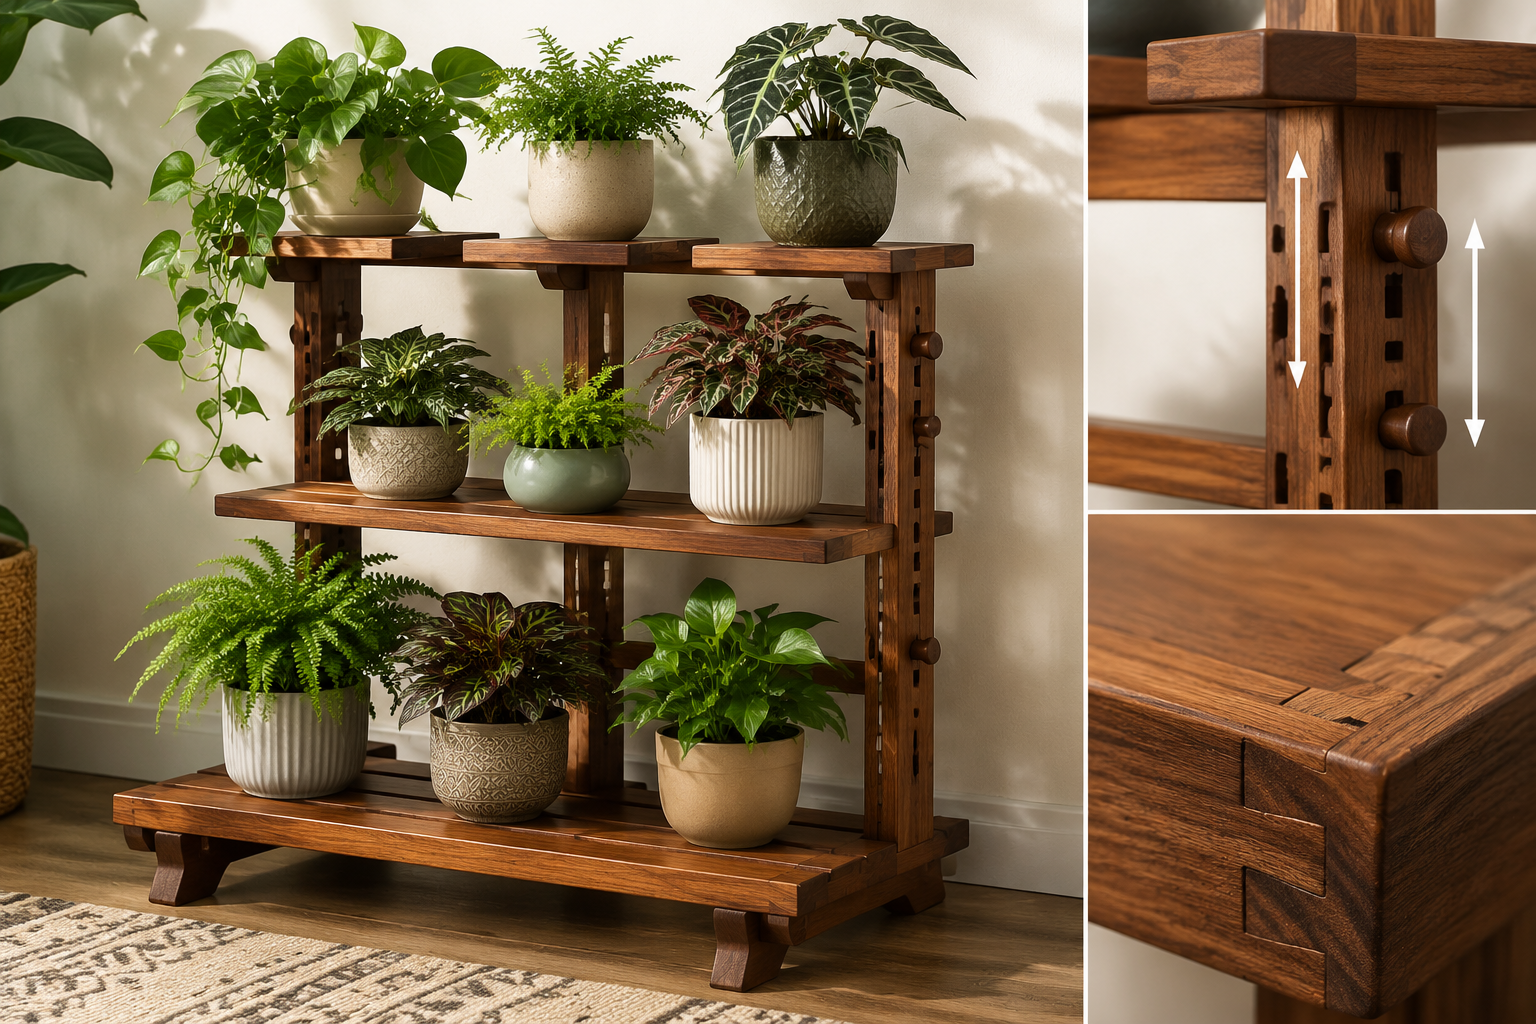
- Peg and hole system: Drilling a series of holes in vertical supports allows shelves to be moved up or down with wooden pegs. This is simple and effective.
- Sliding dovetails or grooves: More advanced, but offers a cleaner look where shelves can slide into pre-cut grooves at various heights.
- Bolt and wingnut system: For heavy-duty stands, bolts can pass through pre-drilled holes in supports and shelves, secured with wingnuts for easy adjustment.
For those interested in mastering joinery techniques essential for such designs, exploring resources like the “Mastering Dovetail Joints with Hand Tools” guide can be beneficial Mastering Dovetail Joints with Hand Tools: A Step-by-Step Guide for.
Integrated Drainage Solutions
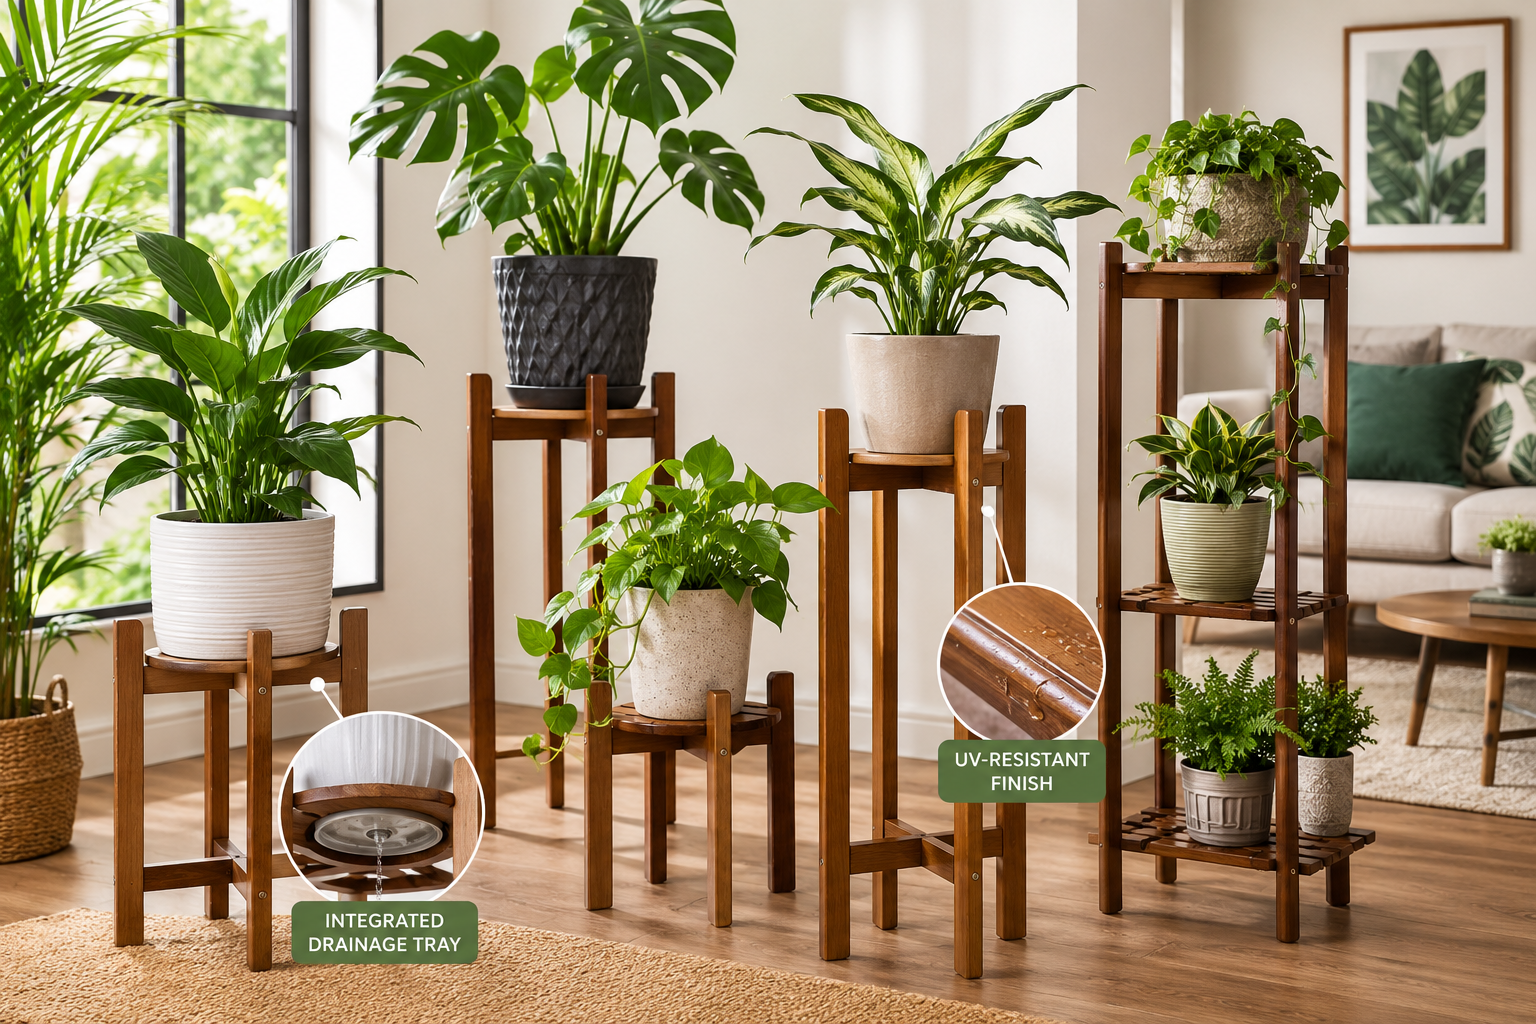
One of the most critical, yet often overlooked, aspects of indoor plant care and stand design is proper drainage. Stagnant water can lead to root rot, which is detrimental to plant health. Moreover, water spills can damage your wooden stand and surrounding floors. Integrating drainage into your DIY plant stands for indoor jungles is non-negotiable.
Consider these solutions:
- Recessed trays: Create a slightly recessed area on each shelf to hold a shallow, waterproof tray. This catches excess water.
- Slatted shelves: Design shelves with slats, allowing water to drip through to a larger, removable collection tray at the bottom of the stand. This also improves air circulation around the pots.
- Removable drip trays: Ensure any integrated trays are easily removable for cleaning. These can be made from plastic, metal, or even treated wood.
When designing the shelves themselves, remember that weight distribution is important. For guidance on crafting custom wooden planters that already incorporate drainage, refer to “Crafting Custom Wooden Planters: Indoor and Outdoor Designs with Drainage Solutions and Weatherproofing” Crafting Custom Wooden Planters: Indoor and Outdoor Designs with.
Material Selection: Wood Types and Sustainable Sourcing
The choice of wood greatly impacts the durability, aesthetics, and overall sustainability of your plant stand.
| Wood Type | Characteristics | Pros | Cons |
|---|---|---|---|
| Pine | Softwood, light color, distinct grain, readily available | Affordable, easy to work with, takes stain well | Less durable, prone to dents, can warp if not sealed properly |
| Oak | Hardwood, strong, prominent grain, light to medium brown color | Very durable, strong, resistant to rot (especially red oak) | More expensive, harder to work with, heavy |
| Maple | Hardwood, fine grain, very strong, light color | Extremely durable, smooth finish, resistant to wear and tear | Expensive, very hard to work with |
| Cedar | Softwood, aromatic, distinct red-brown color | Naturally rot and insect resistant, lightweight | Softer than hardwoods, can be expensive depending on source |
| Reclaimed | Varied wood types, often salvaged from old buildings, pallets, or furniture | Environmentally friendly, unique character, often very stable | Can be inconsistent in quality, may contain nails/hardware, prep work |
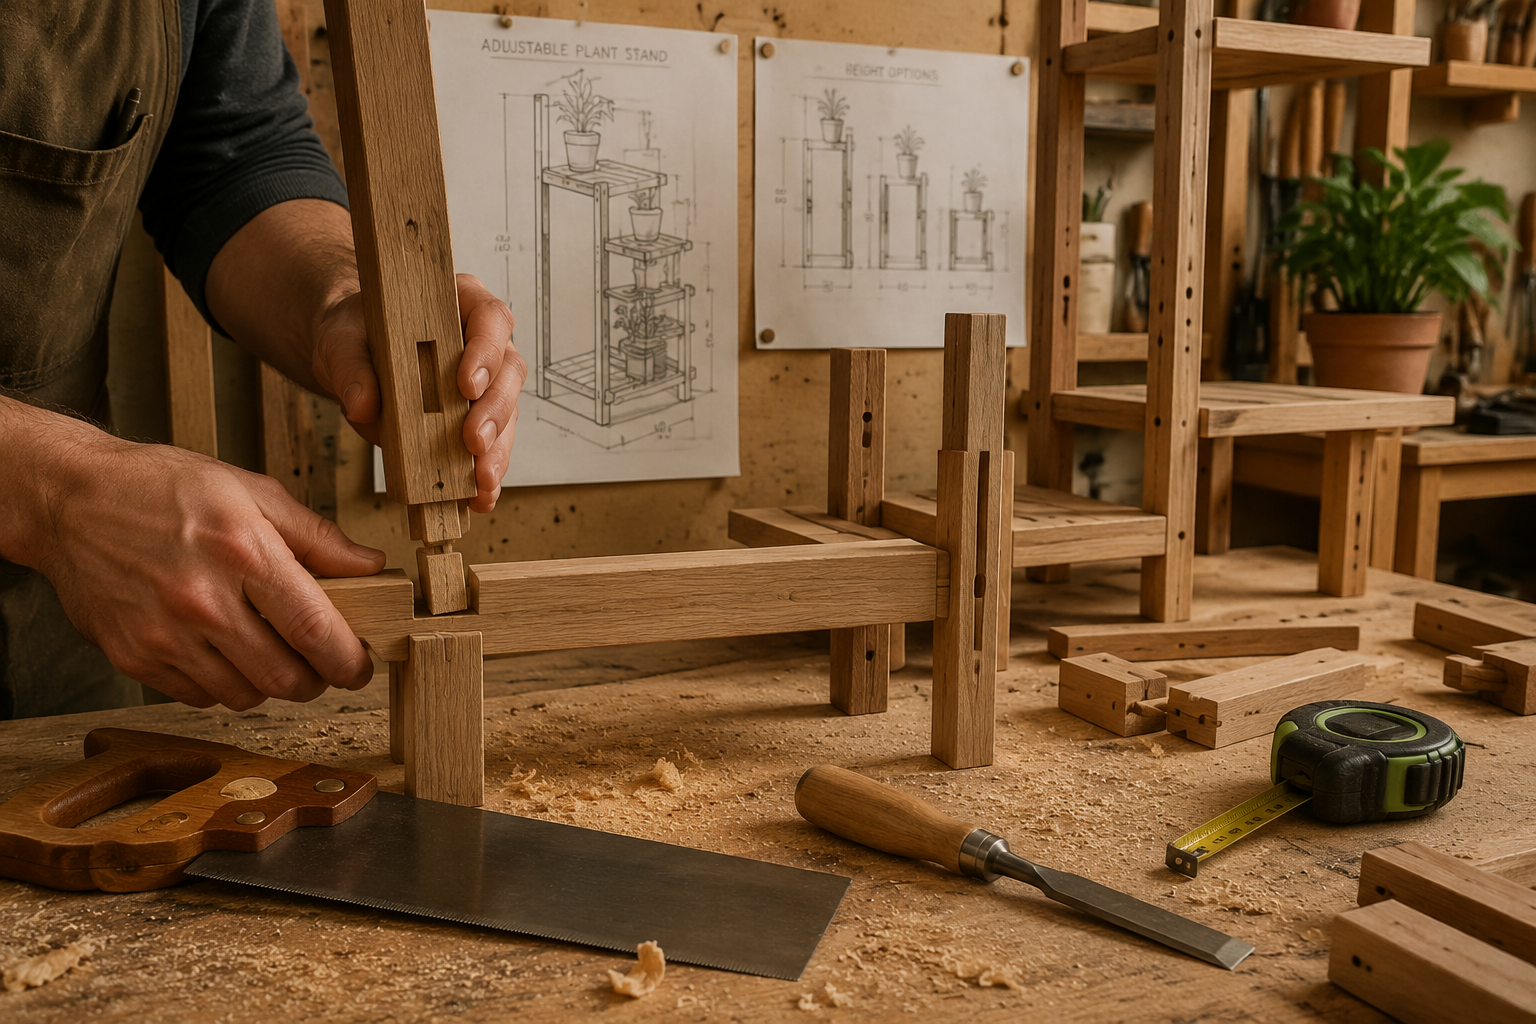
For eco-conscious woodworkers, sustainable wood sourcing is paramount in 2026. Look for lumber certified by organizations like the Forest Stewardship Council (FSC) or consider sourcing reclaimed wood. Reclaimed wood not only reduces demand for new timber but often comes with unique character and a story. For more on this, consult “Sustainable Wood Sourcing for the Modern Woodworker” Sustainable Wood Sourcing for the Modern Woodworker: Beyond Reclaimed. Upcycling old pallets can also be a cost-effective and sustainable option, as detailed in “Upcycling Old Pallets: Creative and Sustainable Woodworking Projects” Upcycling Old Pallets: Creative and Sustainable Woodworking Projects.
Essential Tools and Techniques for Building Elevated Wooden Plant Stands
Even in a small workshop, a selection of basic hand and power tools can enable you to build robust and beautiful DIY plant stands for indoor jungles. The key is to choose versatile tools and master fundamental woodworking techniques.
Basic Woodworking Tools for Small Workshops
To construct elevated wooden plant stands, you don’t need a sprawling industrial setup. A focused collection of tools will suffice:
- Measuring and Marking Tools:
- Tape measure (25-foot)
- Combination square
- Pencil or marking knife
- Protractor for angles
- Cutting Tools:
- Hand saw (crosscut and rip)
- Miter saw or circular saw (with a guide for straight cuts)
- Jigsaw for curves (optional)
- Shaping and Smoothing Tools:
- Chisels (a small set of general-purpose chisels)
- Hand plane (block plane or smoothing plane)
- Sandpaper (various grits from 80 to 220)
- Random orbital sander (power tool for efficiency)
- Joining and Fastening Tools:
- Drill/driver (cordless is highly recommended)
- Clamps (bar clamps, C-clamps – essential for joinery and glue-ups)
- Wood glue (waterproof if possible, for added durability) – see The Ultimate Guide to Wood Glue
- Screws and/or dowels (depending on joinery)
Investing in good quality clamps is critical for successful glue joints and stable assemblies, especially when working with joinery like dadoes or lap joints.
Fundamental Joinery for Stability and Aesthetics
The integrity of your plant stand hinges on the strength of its joints. Basic joinery techniques can create incredibly sturdy and attractive pieces, even without complex machinery.
- Butt Joint: The simplest joint, where two pieces are butted together and fastened. Often reinforced with screws or dowels. Use for non-load-bearing connections or where appearance is less critical.
- Lap Joint: Parts overlap and are typically glued and screwed/bolted. This adds more surface area for glue than a butt joint, increasing strength.
- Dado Joint: A groove cut across the grain of one piece of wood, into which another piece fits. Ideal for shelving, providing excellent support and stability.
- Mortise and Tenon: A classic, strong joint where a “tenon” (projection) on one piece fits into a “mortise” (hole) on another. Perfect for connecting legs to rails, offering superior strength and a refined look. This can be done effectively with hand tools or a router table.
“The beauty of woodworking in a small shop is the focus on fundamental skills. A well-executed dado or mortise and tenon joint, often seen as ‘basic,’ forms the backbone of countless enduring projects. Mastering these is more valuable than owning every power tool.”
For projects involving precise cuts and shaping, understanding how to utilize tools like a router table can significantly enhance your capabilities. Learn more through “Mastering the Router Table: Beyond Basic Edges for Precision Joinery” Mastering the Router Table: Beyond Basic Edges for Precision Joinery.
Finishing Techniques: Protection and Enhancement
Finishing your wooden plant stand is crucial for both its longevity and aesthetic appeal. Given that plant stands will be exposed to moisture and potentially sunlight, selecting the right finish is vital.
- UV-Resistant Finishes: For stands exposed to sunlight, a UV-resistant finish is essential to prevent discoloration and degradation of the wood. Spar urethane or marine-grade varnish are excellent choices as they are designed for outdoor use and provide superior UV protection.
- Waterproof/Water-Resistant Finishes: To protect against spills and humidity, choose finishes that repel water. Polyurethane, tung oil, or Danish oil can offer good protection.
- Polyurethane: Forms a durable, clear, protective layer. Available in various sheens.
- Tung Oil/Danish Oil: Penetrates the wood, enhancing its natural grain while offering good water resistance. Requires multiple coats.
- Stains and Paints: Before applying a clear protective finish, you might want to stain the wood to alter its color or paint it to match your decor. Always ensure the stain/paint is compatible with your chosen topcoat.
Remember to prepare the wood properly by sanding it smooth through progressively finer grits (e.g., 80, 120, 180, 220) before applying any finish. This ensures an even absorption of stain and a smooth final coat.
Building Your Elevated Wooden Plant Stand: Step-by-Step
This section outlines a general approach to constructing a multi-tiered, adjustable wooden plant stand suitable for an indoor jungle. While specific dimensions will vary based on your needs, the principles remain consistent.
Step-by-Step Construction Guide
- Design and Plan:
- Sketch your design, including desired dimensions, number of tiers, and height adjustability.
- Measure your plants and pots to ensure adequate shelf size and spacing.
- Create a cut list for all wood components (legs, rails, shelves, cross-braces).
- Consider the type of joinery for each connection.
- Source your wood sustainably.
- Cut Components:
- Precisely cut all wood pieces according to your cut list. Use a miter saw for square cuts and a circular saw with a guide for shelves.
- For adjustable shelves using a peg system, drill a series of evenly spaced holes in the vertical legs.
- Cut Joinery:
- If using dadoes for shelves, cut these into the vertical supports or rails. A router table can make this precise and efficient.
- If using mortise and tenon joints, cut the mortises into the legs and tenons onto the rails.
- Assemble Frame:
- Dry-fit all frame components (legs, rails) to ensure everything fits correctly.
- Apply wood glue to the joints. Clamp the frame together, ensuring it is square. Wipe away any excess glue with a damp cloth. Allow glue to dry completely.
- Reinforce joints with screws or dowels as needed, counter-sinking screw heads for a cleaner look.
- For a sturdy base, consider cross-bracing at the bottom.
- Prepare and Install Shelves:
- Sand all shelf pieces smooth.
- If using slats, cut and sand each slat.
- For drainage, route a shallow recess into solid shelves or ensure sufficient gaps between slats.
- Install the shelves. For adjustable shelves, simply place them on pegs or slide them into their designated grooves. For fixed shelves, glue and screw them into place.
- Sanding:
- Once the stand is fully assembled and dry, sand the entire piece starting with a coarser grit (e.g., 120) and progressing to finer grits (e.g., 220) for a smooth finish. Pay attention to edges and corners.
- Finishing:
- Clean the stand thoroughly to remove all dust.
- Apply your chosen stain (if desired) according to manufacturer instructions.
- Apply multiple coats of your UV-resistant and water-resistant finish, sanding lightly between coats with a very fine grit (e.g., 320-400) for optimal adhesion and smoothness.
- Allow the finish to cure completely before placing plants on the stand.
Customization Options and Advanced Tips
- Incorporate Storage: Add small drawers or a cabinet at the base for gardening tools, fertilizer, or extra pots. This can involve more complex joinery, but adds significant functionality.
- Lighting Integration: Consider routing channels to conceal LED grow lights under shelves for plants that require more light, or for aesthetic uplighting. This can be combined with “DIY Smart Home Integration with Custom Wooden Enclosures” DIY Smart Home Integration with Custom Wooden Enclosures: Concealing for automated control.
- Mobility: Add casters (wheels) to the base if you plan to move the stand frequently for cleaning or repositioning. Ensure the casters are robust enough to handle the total weight of the stand and plants.
- Live Edge Accents: For a natural, organic look, incorporate live edge wood for shelves or a prominent structural element. This adds a unique character, as explored in articles like “Live Edge Slab Selection and Milling” Live Edge Slab Selection and Milling: From Raw Wood to Finis.
Remember, the goal is to create a piece that is not only functional for your indoor jungle but also a beautiful addition to your home, reflecting your craftsmanship.
Conclusion
Creating DIY Plant Stands for Indoor Jungles: Elevated Wooden Designs Beyond Basic Planters is an incredibly rewarding woodworking project for 2026. It allows for the expression of personal style, addresses specific spatial and horticultural needs, and significantly enhances the beauty and vitality of any indoor space. By focusing on multi-tiered, adjustable designs, integrating effective drainage, and selecting appropriate, durable finishes, woodworkers can craft stands that are not only aesthetically pleasing but also built to last for years to come. The process, while requiring precision and patience, is achievable even in small workshops using fundamental tools and techniques.
The journey from raw lumber to a stunning, functional plant sanctuary transforms a simple craft into an art form that nurtures both plants and the home environment. As you embark on your next woodworking endeavor, remember that thoughtful design, meticulous execution, and a commitment to quality will yield a piece that stands proudly as a testament to your skill and dedication.
Actionable Next Steps:
- Sketch Your Design: Begin by outlining the dimensions and desired features for your ideal plant stand, considering the number and size of your plants.
- Source Sustainably: Identify local suppliers for FSC-certified or reclaimed wood, minimizing your environmental impact.
- Gather Your Tools: Ensure you have the necessary hand and power tools, prioritizing quality measuring tools and clamps.
- Practice Joinery: If new to specific joints, practice on scrap wood before cutting your final pieces.
- Choose Your Finish Wisely: Select a UV-resistant and water-repellent finish appropriate for the stand’s intended location and exposure to moisture.
Meta Title: DIY Wooden Plant Stands: Elevated Designs for Indoor Jungles 2026 Meta Description: Craft stunning, multi-tiered DIY wooden plant stands for indoor jungles in 2026. Explore elevated designs with adjustable heights, drainage, and durable finishes.