


A quiet hum in a home studio, or a focused buzz in a workshop, can be the difference between creative flow and frustrating distractions. Surprisingly, achieving this acoustic serenity doesn’t always require professional-grade, budget-breaking solutions. Instead, a well-executed DIY project involving wooden panels can transform your space. This article delves into how to design and construct effective DIY Sound-Dampening Wooden Panels for Home Studios and Workshops: Improving Acoustics with Custom Designs that not only enhance sound quality but also serve as aesthetic wall art, utilizing various wood types and textures.
Key Takeaways
- Understanding Acoustics is Crucial: Effective sound dampening begins with distinguishing between sound absorption and diffusion to address flutter echoes, standing waves, and reverberation.
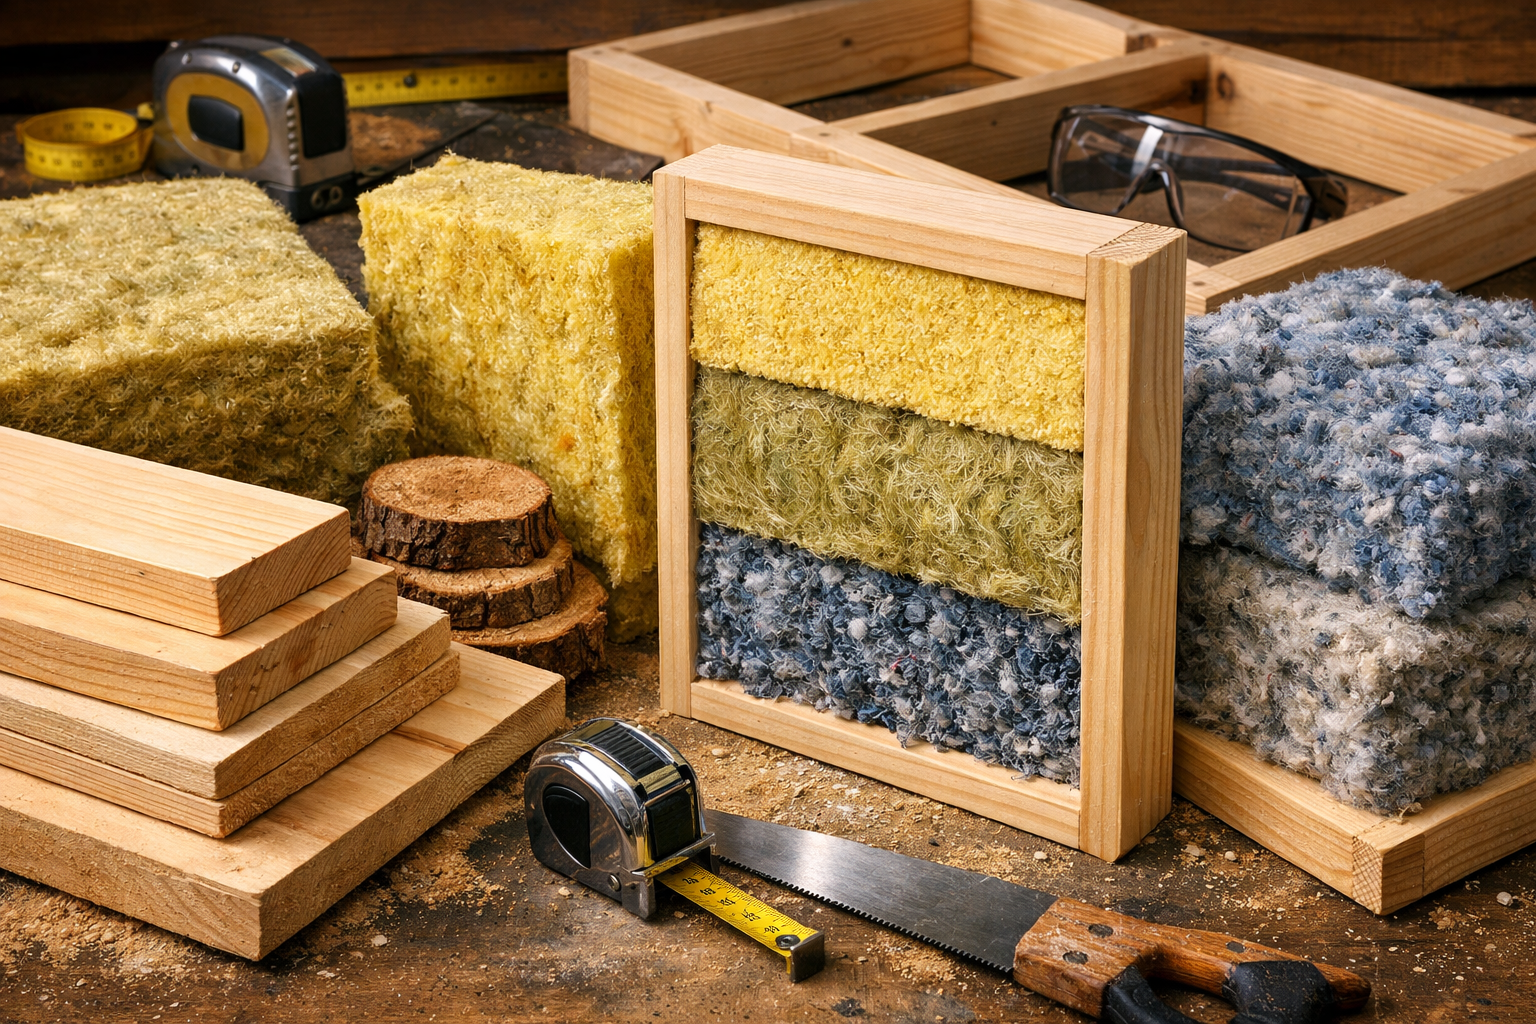
- Material Selection Matters: The core of DIY sound panels relies on dense, fibrous insulation (mineral wool, rigid fiberglass) encased in a sturdy wooden frame, with fabric or perforated wood facings.
- Custom Designs Offer Dual Benefits: Wooden panels can be tailored to specific aesthetic tastes and acoustic needs, acting as both functional sound treatment and decorative elements.
- Strategic Placement is Key: The effectiveness of sound panels is heavily dependent on their thoughtful placement at primary reflection points and problematic areas within the room.
- Safety First: Always prioritize safety by using appropriate PPE, ensuring proper ventilation, and securing panels firmly to walls or ceilings.
Understanding the Fundamentals of Acoustic Treatment with DIY Sound-Dampening Wooden Panels
The sound environment of any room, especially a home studio or workshop, profoundly impacts productivity, clarity, and overall enjoyment. Uncontrolled sound reflections, reverberation, and echoes can muddy audio recordings, make conversations difficult, or even contribute to hearing fatigue. Before diving into the construction of DIY Sound-Dampening Wooden Panels for Home Studios and Workshops: Improving Acoustics with Custom Designs, it’s essential to grasp the basic principles of acoustics: sound absorption and sound diffusion.

Sound absorption involves materials that convert sound energy into heat, reducing reflections and reverberation. Think of soft, porous materials. Sound diffusion, on the other hand, scatters sound waves in various directions, breaking up harsh echoes and creating a more even, spacious sound field. This is typically achieved with irregular, reflective surfaces. Most effective acoustic treatments combine both.
The Impact of Room Acoustics
- Reverberation: This is the persistence of sound in a room after the original sound source has stopped. High reverberation times can make a room sound “live” or “boomy,” blurring sounds together.
- Flutter Echo: A rapid succession of echoes between two parallel reflective surfaces, creating a metallic, ringing sound.
- Standing Waves: Occur when sound waves reflect back and forth between parallel surfaces, creating points of high and low pressure, leading to uneven frequency response (some notes sound louder, others quieter).
Proper acoustic treatment addresses these issues, leading to a clearer, more controlled, and pleasing sound environment. For example, in a home studio, this means more accurate monitoring, better recording quality, and reduced ear fatigue during long sessions. In a workshop, it can mean a reduction in distracting machinery noise and a more pleasant working atmosphere.
Choosing Your Materials: Wood Types and Sound-Absorbing Cores
The effectiveness and aesthetic appeal of your DIY sound panels hinge on careful material selection.
Wooden Frame Materials
The frame provides structural integrity and defines the panel’s appearance.
- Pine: Affordable, easy to work with, and takes stain well. A great choice for beginners.
- Poplar: Slightly harder than pine, takes paint and stain exceptionally well, and has a finer grain.
- Oak (Red or White): Durable, strong, and visually appealing with a prominent grain. It’s heavier and harder to work with but offers a high-end finish.
- Maple: Very dense and hard, offering a clean, smooth finish. Excellent for modern aesthetics.
- Plywood or MDF: Can be used for the back panel or even the entire frame if strength isn’t paramount. They are stable and cost-effective. For ideas on using various wood types, including scraps, explore turning shop scraps into design features.
Sound-Absorbing Core Materials
These are the heart of your sound-dampening panels.
- Mineral Wool (Rock Wool): High-density, excellent absorption across a wide frequency range, fire-resistant, and relatively affordable. Brands like Roxul Safe’n’Sound are popular.
- Rigid Fiberglass (Owens Corning 703/705): Similar to mineral wool in performance, often comes in denser boards which are easier to work with. Can be pricier.
- Recycled Denim Insulation: An eco-friendly alternative. Offers good mid-to-high frequency absorption but may be less effective at lower frequencies compared to mineral wool or fiberglass.
- Acoustic Foam: While readily available, typical foam panels are less effective at lower frequencies and offer lower density compared to mineral wool/fiberglass. It’s often best used for high-frequency dampening or as a lightweight alternative where deep absorption isn’t critical.
Facing Materials
The outer layer protects the core and provides the finished look.
- Acoustic Fabric: Breathable fabric (like burlap, speaker cloth, or specially designed acoustic fabric) allows sound to pass through to the absorbent core. Choose a fabric that matches your room’s aesthetic.
- Perforated Wood/Plywood: Creates a semi-reflective, semi-absorbent surface. The holes allow some sound to penetrate to the core while the solid wood reflects others, contributing to a diffusion effect, especially at higher frequencies.
- Thin Wood Slats: Arranged with gaps, these can create a striking visual and contribute to a degree of diffusion.
Designing and Building Your Custom DIY Sound-Dampening Wooden Panels
The true beauty of DIY Sound-Dampening Wooden Panels for Home Studios and Workshops: Improving Acoustics with Custom Designs lies in the ability to customize every aspect, from size and shape to the interplay of absorption and diffusion. This section outlines the design considerations and construction steps.
Design Considerations: Blending Function with Aesthetics
- Size and Thickness: Standard panel sizes range from 2’x4′ to 2’x2′. Thicker panels (4-6 inches deep) are more effective at absorbing lower frequencies, which are particularly problematic in smaller rooms.
- Absorption vs. Diffusion: For most home studios, a mix is ideal. Panels focused on absorption are typically flat and fabric-covered. Diffuser panels involve varied depths or shapes in their wood surface to scatter sound. Combining these, perhaps with a perforated wood front over an absorbent core, offers a balanced approach.
- Aesthetic Integration: Consider how the panels will complement your room’s existing decor.
- Wood Stains/Finishes: Match or contrast with existing wooden furniture. For inspiration, see natural wood finishing techniques.
- Fabric Choices: Select colors and textures that enhance the room’s palette.
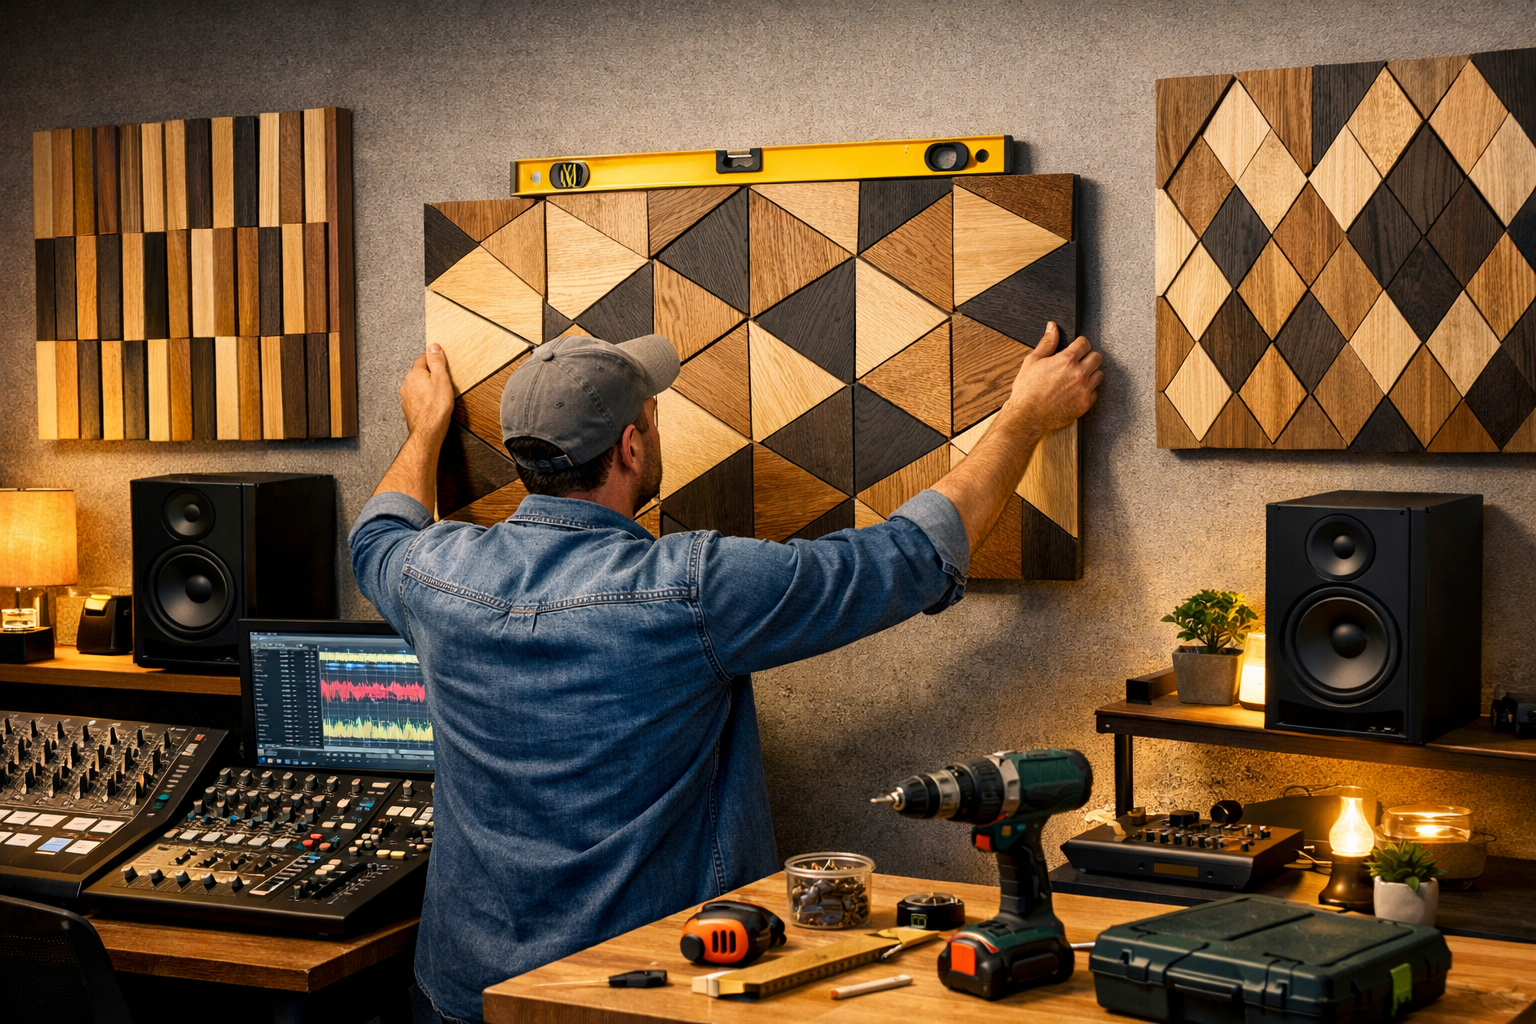
- Geometric Patterns: Arrange multiple panels to form larger geometric art pieces. Create intricate designs by varying wood species or grain direction, similar to principles discussed in warm minimalism in woodworking.
- Integrated Lighting: Small LED strips can be integrated into the frame or behind the panels to create ambient backlighting, adding another layer of aesthetic appeal.
Step-by-Step Construction Guide
Tools and Materials Checklist:
- Wood for Frames: Pine, poplar, or preferred wood
- Sound-Absorbing Material: Mineral wool, rigid fiberglass, or recycled denim
- Fabric or Perforated Wood: For the facing
- Plywood/MDF (optional): For back panel
- Wood Glue
- Screws or Staples
- Saw: Miter saw, circular saw, or table saw
- Drill
- Staple Gun
- Measuring Tape, Ruler, Pencil
- Utility Knife
- Safety Gear: Gloves, dust mask, safety glasses
Construction Steps:
Cut the Wood for the Frame:
- Measure and cut four pieces of wood for each panel’s frame. For a 2’x4′ panel, you’ll need two 2′ pieces and two 4′ pieces (or adjust for dado/rabbet joints).
- Consider the desired thickness (e.g., 1×4 lumber for a 3.5″ deep panel).
- For strong joints, use a router to create precision joinery like lap joints or half-lap joints. Otherwise, butt joints reinforced with screws and glue are sufficient.
Assemble the Frame:
- Apply wood glue to the joints.
- Assemble the frame, ensuring it is square. Use clamps to hold it while securing with screws or staples.
- Optional: Cut a thin piece of plywood or MDF for the back panel and attach it to one side of the frame. This helps contain the insulation and provides a flat mounting surface.
Cut and Install Absorbing Material:
- Wearing gloves, a dust mask, and safety glasses, carefully cut the mineral wool or fiberglass to fit snugly inside the wooden frame. A utility knife and a straight edge work well.
- Insert the absorbent material into the frame. Ensure it fills the cavity without being overly compressed, as compression reduces its effectiveness.
Attach the Facing Material:
- For Fabric: Lay your chosen acoustic fabric face down on a clean surface. Place the frame (with insulation) centered on the fabric. Pull the fabric taut around the edges and staple it securely to the back of the frame, starting from the middle of each side and working outwards, ensuring no wrinkles. Trim any excess fabric.
- For Perforated Wood/Slats: Cut the perforated wood or individual slats to size. Attach them to the front of the frame using small screws or glue and brad nails. Ensure any gaps or perforations are consistent with your design.
Finishing Touches:
- Sand any rough edges on the wooden frame.
- Apply stain, paint, or a clear coat to the exposed wood parts of the frame or solid wood diffusers. Follow proper wood finishing techniques for a professional look.
- Attach appropriate hanging hardware (e.g., French cleats, D-rings, wire hangers) to the back of the panels, ensuring they are strong enough to support the panel’s weight.
Strategic Placement for Optimal Acoustic Performance
The best DIY sound-dampening wooden panels won’t perform optimally if placed incorrectly.
- Identify First Reflection Points: These are crucial. Sit in your listening position (for studios) or primary workspace (for workshops). Have someone hold a mirror against the walls and ceiling. Anywhere you can see a speaker (or sound source) in the mirror is a first reflection point. These are prime locations for absorbent panels.
- Behind Speakers (for studios): Panels placed directly behind monitors can help reduce reflections that bounce off the front wall and interfere with direct sound.
- Opposite Parallel Walls: To combat flutter echo, place absorbent panels on opposite walls, ensuring they are not directly facing each other without treatment.
- Ceiling: The ceiling is often overlooked but can be a major source of reflections. Ceiling clouds (panels suspended horizontally) are highly effective.
- Corners (for Bass Traps): While standard panels offer some bass absorption, dedicated bass traps are typically thicker and designed specifically for low-frequency control. These are often placed in corners where bass frequencies tend to build up. Even basic DIY panels can be built as corner units.
Remember, acoustic treatment is rarely about covering every surface. It’s about strategically targeting problem areas to create a balanced sound environment. Experimentation with placement can yield surprising results.
Maximizing Impact and Integrating Custom Designs in 2026
The year 2026 sees an increasing demand for workspaces that are both functional and aesthetically pleasing. Custom-designed DIY Sound-Dampening Wooden Panels for Home Studios and Workshops: Improving Acoustics with Custom Designs fit perfectly into this trend, offering personalization that off-the-shelf solutions simply cannot match. Beyond basic absorption, these panels can become central design features.
Advanced Customization Techniques
- Integrated Diffusers: Instead of just flat absorption, design panels that incorporate wooden blocks or slats of varying depths to scatter sound waves. These Quadratic Residue Diffusers (QRDs) or primitive root diffusers can be intricate woodworking projects, utilizing diverse wood species for visual contrast. Consider techniques from live edge wood projects to add unique, organic elements to your diffusers.
- Artistic Carving and Engraving: Use a CNC router or hand tools to carve designs, logos, or patterns directly into the wooden face of the panel, enhancing its artistic value. This transforms a functional item into a conversation piece. For those interested in hand tools, explore introduction to wood carving for beginners.
- Modular Systems: Create smaller, interconnected panels that can be rearranged to suit different acoustic needs or aesthetic preferences. These modular designs can be as flexible as DIY modular desk organizers, allowing for dynamic acoustic tuning.
- Hidden Storage: Design thicker panels with a discreet cavity that can serve as hidden storage for small items, combining acoustic treatment with practical space-saving solutions.
- Material Mix-and-Match: Experiment with combining different materials on a single panel – for instance, a fabric-covered section for absorption alongside a carved wood section for diffusion. This creates visual interest and optimizes acoustic performance.
Maintenance and Longevity
DIY sound panels, especially those made from wood, are relatively low maintenance.
- Dusting: Regularly dust the wooden frames and fabric surfaces to prevent buildup, which can subtly affect acoustic properties and appearance.
- Cleaning: For fabric, use a soft brush or vacuum with an upholstery attachment. For wood, a damp cloth followed by a dry one will suffice. Avoid harsh chemicals.
- Inspecting: Periodically check the mounting hardware and the integrity of the frame and fabric to ensure everything remains secure and effective.
Investing time in crafting DIY Sound-Dampening Wooden Panels for Home Studios and Workshops: Improving Acoustics with Custom Designs pays dividends in the form of a more comfortable, productive, and aesthetically pleasing environment. The satisfaction of building something functional and beautiful with your own hands is an added bonus.

Conclusion
Creating DIY Sound-Dampening Wooden Panels for Home Studios and Workshops: Improving Acoustics with Custom Designs is an accessible and rewarding project for any woodworker or hobbyist looking to enhance their acoustic environment. By understanding the basics of sound absorption and diffusion, selecting appropriate materials like high-density insulation and various wood types, and meticulously following construction steps, you can craft panels that are both highly effective and visually appealing.

The real power of DIY panels lies in their customizability. From choosing specific wood grains and finishes to integrating artistic carvings or modular designs, you have the creative freedom to ensure your acoustic treatment complements your space rather than detracting from it. Strategic placement is as crucial as quality construction, ensuring that flutter echoes, standing waves, and excessive reverberation are effectively mitigated. In 2026, where home-based creative and professional spaces are paramount, investing in your acoustic environment through custom woodworking is an intelligent decision that improves both functionality and aesthetics.
Actionable Next Steps:
- Assess Your Space: Identify current acoustic problems (echoes, muddiness) and potential reflection points using the mirror trick.
- Plan Your Design: Sketch out panel sizes, desired aesthetic (absorption vs. diffusion mix), wood types, and fabric choices.
- Gather Materials: Purchase lumber, insulation, fabric, and hardware, keeping your budget and desired performance in mind.
- Start Building: Begin with a single panel to refine your technique, then proceed to build the rest of your custom acoustic treatment system.
- Install and Test: Carefully mount your panels and listen critically to the improvements. Adjust placement if necessary to fine-tune your room’s acoustics.
Remember, a well-designed and constructed set of DIY sound-dampening wooden panels can significantly elevate your home studio or workshop experience, proving that great acoustics and beautiful design can indeed go hand-in-hand.
References
- Everest, F. A., & Pohlmann, K. C. (2015). Master Handbook of Acoustics (6th ed.). McGraw-Hill Education.
- Alton, S. (2012). The Acoustical Design of Home Theaters. Focal Press.
- Cox, T. J., & D’Antonio, P. (2009). Acoustic Absorbers and Diffusers: Theory, Design and Application (2nd ed.). Spon Press.
