
The average piece of mass-produced furniture today lasts a mere 7 to 10 years before requiring replacement, often due to failing connections or shoddy construction. In stark contrast, furniture crafted with traditional hand tool joinery can easily endure for centuries, a testament to the unparalleled strength, elegance, and longevity achieved when wood is thoughtfully connected by hand. This enduring quality isn’t just about nostalgia; it’s a tangible advantage in craftsmanship. This article serves as “The Complete Guide to Hand Tool Joinery: Crafting Strong and Beautiful Joints Without Power Tools,” providing an in-depth exploration of the techniques, tools, and philosophy behind creating joints that stand the test of time.
Forget the whir of electric motors and the rush of modern power tools. Hand tool joinery invites a meditative approach, demanding patience, precision, and an intimate understanding of wood grain. It’s a skill that elevates woodworking from a hobby to an art form, allowing the woodworker to feel the timber, guide the blade, and sculpt connections with unparalleled accuracy. By mastering these foundational techniques, you gain not only the ability to build incredibly strong structures but also a profound satisfaction that only comes from crafting something truly beautiful with your own hands.
Key Takeaways
- Longevity and Strength: Hand-cut joints, when properly executed, offer superior mechanical strength and durability compared to most mechanically fastened or power-tool-driven alternatives, allowing furniture to last for generations.
- Precision and Aesthetics: Hand tools enable a level of fine-tuning and intricate detail that is difficult to replicate with machines, leading to tighter, more aesthetically pleasing joints.
- Fundamental Skills: Mastering hand tool joinery builds a deeper understanding of wood movement, grain direction, and tool mechanics, forming a strong foundation for all woodworking endeavors.
- Therapeutic and Rewarding: The deliberate, focused nature of hand tool work can be a calming and highly satisfying experience, fostering patience and a connection to the material.
- Accessibility: While requiring skill, hand tool joinery can be started with a relatively modest investment in basic tools, making it accessible to many aspiring craftspeople.
Essential Tools and Preparation for Hand Tool Joinery
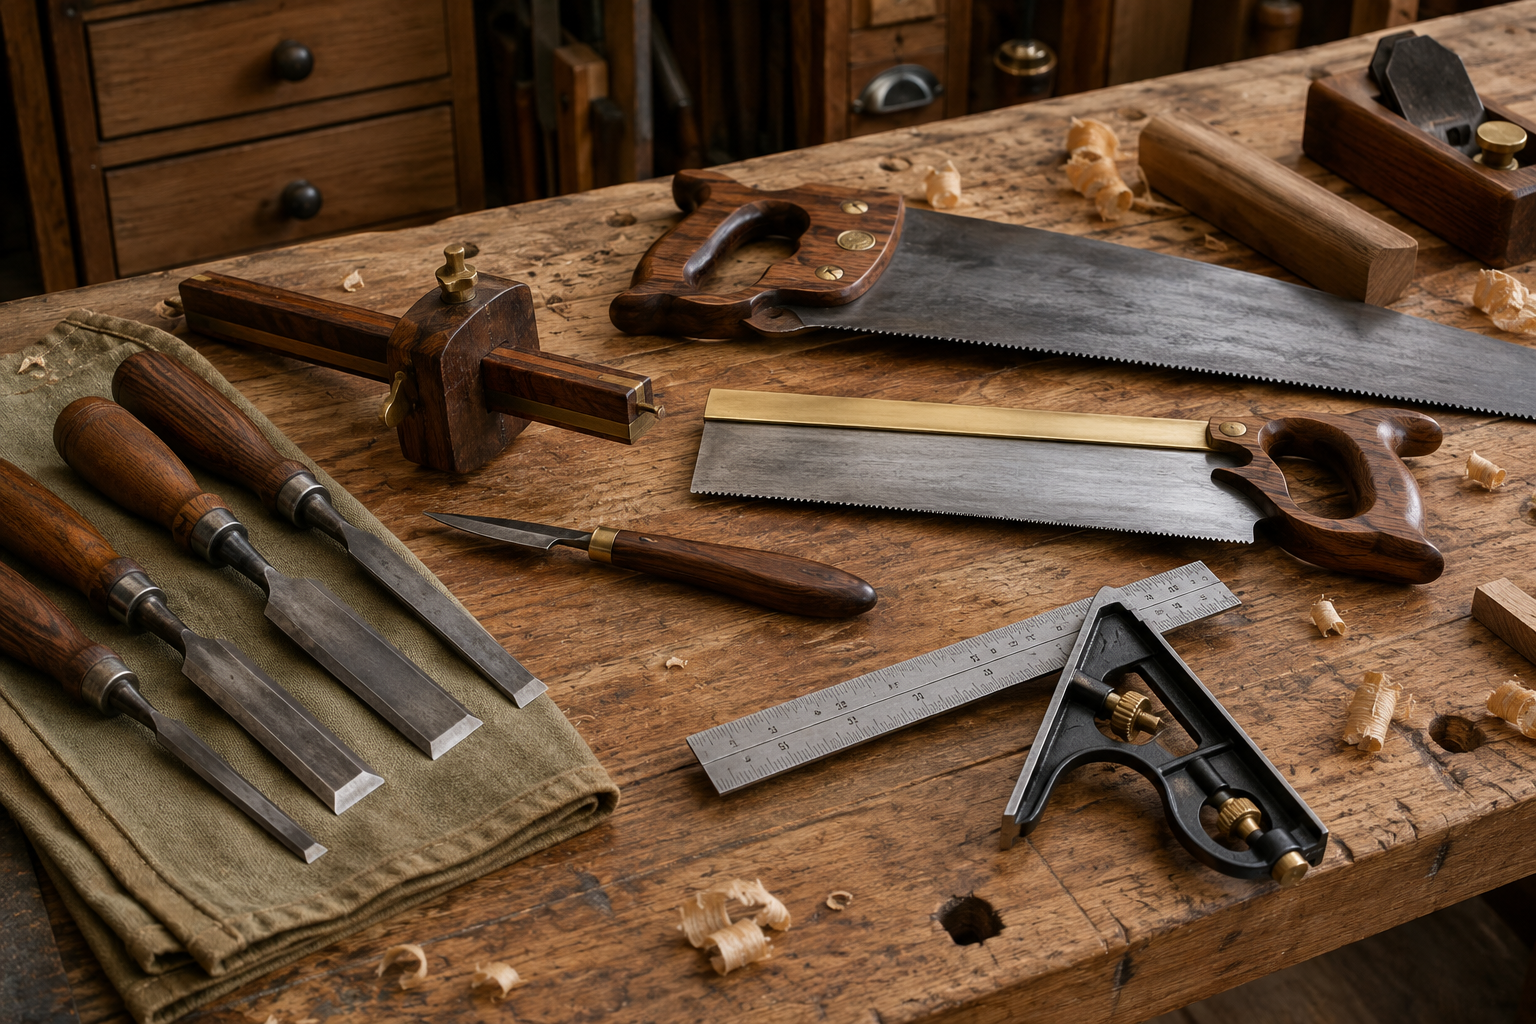
Embarking on “The Complete Guide to Hand Tool Joinery: Crafting Strong and Beautiful Joints Without Power Tools” begins with a foundational understanding of the necessary instruments and proper setup. Unlike power tool methods that often rely on jigs and templates, hand tool joinery prioritizes sharp tools and a stable workpiece.
Critical Hand Tools for Joinery
A well-equipped hand tool joinery kit doesn’t need to be extensive, but each tool must be of good quality and meticulously maintained.
- Saws:
- Dovetail Saw: A small, fine-toothed saw with a stiff back, primarily used for cutting dovetails and other delicate joinery. Its thin plate and precise set allow for very accurate cuts.
- Tenon Saw: A slightly larger backsaw used for cutting tenons, shoulders, and other medium-sized joinery.
- Carcass Saw: Similar to a tenon saw but with a finer tooth count, ideal for smaller shoulder cuts and more delicate work.
- Chisels:
- Bench Chisels: A set of well-sharpened chisels (1/4″, 1/2″, 3/4″, 1″) is indispensable for paring, chopping mortises, and cleaning out waste. Quality chisels hold an edge longer and are easier to sharpen.
- Mortise Chisels: Heavier and thicker than bench chisels, designed for the leverage and strength needed to chop deep mortises.
- Planes:
- Block Plane: Essential for chamfering, trimming end grain, and small adjustments.
- Shoulder Plane: Used for precisely trimming tenon shoulders and other rebates.
- Marking and Measuring Tools:
- Marking Gauge: Crucial for scribing parallel lines, such as the shoulders of tenons or the baseline for dovetails.
- Mortise Gauge: A specialized marking gauge with two spurs for marking both sides of a mortise simultaneously.
- Marking Knife: Provides a clean, precise line that a chisel can register against, leading to sharper cuts than a pencil.
- Square: For checking and marking 90-degree angles. A reliable combination square and a smaller, accurate try square are vital.
- Bevel Gauge: For transferring and marking angles.
- Sharpening Supplies: A keen edge is paramount. This includes sharpening stones (waterstones or oilstones), a flattening plate, and a leather strop. Dull tools are not only inefficient but also dangerous.

Workbench and Workholding
A sturdy workbench equipped with effective workholding solutions is non-negotiable. Bench vises, holdfasts, and bench dogs securely clamp your workpiece, allowing you to focus on the precision of your cuts without battling instability. Without proper workholding, achieving accuracy in hand tool joinery is exceedingly difficult. For those interested in visible wood joints, understanding the interplay of these tools is key to success. Consider exploring “Hand Tool Joinery for Visible Wood Joints: Dovetails, Mortis” to see how these joints become design features here.
Mastering Fundamental Hand Tool Joinery Techniques
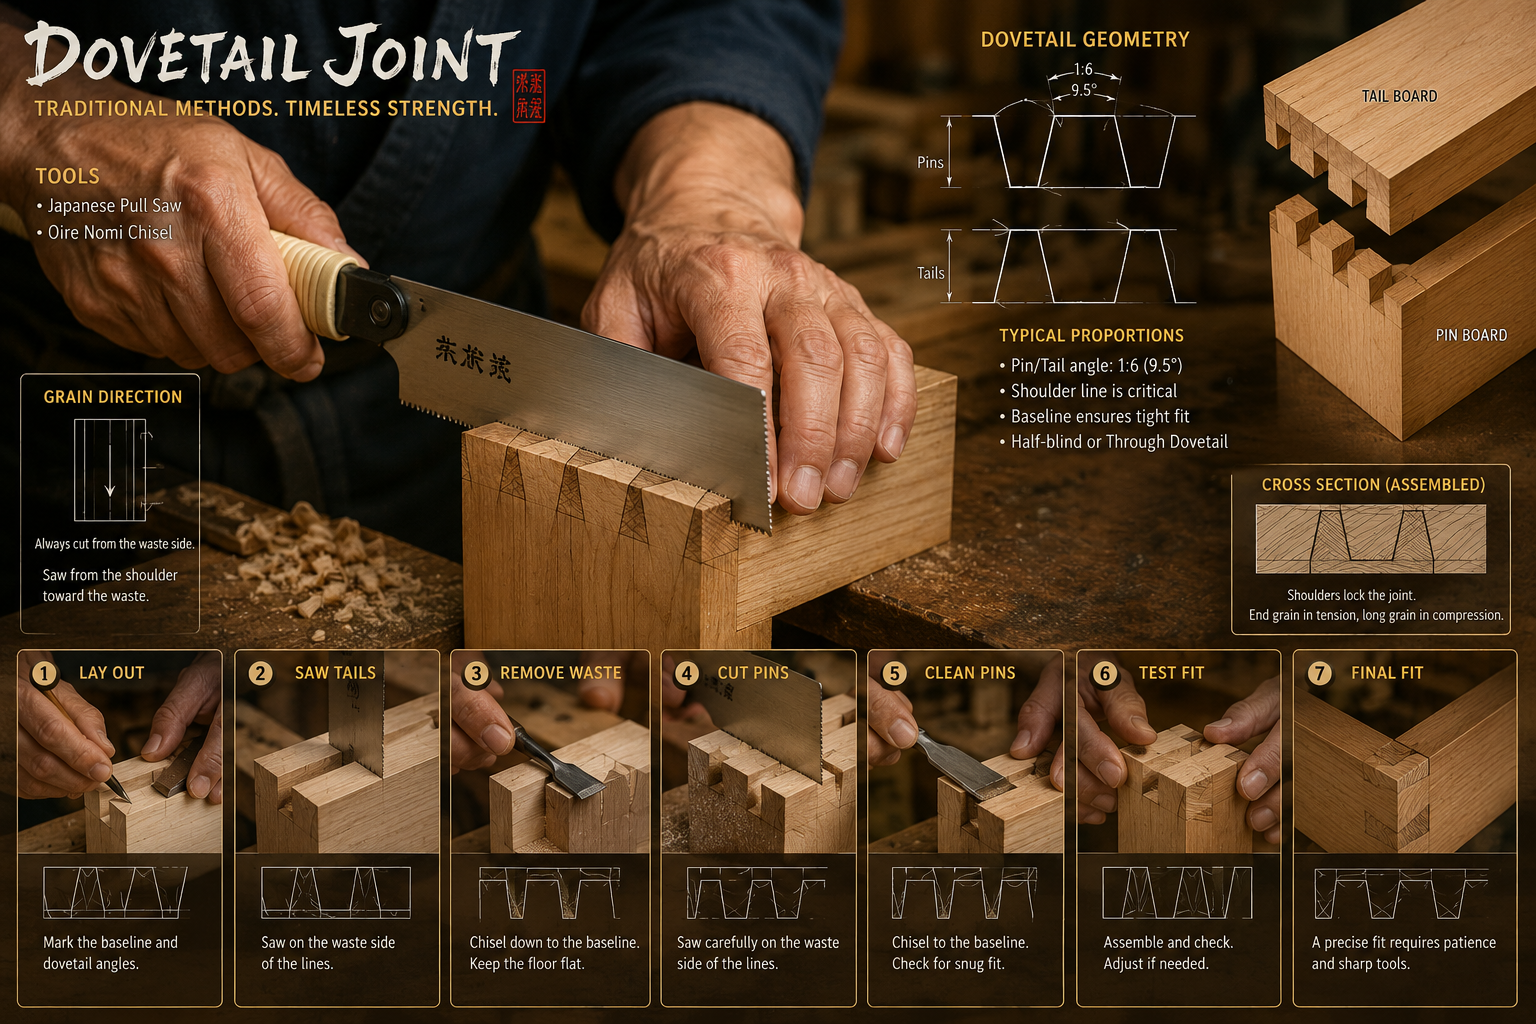
The heart of “The Complete Guide to Hand Tool Joinery: Crafting Strong and Beautiful Joints Without Power Tools” lies in mastering a few core joints. These foundational techniques form the building blocks for virtually any woodworking project.
1. The Dovetail Joint
Regarded as the pinnacle of hand tool joinery, the dovetail joint is renowned for its exceptional mechanical strength and aesthetic appeal. It resists being pulled apart due to the flared “tails” interlocking with the angled “pins.”
Types of Dovetails:
- Through Dovetail: Visible on both faces of the joint, often used in chests and drawers where aesthetics allow for exposed joinery.
- Half-Blind Dovetail: Visible on one face (the tails are usually hidden), commonly used for drawer fronts where the joint needs to be strong but concealed from the front.
- Secret Dovetail: Completely hidden, requiring advanced skill.
Steps for Cutting a Through Dovetail:
- Preparation: Square your stock perfectly. Mark the thickness of the mating piece on both ends of the board.
- Marking Tails: Using a dovetail marker or a bevel gauge set to the appropriate angle (typically 1:6 for hardwoods, 1:8 for softwoods), mark the tails on the end grain of the “tail board.”
- Sawing Tails: Carefully saw to your marked lines, ensuring the saw kerf is on the waste side. Saw to the baseline.
- Removing Waste: Use a coping saw to remove the bulk of the waste between the tails, then pare precisely to the baseline with a sharp chisel.
- Transferring to Pin Board: Place the tail board onto the end grain of the “pin board,” aligning it perfectly. Use a sharp marking knife to transfer the outline of the tails to the pin board.
- Marking Pins: Square down the lines from your knife marks on the pin board to the baseline.
- Sawing Pins: Saw carefully to the pin lines, again keeping the saw kerf in the waste.
- Removing Waste: Chop out the waste between the pins with chisels, paring precisely to the baseline.
- Test Fit and Refine: Gently test the fit. If it’s too tight, pare small amounts from the pins or tails until a snug fit is achieved. Avoid forcing it.
“The beauty of hand tool joinery is in the process as much as the product. Each cut is a conversation with the wood.”
2. The Mortise and Tenon Joint
This is arguably the most fundamental and versatile joint in furniture construction, offering immense strength and stability, particularly against racking forces. A tenon (a projection) on one piece fits snugly into a mortise (a recess) on the other.
Types of Mortise and Tenon Joints:
- Through Mortise and Tenon: The tenon passes completely through the mortise and is visible on the other side, often wedged for extra strength and decorative effect.
- Blind Mortise and Tenon: The tenon does not pass all the way through the mortise, remaining hidden.
- Haunched Mortise and Tenon: Features a small shoulder (haunch) that fills a corresponding recess in the mortise, providing extra resistance to twisting and preventing the mortise from showing if the panel shrinks.
Steps for Cutting a Blind Mortise and Tenon:
- Marking the Tenon: On the end of the “rail” piece, use a mortise gauge to mark the thickness of the tenon. Mark the shoulders with a marking knife.
- Cutting the Tenon: Saw the shoulders first, then the cheeks (the flat sides) of the tenon. Pare any remaining waste with chisels for a smooth, flat tenon.
- Marking the Mortise: On the “stile” piece, mark the location and length of the mortise. Use the mortise gauge to mark its width precisely, matching the tenon’s thickness.
- Chopping the Mortise: Use a mortise chisel (or bench chisel for smaller mortises) and a mallet to chop out the waste. Start by chopping along the marked lines, then work your way into the middle, chopping out small chunks. Gradually deepen the mortise, chopping from both sides of the board if possible to prevent blowout.
- Cleaning and Test Fit: Clean the mortise walls with a sharp chisel. Test fit the tenon. It should slide in with moderate hand pressure and no forcing. Refine as needed.
For those venturing into building larger pieces like dining tables, precise joinery is paramount. Discover more about essential construction techniques for enduring furniture in our guide to crafting a DIY Farmhouse Dining Table.
3. The Half-Lap Joint
A simpler but very strong joint, the half-lap involves removing half the thickness from the mating faces of two pieces of wood so they overlap and fit flush. It’s often used for frames, stretchers, or situations where material thickness is consistent.
Steps for Cutting a Half-Lap Joint:
- Marking: Mark the length and width of the lap on both pieces, ensuring the joint will be half the thickness of the wood.
- Cutting Shoulders: Use a backsaw to cut the shoulders of the lap to the marked depth.
- Removing Waste: Make several relief cuts within the waste area. Then, use a chisel to pare away the waste down to the marked depth. Ensure the bottom of the lap is flat and even.
- Test Fit: The pieces should fit together perfectly flush.

Advanced Considerations and Finishing Touches in Hand Tool Joinery
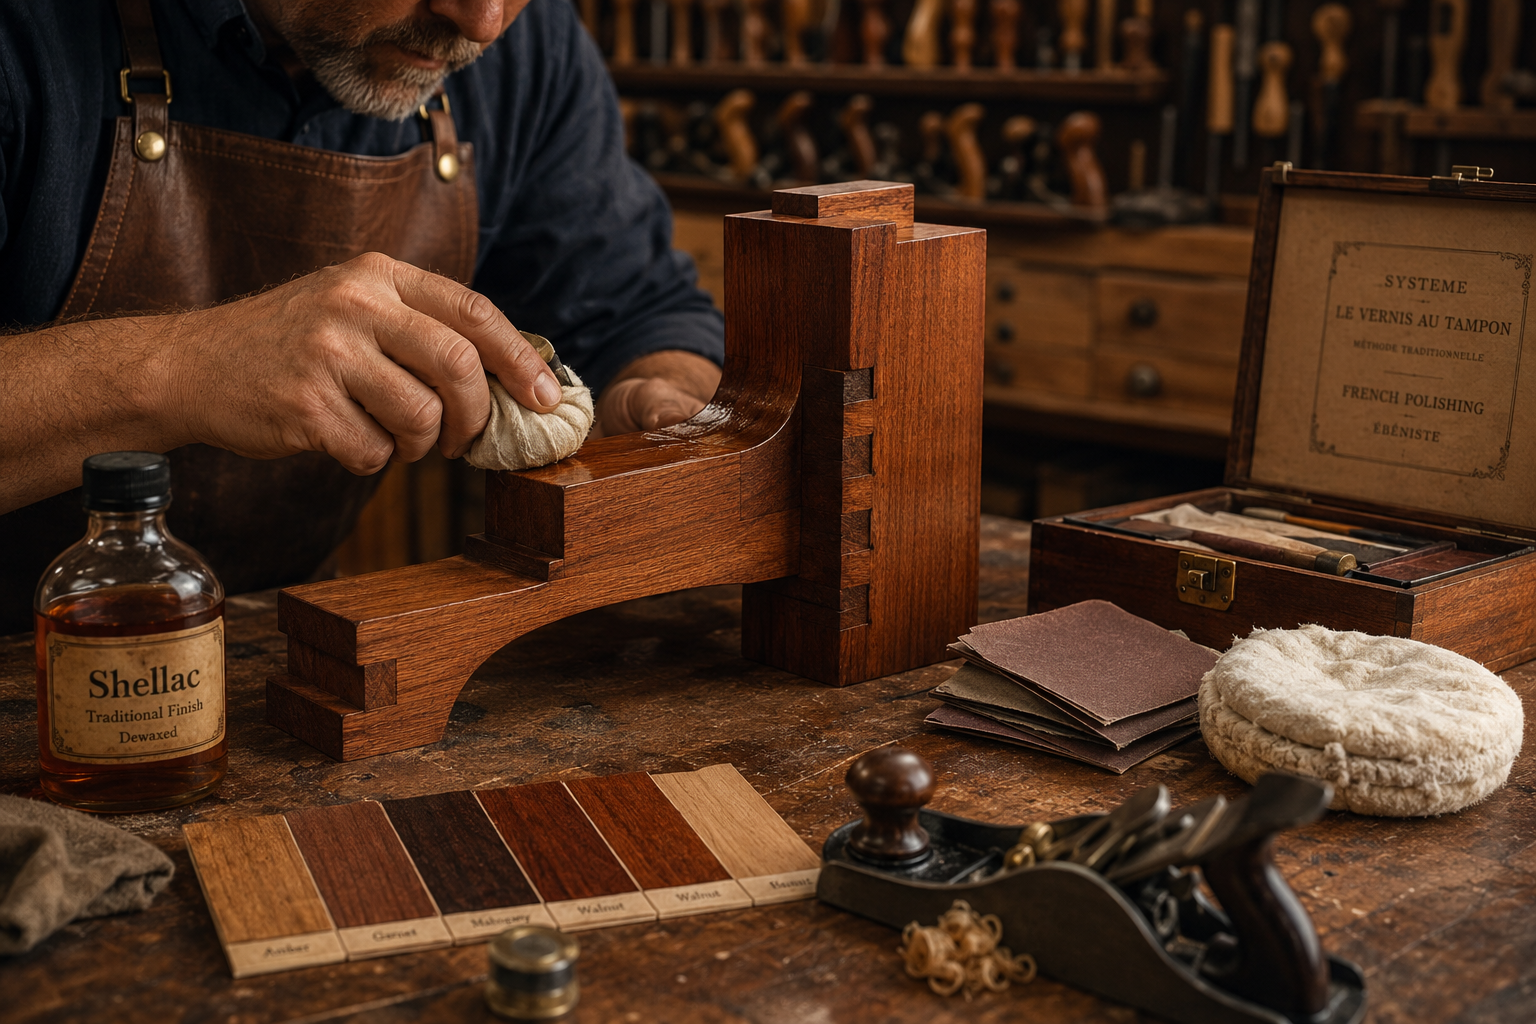
Once the fundamental joints are mastered, the journey into “The Complete Guide to Hand Tool Joinery: Crafting Strong and Beautiful Joints Without Power Tools” continues with refinement, precision, and an understanding of wood’s inherent properties.
Understanding Wood Movement
Wood is a hygroscopic material, meaning it absorbs and releases moisture, causing it to expand and contract. This “wood movement” is a critical consideration in joinery. Designing joints that accommodate this movement prevents cracking, warping, and joint failure. For instance, panel glue-ups often feature breadboard ends, a joint specifically designed to allow the main panel to move across its width while remaining flat. A deeper dive into this phenomenon can be found in our article, “Understanding Wood Movement: How to Design and Build Furniture That” here.
Glue and Clamping
While hand-cut joints derive much of their strength from their mechanical interlocking, glue provides additional shear strength and seals the joint against moisture ingress. Choose the appropriate wood glue for your project (e.g., PVA for general woodworking, hide glue for traditional applications).
Tips for Gluing:
- Even Application: Apply a thin, even coat of glue to both mating surfaces.
- Open and Closed Time: Understand your glue’s open time (how long before it starts to set) and closed time (how long it needs to be clamped).
- Clamping Pressure: Apply firm, even pressure to bring the joint surfaces into intimate contact. Avoid excessive clamping pressure, which can squeeze out too much glue and starve the joint.
- Squeeze-out: Clean up glue squeeze-out with a damp cloth before it dries, or allow it to dry to a rubbery consistency and scrape it off.
Refinement and Finishing
The beauty of hand tool joinery is its precision. After assembly, minimal sanding should be required. Any exposed end grain or joint lines can be subtly chamfered or rounded with a block plane or sandpaper for a refined look. The choice of finish (oil, varnish, shellac, lacquer) will further enhance the wood’s natural beauty and protect the meticulously crafted joints. When integrating these joints into larger pieces, like a custom TV stand, ensuring all aspects, including cable management, are considered from the design phase is key. Explore concepts like hidden joinery in building custom TV Stands.
Safety First
Even with hand tools, safety remains paramount. Always work with sharp tools, as dull tools require more force and are more likely to slip. Wear appropriate eye protection. Keep your workshop clean and organized. Understand the grain direction of the wood before making cuts to avoid tear-out and unpredictable chisel behavior. For broader safety considerations, particularly in a workshop environment, articles on building a smart dust collection system can provide valuable insights into creating a safer workspace.

Conclusion
“The Complete Guide to Hand Tool Joinery: Crafting Strong and Beautiful Joints Without Power Tools” is more than just a manual for making connections; it’s an invitation to a deeper, more mindful form of woodworking. By embracing the rhythm of hand tools, the tactile feedback of sharp steel on wood, and the satisfaction of a perfectly fitted joint, you are not merely assembling pieces of timber. You are creating heirlooms, pieces imbued with a strength and character that power tools often cannot replicate.
The skills learned in hand tool joinery – patience, precision, problem-solving, and a profound respect for the material – extend far beyond the workshop. They cultivate a discerning eye for quality and an appreciation for craftsmanship that endures.
Actionable Next Steps:
- Invest in Quality: Start by acquiring a few high-quality, sharp hand tools rather than a large set of mediocre ones. A good dovetail saw, a few chisels, a marking knife, and a square are excellent starting points.
- Learn to Sharpen: Before attempting any joinery, commit to learning how to sharpen your tools to a razor’s edge. This is the single most important skill in hand tool woodworking.
- Practice on Scrap: Don’t hesitate to practice each joint repeatedly on inexpensive scrap wood. Focus on achieving accuracy and consistency before moving to project material.
- Start Simple: Begin with simpler joints like the half-lap, then progress to the mortise and tenon, and finally the dovetail. Build confidence with each success.
- Build a Project: Apply your newfound skills to a small project, such as a box, a stool, or a picture frame. The tangible result will solidify your learning and provide immense satisfaction. For inspiration, consider crafting personalized wooden coasters or even a simple wooden key holder.
Embrace the journey. The path to mastering hand tool joinery is a rewarding one, yielding not just strong and beautiful wood joints, but also a profound connection to the timeless art of woodworking.
References
- Schwarz, C. (2009). The Anarchist’s Tool Chest. Lost Art Press.
- Frid, K. (1979). Tage Frid Teaches Woodworking: Book 1, Joinery. Taunton Press.
- Tollerton, T. (2014). The Essential Woodworker. Lost Art Press.
SEO Meta Title: Hand Tool Joinery: Craft Strong, Beautiful Wood Joints SEO Meta Description: Master hand tool joinery for superior strength & beauty. Learn dovetails, mortise & tenons, & essential tools to craft lasting wood joints in 2026.